
WireGuard VPN from Windows to Vigor Router
WireGuard is a secure, fast, and modern VPN Protocol. A WireGuard VPN connection is made by exchanging public keys and intends to be considerably more performant than OpenVPN. We support the new VPN protocol on Vigor2962/3910 routers since firmware version 4.3.1. This article will show how to establish a WireGuard VPN tunnel between Vigor3910 and Smart VPN Client.
Vigor Router Setup :
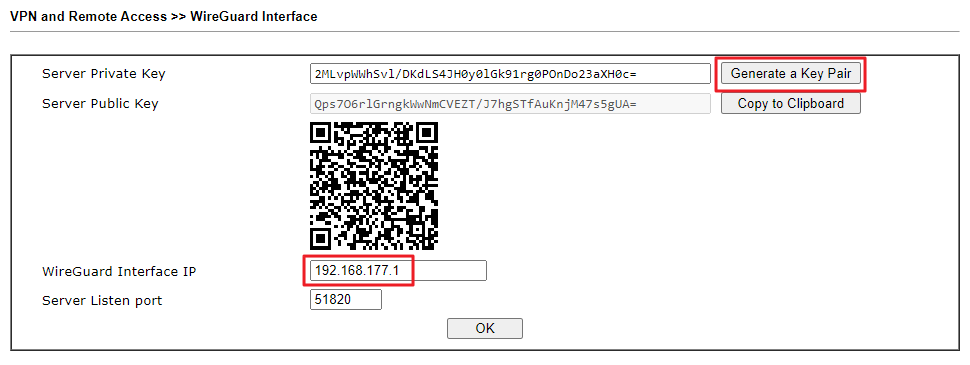
1. Go to VPN and Remote Access >> WireGuard
- Click Generate a Key Pair.
- Enter WireGuard Interface IP.(We can use Vigor Router’s LAN IP as the WireGuard Interface IP)
- Click OK to save.
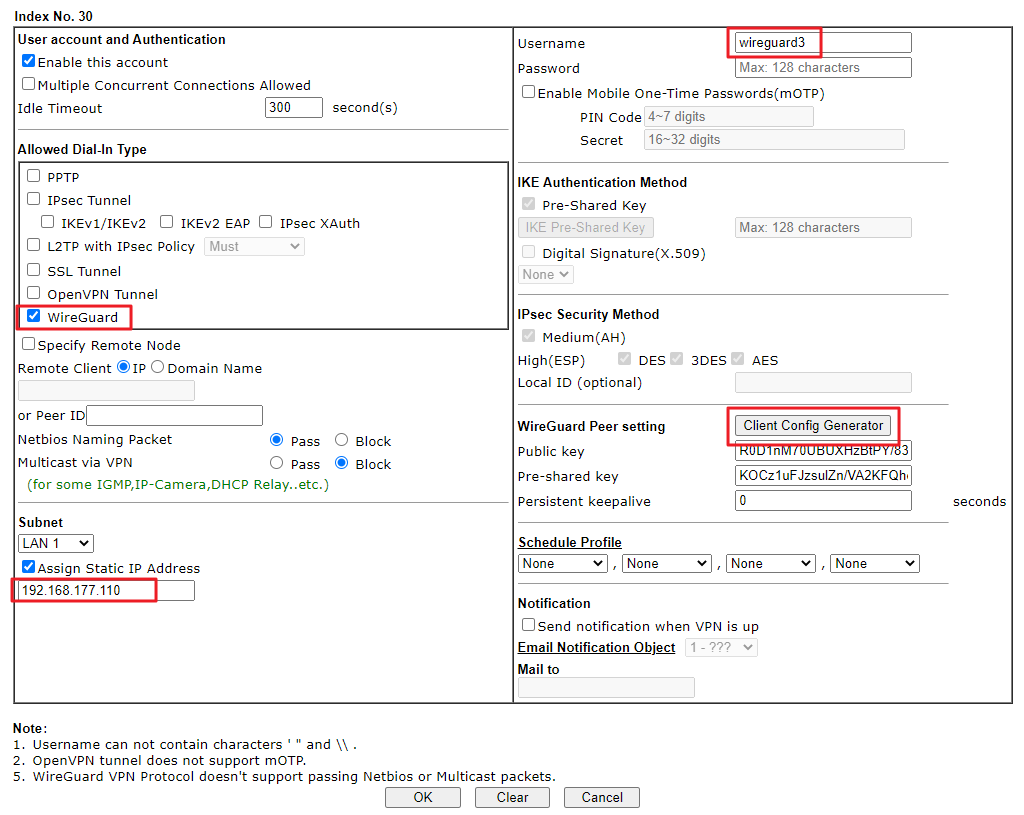
2. Go to VPN and Remote Access >> Remote Dial-in User to create a profile.
- Check Enable this account.
- Check WireGuard as Dial-In Type.
- Enter Username.
- Assign a Static IP Address.
- Click Client Config Generator.
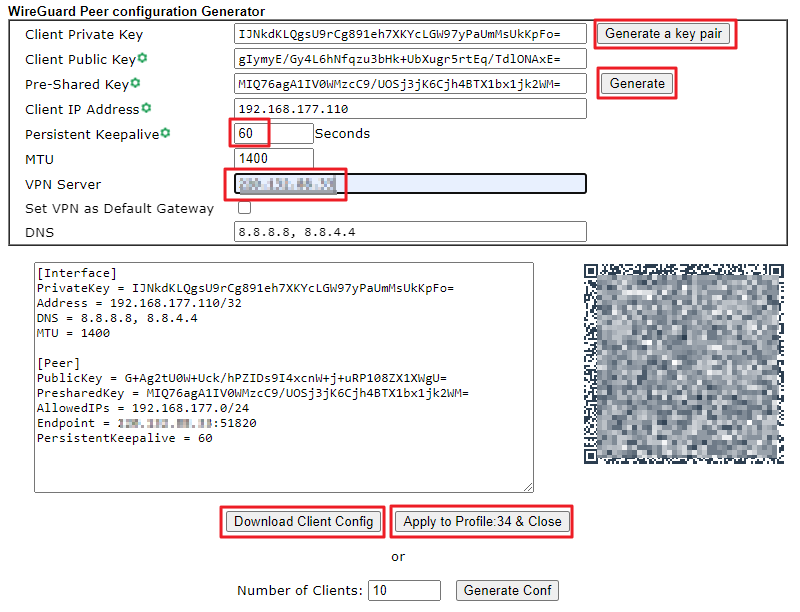
- Click Generate a key pair.
- Click Generate for Pre-Shared Key(Optional).
- Enter a Persistent Keepalive value. (By default, Persistent Keepalive is set 60 seconds on Vigor Router. We recommend remaining in this setting when your peer is behind a NAT or a firewall.)
- Enter VPN server's IP or Domain Name.
- Check Set VPN as Default Gateway(Optional).
- Click Download Client Config to download the .conf file.
- Click Apply to Profile & Close.
- Click OK to save the profile.
VPN Client Setup(SmartVPN Client v5.6.3) :
0. Click here to download WireGuard client, then install it. Wireguard VPN would not work on SmartVPN Client if we did not install primeval Windows Wirguard Client on the PC.
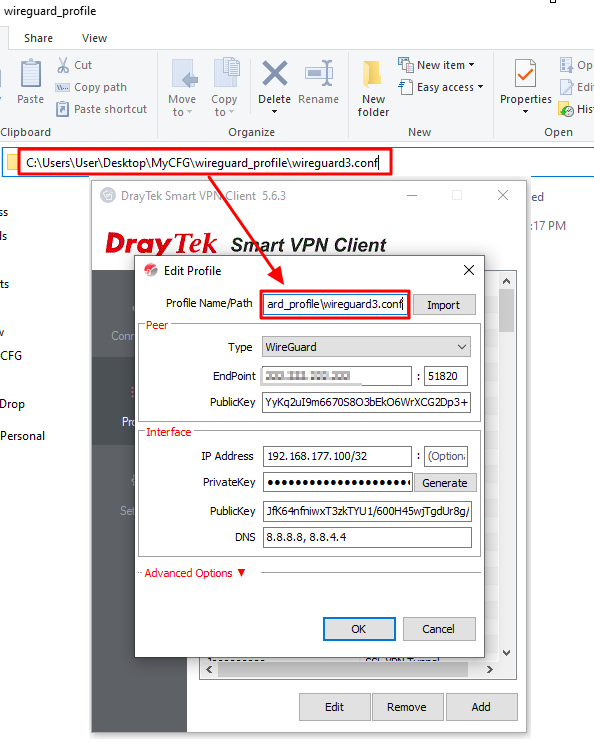
1. Open the SmartVPN Client.
- Click Add to create a new profile.
- Select WireGuard for the Type.
- Paste the correct file path and click Import.
- Click OK to save.
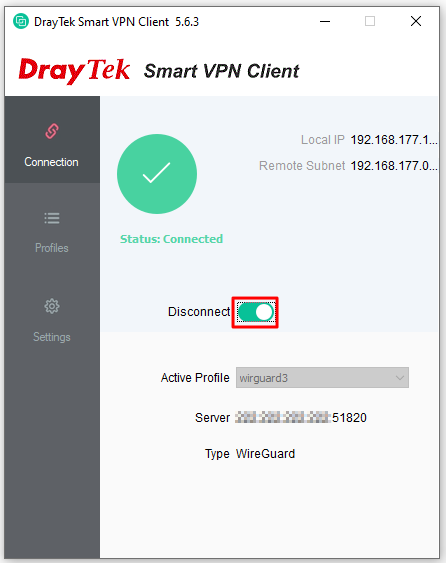
2. Select the profile created on step1. Then click Connect to activate the tunnel.
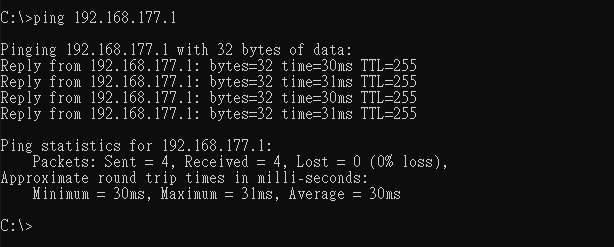
3. Ping a remote network IP(e.g.,Vigor3910’s LAN IP) to establish the VPN connection and check if the VPN works correctly.
VPN Client Setup(WireGuard Client) :
0. Click here to download WireGuard client, then install it.
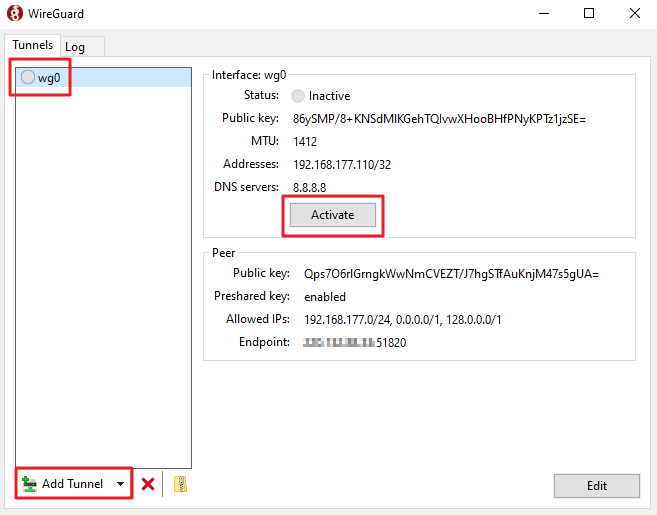
1. Open WireGuard Client.
- Click Add Tunnel.
- Choose the .conf file downloaded from the VPN server.
- Choose this profile and click Activate.
Now the status shows "Active".
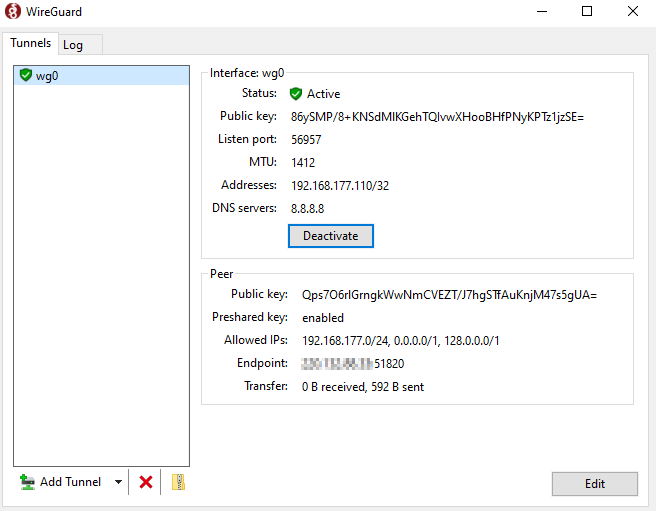
Ping a remote network IP(e.g.,Vigor3910’s LAN IP) to establish the VPN connection and check if the VPN works correctly.
We can also check the VPN connection status in Router’s VPN Connection Status page.

WireGuard is a modern VPN protocol that is fast, secure, and uses public key exchange. Compared with OpenVPN, WireGuard delivers significantly better performance. Since firmware version 5.3.5, DrayOS5 routers support generating WireGuard configuration files for clients, which simplifies the setup. This article explains how to create a WireGuard VPN tunnel between a Windows Smart VPN client and a Vigor2136 router.
Vigor Router Setup
1.Activate WireGuard VPN service via VPN/ General Setup/WireGuard

2. Create a Teleworker VPN profile
Go to VPN / Teleworker VPN to create the Teleworker VPN profile for the VPN client.
Click on +Add to add a new profile,
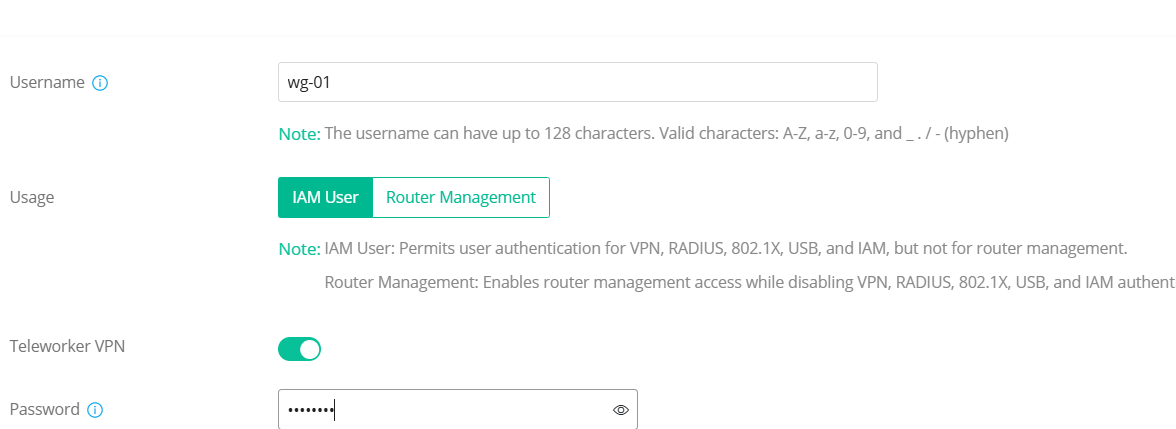


Please note that, the configuration can be downloaded once. It is necessary to generate the Key Pairs again if you want to download the WireGuard Client configuration again.

Smart VPN Client Setup
0. Click here to download WireGuard client, then install it. Wireguard VPN would not work on SmartVPN Client if we did not install primeval Windows Wirguard Client on the PC.
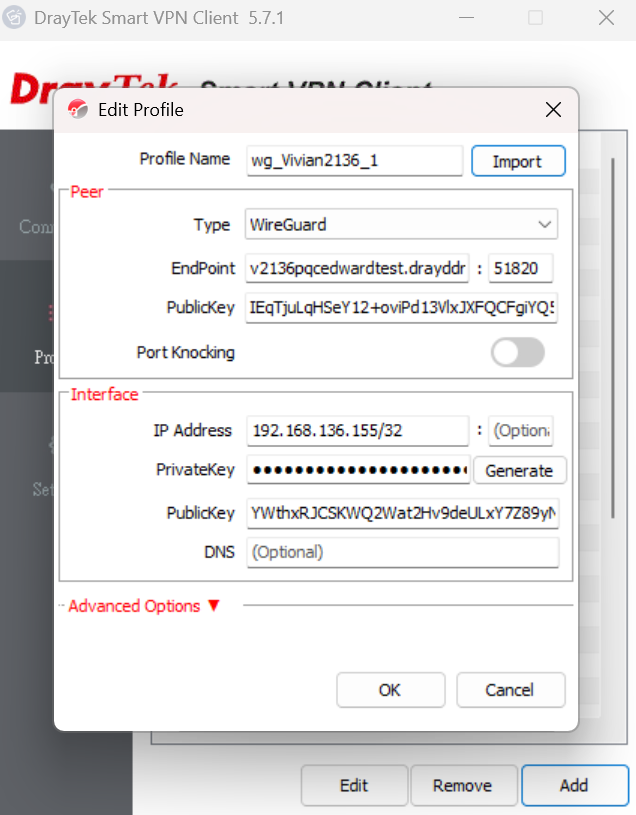
1. Run Smart VPN Client v5.7.1 or above versions. Click Add to create a new VPN profile. Select WireGuard for the Type, then click Import.

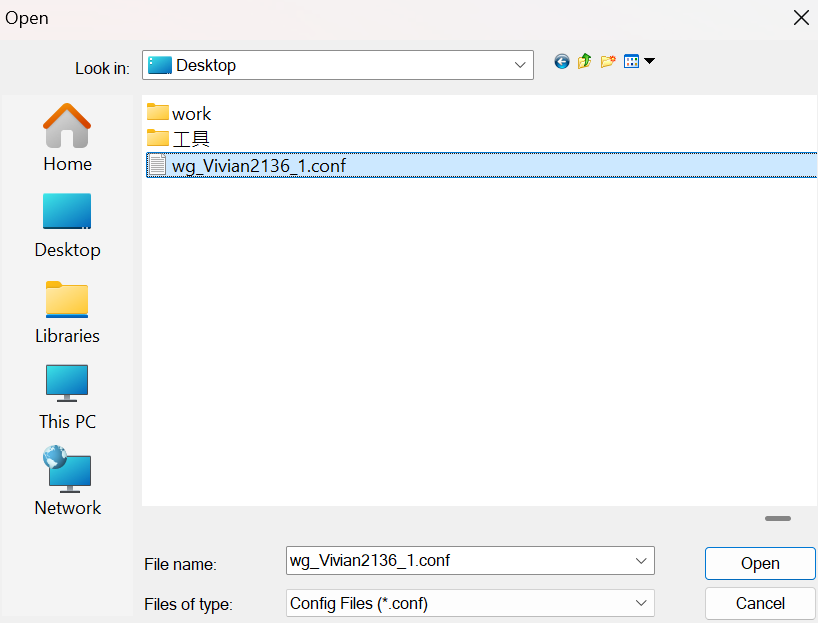
2. Select the wireguard client configuration file provided by the administrator, then click Open.
3. Click OK to save the imported profile.
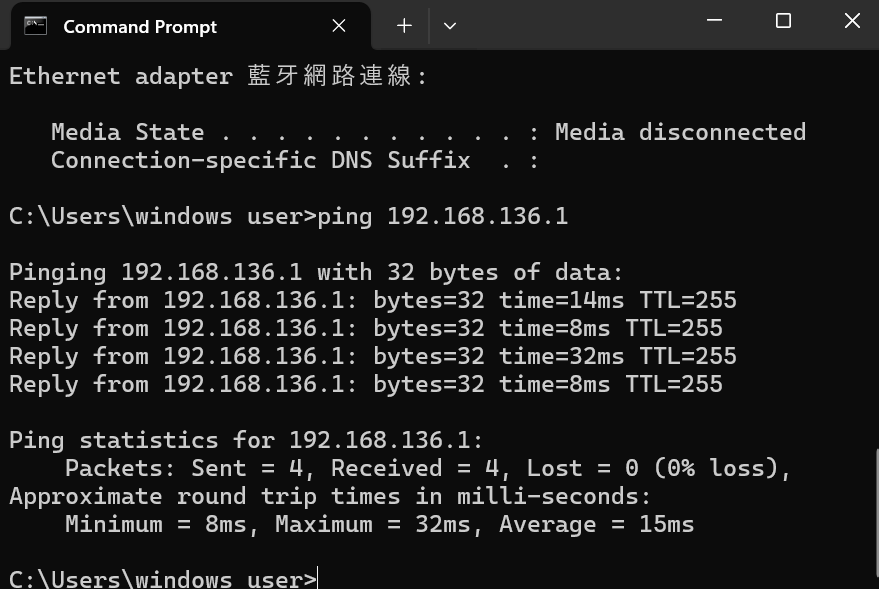
4. Toggle Connect to activate the WireGuard VPN.
Ping an IP in the remote VPN netwok to ensure the WireGuard connection work.

Published On:2026-01-12
ShareWas this helpful?