
IPsec VPN from Windows to Vigor Router by Smart VPN Client
This document introduces how to set up the router as an IPsec VPN server, set up Windows Smart VPN Client in IPsec mode, and how to start the IPsec connection.
Setup on Vigor Router
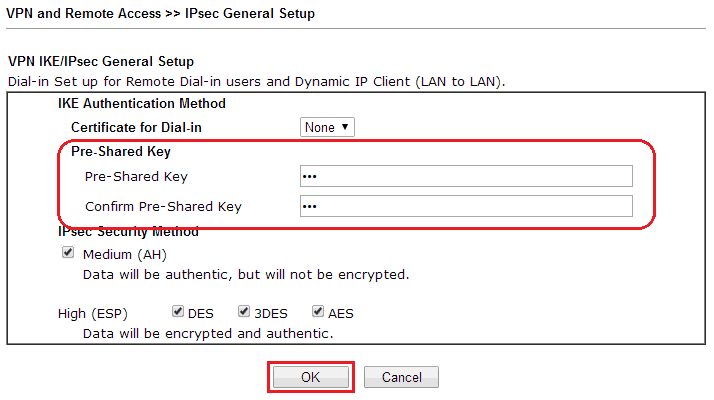
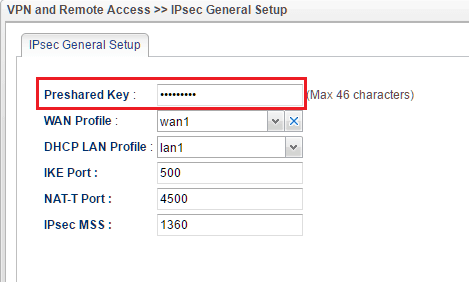
1. Go to VPN and Remote Access >> IPsec General Setup, enter Pre-shared Key and confirm it again, then click OK.
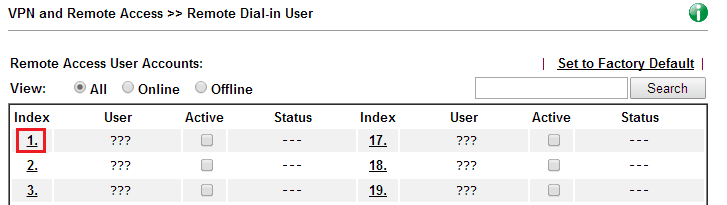
2. Go to VPN and Remote Access >> Remote Dial-in User, and click an available Index.
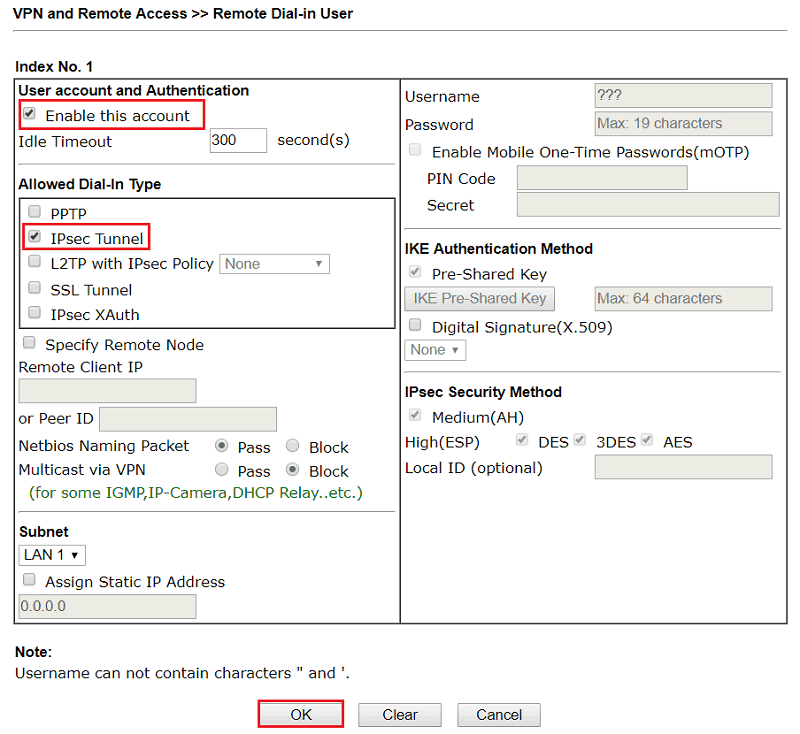
3. Set up IPsec profile for the remote dial-in user:
- Enable this account
- Make sure IPsec Tunnel is enabled at Allowed Dial-in Type
- Click OK to save.
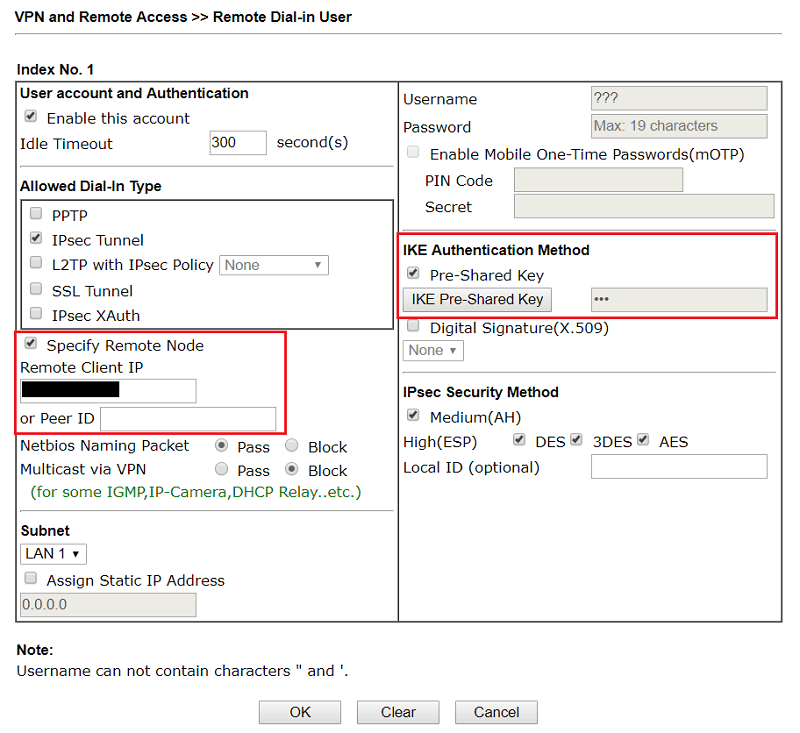
4. (Optional) Use Specify Remote Node to increase security by letting allow the connection from only the specified IP address and using a customized IKE Pre-Shared Key for this account (instead of general pre-shared key)
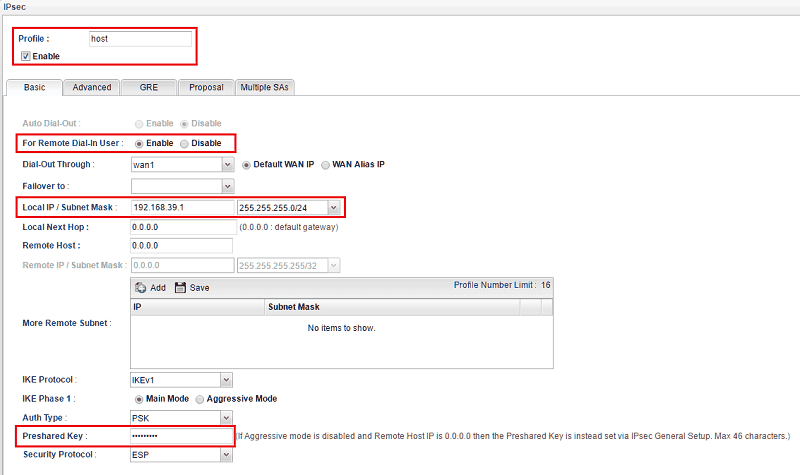
1. Navigate to VPN and Remote Access >> VPN Profiles, click Add to create a new Profile:
- Enable this profile
- Type Local IP and select Subnet Mask
- Type Remote Host IP. Use
0.0.0.0when the remote VPN client is using Dynamic IP - Type Pre-Shared Key if Remote Host IP is NOT 0.0.0.0 (the VPN client is NOT using Dynamic IP)
- Click Apply to save the VPN profile.
2. Go to VPN and Remote Access >> IPSec General Setup, type IPsec Pre-Shared key in and click Apply.
VPN Client Setup
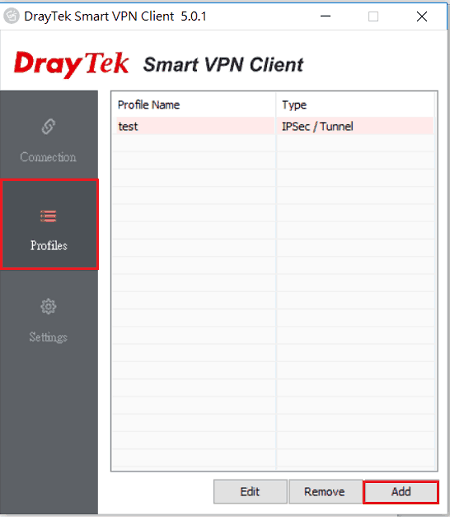
1. Open Smart VPN Client on the VPN client, and click Profiles >> Add (Download the latest version here)
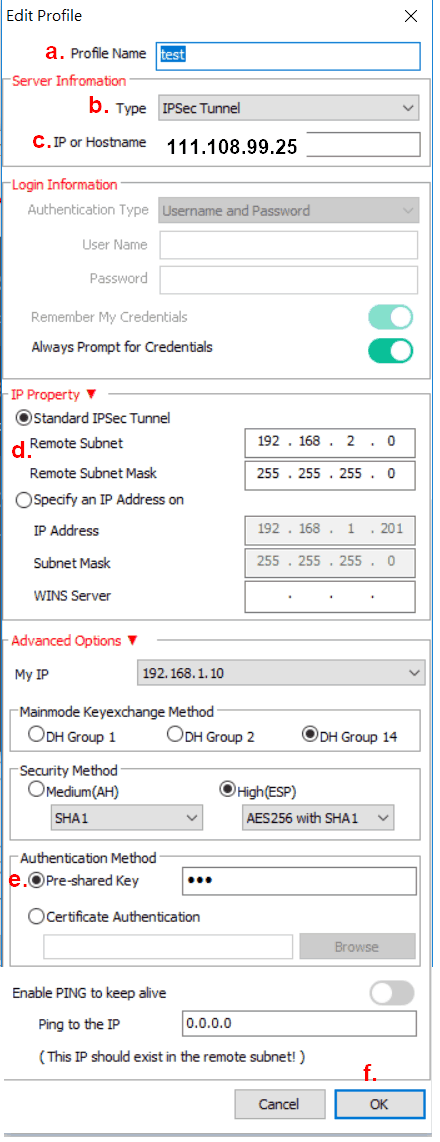
2. Set up VPN profile as follows
- Enter Profile Name
- Select IPSec Tunnel for Type
- Enter VPN Server's IP (the router's WAN IP) at Server Information
- At IP Property, input VPN server's LAN subnet at Remote Subnet and Remote Subnet Mask
- Choose Pre-shared Key at Authentication Method and input the same Pre-shared key as step 1.
- Click OK to save
Active the IPsec connection
3. Select the profile we just created at Active Profile, and switch on Active.
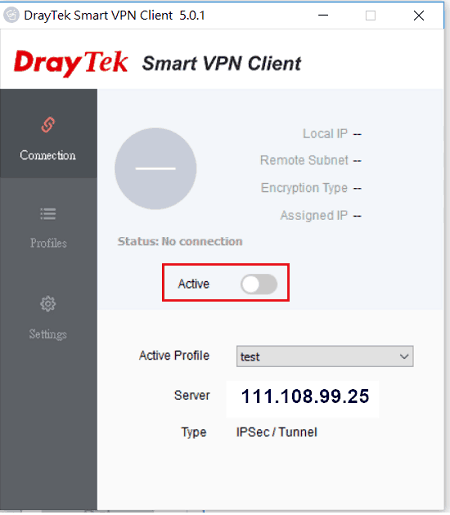
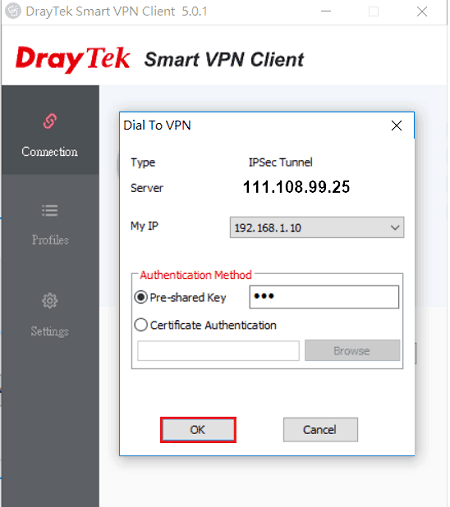
4. Click OK to start dialing.
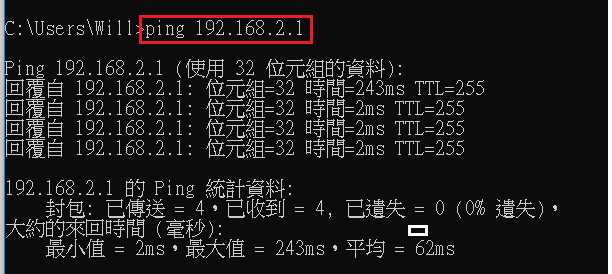
5. According to the Security Policy Database (SPD) in Windows, IPsec only starts IKE negotiation to establish a tunnel when traffic is sent to the remote VPN network. Therefore, we use a ping to the router's LAN IP to trigger the connection.
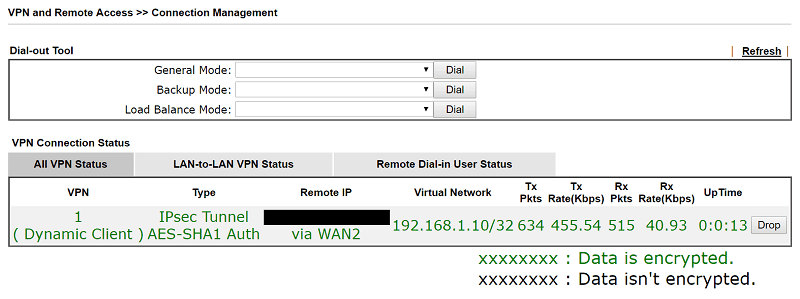
Network Administrator may also check the online VPN clients by going to VPN and Remote Access >> Connection Management.
Published On: Jan 17, 2019
ShareWas this helpful?