
DrayDDNS is a free DDNS service provided for every Vigor Router. Each device can register one hostname under the drayddns.com domain. The hostname works with all WAN interfaces and only needs to be renewed once every two years. This article demonstrates how to configure DrayDDNS on the router.
1. Register a MyVigor User Account
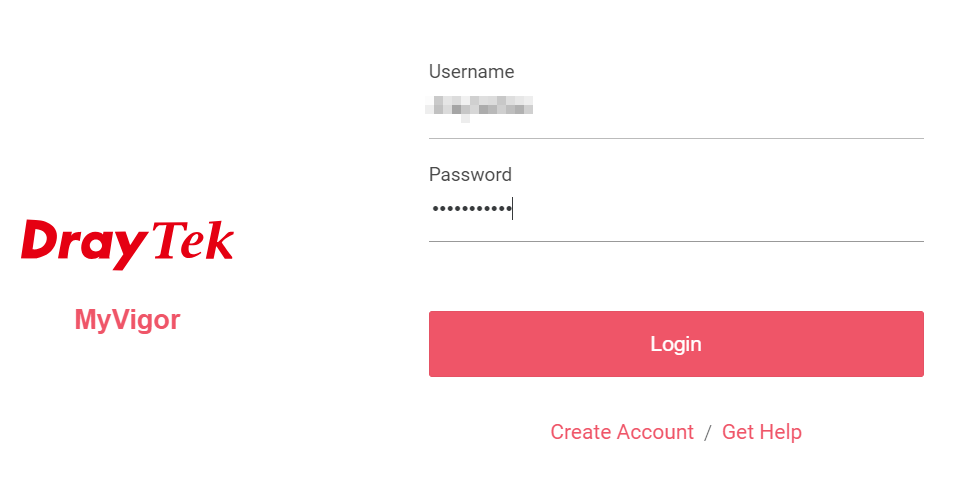
Go to MyVigor Login and click Create Account to register a MyVigor account.
2. Login to MyVigor from the Vigor Router
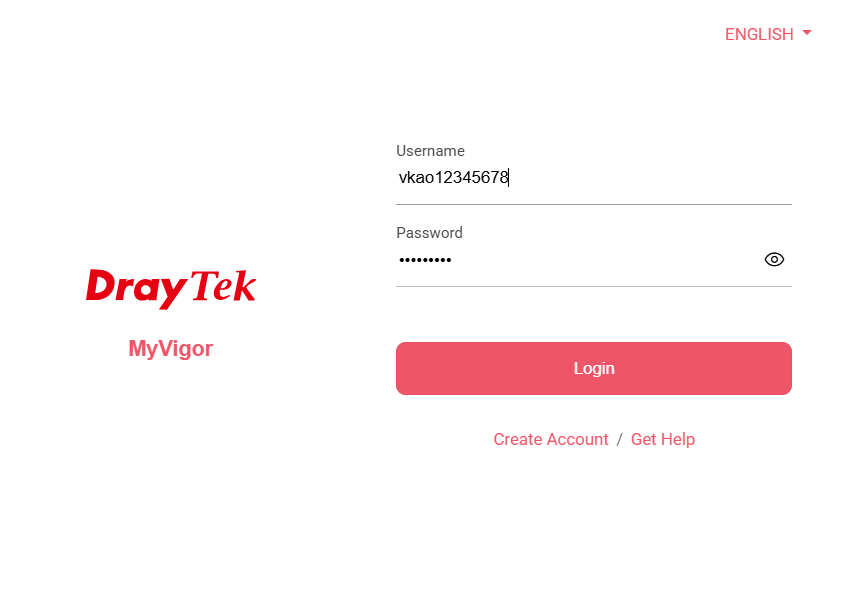
Access your Vigor Router. Navigate to Registration & Services, which will redirect you to the MyVigor login page. Log in with your MyVigor account.
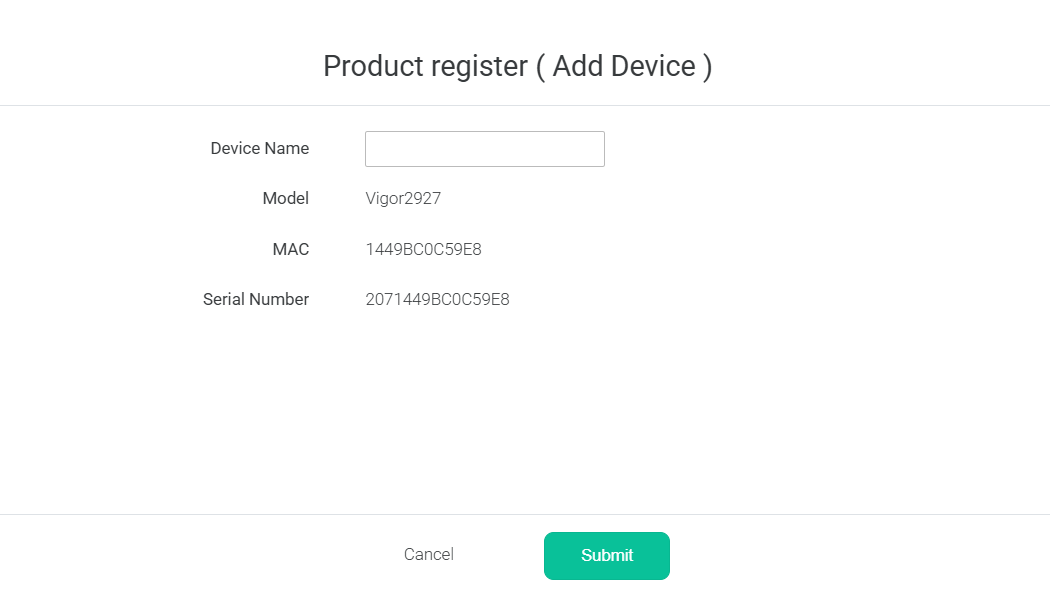
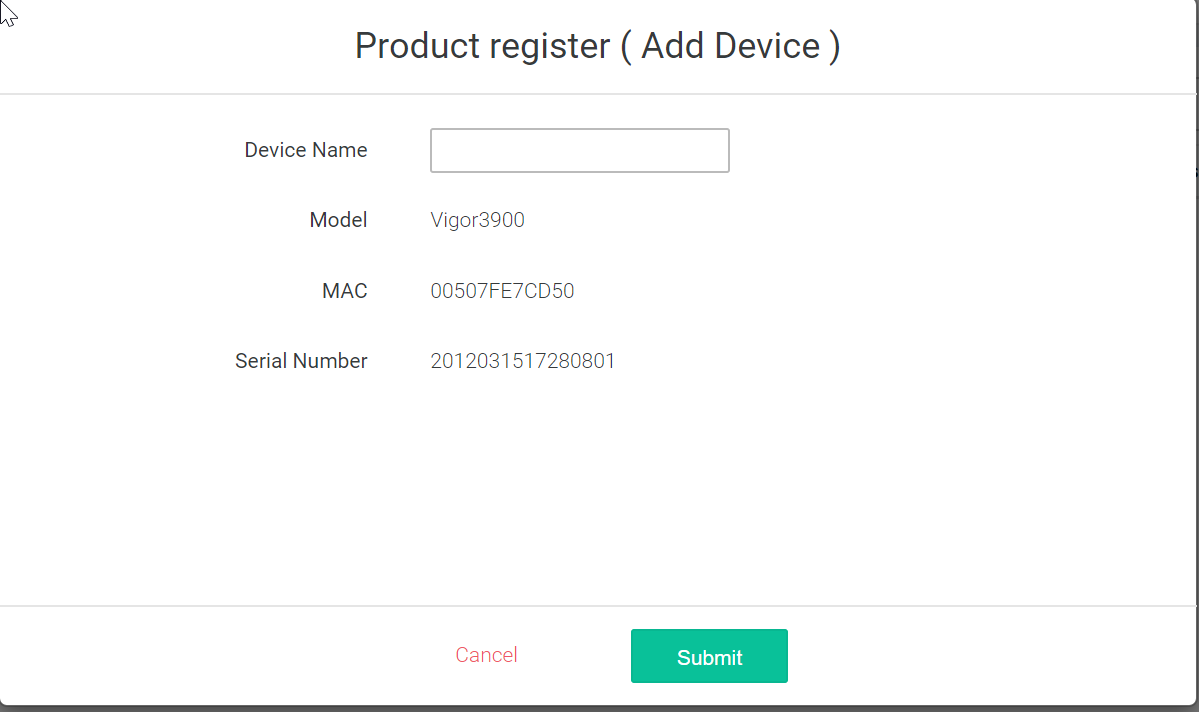
3. Add the Device to MyVigor
Enter a Device Name for your router and click Submit.
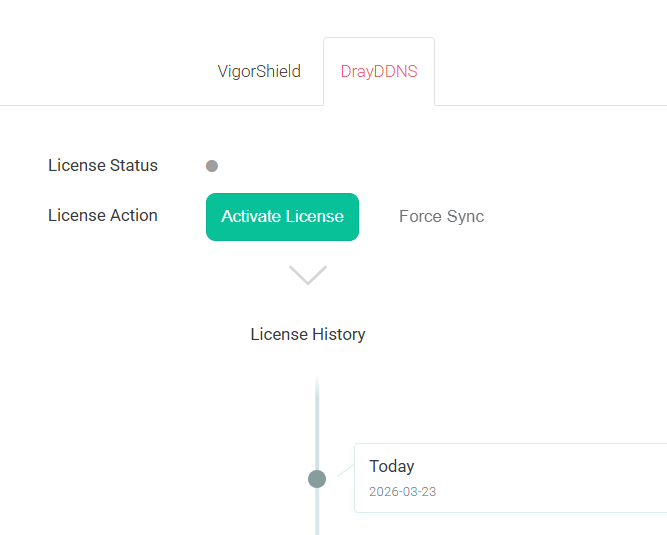
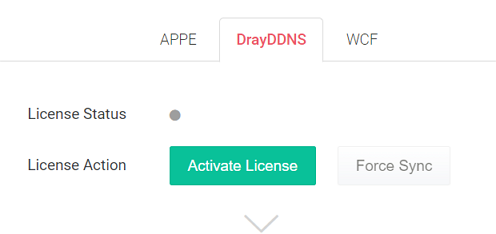
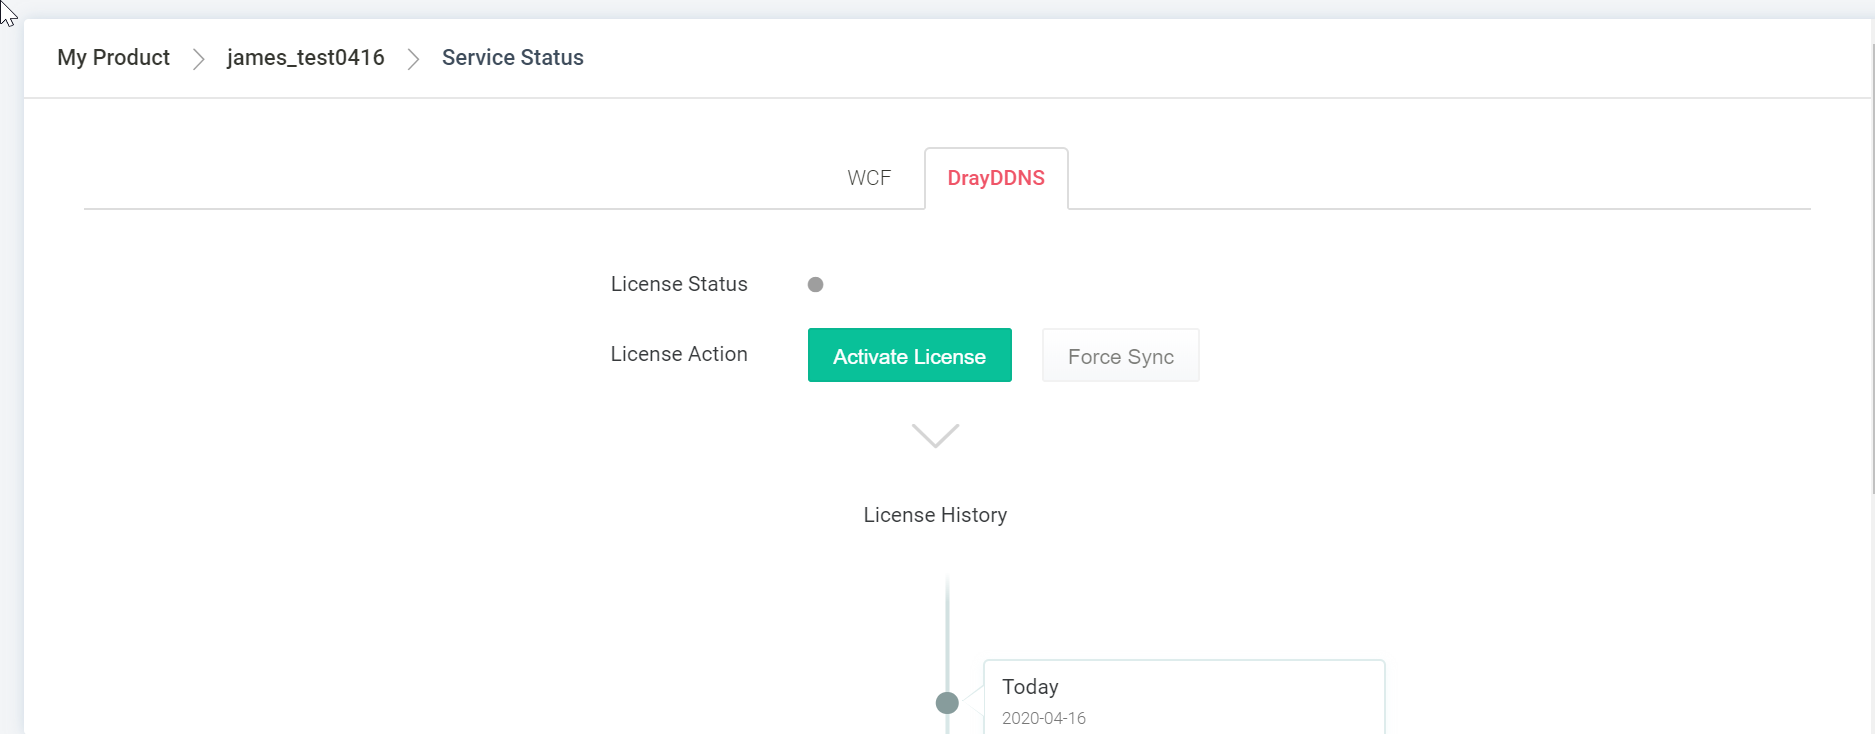
4. Activate the DrayDDNS License
Switch to the DrayDDNS tab and activate your DrayDDNS license.
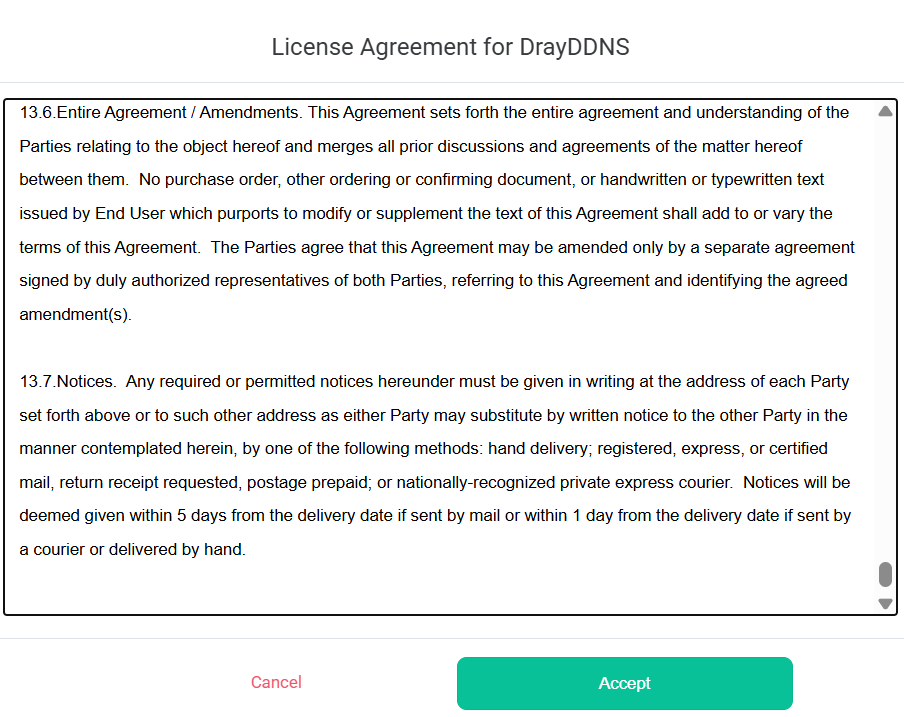
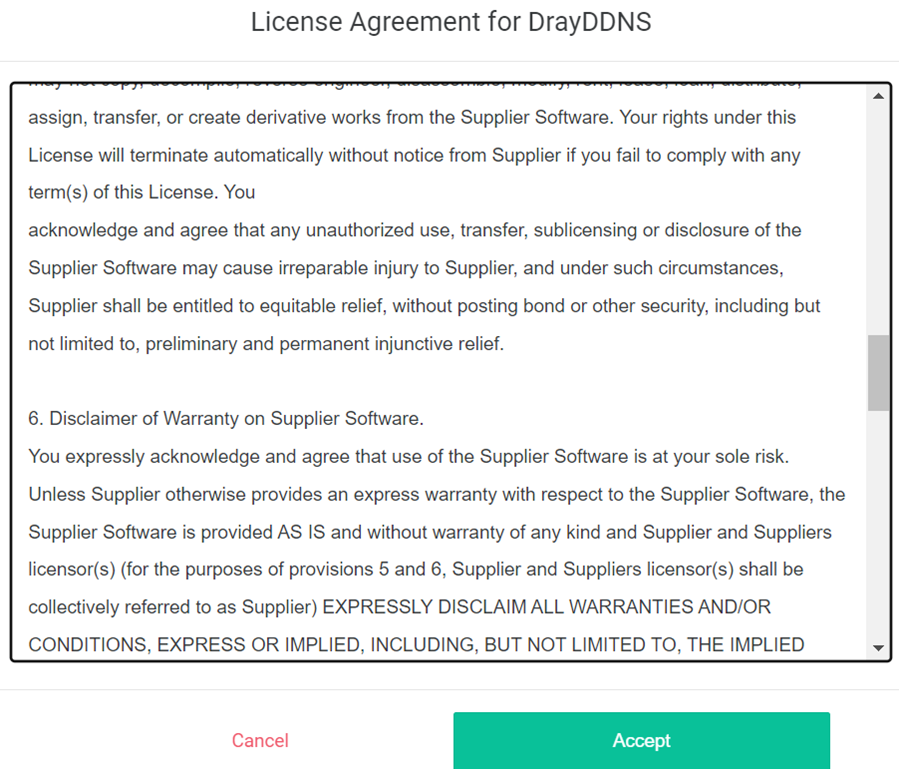
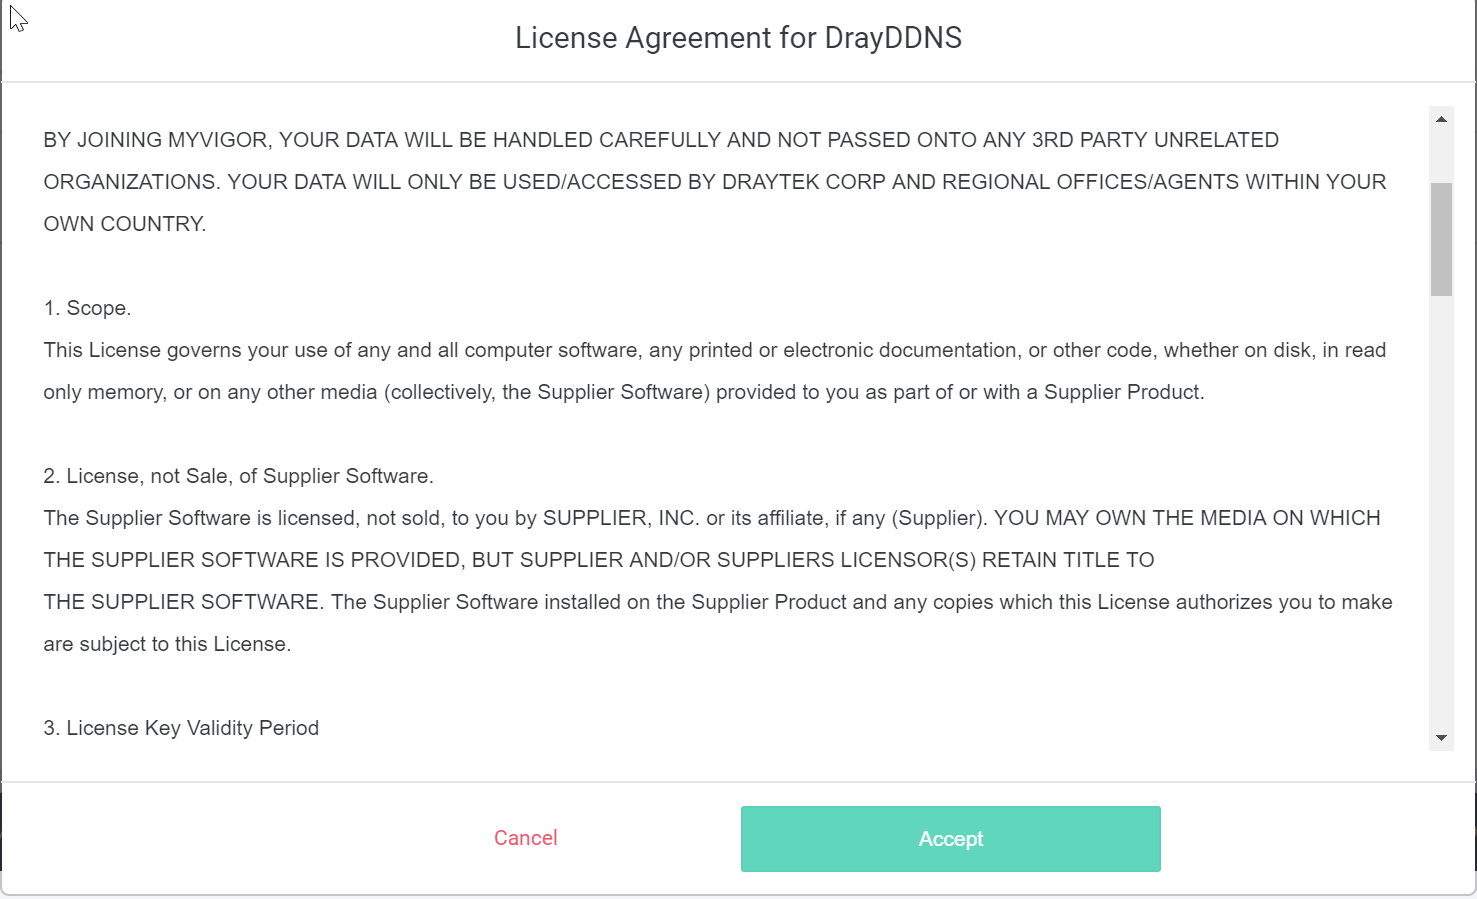
5. Accept the License Agreement
Read and accept the DrayDDNS License Agreement, then click Next.
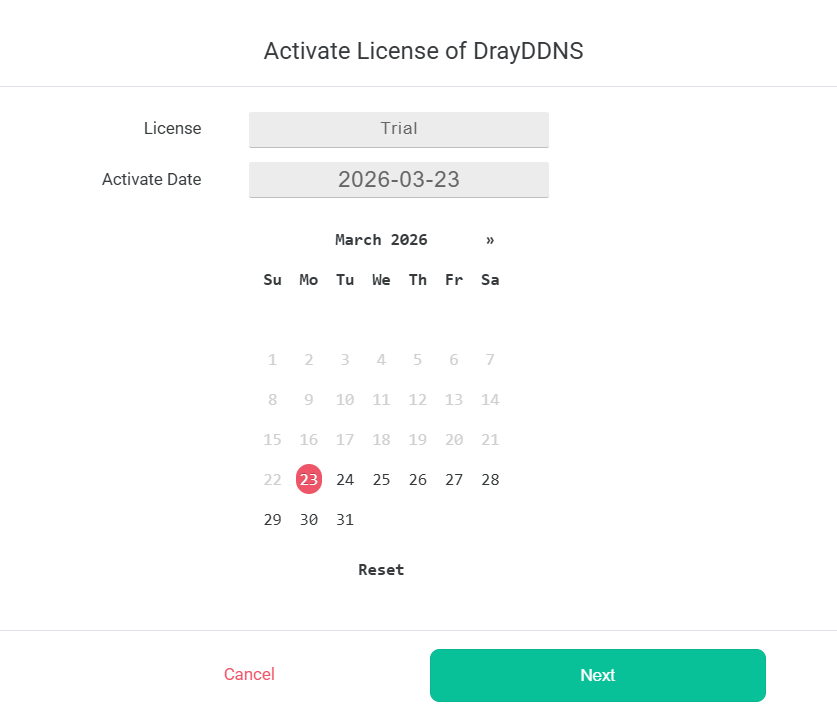
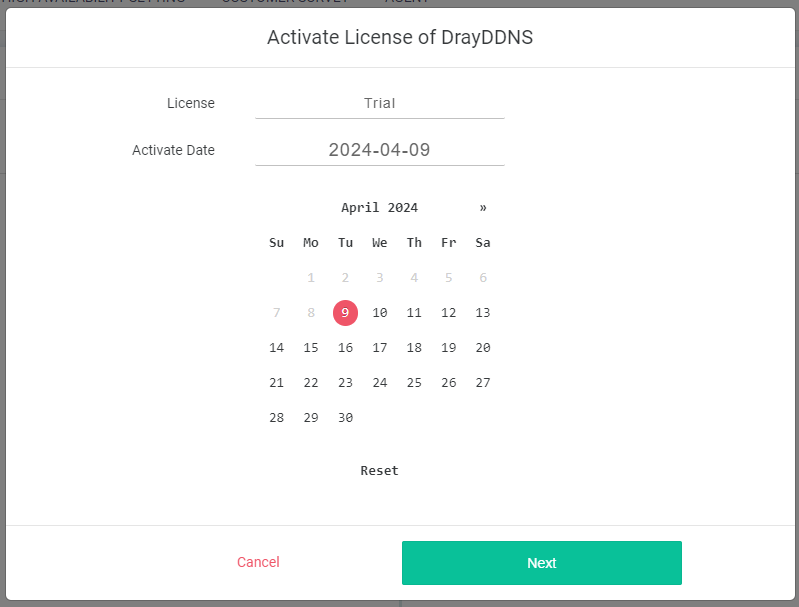
6. Select Activation Date
Choose the desired Activate Date and click Next.
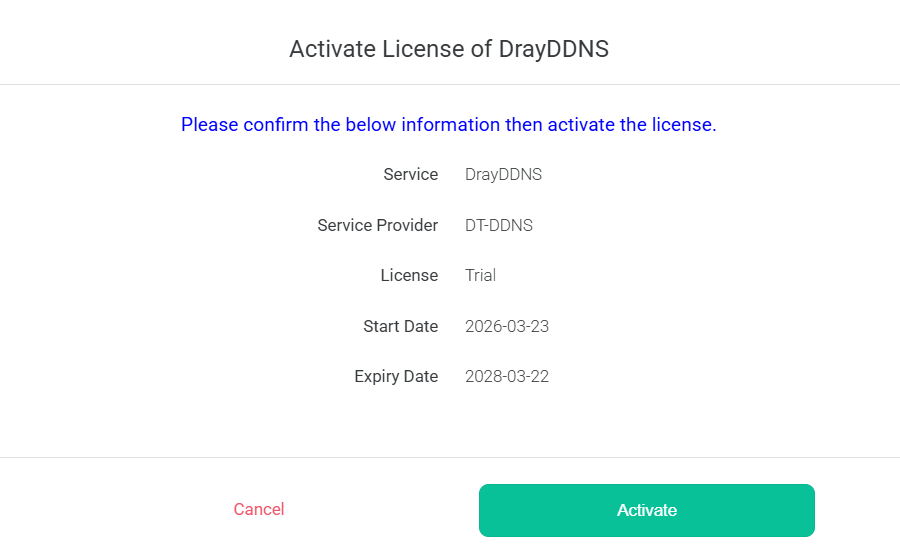
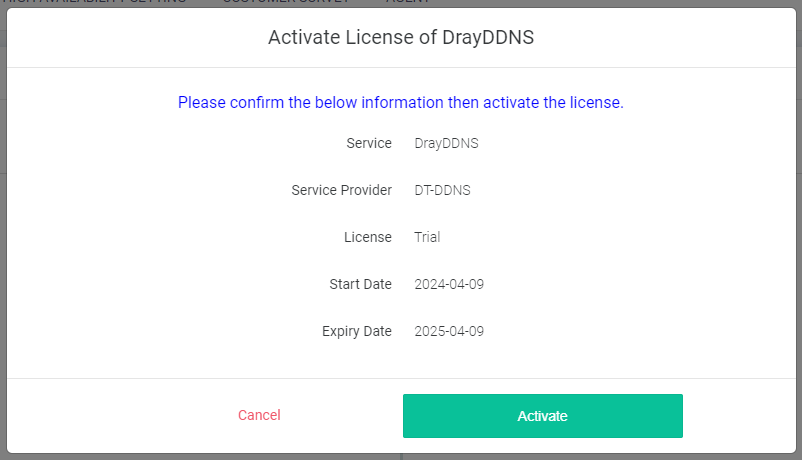
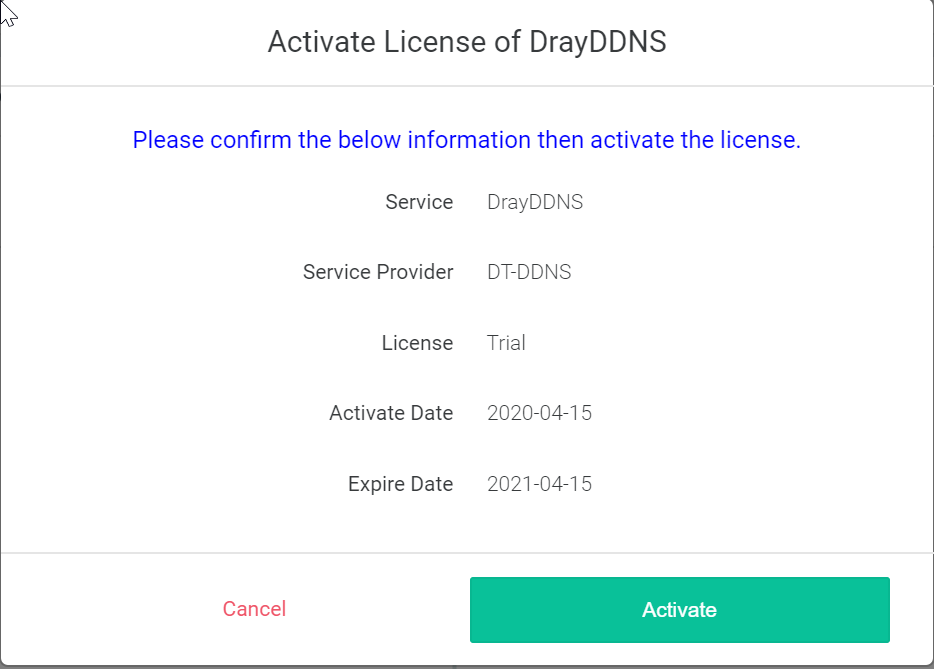
7. Confirm and Activate
Verify the information and click Activate.
8. Successful Activation
When the success message appears, the DrayDDNS activation is complete.
9. Edit DrayDDNS Domain Name
Return to the previous page to enter the DrayDDNS domain name for the router.
10. Enable DrayDDNS Profile
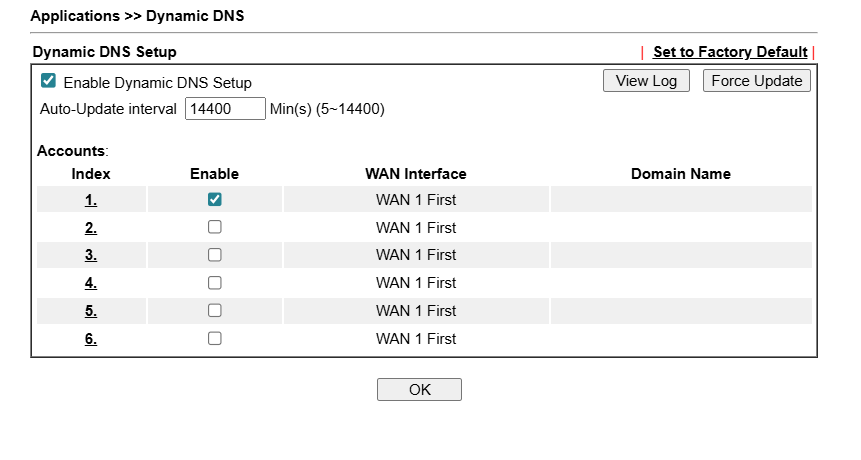
Go to Applications >> Dynamic DNS. Enable Dynamic DNS Setup and select an available index to edit the profile.
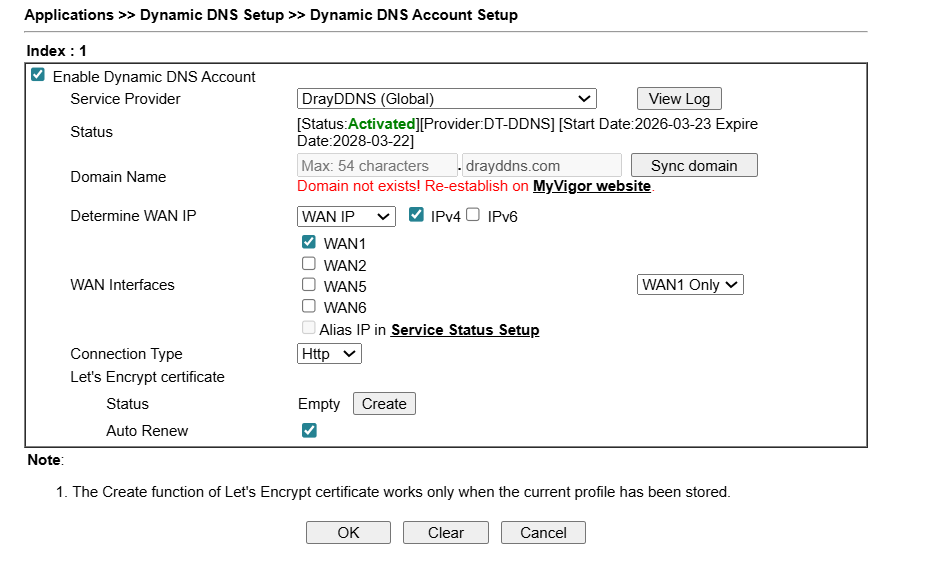
11. Configure Service Provider and WAN Interface
Choose DrayDDNS as the service provider, select the appropriate WAN Interface, then click OK.
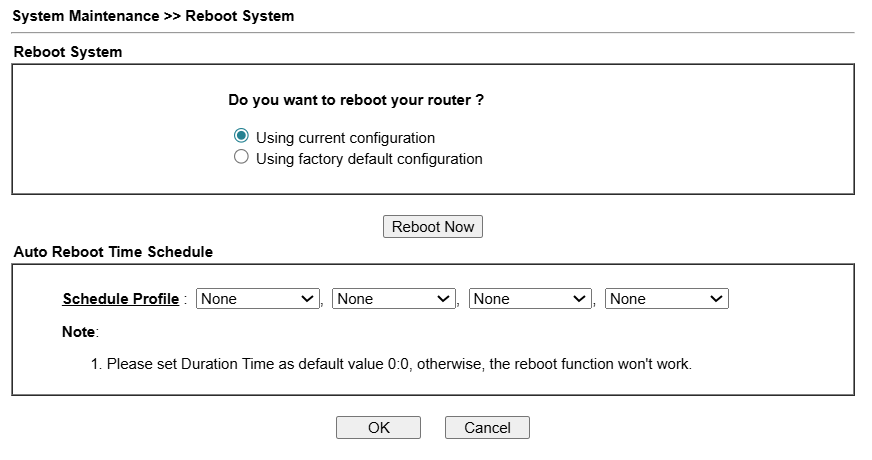
12. Reboot the System
Go to System Maintenance >> Reboot System. Perform a system reboot on the router.
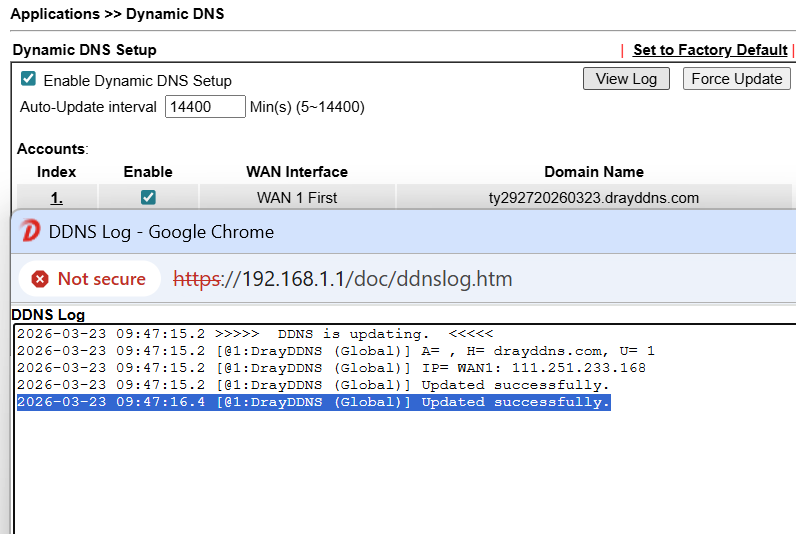
13. Verify DDNS Update
The DrayDDNS domain name will be retrieved automatically after the reboot. Click View Log to check whether the DDNS update is successful.
1. Before activating the DrayDDNS service, ensure the Vigor Router can connect to the Internet.
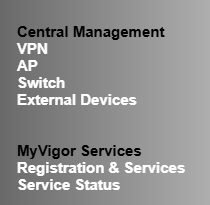
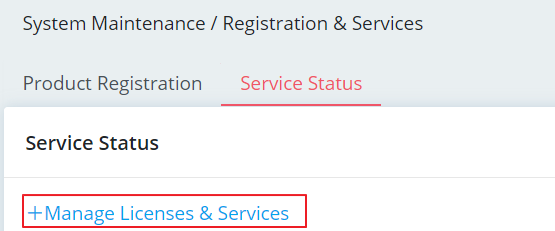
2. Go to System Maintenance >> Registration & Services.
3. This will take you to the login page for MyVigor. Enter your MyVigor credentials to sign in. Check if the browser blocked the pop-up window if you do not see the web page.
Note: The router must be registered to a MyVigor user account before activating the DrayDDNS service. If you do not have one, please register one before continuing.
4. Go to the DrayDDNS tab and click Activate License.
5. Read the License Agreement and click Accept.
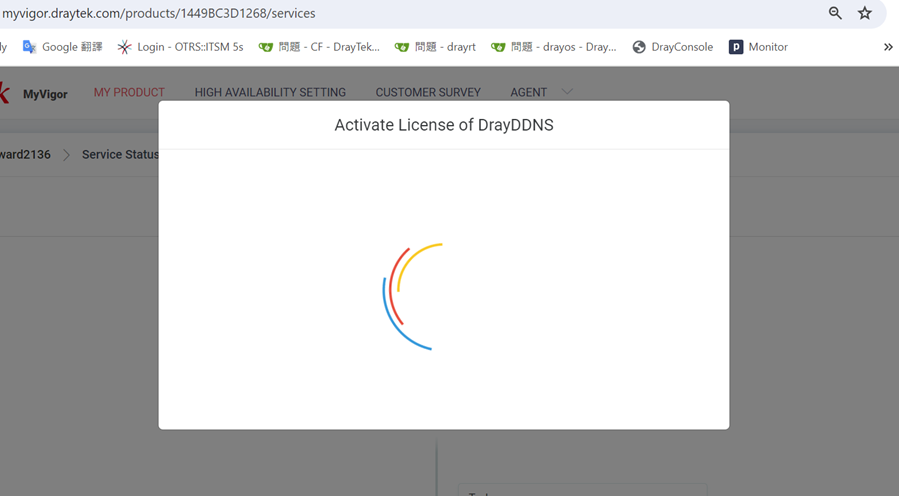
6. The DrayDDNS License activation process is ongoing
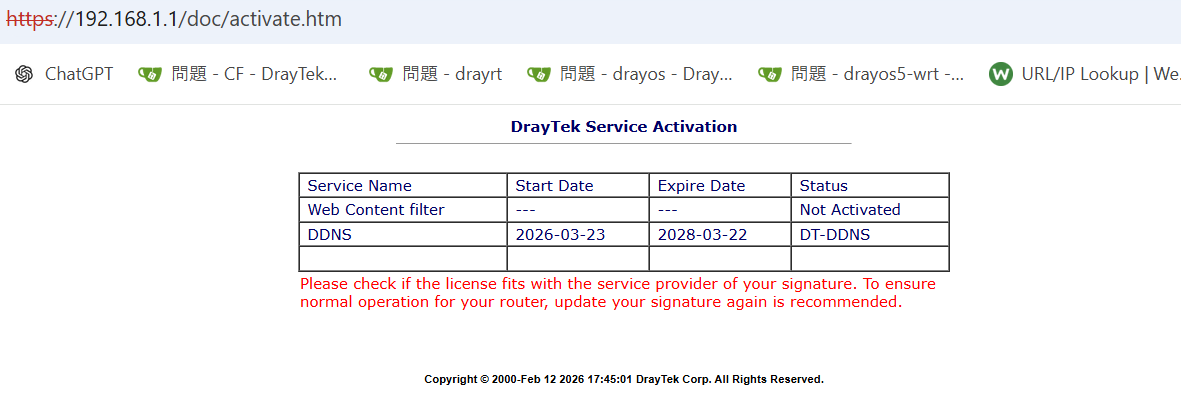
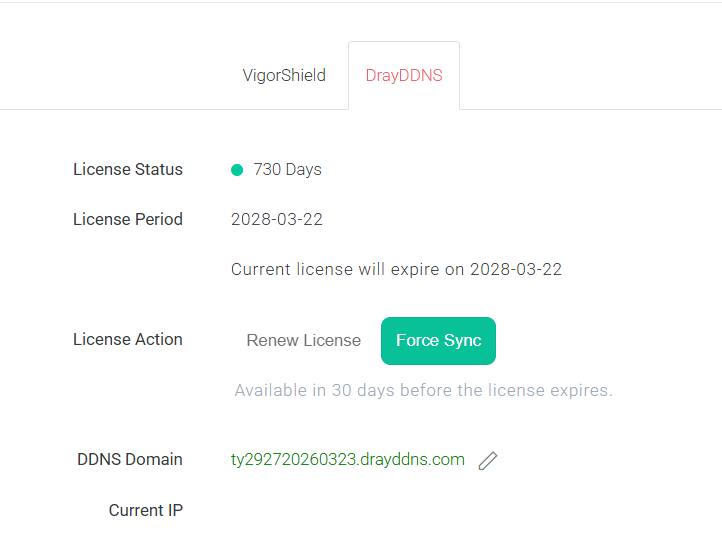
7. The DrayDDNS license is generated for the router when the Service Status is displayed, as shown below.
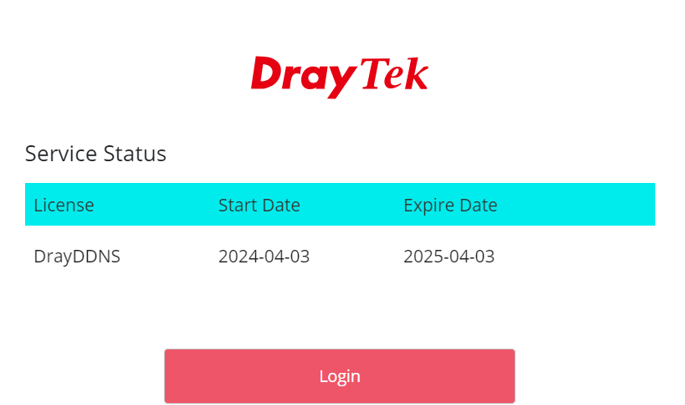
8. Click Login to log into the Vigor2136.
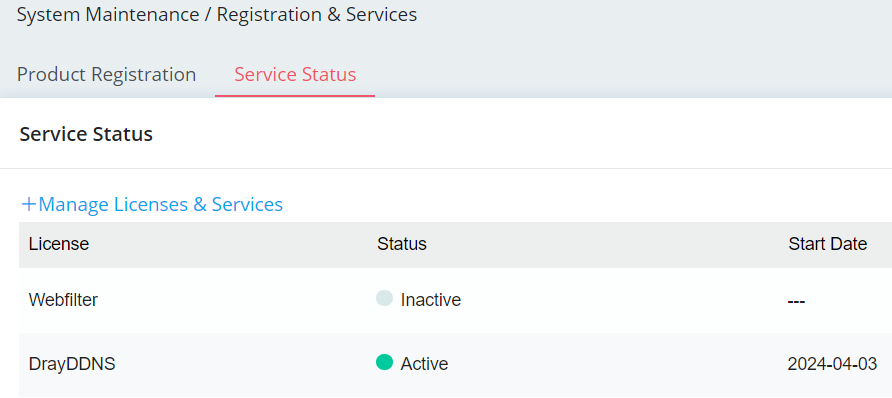
9. Log in to MyVigor and move to the DrayDDNS tab.
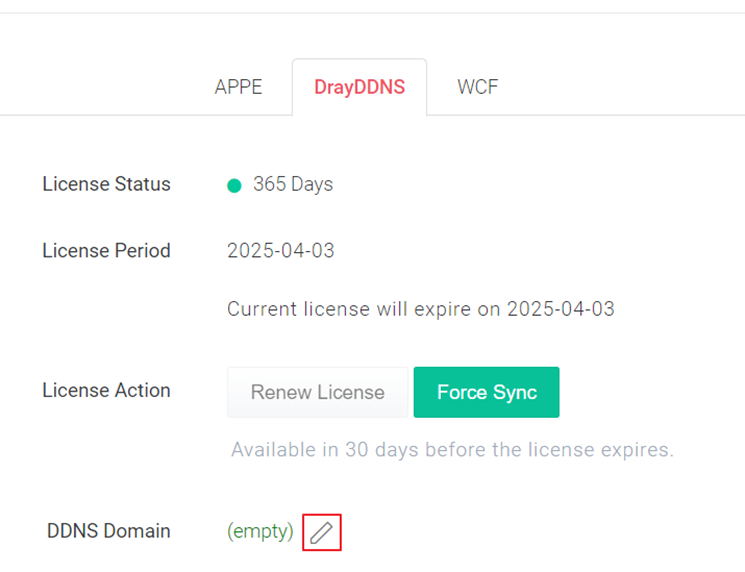
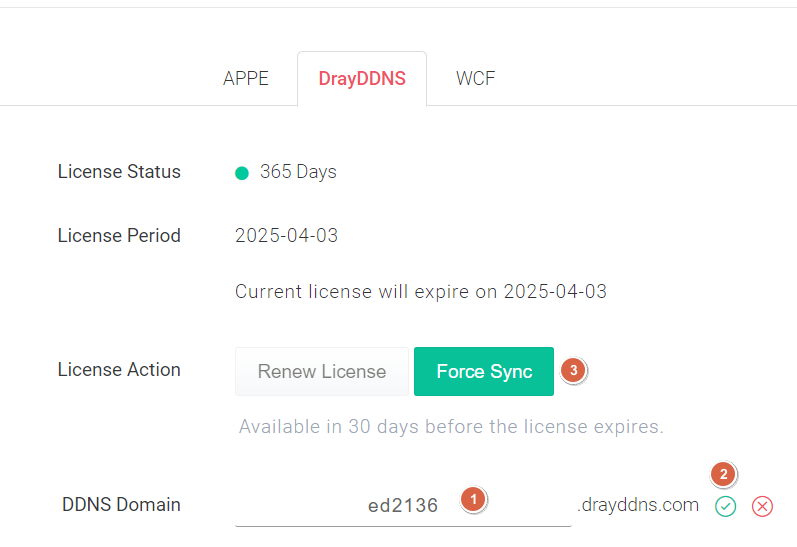
10. Click Force Sync. MyVigor will push the Domain Name info to the Vigor Router.
11. Go to Configuration / WAN,
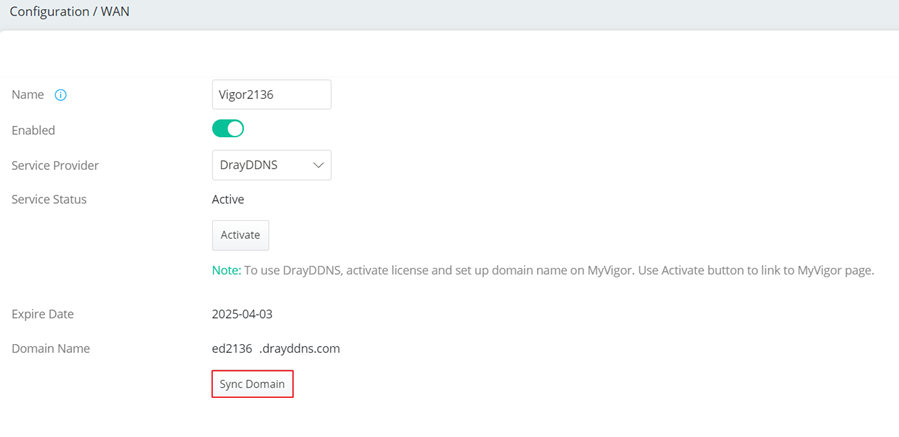
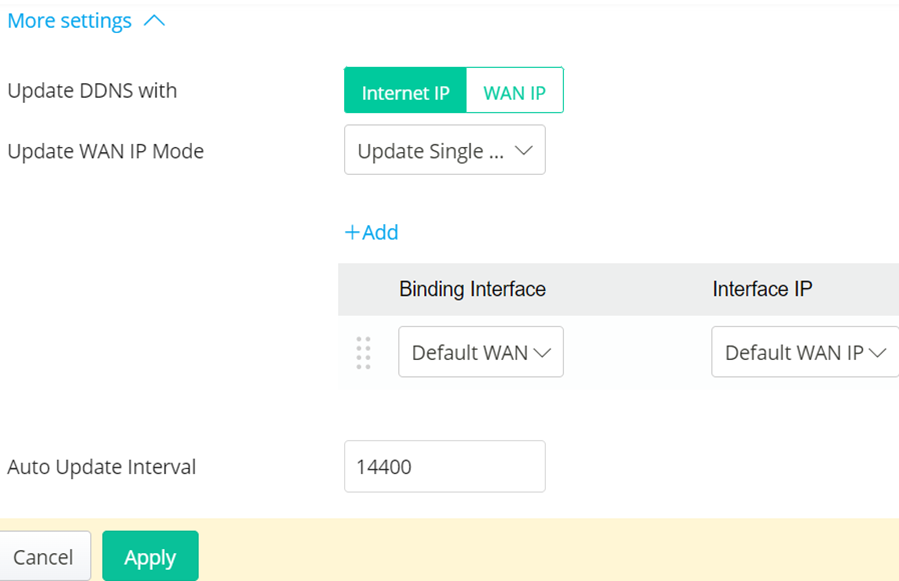
12. Click “More settings” to configure the WAN used and the IP address for the DrayDDNS profile, and click Apply to save the settings.
Update Single WAN IP by sequence: Use when you want the domain to be updated with one WAN simultaneously.
Update All selected WAN IPs: This option is used when you want the domain name to be updated simultaneously with more than one WAN.
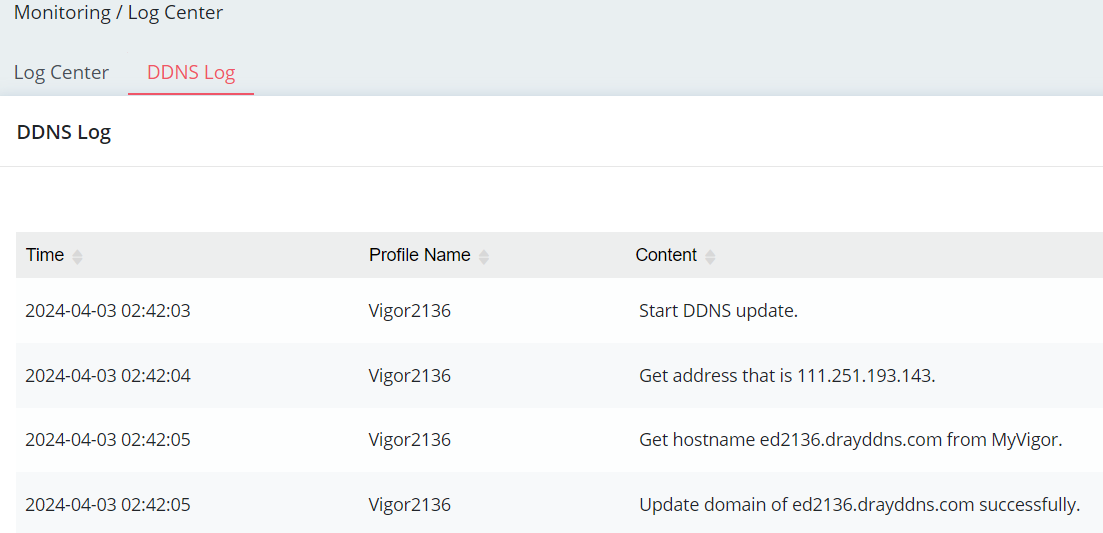
13. Go to Monitoring / Log Center, Under the DDNS Log tab, check if the router has updated the DDNS successfully.
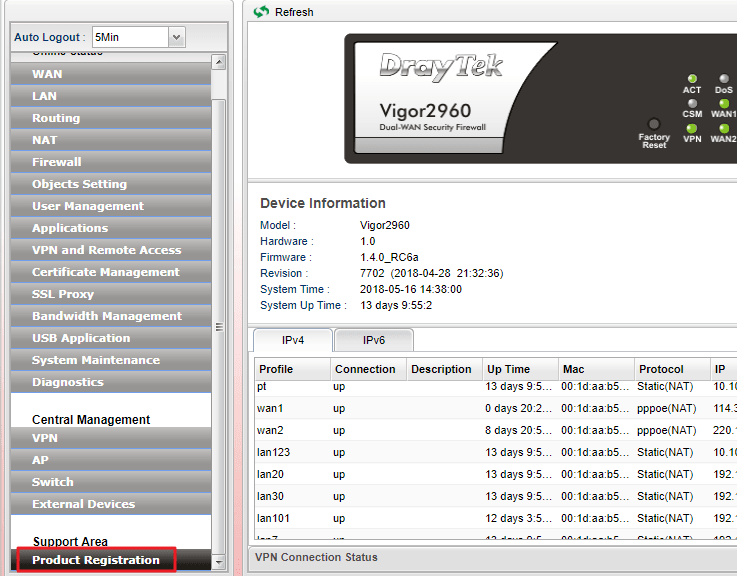
1. Before using the DrayDDNS service, it is required to register your router to your MyVigor account, you can do that by clicking Product Registration from the menu.
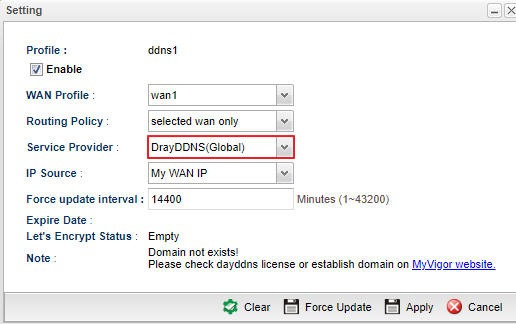
2. Go to Applications >> Dynamic DNS >> Setting page . Select the profile "ddns1" and click Edit:
- Check Enable
- Select the WAN interface to which you would like the DrayDDNS to be associated.
- Select DrayDDNS (Global) for Service Provider
- Click Apply
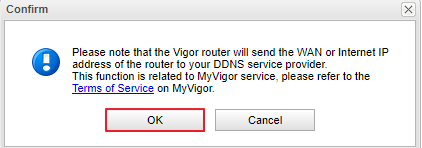
3. If you enable the DrayDDNS service, the router will send the WAN IP info to DrayDDNS Service Provider. Read the Terms of Service and click OK if you agree.
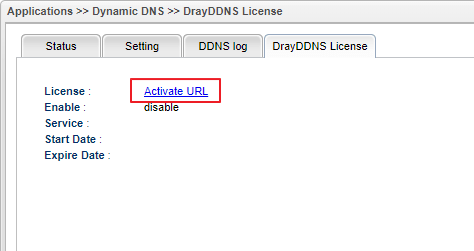
4. Go to Applications >> Dynamic DNS >> DrayDDNS License page and click Activate URL.
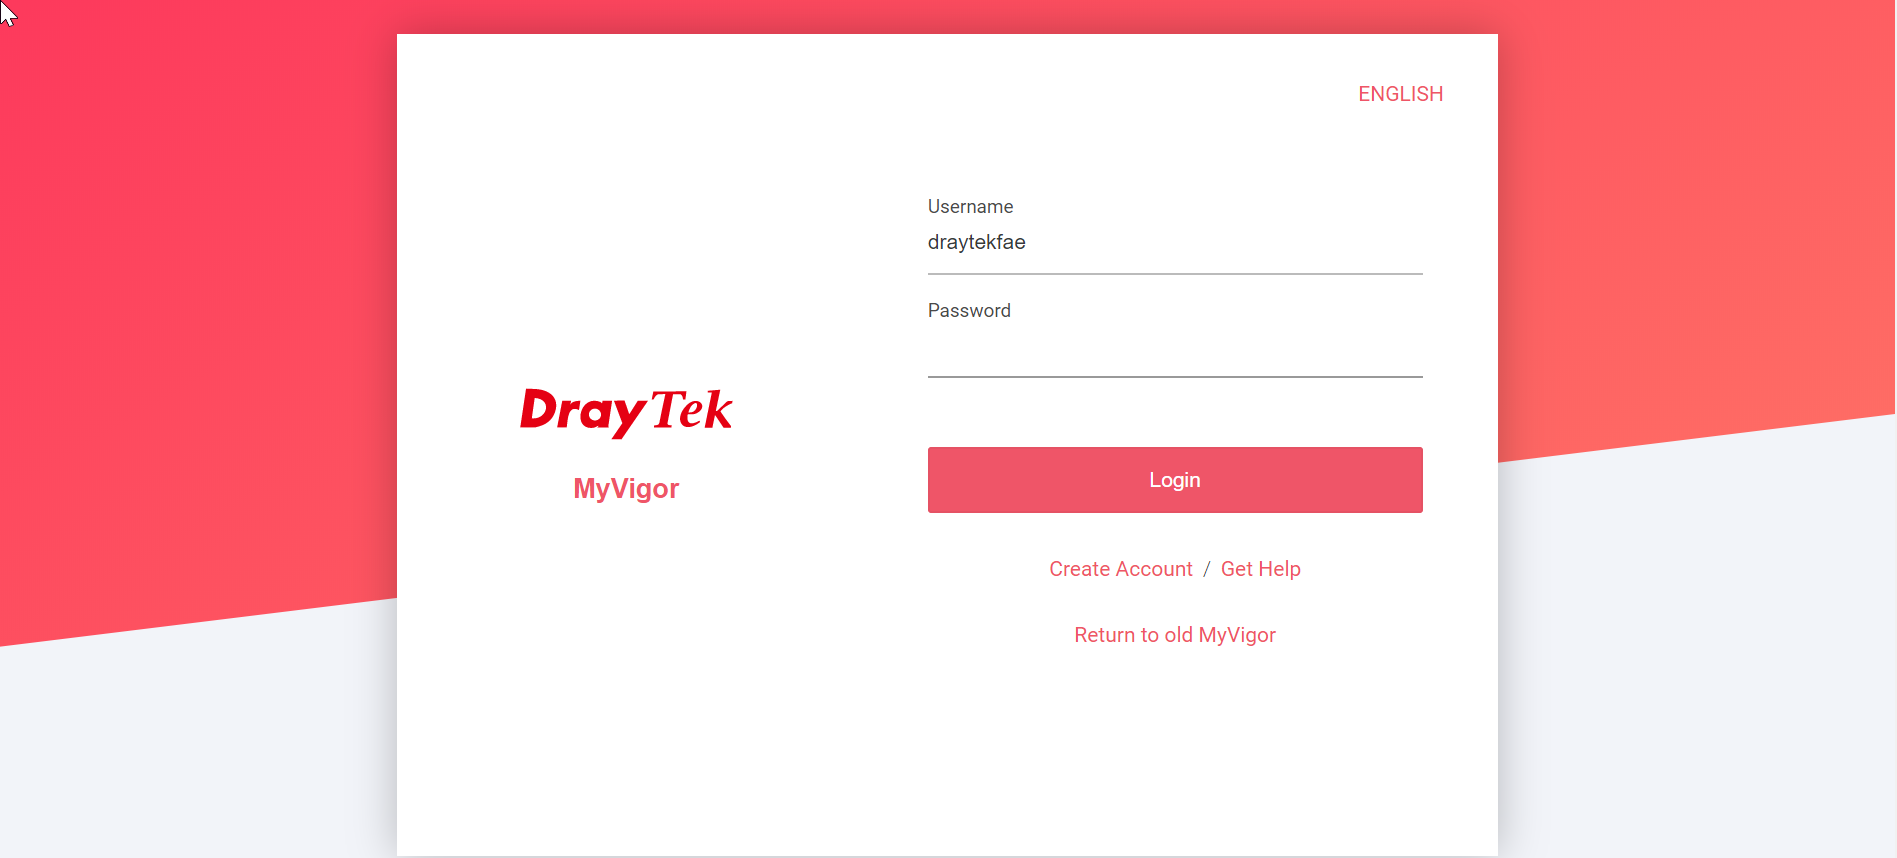
5. It will lead you to MyVigor portal. Log in with your myVigor account.
6. Enter the Device Name, and click submit.
7. Swtich to DrayDDNS and click Activate License.
8. Click Accept for License Agreement.
9. Click Activate.
10. Wait a few seconds to see if the registration is successful or not.
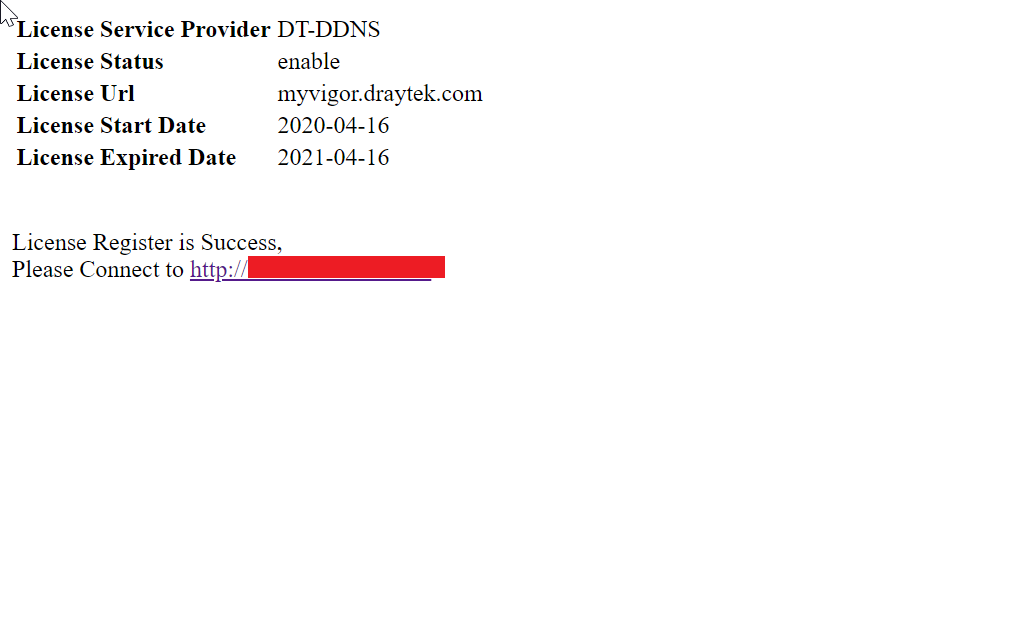
11. And back to My product >>your device name>>Service Status, and then click and enter the DDNS Domain.

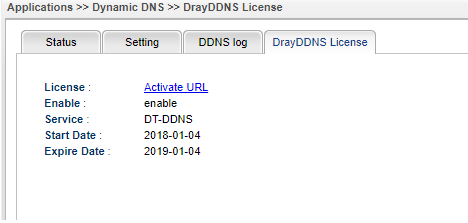
12. Go to Applications >> Dynamic DNS >> DrayDDNS License to check the license state.
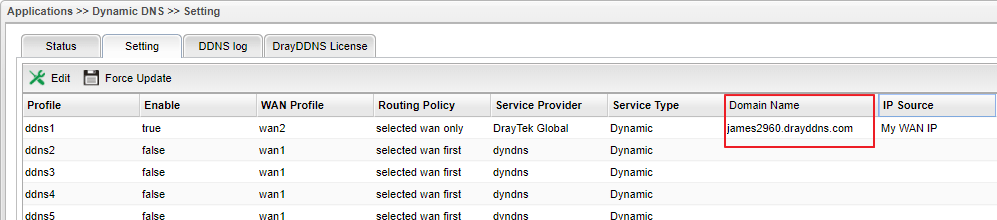
13. Go to Applications >> Dynamic DNS >> Setting and we will see the Domain Name and the DDNS Status are updated successfully.
Domain Update
DrayDDNS server will remove the domain which does not update its IP for 30 days. You should receive the notification mail from MyVigor if your DrayDDNS domain has been 15, 23 days without updating. You may press the link to update the domain status manually, and Draytek will keep your domain.
In addition, please make sure you have registered the router to the MyVigor and the mail address of MyVgior account is still available, or you will miss the mail.
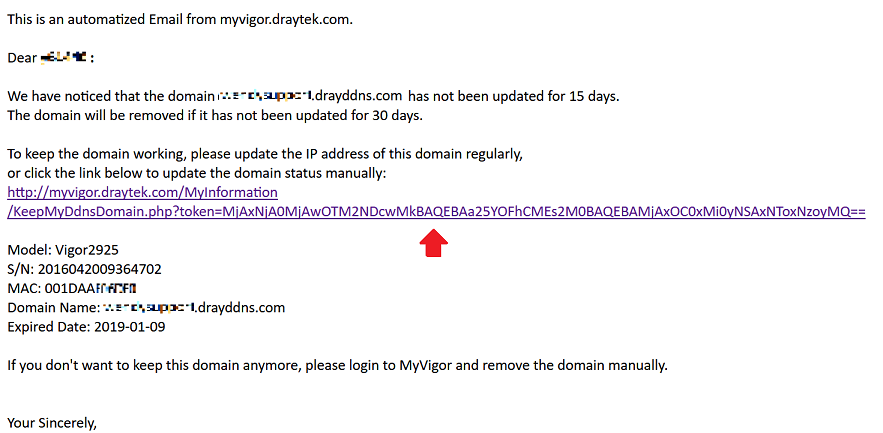
Note: If you obtain the static IP for the Vigor, you still need to renew the domain manually from the notification mail.
Published On:2018-05-22
ShareWas this helpful?