
IPsec VPN between a DrayOS router and a Vigor3900/Vigor2960
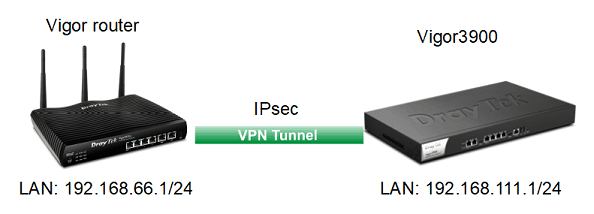
This article demonstrates LAN-to-LAN IPsec VPN between a DrayOS router and Vigor3900/2960. The network topology is shown below. We separate this article into two parts, to demonstrate how to establish the IPsec VPN connection between a DrayOS Router and Vigor3900/2960 when using one of them as VPN server respectively.
Part A: Take DrayOS Router as the VPN server
DrayOS Dial-In settings
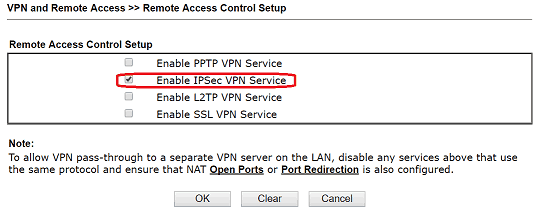
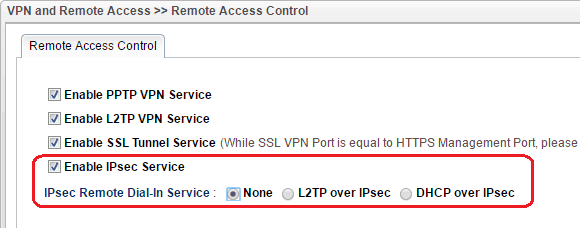
1. Make sure the IPsec service is enabled in VPN and Remote Access >> Remote Access Control page.
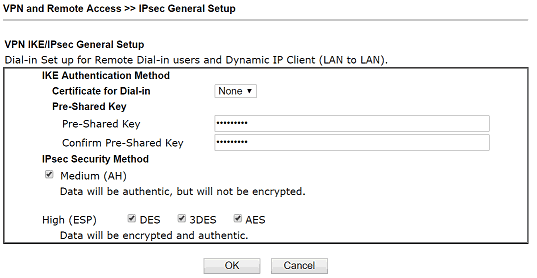
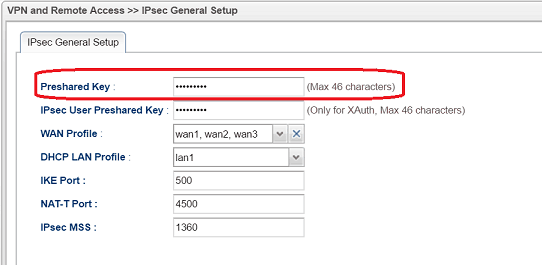
2. Go to VPN and Remote Access Control >> IPsec General Setup, enter Pre-Shared Key. Then, click OK to save.
3. Go to VPN and Remote Access Control >> LAN to LAN and click an available index. In Common Settings:
- Give a Profile Name
- Enable this profile
- Select "Dial-in" for Call Direction

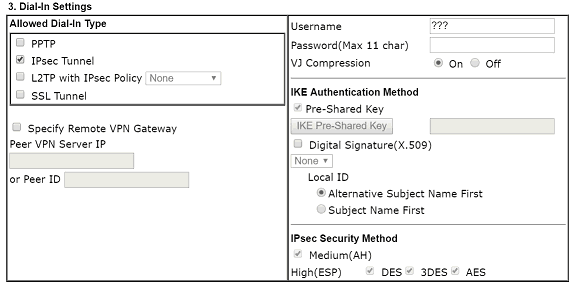
4. In Dial-In Settings, allow IPsec dial-in
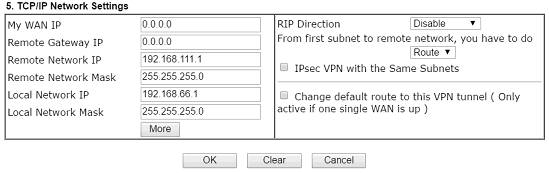
5. In TCP/IP Network Settings, enter Vigor3900's LAN in Remote Network IP/Mask. Then, click OK to save.
Vigor3900 Dial-out Settings
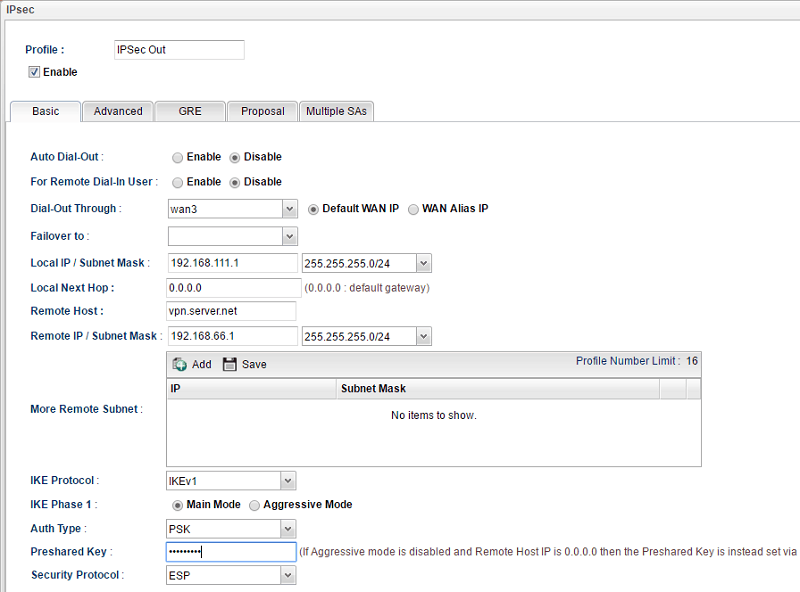
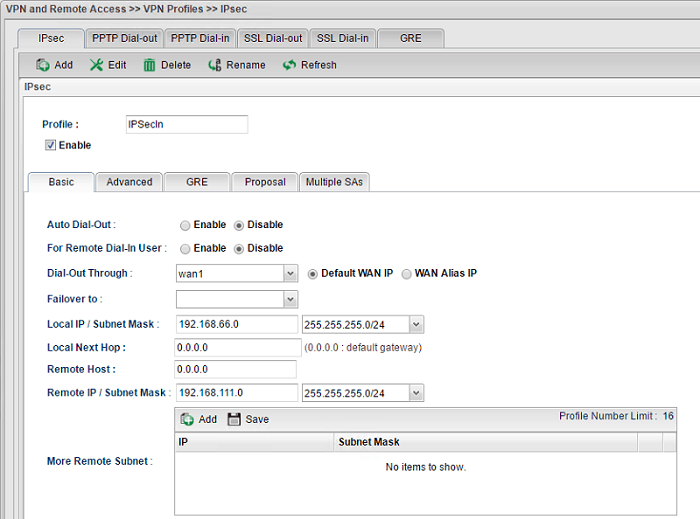
6. Go to VPN and Remote Access >> VPN Profiles, and click Add in the IPsec tab
- Give Profile name and Enable the profile
- Select the WAN interface used to dial out
- Enter Vigor3900's LAN in Local IP/Subnet Mask
- Enter the DrayOS router's WAN IP or domain name in Server IP/Host Name
- Enter the DrayOS Router's LAN in Remote IP/Subnet Mask
- Enter Preshared Key as the same as the one set in step 2.
- Click Apply
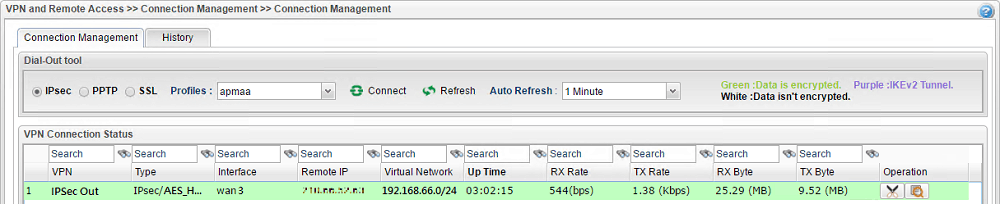
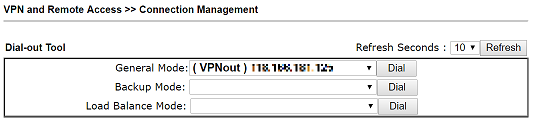
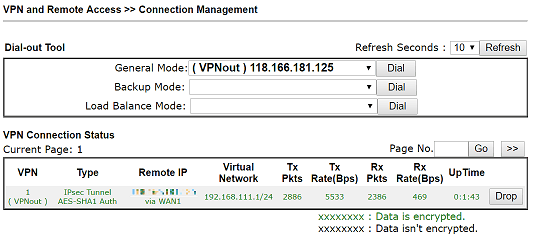
Now we can go to VPN and Remote Access >> Connection Management to dial the VPN.

After VPN is connected successfully, we can see the status below.
Part B: Take Vigor3900 as VPN server
Vigor3900 Dial-in Settings
1. Make sure the IPsec service is enabled in VPN and Remote Access >> Remote Access Control page.
2. Go to VPN and Remote Access >> IPsec General Setup, enter Preshared key and click Apply.
3. Go to VPN and Remote Access >> VPN Profiles, and click Add in the IPsec tab,
- Give Profile Name and Enable the profile
- Enter the Vigor3900's LAN in Local IP/Subnet Mask
- Enter the DrayOS Router's LAN in Remote IP/Subnet Mask
- Click Apply
DrayOS Router Dial-Out Settings
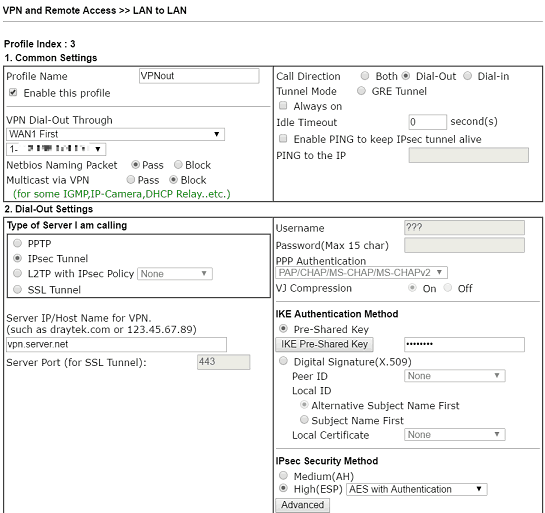
4. Go to VPN and Remote Access Control >> LAN to LAN and click an available index
- In Common Settings, give a Profile Name
- Enable this profile
- Select Dial-out for Call Direction
- In Dial-Out settings, select IPsec as dial-out type
- Enter Vigor3900's WAN IP or domain name in Server IP/Host Name
- Enter Pre-Shared Key as the same as in step 2.
- Select ESP(High), AES with Authentication for IPSec Security Method
5. In TCP/IP Network Settings, enter Vigor3900's LAN in Remote Network IP/Mask. Then click OK to save
Now we can go to VPN and Remote Access >> Connection Management to dial the VPN.
After VPN is connected successfully, we can see the status below.
Published On:2017-06-06
ShareWas this helpful?