IPsec is very secure and delivers great performance, and since 2018, Vigor Router also provides IPsec Xauth. If you are not comfortable with every VPN client using the same pre-shared key, you can use IPsec Xauth instead. IPsec Xauth authenticates the VPN clients not only by a pre-shared key but also a unique username and password. This article demonstrates how to set up Vigor Router as a VPN server for IPsec Xauth clients, and the configuration required on an Android device to establish the VPN.
Setup on Vigor Router
1. Go to VPN and Remote Access >> IPsec General Setup, and enter Pre-Shared Key.
2. Go to VPN and Remote Access >> Remote Dial-in User, and click on an available index:
- Check Enable this account
- Give Username and Password
- Make sure IPsec Xauth is checked at Allow Dial-In Type
3. You may check if the client is online from VPN and Remote Access >> Connection Management page.
1. Go to User Management >> User Profile and click Add,
- Enter Username and Password
- Check Enable
- Select "Enable" for Xauth at IPsec User Setting
2. Go to VPN and Remote Access >> IPsec General Setup, Enter IPsec User Preshared Key. Then click Apply.
3. Go to VPN and Remote Access >> VPN Profile and add a profile as follows:
- Give a Profile name
- Check Enable
- Select "Enable" For Remote Dial-In User
- Enter the LAN IP of the router at Local IP / Subnet Mask
4. Go to Proposal tab to choose the proposal preferences. For Android 6 or 7, we recommend the settings below.
5. You may check if the client is online from Remote Access >> Connection Management page.
The Setup on Android
1 Go to Settings >> More >> VPN to add a VPN profile as follows:
- Select IPSec Xauth PSK for TYPE
- Enter the router's domain name or WAN IP address for SERVER ADDRESS
- Enter the Preshared Key at IPSEC PRE-SHARED KEY
- Tap SAVE
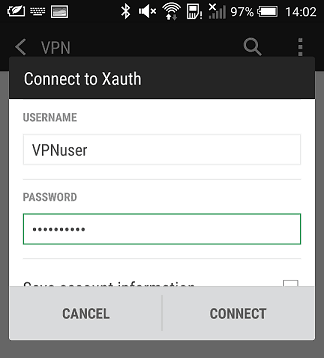
2. To start the VPN connection, tap the profile, enter username and password. Then, tap Connect.

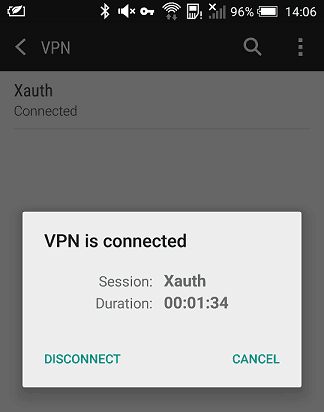
3. It shows the following information if VPN connects successfully.

Published On: Jul 04, 2018
Was this helpful?
