
How to set up DHCP Relay on VigorSwitch
DHCP clients use local broadcast packets to obtain IP addresses from the DHCP server. And in some situations, the DHCP server may not be in the same subnet as the DHCP clients. As a result, DHCP clients will not receive IP addresses from the DHCP server. In such a situation, we could configure DHCP Relay on VigorSwitch to make this work. Please note that we couldn't set up the DHCP server as the VigorSwitch built-in DHCP server.
DHCP Relay Setup
Go to Switch LAN >> VLAN Management >> Create VLAN Create two VLAN profiles as ID 10, 20.

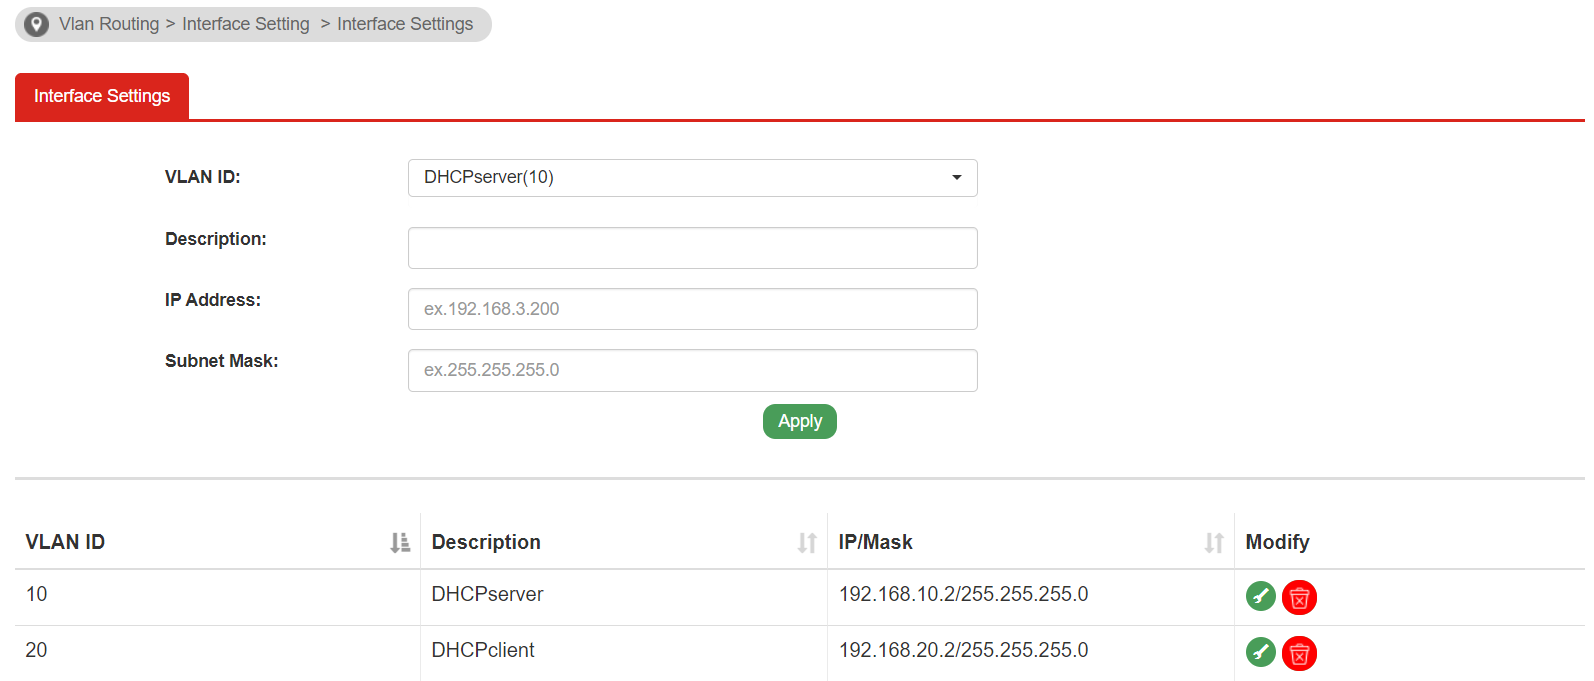
Go to VLAN Routing >> Interface Setting, set up IP address and Subnet Mask for two VLAN profiles.
- VLAN ID 10 192.168.10.2/255.255.255.0
- VLAN ID 20 192.168.20.2/255.255.255.0
Go to Switch LAN >> DHCP Server/Relay >> DHCP Relay >> Global Setting.
- Select Enable as Append Agent Option
- Select Keep Packets Contain Relay Agent Options
- Click Apply

When we enable Append Agent Option, it allows the VigorSwitch to add DHCP Option 82 to the forwarded DHCP packets. When we select Keep as Packets Conatin Relay Agent Options, it means all the packets will be fowarded, but the relay information which is already present will be ignored.
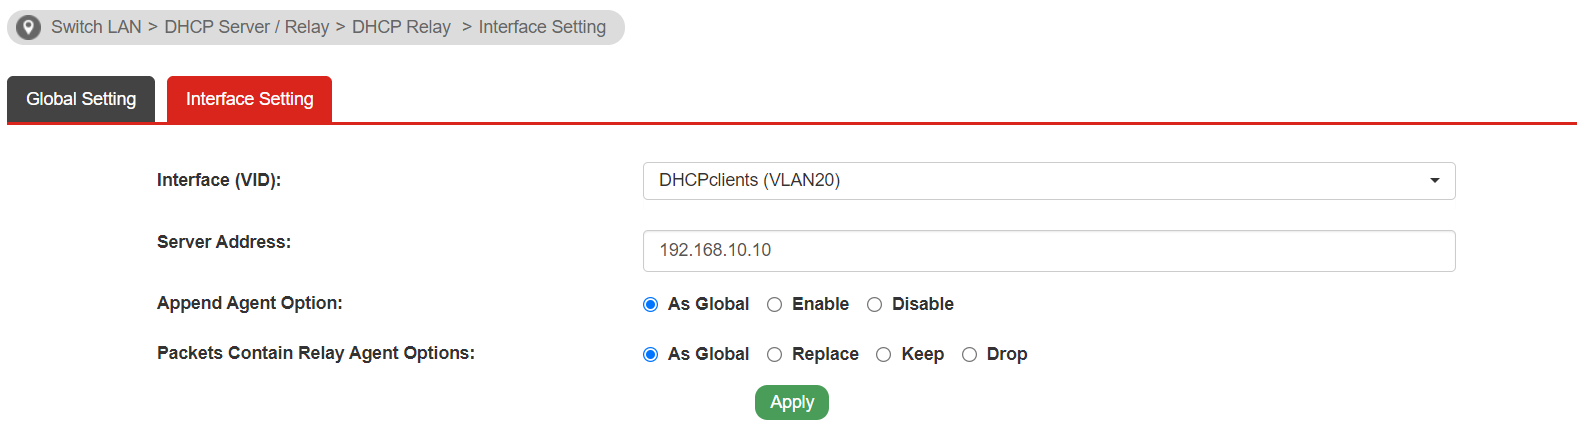
Go to Switch LAN >> DHCP Server/Relay >> DHCP Relay >> Interface Setting
- Select VLAN20 as Interface(VID)
- Enter in 192.168.10.10 as Server Address
- Select As Global as Append Agent Option
- Select As Global as Packets Contain Relay Agent Options
DHCP Relay Test
Go to Switch LAN >> VLAN Management >> Interface Settings
- GE2 Access PVID10, untag10
- GE3 Access PVID20, untag20

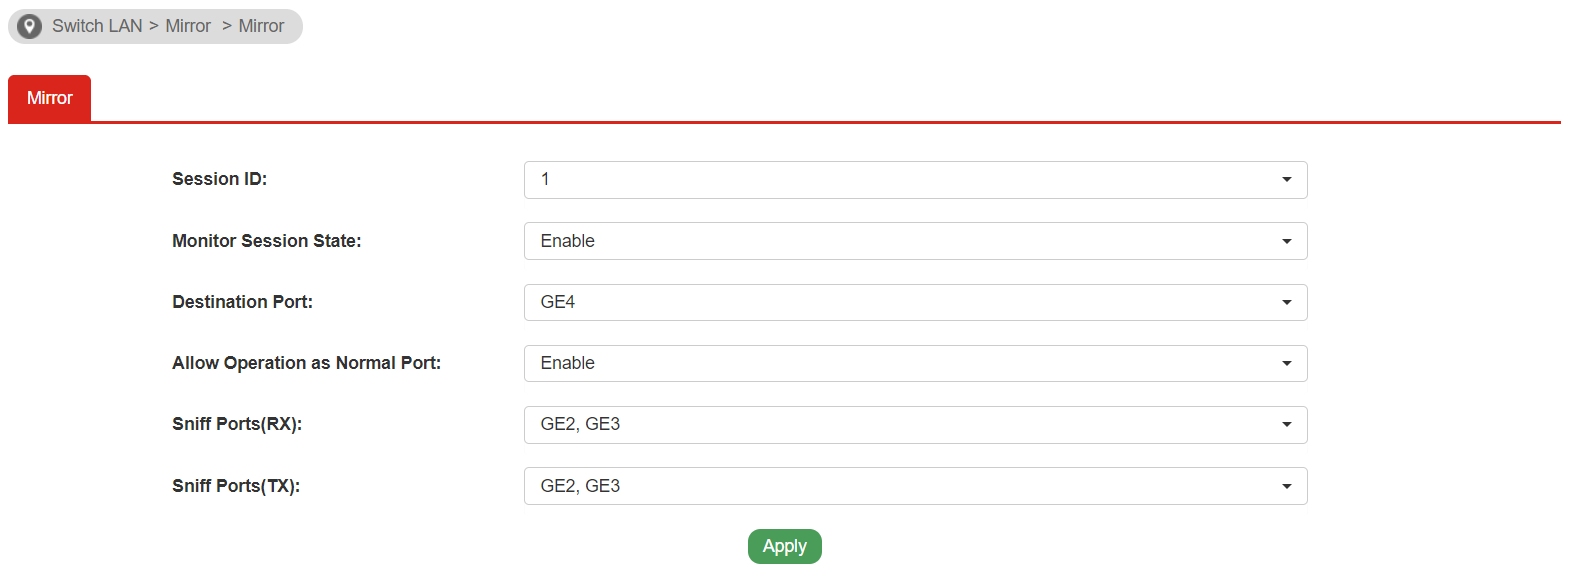
Go to Switch LAN >> Mirror, set up port mirror for GE2, GE3.
We use a VigorRouter as the DHCP server
- LAN2 on port5 without tag that connects to GE2
- Static Route: Destination 192.168.20.0/24, Gateway 192.168.10.2, Interface: LAN2
Now we can connect a DHCP client(PC) to GE3 and capture the packets on GE14 to confirm the DHCP relay is working.

- The PC sends out a broadcast DHCP discover
- 192.168.10.2 forwards an unicast DHCP discover to DHCP server 192.168.10.10
- DHCP server 192.168.10.10 replies an DHCP Offer to VLAN 20 192.168.20.2
- 192.168.20.2 forwards the DHCP offer to the DHCP client(PC)
- DHCP request and ACK are sent based on the same order
- DHCP client get an IP address as 192.168.10.11
Published On:2021-06-30
ShareWas this helpful?