
L2TP over IPsec from iOS to Vigor Router
This article explains how to configure a Vigor Router as an L2TP over IPsec VPN server and how to establish an L2TP VPN connection from iOS to access the Vigor Router’s private network. *L2TP over IPsec VPN is supported on DrayOS 5 routers starting from firmware version 5.3.6
This article demonstrates how to set up Vigor Router as an L2TP VPN server for iPhone, and how to establish an L2TP VPN from iPhone to connect to the private network of Vigor Router.
Vigor Router Setup
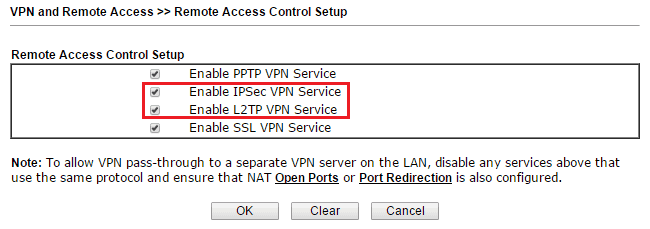
1. Go to VPN and Remote Access >> Remote Access Control Setup, and make sure "Enable IPsec VPN Service" and "Enable L2TP VPN Service" are both checked.
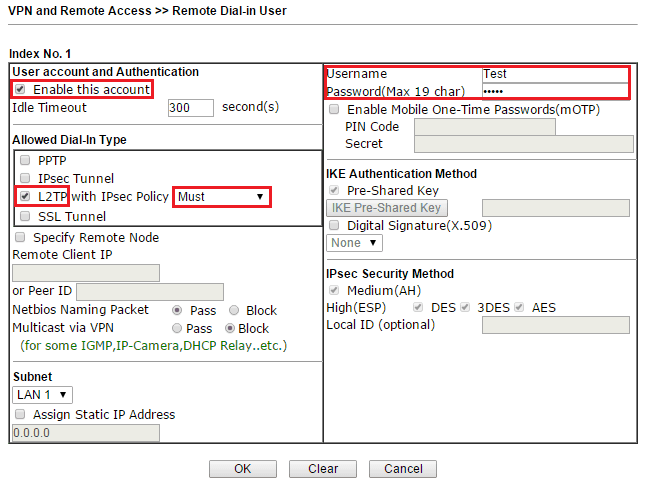
2. Go to VPN and Remote Access >> Remote Dial-in User, click on an available index number and edit the profile as follows:
- Check Enable this account
- Select "L2TP" for Allowed Dial-In Type and also select "Must" for IPsec Policy
- Enter username and password, which will be used for the VPN settings on iPhone later.
- Click OK to save
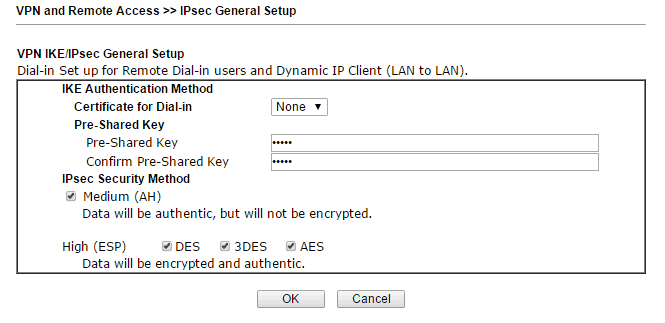
3. Create VPN IKE Pre-Shared Key: Go to VPN and Remote Access >> IPsec General Setup, enter Pre-Shared Key and confirm it. Click OK to save
Establish VPN from iPhone
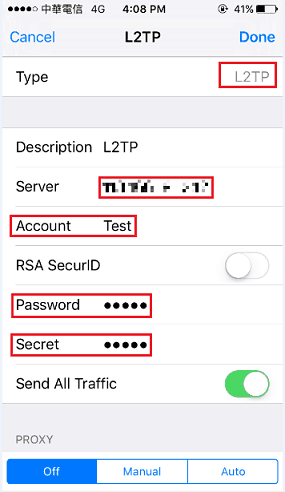
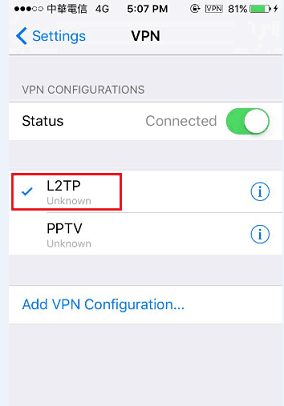
4. On the iPhone, go to Settings >> VPN, and tap Add VPN Configuration.
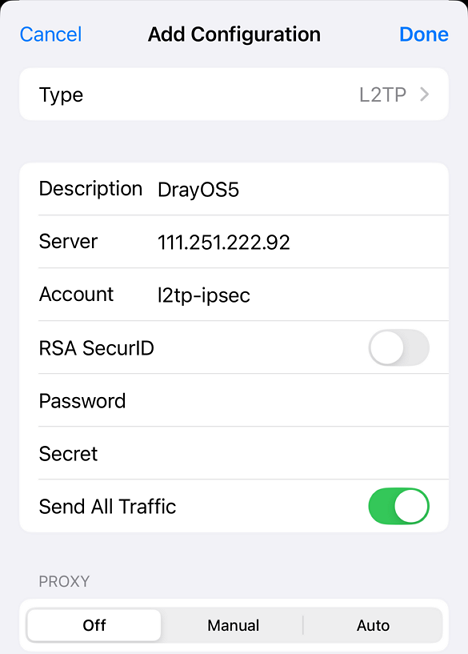
- Select "L2TP" for Type and Description
- Enter the WAN IP of the router for Server.
- Enter Account and Password, which are the username and password set up in step 2.
- Enter Secret as the Pre-Shared Key set in step 3.
- Tap Done to save the settings
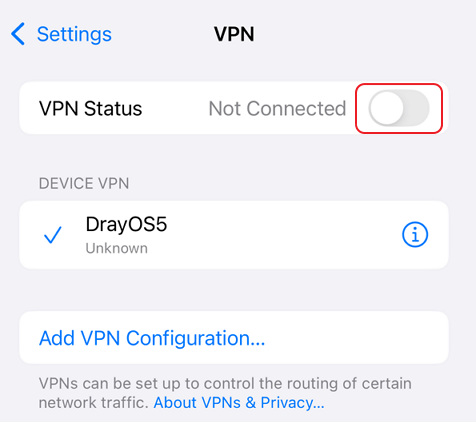
5. Once we finish the above settings, select the profile and switch on VPN connection. When the VPN connected successfully, there will be a "VPN" icon on the top of the screen. We can also tap the profile to see more details, such as assigned IP address and connect time.
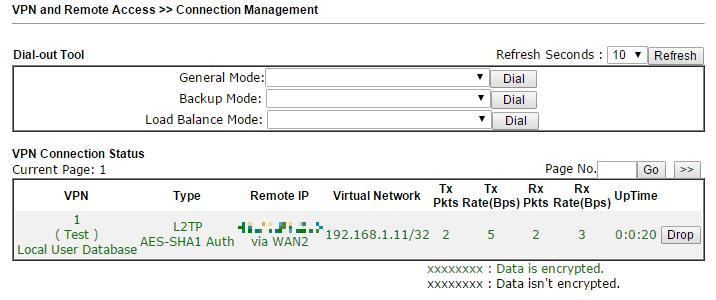
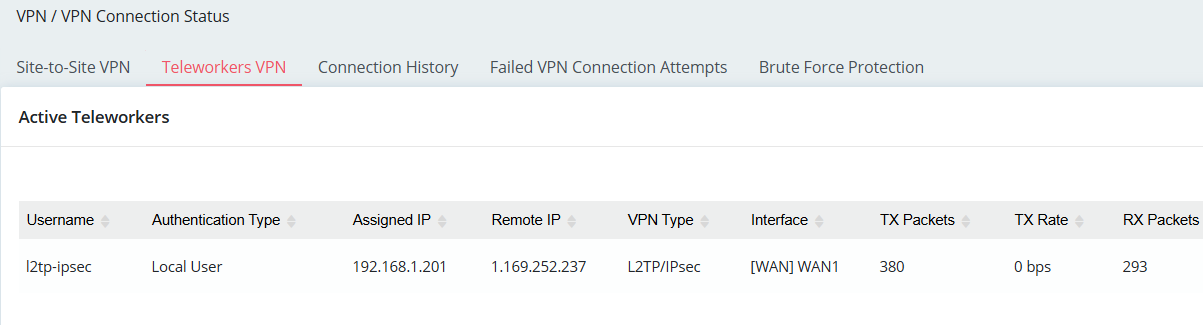
6. We can also check the VPN client status from the router by visiting VPN and Remote Access >> Connection Management.
Vigor Router Setup
1. Make sure the router is connected to the Internet and has a public WAN IP address so that VPN clients on the Internet can reach it.
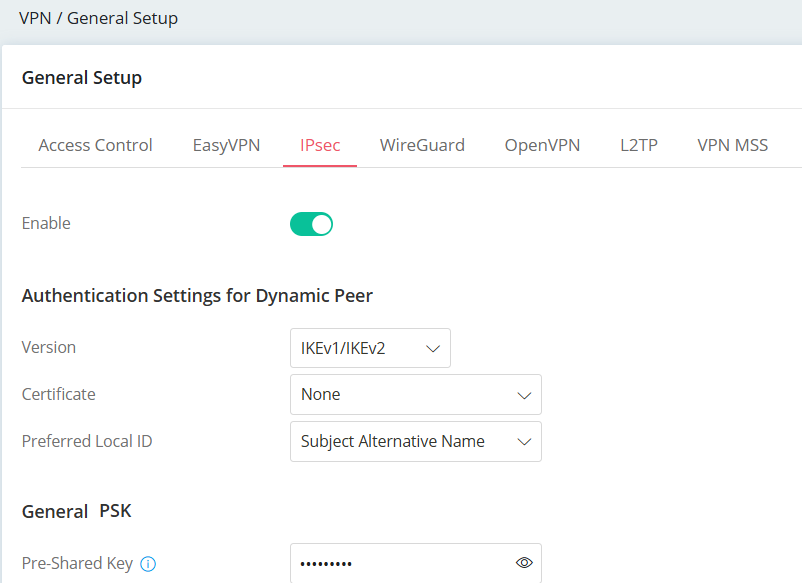
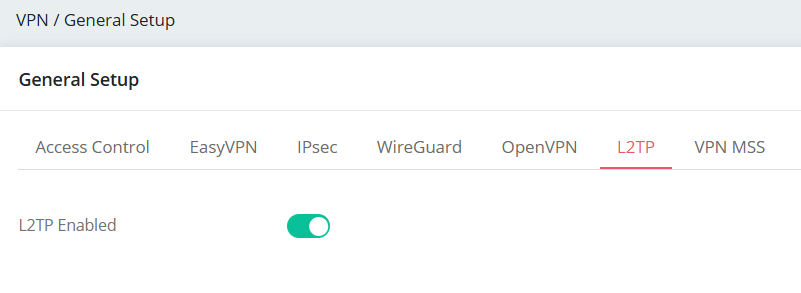
2. Activate the IPsec and L2TP VPN service.
Go to VPN > General Setup,
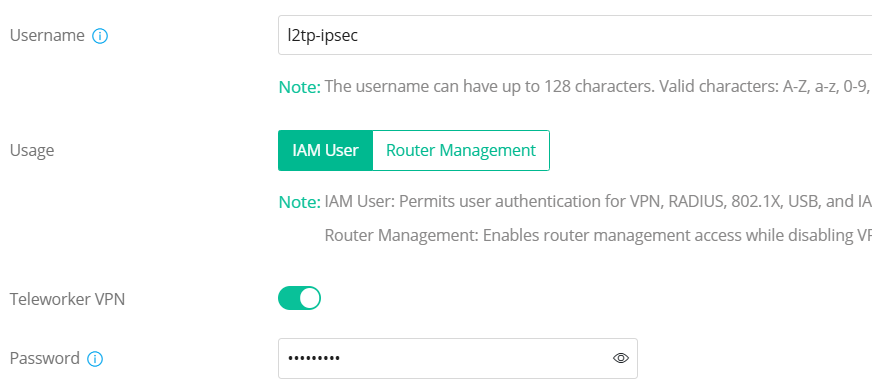
3. Create a Teleworker VPN User Profile.
Go to VPN > Teleworker VPN, click Add. Enter the Username, toggle Teleworker VPN and enter Password.
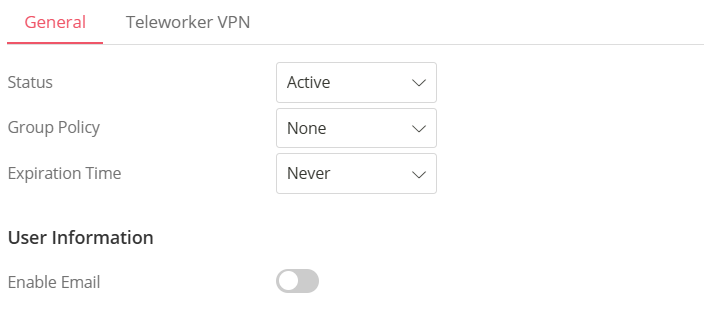
In General Tab,
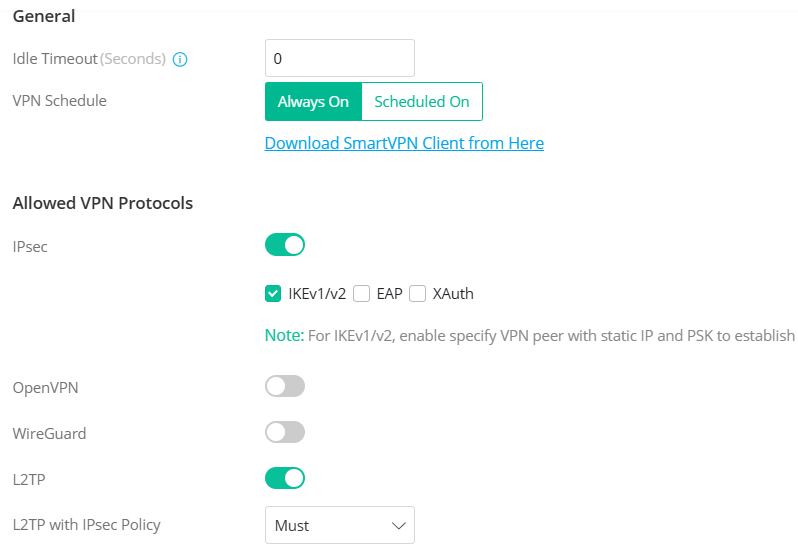
In the Teleworker VPN tab,
iOS VPN Client Setup
1. Go to Settings >> General >> VPN and tap Add VPN Configuration.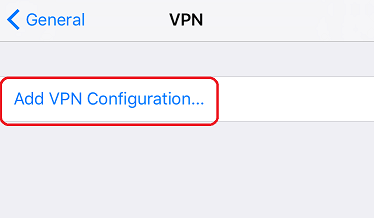
2. Edit the configuration as follows:
3. Switch on Status to start the L2TP over IPsec VPN connection to Vigor Router.
4. To check whether a VPN user is online or not, we could navigate to VPN / VPN Connection Status / Teleworkers VPN.
Published On:2026-02-24
ShareWas this helpful?