
L2TP over IPsec from macOS to Vigor Router
This article explains how to configure a Vigor Router as an L2TP over IPsec VPN server and how to establish an L2TP over IPSec VPN connection from macOS to access the Vigor Router’s private network. *L2TP over IPsec VPN is supported on DrayOS 5 routers starting from firmware version 5.3.6
1. Make sure the router is connected to the Internet. Keep in mind the router's WAN IP or domain name.
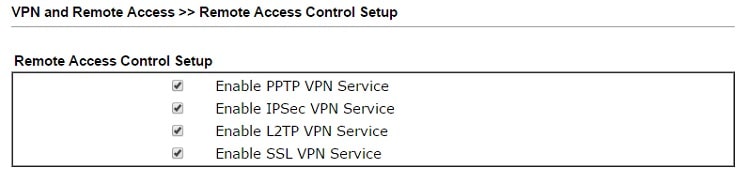
2. Go to VPN and Remote Access >> Remote Access Control Setup to make sure "Enable IPsec VPN Service" and "Enable L2TP VPN Service" are checked.
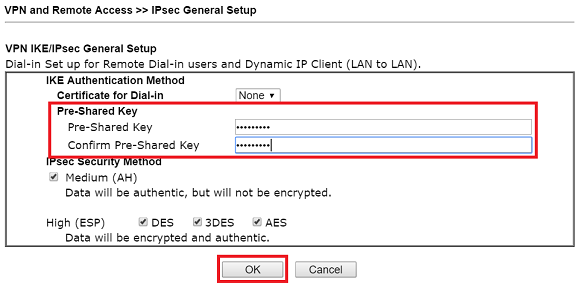
3. Go to VPN and Remote Access >> IPsec General Setup, enter and confirm the Pre-Shared Key, then click OK.
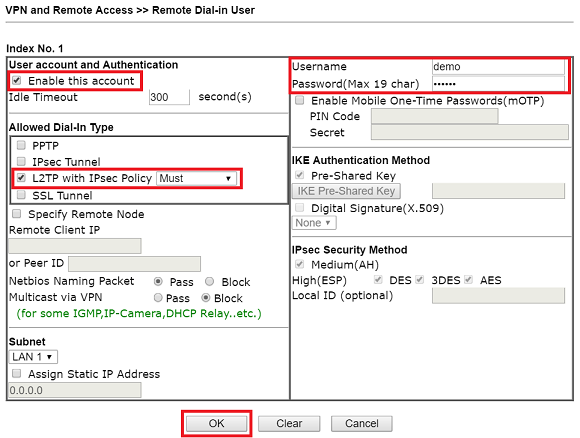
4. Go to VPN and Remote Access >> Remote Dial-in User, click on an index available to create a new account:
- Enable this account,
- enable "L2TP with IPSec" for Allowed Dial-in Type and select "Must" for IPsec Policy,
- enter User Name and Password,
- click OK to save.
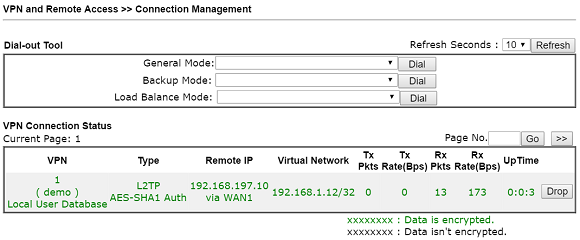
5. If the VPN user is online, you will see VPN connection status at VPN and Remote Access >> Connection Management.
Connecting VPN from macOS
1. Go to System Preferences >> Network.
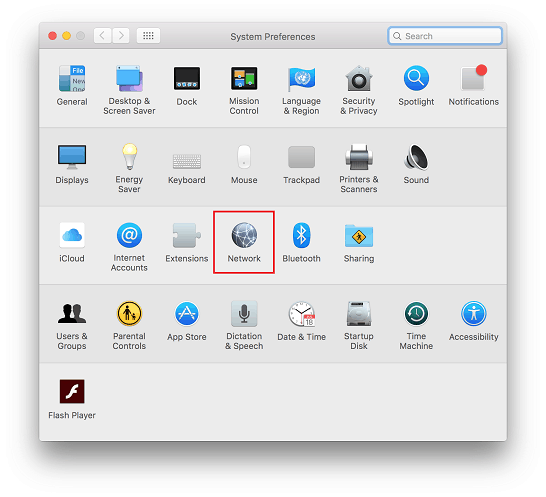
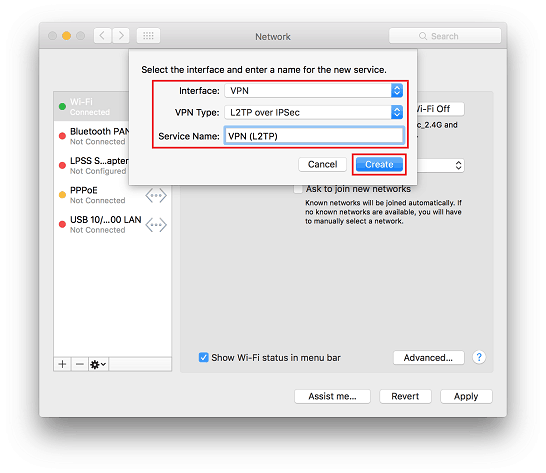
2. Click + to add a new network and edit the profile as follows:
- Select VPN for Interface
- Select "L2TP over IPSec" for VPN Type
- Enter a Service Name
- Click Create.
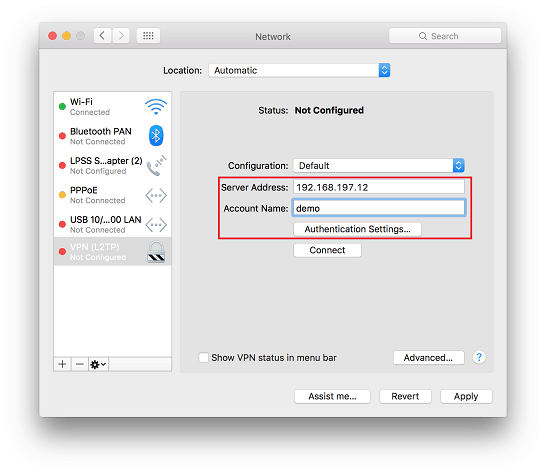
3. Enter Server Address as the WAN IP of the router and Account Name as the username in the router's user profile. Then, click Authentication Settings.
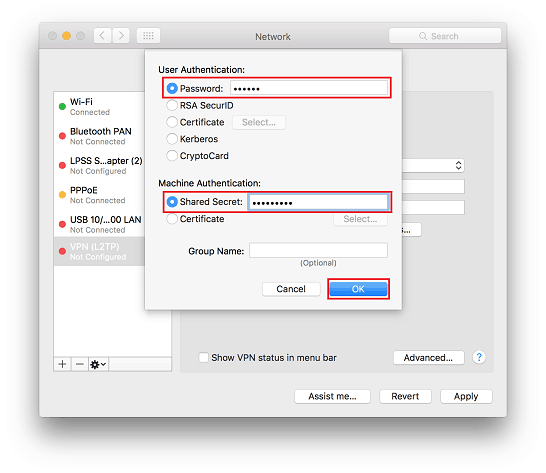
4. Select "Password" for User Authentication and enter the password in the user profile. For Machine Authentication, select "Shared Secret" and enter the pre-shared key set in the router's IPsec General Setup.
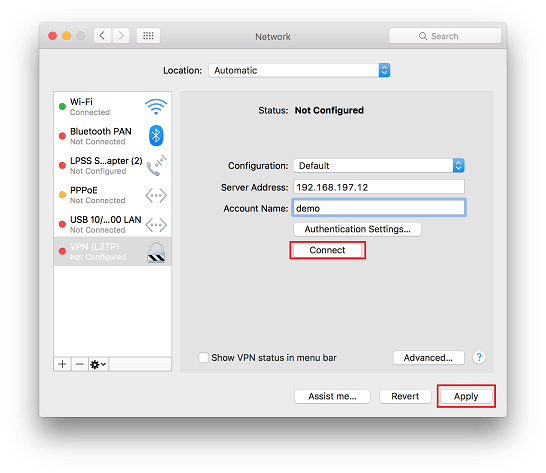
5. Click Apply, then Connect. And wait for the connection to establish.
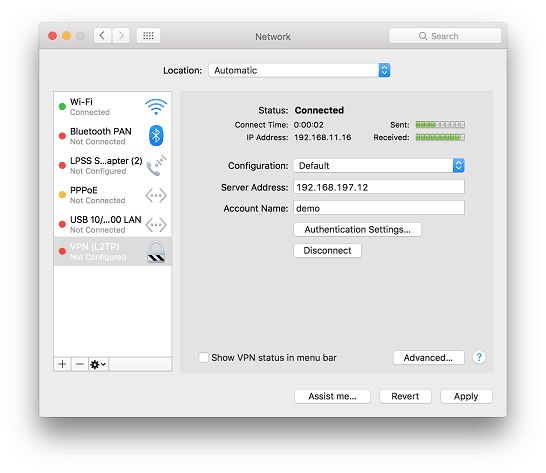
6. When seeing this status, you are connecting to the VPN server successfully.
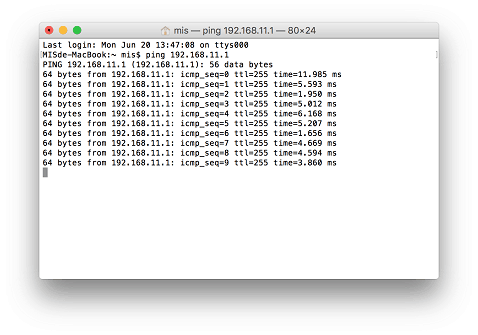
We can use Terminal to verify the connection by ping the local IP on the remote network.
1. Make sure the router is connected to the Internet and has a public WAN IP address so that VPN clients on the Internet can reach it.
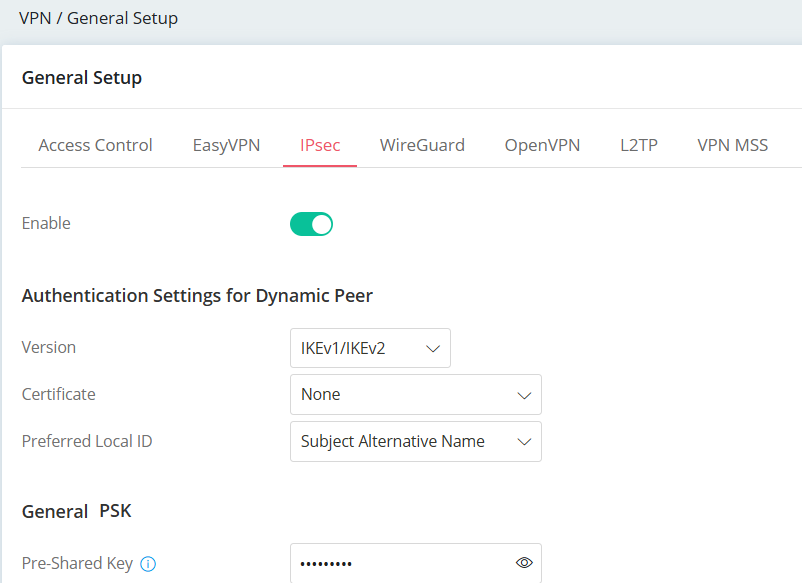
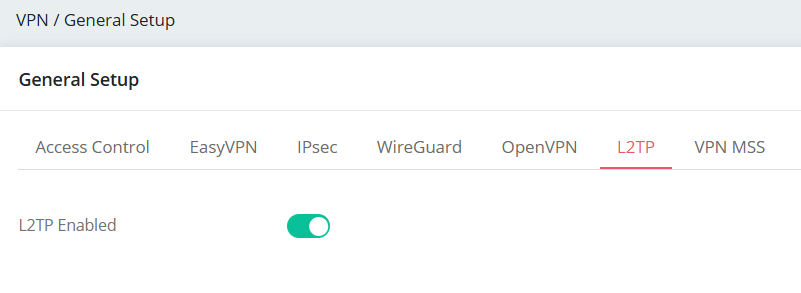
2. Activate the IPsec and L2TP VPN service.
Go to VPN / General Setup,
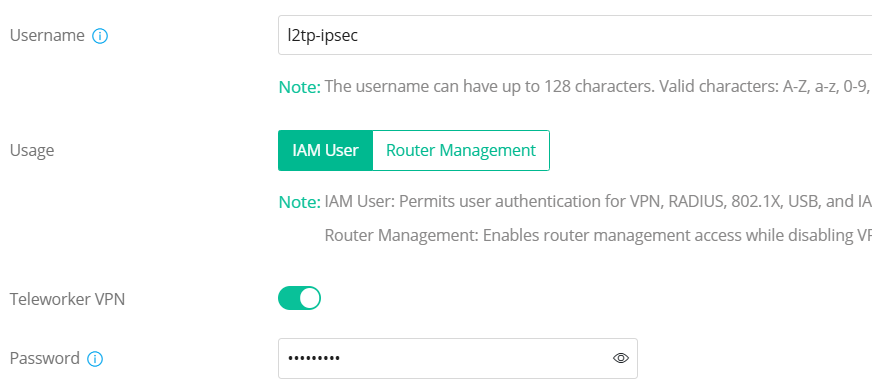
3. Create a Teleworker VPN User Profile.
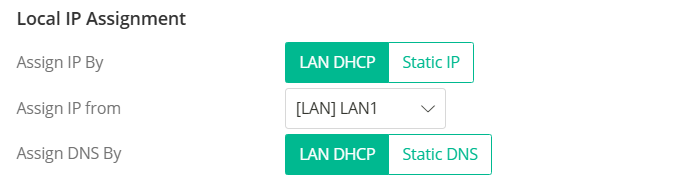
Go to VPN / Teleworker VPN, click Add. Enter the Username, toggle Teleworker VPN and enter Password.
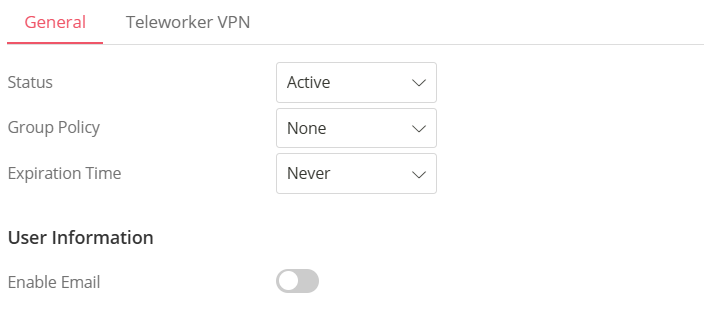
In General Tab,
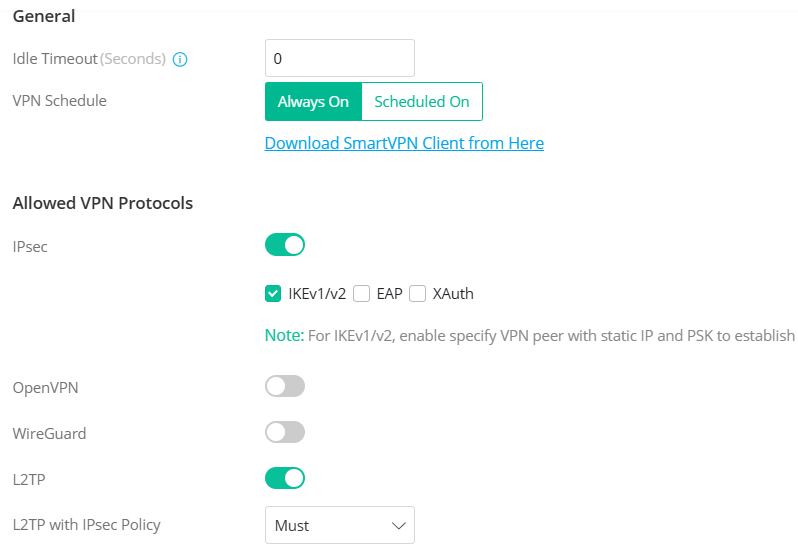
In the Teleworker VPN tab,
macOS VPN Client Setup
1. Go to System Preferences >> Network.
2. Click + to add a new network and edit the profile as follows:
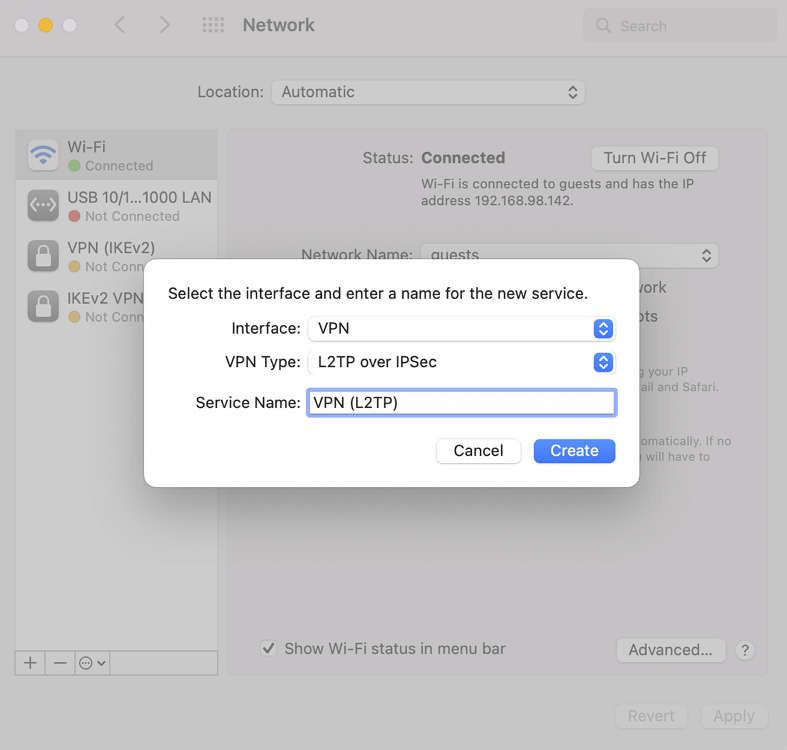
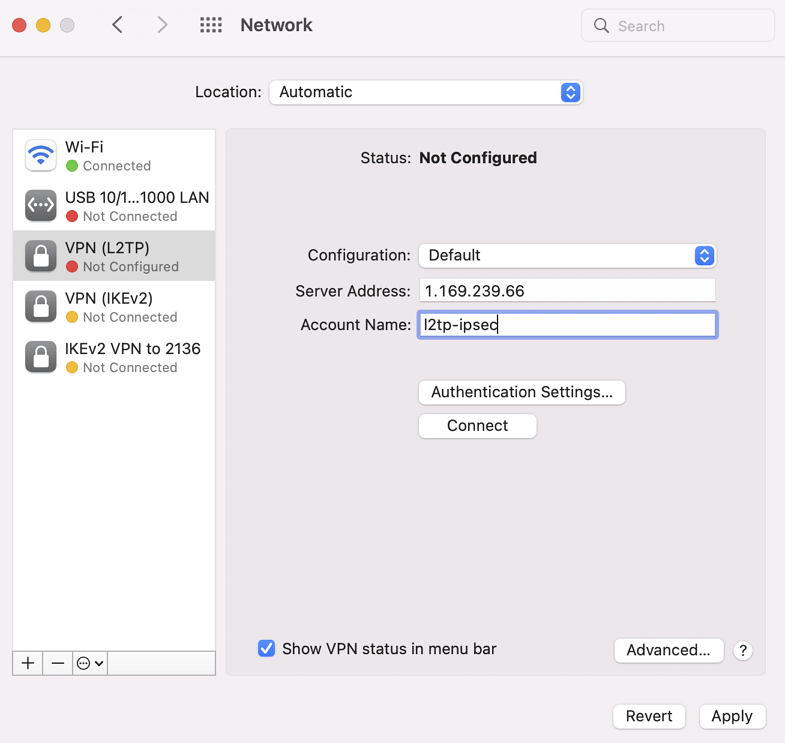
3. Enter Server Address as the WAN IP of the router and Account Name as the username in the router's user profile. Then, click Authentication Settings.
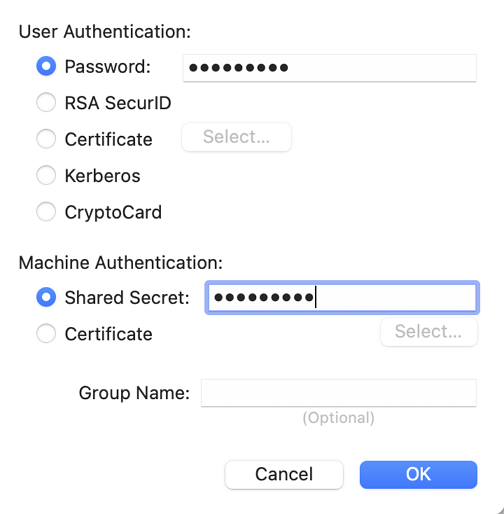
4. Select Password for User Authentication and enter the password in the user profile. For Machine Authentication, select "Shared Secret" and enter the pre-shared key set in the router's IPsec General Setup.
5. Click Apply, then Connect. And wait for the connection to establish.
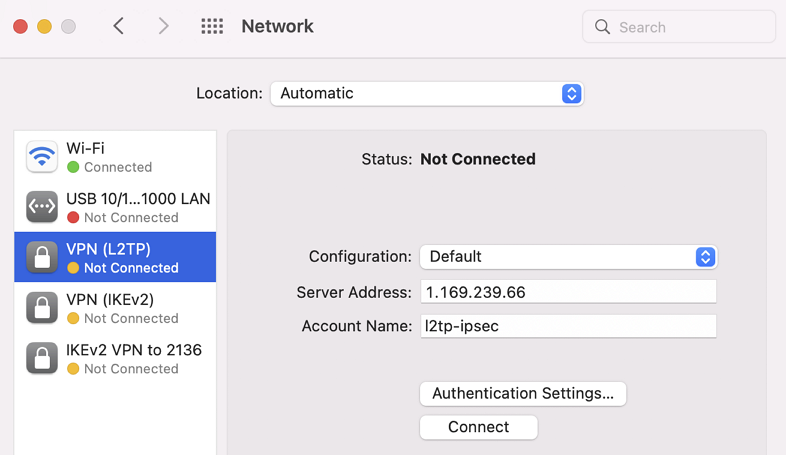
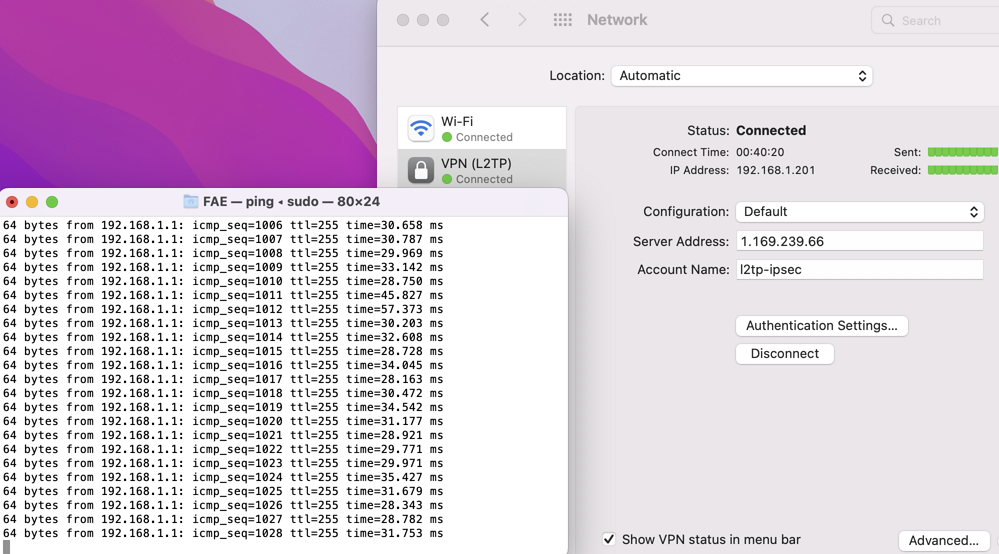
6. When the Status shows Connected, the VPN is established. We can use Terminal to verify the connection by pinging a local IP address on the remote network.
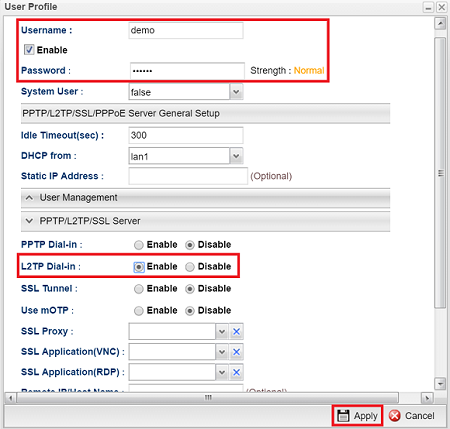
1. Go to User Management >> User Profile, add a profile as follows:
- enter Username,
- check Enable,
- enter Password,
- select "Enable" for L2TP Dial-in,
- click Apply.
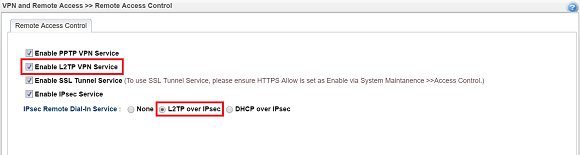
2. Go to VPN and Remote Access >> Remote Access Control,
- make sure Enable L2TP VPN Service is checked,
- select "L2TP over IPsec" for IPsec Remote Dial-In Service,
- click Apply
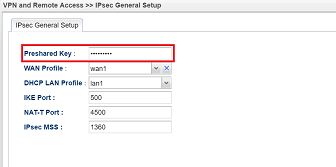
3. Go to VPN and Remote Access >> IPsec General Setup, enter a Preshared Key then click Apply.
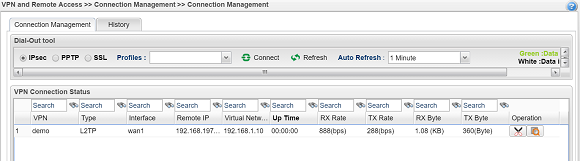
4. If the VPN user is online, you will see VPN connection status at VPN and Remote Access >> Connection Management.
Connecting VPN from macOS
1. Go to System Preferences >> Network.
2. Click + to add a new network and edit the profile as follows:
- Select VPN for Interface
- Select "L2TP over IPSec" for VPN Type
- Enter a Service Name
- Click Create.
3. Enter Server Address as the WAN IP of the router and Account Name as the username in the router's user profile. Then, click Authentication Settings.
4. Select "Password" for User Authentication and enter the password in the user profile. For Machine Authentication, select "Shared Secret" and enter the pre-shared key set in the router's IPsec General Setup.
5. Click Apply, then Connect. And wait for the connection to establish.
6. When seeing this status, you are connecting to the VPN server successfully.
We can use Terminal to verify the connection by ping the local IP on the remote network.
Published On:2026-02-24
ShareWas this helpful?