
Upgrade VigorACS 2 on Windows
This document is going to demonstrate how to upgrade the VigorACS 2 on the Windows platform. If you are the new user for the VigorACS, please refer the document to follow the step for installing VigorACS on Windows platform. Before upgrading the ACS, please pay attention to the following item:
- Contact your local distributor to get the installation file of the VigorACS 2.
- This article is for upgrading the version of VigorACS 2 on the Windows platform.
- The database will remain after the upgrade; however, we still strongly recommend to backup the database before you start. Please refer to this article to see how to back up the database
Upgrade VigorACS 2 on Windows
1. Download the VigorACS 2 package and extract it.
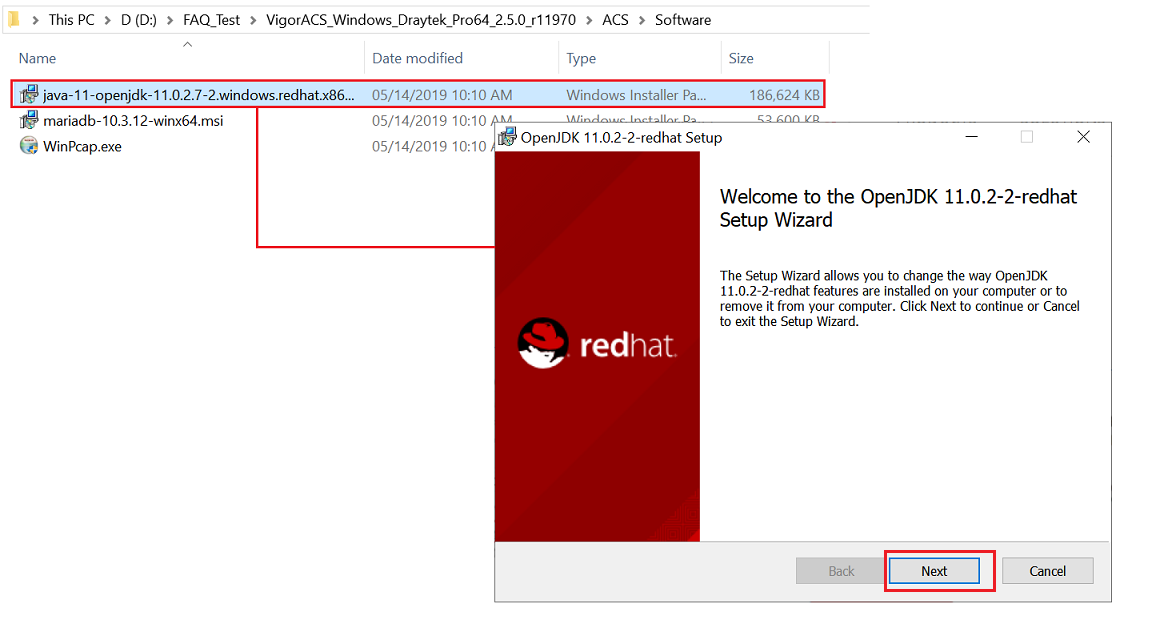
2. Uninstall OpenJDK from your server first. Then, install the newer OpenJDK version from the ACS2 package (Path: \ACS\Software):
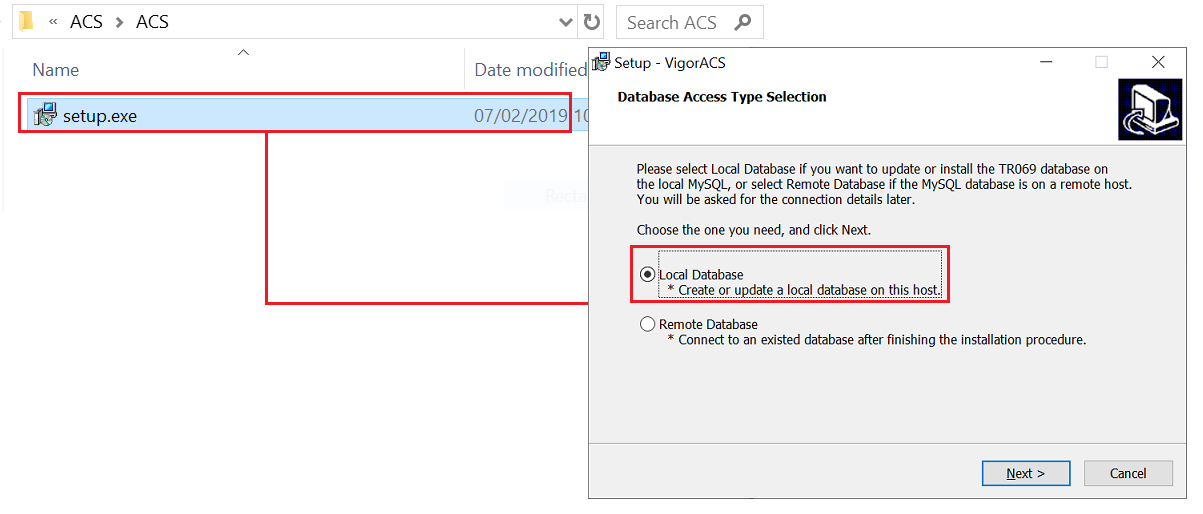
3. Click setup.exe to upgrade VigorACS 2 (Path: \ACS\ACS): Select the Local Database option if you install ACS and MariaDB at the same server
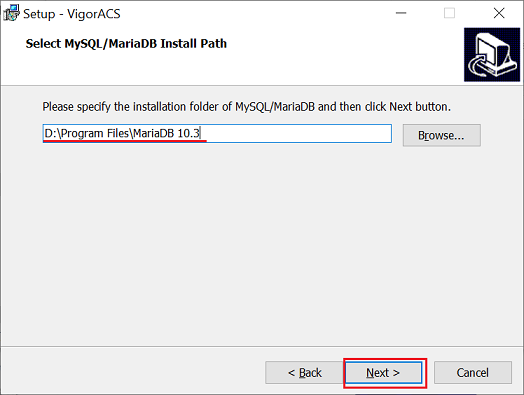
4. Select MariaDB Path: When the program prompts to select the path of MySQL, you must choose the correct directory.
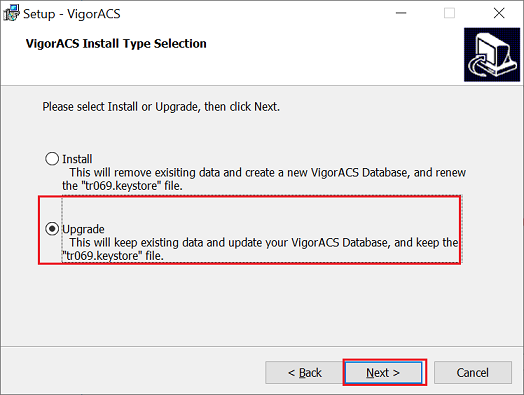
5. Choose Install Type: Select Upgrade if you'd like to keep the existed data.
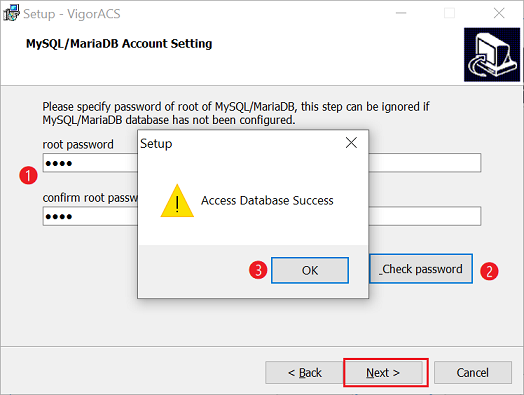
6. MySQL/MariaDB account setting: Enter the MySQL password which you have already set up. We could press the Check password button to verify if the password is correct. If you forgot the password, you might refer the document here to retrieve the MySQL password from VigorACS setting.
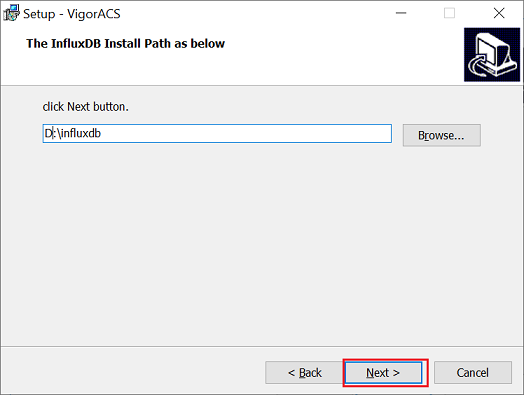
7. Install influxDB: If you upgrade the ACS version from 2.3.3(or older one) to ACS2.4.0(or above), please install the influxDB. Specify the path to install the influxDB. The program will install the influxDB service at the same time.If you have already installed the influxDB, please remember to specify the same location as before.
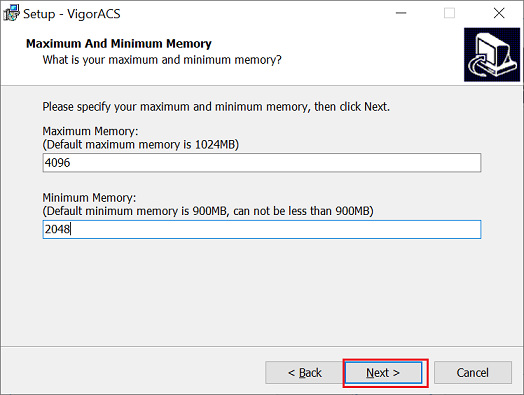
8. Memory setting: Type the memory size which you have already set up:
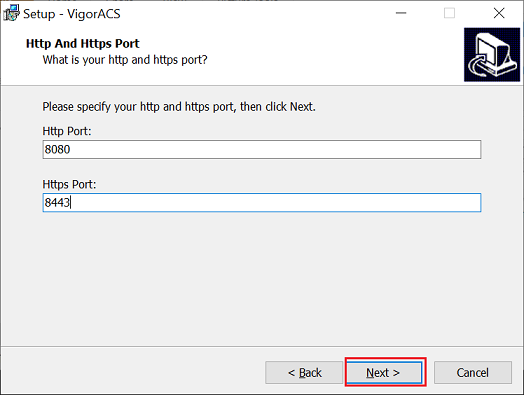
9. Setup VigorACS 2 HTTP and HTTPS port: Specify the web service port of VigorACS 2 which you have already set up. It is recommended to use other ports instead of default 80/443 port to prevent the possible conflict.
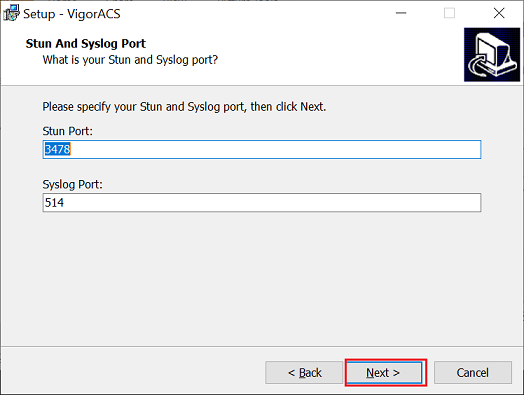
10. Setup STUN and Syslog port: Specify the STUN and Syslog service port of VigorACS 2 which you have already set up. If you have other Syslog utility running on the Syslog server, it's recommended to use another Syslog port to avoid the conflict.
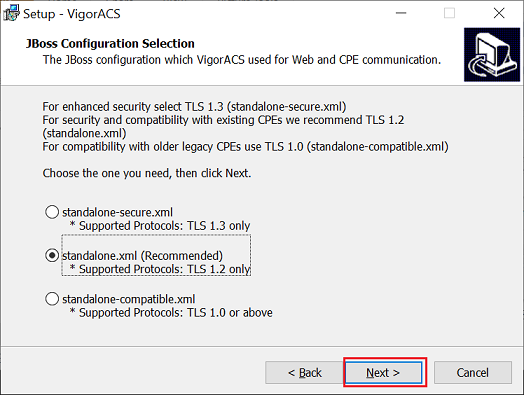
11. Select the JBOSS Configuration: It is recommended to use the standalone.xml for security and compatibility.
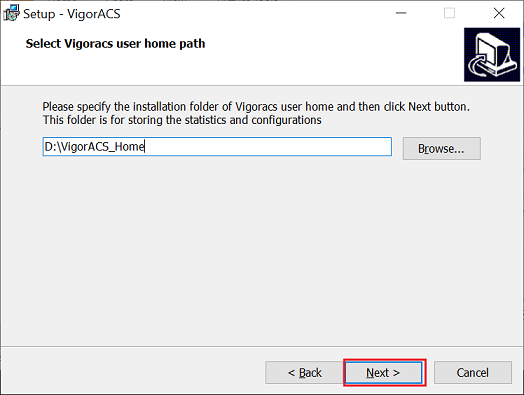
12. Setup user home path for VigorACS: Specify the location of EMS folder which you have already set up. You may refer this document to know what's the EMS folder. Finish the further process to start the upgrading process.
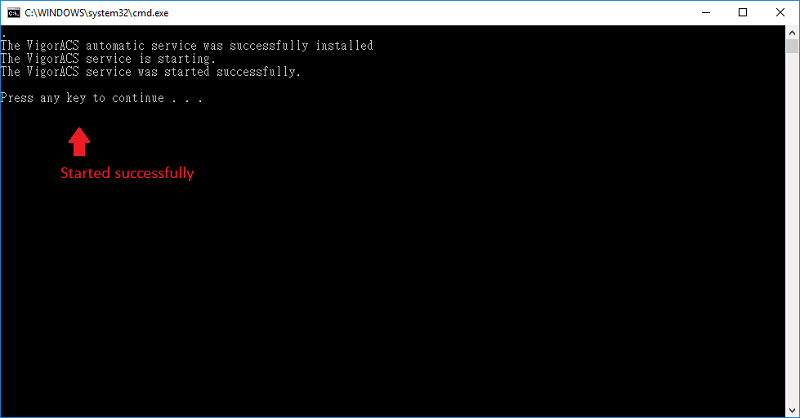
17. After upgrade, you should see the message shows VigorACS service started successfully.
13. Log in to ACS and check your server has upgraded to the new version

How to check if the VigorACS 2 services started successfully?
If VigorACS 2 couldn't start properly, please ensure there is a start message in Syslog, which is at the path: {Installed path}\VigorACS\standalone\log\server.log
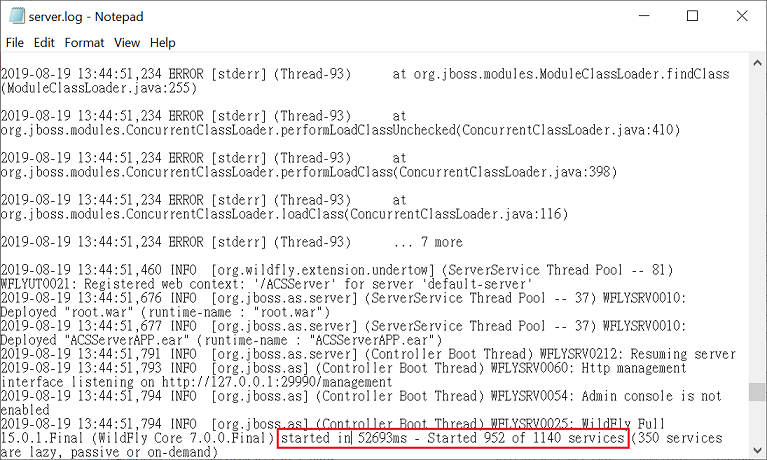
If you couldn't see the started message in Syslog, please provide the log and all the VigorACS 2 installed information to DrayTek technical support: [email protected]
Published On:2019-01-02
Was this helpful?