
Upgrade VigorACS SI to VigorACS 2 on Windows
VigorACS SI users are offered to upgrade to VigorACS 2. The database of VigorACS 2 is compatible with that of VigorACS SI, so you can keep all your data after updating. If you still have an unexpired license of VigorACS SI, MyVigor will convert the remaining license to VigorACS 2 automatically.
However, note that once install VigorACS 2, you cannot downgrade to VigorACS SI. Please check the compatible CPE list and hardware requirement first. And VigorACS 2 can only run on the 64-bit platforms, so make sure you have the 64-bit operating system.
This document demonstrates how to upgrade VigorACS SI to VigorACS 2 on Windows.
/0_1.PNG)
1. Backup the database
The database will remain after the upgrade; however, we still strongly recommend to backup the database of VigorACS SI before you start. Please refer to this article to see how to back up the database.
2. Remove VigorACS SI and java.
Shut-down the VigorACS SI services first and remove VigorACS SI and java. (Please do not remove MariaDB if you want to keep the database of VigorACS SI.)
3. Install Java (OpenJDK) and VigorACS2
Extract the installation package and install OpenJDK first (Path: \ACS\Software), then click Next and go through the installation process.
/1.PNG)
4. Install the VigorACS 2
1) Run setup.exe at path: \ACS\ACS.
/2.png)
2) Choose the path to the directory of MySQL.
/3.PNG)
3) Choose "Upgrade Database" to keep the data. "Rebuild Database" will clear the database.
/4.PNG)
4) Enter the MariaDB root password which specified on VigorACS SI
/5.PNG)
5) Set up HTTP and HTTPS port for VigorACS 2. Use the same port number as VigorACS SI so that you don't need to change the firewall and open port settings.
/6.PNG)
6) After installation, you should see the message VigorACS 2 started successfully.
/7.PNG)
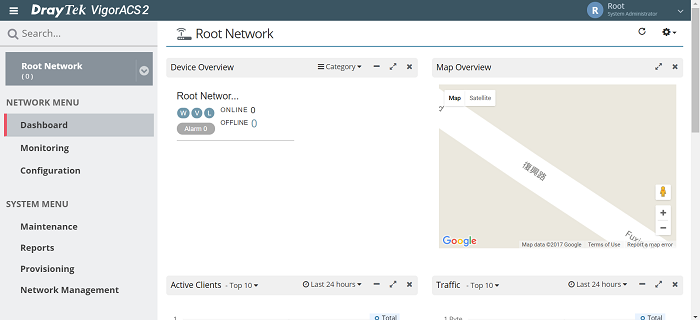
5. Access VigorACS 2 and activate the license
1) To access VigorACS 2, launch a browser and type the IP or the domain name of the PC, specify the port number on the URL, then you'll see VigorACS 2 login page. (If you are using the PC that has VigorACS 2 installed, you may enter "localhost" with the port number.) Since VigorACS 2 is using the original database of VigorACS SI, you can log in with the same username and password.
/8.PNG)
2) Once you attempt to log in VigorACS 2, you'll see the warning message. Click Activate button, and it will redirect to MyVigor login page. Log in with the MyVigor account who owns the original VigorACS SI server.
/9.PNG)
3) MyVigor server will detect and convert your license from VigorACS SI to VigorACS 2 automatically. We only need to press "ON" button to activate the license again.
/18.PNG)
Now, we could enjoy the new VigorACS 2!
Published On:2017-07-18
ShareWas this helpful?