
SSL VPN from iOS to Vigor Router
This article demonstrates how to set up the Vigor Router as an SSL VPN gateway to allow Internet clients, especially iPhones and iPads, to access the local network by an SSL VPN tunnel. In the article, we show the configuration required for the router, as well as how to start the SSL VPN connection from iOS using SmartVPN, the free VPN client app provided by DrayTek.
Setup on Vigor Router
1. Make sure the router is connected to the Internet and has a public WAN IP address so that VPN clients on the Internet can reach it.
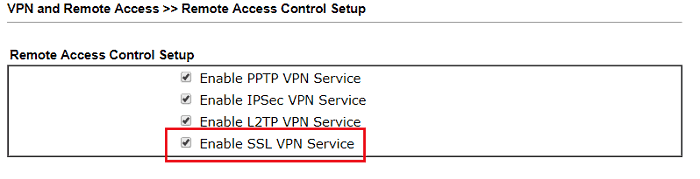
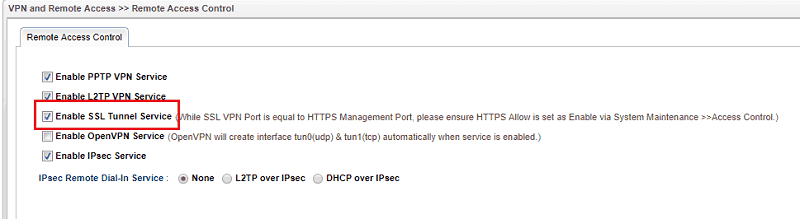
2. At VPN and Remote Access >> Remote Access Control, make sure "SSL VPN Service" is enabled.
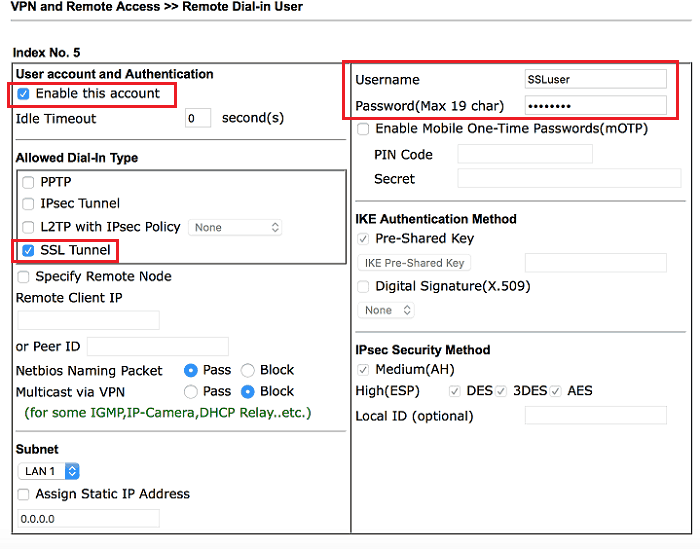
3. Create user profiles for SSL VPN clients. Go to VPN and Remote Access >> Remote Dial-in User. add a profile as follows:
- Check "SSL Tunnel" for Allowed Dial-In Type.
- Enter Username and Password. Please note that admin cannot be used as the username, as it is reserved for router management via HTTPS.
- Click OK to save the profile.
1. Make sure the router is connected to the Internet and has a public WAN IP address so that VPN clients on the Internet can reach it.
2. At VPN and Remote Access >> Remote Access Control, make sure "SSL VPN Service" is enabled.
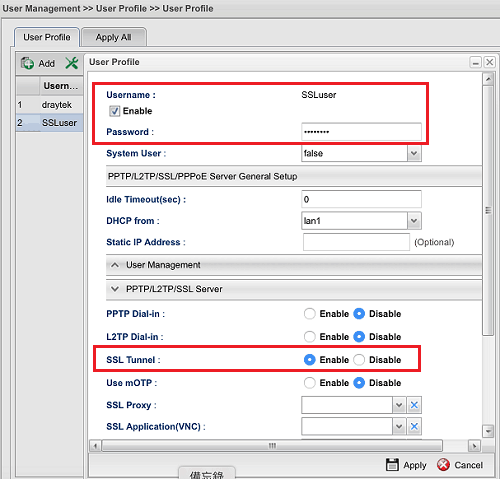
3. Create user profiles for SSL VPN clients. Go to User Management >> User Profile, and click Add.
- Check Enable
- Type Username and Password
- At PPTP/L2TP SSL Server, select "Enable" for SSL Tunnel
- Click Apply to save the profile.
SSL VPN Setup on iOS
1. Start Smart VPN App.
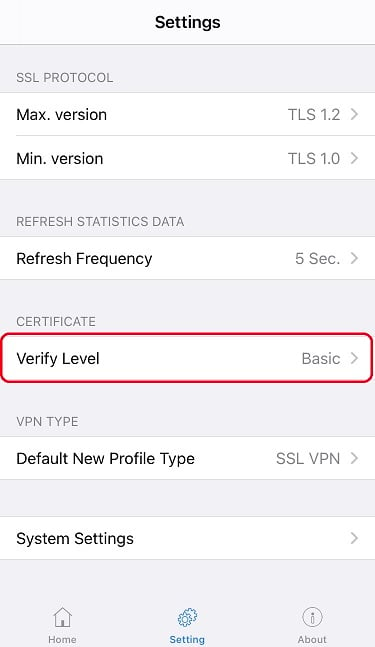
2. Go to Settings >> Certificate, select "Basic" for Verify Level
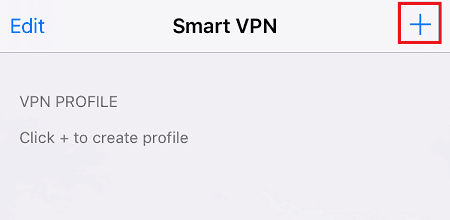
3. Go back to Home, tap + on the top-right corner to add a VPN profile.
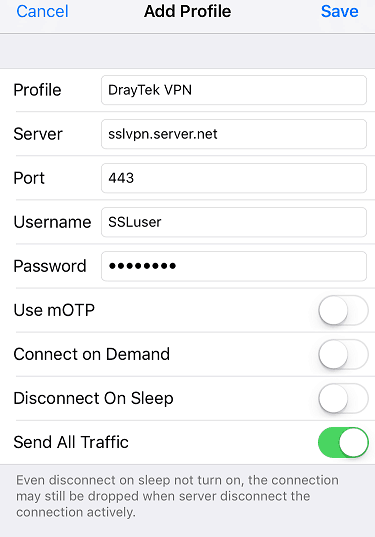
4. Configure the profile as follows:
- Enter the domain name or IP address of the router for Server
- Type Username and Password as what was configured on the router
- Tap Save
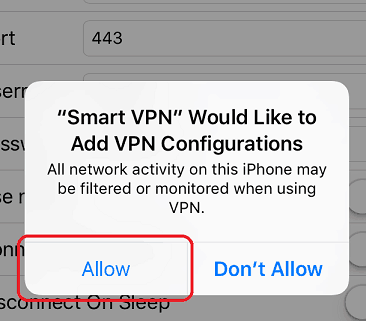
5.Allow Smart VPN to add VPN confirmation to the device.
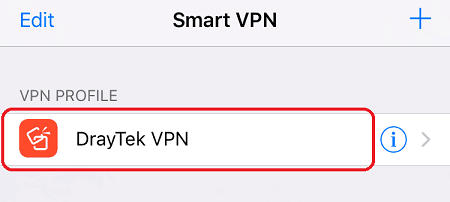
6.At Home, tap the VPN profile we just created.
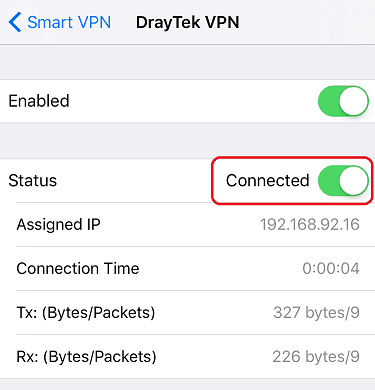
7.Switch Status to "Connected" to establish the SSL VPN. When the VPN established, we can see the tunnel information.
Published On: Oct 18, 2016
ShareWas this helpful?