
Join the Wireless Network by WPS
Wi-Fi Protected Setup (WPS) allows a wireless device to connect to the password-protected Wi-Fi without the configuration of a password, this is helpful when the device does not have a user-friendly interface. However, WPS is disabled by default to protect the wireless network, you'll need to activate first it when the client is ready to connect. This article shows how to use WPS in Push Button Method, Client PIN method, and some troubleshooting tips if WPS is not working.
Push Button Method
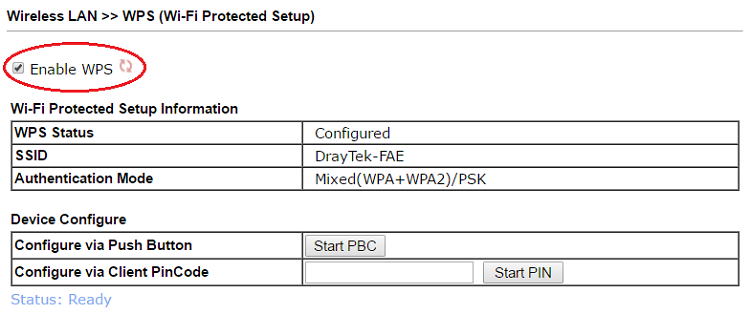
1. To turn on WPS, you can press and hold the “Wireless LAN ON/OFF/WPS” button on the front panel, or click "Start PBC" at Wireless LAN >> WPS if the router/AP is not physically reachable.
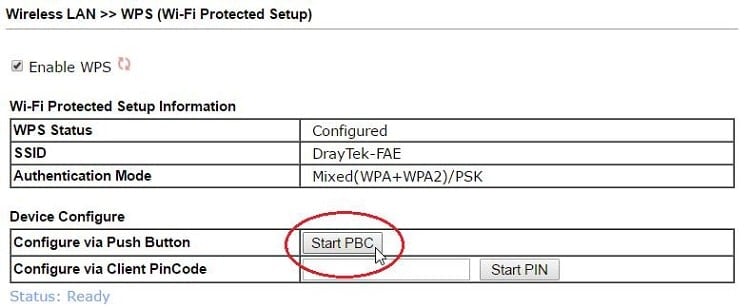
2. When WPS is enabled, the LED ACT and WLAN will flash rapidly and synchronously. It will wait for WPS connections for two minutes.

3. Now, the WPS-supported clients can join the Wi-Fi network by choosing the router's SSID. (Note: The default SSID of Vigor Wireless Router is “Draytek”, and VigorAP is “Draytek-LAN-A” or “Draytek-LAN-B”.)
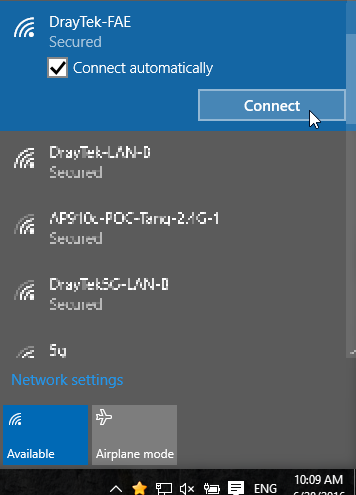
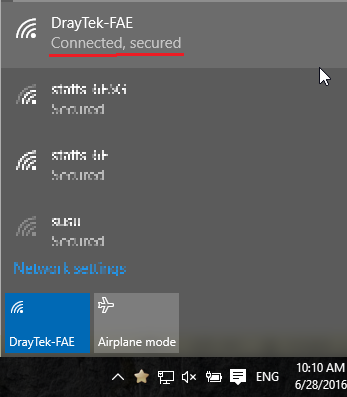
4. Without entering the Wi-Fi password, the client device will connect to the router after a few seconds.
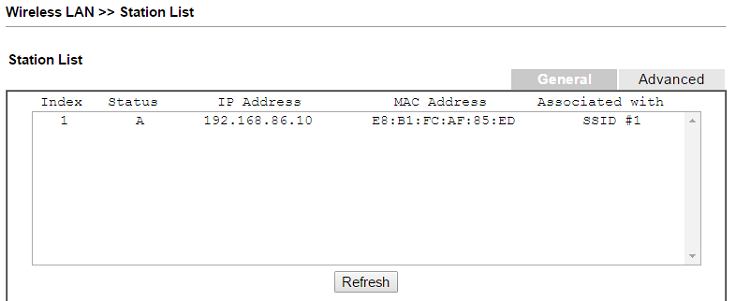
5. After two minutes, the router will turn off WPS automatically. From the front panel, you will see LED "WLAN" stops flashing, and the LED "ACT" flashes about once per second. You may check the Wi-Fi clients connected from Wireless LAN >> Station List.
Client PIN Method
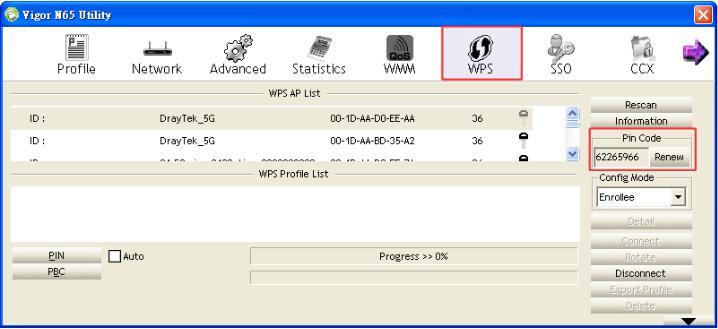
If the Wi-Fi client supports WPS PIN, you may use the WPS with “Client PinCode” for better security. Here we take Vigor N65 WLAN adapter for example.
1. Get the Wi-Fi client's PIN Code.
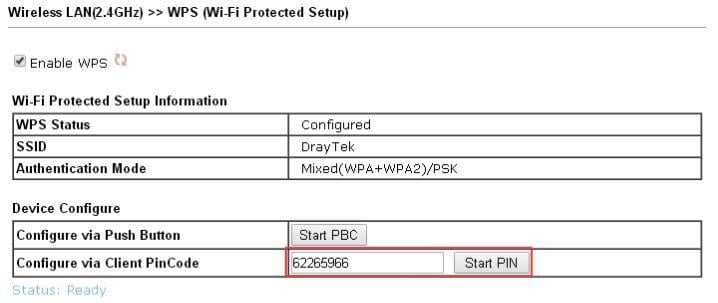
2. Enter the Client PIN code on Wireless LAN >> WPS page, then click “Start PIN.” After that, the router will activate WPS and wait for the client for two minutes. If there are no WPS requests within two minutes, it will return to normal mode
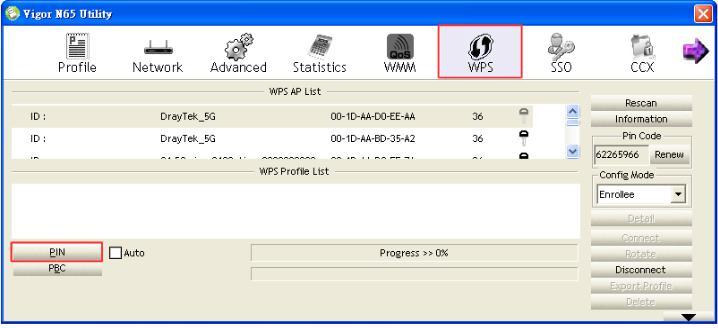
3. Start PIN WPS on the wireless client, and it will establish a connection with the router. After a few seconds, the wireless client will be connected to Vigor Router.
Troubleshoot
If the WPS is not working as expected, you can log into the router's web management page and check the following settings.
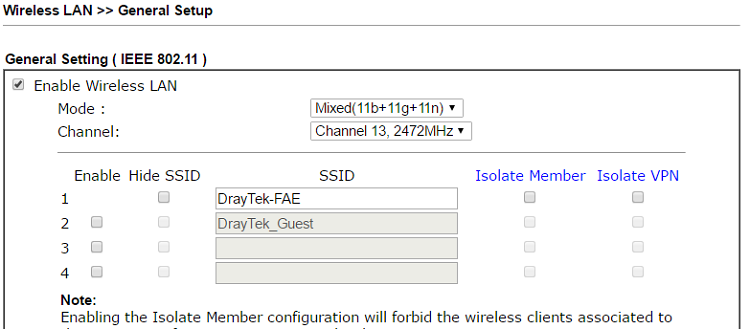
1. Make sure Wireless LAN is enabled on Wireless LAN >> General Setup page.
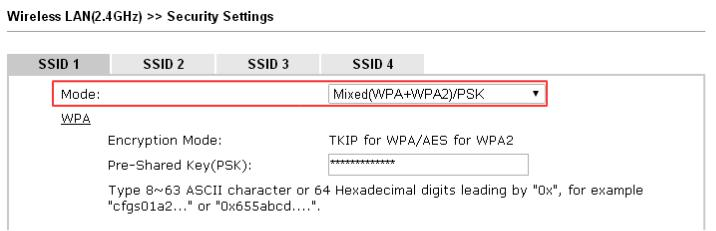
2. The security settings must be one of the PSK (Pre-shared key) modes.
3. The WPS switch on Wireless LAN >> WPS should be enabled.
Published On:2016-05-24
ShareWas this helpful?