
Apply NAT inside IPsec VPN to match Remote Network's Firewall Policy
Vigor Router supports applying NAT to traffic in a LAN-to-LAN IPsec VPN, so that the remote network will only see traffic from a single IP address. This is necessary when the VPN server use one network for creating IPsec connection, but the firewall policy allow a different IP address to access their local network. Like the illustrated below.
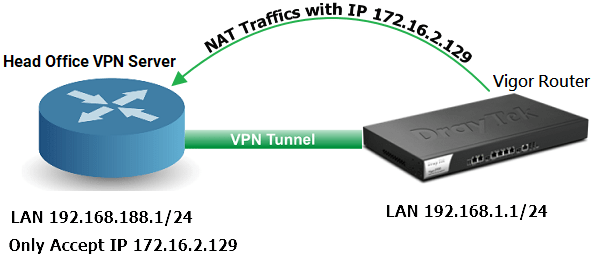
- Head Office Local Network IP: 192.168.188.1/24
- Vigor Router Local Network IP: 192.168.1.1/24
- Head Office Router only accepts Vigor2960 to use IP 172.16.2.129 for accessing its local network.
On VPN Client site
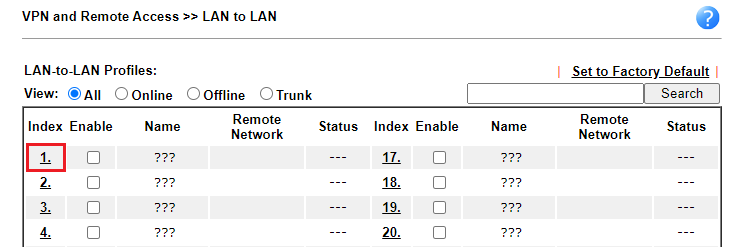
1. Go to VPN and Remote Access >> LAN to LAN, click any index to create a profile.
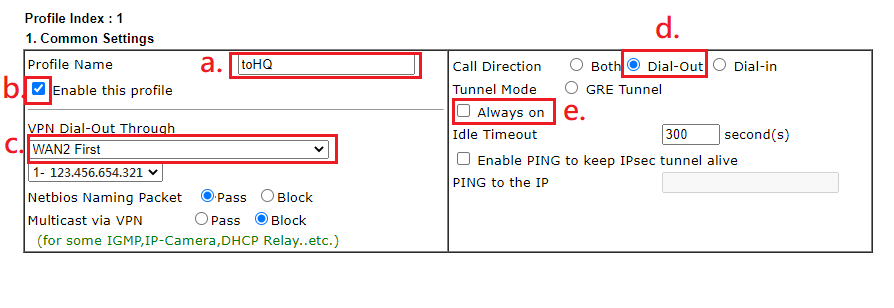
2. In the profile,
Common settings
- Give a Profile Name
- Enable this profile
- Select the WAN interface
- Select Dial-Out for Call Direction
- (Optional) Tick Always On
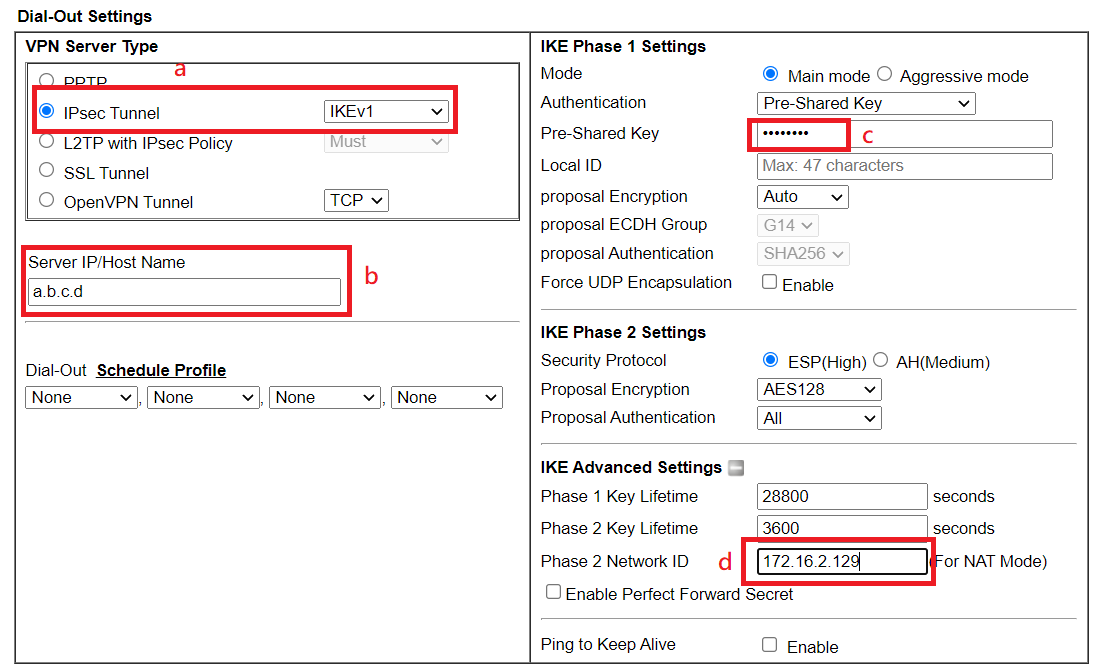
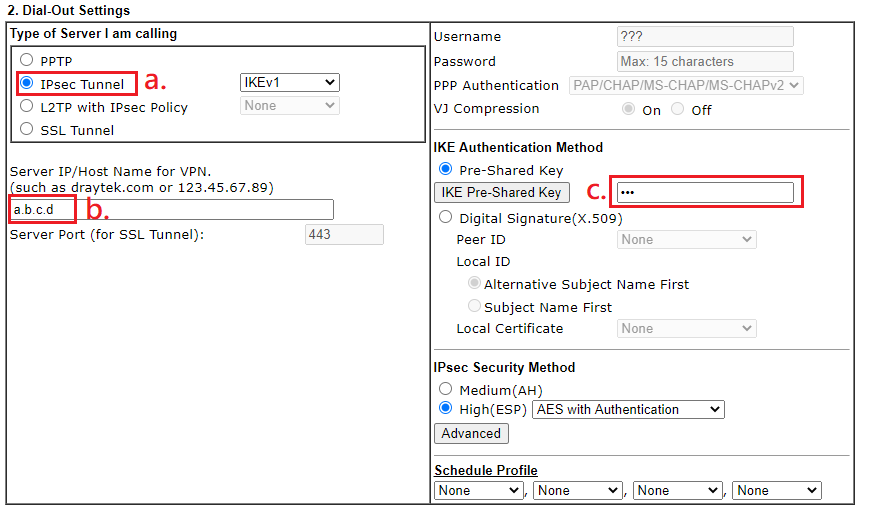
Dial-Out setting(version 4.x.x)
- Select IPsec Tunnel
- Enter VPN server's WAN IP or domain name
- Input IKE Pre-Shard Key
- Enter the IP that VPN server requests at My WAN IP (In this example, the IP will be 172.16.2.129.)
Dial-Out setting(version 3.x.x)
- Select IPsec Tunnel
- Enter VPN server's WAN IP or domain name
- Input IKE Pre-Shard Key
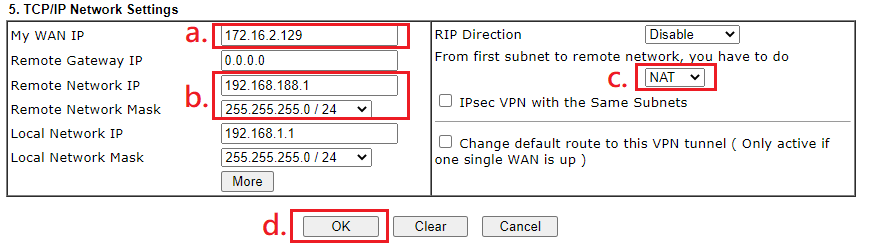
TCP/IP Network Settings
- Enter the IP that VPN server requests at My WAN IP (In this example, the IP will be 172.16.2.129.)
- Enter VPN Server’s LAN network at Remote Network IP
- Select NAT
- Click OK
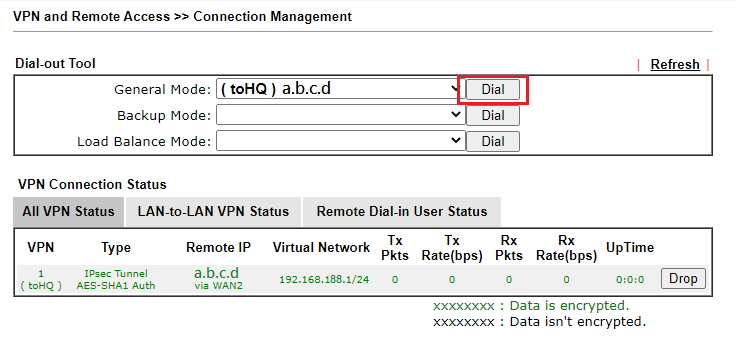
3. Go to VPN and Remote Access >> Connection Management and click Dial.
On VPN Server site
Here comes the difference with/without the client Local Network translating.
1. Without the VPN client Local Network translating: The Status will show the Virtual Network as VPN Client ’s LAN network. In this example, it is 192.168.1.1/24.
2. With the VPN client Local Network translating: The Status will show the Virtual Network as VPN Client ’s translated single IP. In this example, it is 172.16.2.129/32.
This article will show how to configure Vigor2960/3900 for meeting this purpose.
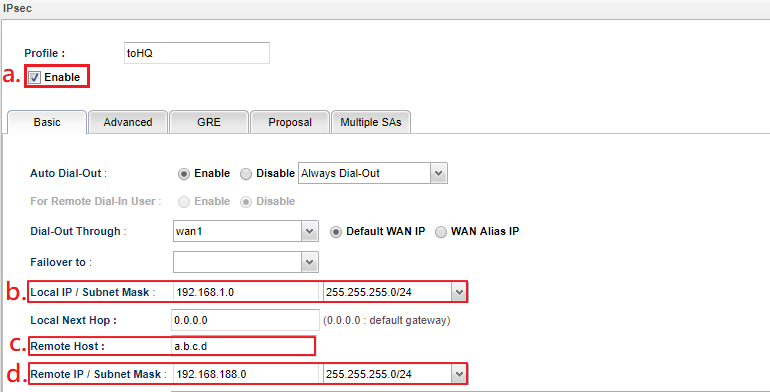
1. Go to VPN and Remote Access >> VPN Profiles >> IPsec page, click Add to create an IPsec LAN to LAN profile.
- Tick Enable
- Enter Local IP/ Subnet Mask
- Enter the IP of remote VPN server at Remote Host
- Enter Remote IP/ Subnet Mask
2. Go to Advanced tab, select Enable for Apply NAT Policy.Translated Local Network option will be visible after enabling Apply NAT Policy.
- Enter the IP that VPN server requests in Translated Local Network.
- In this example, it is a single IP 172.16.2.129, so we should select 255.255.255.255 for the subnet mask.
After the above configuration, Vigor2960 will translate the source IP to 172.16.2.129 while the LAN clients want to access remote VPN network 192.168.188.0/24.
Published On:2020-09-30
ShareWas this helpful?