
IPsec Tunnel Aggresive Mode between DrayTek Routers
IPsec VPN in Main mode use the IP address as peer identity (ID) for Peer authentication; therefore, it's not a solution if both the VPN peers don't have static IP addresses. In such cases, can establish the IPsec VPN in Aggressive mode instead. This document introduces how to set up IPsec Tunnel in Aggressive mode between two Vigor Routers.
VPN Server Setup
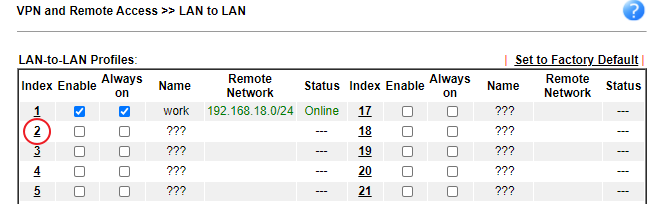
1. Create a VPN LAN to LAN profile for the peer VPN client router via VPN and Remote Access >> LAN to LAN, click on an available index to add a new profile.
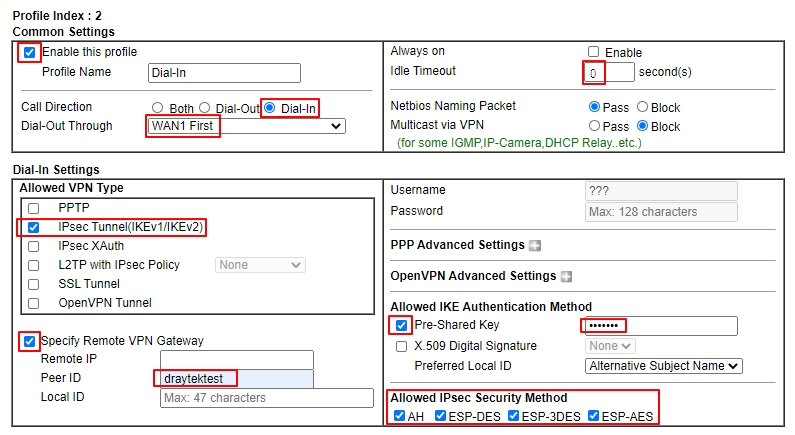
2. Edit the profile as follows:
- Check Enable this profile
- Select Dial-In for Call Direction
- Select the WAN interface that the VPN client will dial In from
- Change Idle Timeout to 0 second
- Allow IPsec Tunnel in Dial-In Settings
- Check Specify Remote VPN Gateway and enter the Peer ID
- Check IKE Pre-Shared Key and enter the Pre-shared Key
- Select the IPsec Security Methods that are allowed to use.
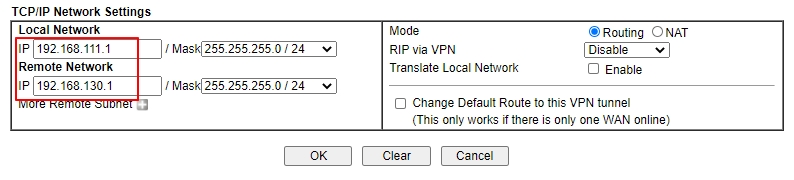
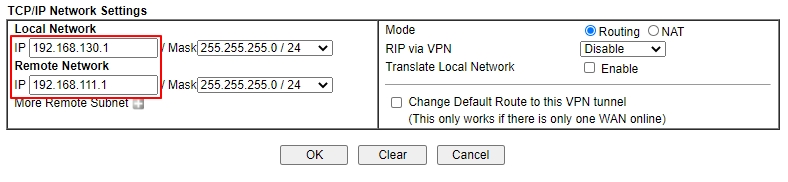
- At TCP/IP Network Settings, input the IP subnet used by the VPN Client for Remote Network IP and Mask
- Click OK to save the VPN profile.
VPN Client Setup
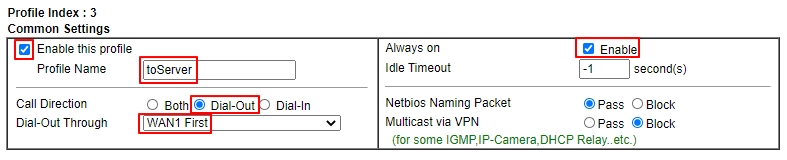
1. Similarly, create a profile at VPN and Remote Access >> LAN to LAN
- Give a Profile Name
- Check Enable this profile
- Select Dial-Out for Call Direction
- Select the WAN interface that the VPN client will dial out from
- Check Always On
- Select IPsec Tunnel in Dial-Out Settings
- Input VPN server's WAN IP or domain name at Server IP/Host Name for VPN
- Choose Aggressive mode
- Input IKE Pre-Shard Key as the same as what was configured on VPN Server
- Enter Local ID as same as Peer ID set on server
- Set phase 1’s Encryption and Authentication you want to use
- Set phase 2’s Security Protocol, Encryption, and Authentication you want to use
- Set phase 1’s and phase 2’s Key Lifetime in IKE Advanced Settings(optional)

In TCP/IP Network Settings, enter VPN Server's LAN Network in Remote Network IP and Remote Network Mask. Click OK to save the profile
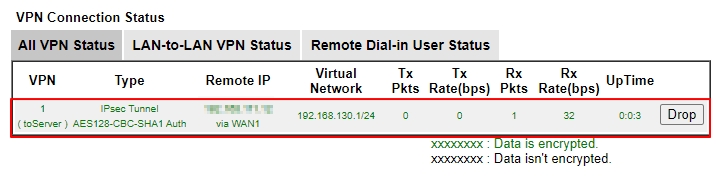
After finishing the above configurations, VPN Client shall dial up the IPsec tunnel automatically. We can check the VPN status via VPN and Remote Access >> Connection Management page.
VPN Server Setup
1. Go to the VPN / General Setup / IPsec menu page.
- Enable the IPsec Service.
Then Click Apply to save the settings.

2. Go VPN / Site-to-Site VPN.
- Click +Add to create a profile.
- Enter a profile name and check enabled the profile.

General
- Select Dial-In in Direction.
- Select IPsec as the VPN Type.
- Check IKEv1/v2.

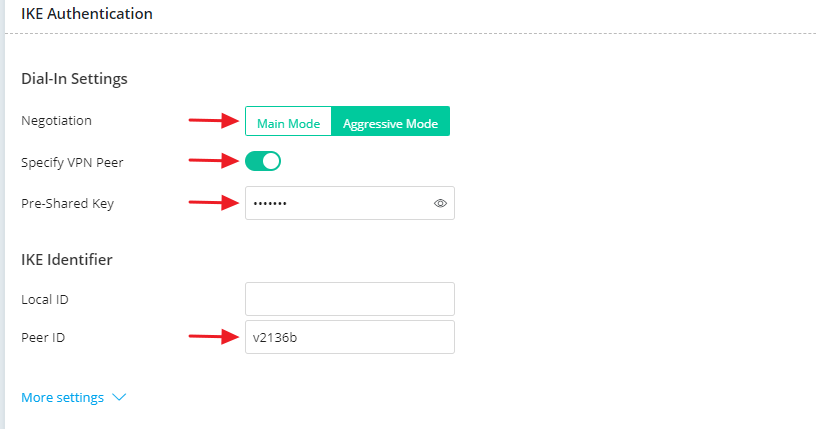
IKE Authentication
- Choose Aggressive Mode.
- Enable Specify VPN Peer.
- Enter the Pre-Shared Key for this profile.
- Enter the Peer ID of the remote VPN client.
- (Optional)Specify the encryption and the security protocol for IKE Phase1 and Phase2 in More settings.
Network
- Enter the Local Network of the VPN server and the Remote Network of the VPN client.

Click Apply to save.
VPN Client Setup
1. Go to VPN / General Setup / IPsec.
- Enable IPsec Service.
Click Apply to save the settings.
2. Go VPN / Site-to-Site VPN.
- Click +Add to create a profile.
- Enter a profile name and check enabled the profile.

General
- Select Dial-Out for the Direction.
- Select IPsec as the VPN Type.
- Select IKEv1 as IPsec Dial-Out Protocol.
- Enter the remote server address or domain name.
- Specify a Dial-Out Mode. Here, we choose Always On.

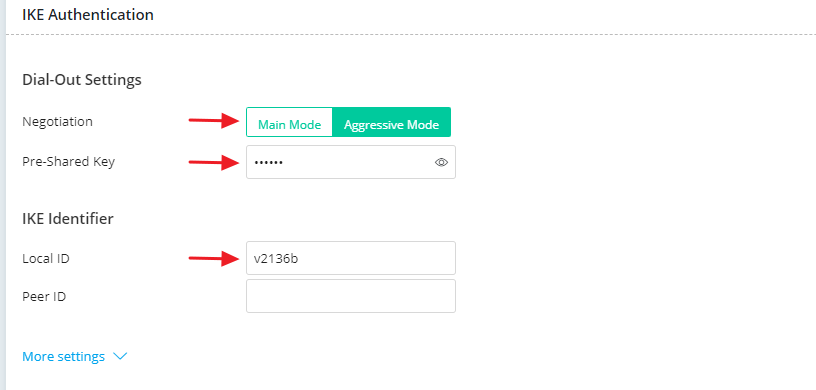
IKE Authentication
- Choose Aggressive Mode for Negotiation.
- Enter the Pre-Shared Key configured in the dial-in profile on the VPN server.
- Enter the Local ID.
- (Optional)Specify the encryption and the security protocol for IKE Phase1 and Phase2 in More settings.
Network
- Enter the Local Network of the VPN client and the Remote Network of the VPN server.

Click Apply to save.
After completing the configuration, the VPN Client will automatically dial up the IPsec tunnel. We can check the VPN status in VPN / VPN Connection Status.

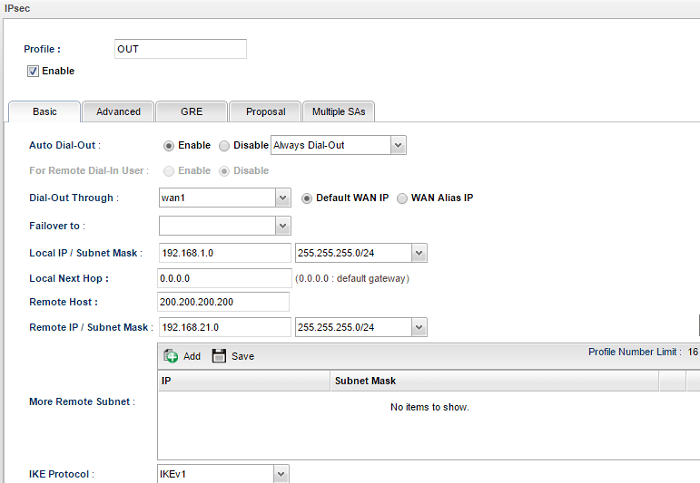
VPN Client (Dial-Out) Setup
1. Go to VPN and Remote Access >> VPN Profile >> IPsec click Add to add a new profile:
- In the Basic tab, enter the Profile name
- Check Enable
- Select "Enable" for Auto Dial-Out and select "Always Dial-Out"
- Enter Local IP / Subnet Mask as the LAN network on this router which you want to link to the remote network
- Enter VPN Peer's WAN IP in Remote Host
- Enter Remote IP/ Subnet Mask as the LAN IP of VPN peer
- Select Aggressive Mode
- Enter Local ID
- Enter Remote ID
- Enter Pre-Shared Key (It must match the Pre-Shared Key on the VPN Peer)
- Click Apply to save the profile
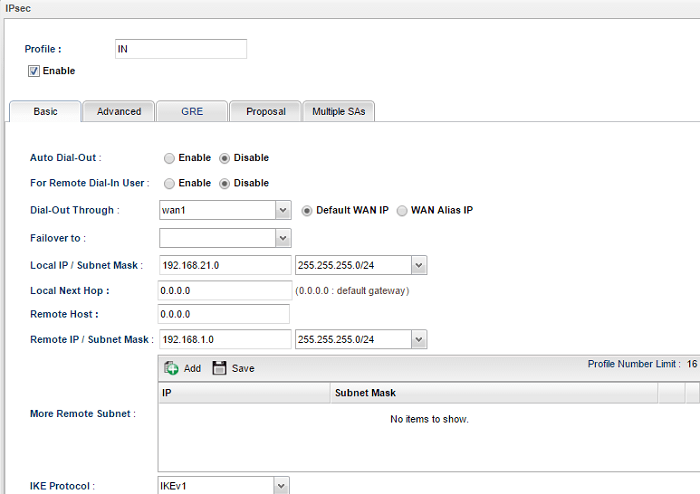
VPN Server (Dial-In) Setup
2. Similarly, on the VPN Peer, go to VPN and Remote Access >> VPN Profile >> IPsec to add a new profile:
- In the Basic tab, enter the Profile name
- Check Enable
- Leave Auto Dial-Out and For Remote Dial-In User as "Disable"
- Enter Local IP /Subnet Mask as the LAN network on this router
- Enter VPN Peer's WAN IP in Remote Host
- Enter Remote IP/ Subnet Mask as the LAN IP of VPN Peer
- Select Aggressive Mode
- Enter Local ID (It should be the Remote ID on the VPN Peer)
- Enter Remote ID (It should be the Local ID on the VPN Peer)
- Enter Pre-Shared Key as the same as the one in VPN Peer
- Click Apply to save the profile
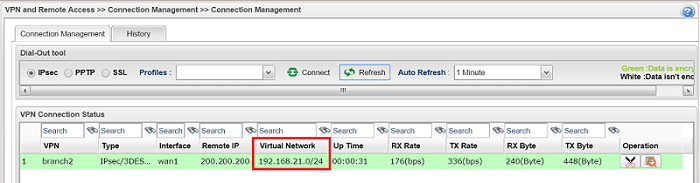
Establishing the VPN
If all the settings match, the VPN connection will create automatically. In connection status, we will see the IPsec tunnel is up.
Published On:2016-05-18
ShareWas this helpful?