
Turn on and off Wi-Fi by Schedule
This note is going to demonstrate how to turn on or off the Wi-Fi by Schedule function. Before setting up the schedule, please make sure you have set the Time and Date correctly, so the schedule will work as expected.
Take the Wi-Fi service in a company as an example. 2.4G Wi-Fi service will only be available during working hours, which is 8:00-12:00, and 13:00-17:00. The following notes will demonstrate how to set the schedule to turn off Wi-Fi service during 12:00-13:00, which is the lunch break.
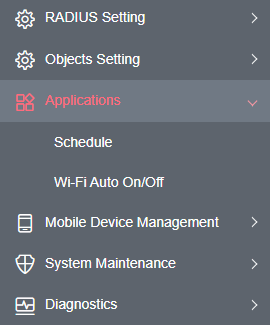
1. Go to Applications >> Schedule page
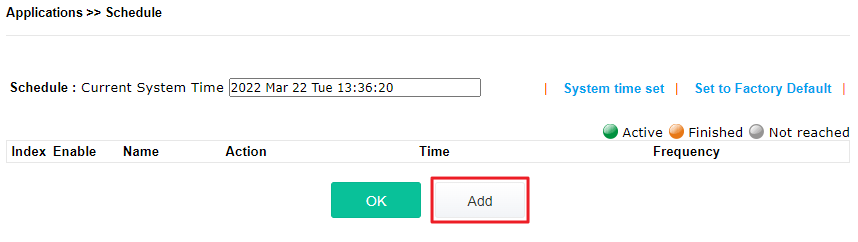
2. Click Add to add a schedule profile.
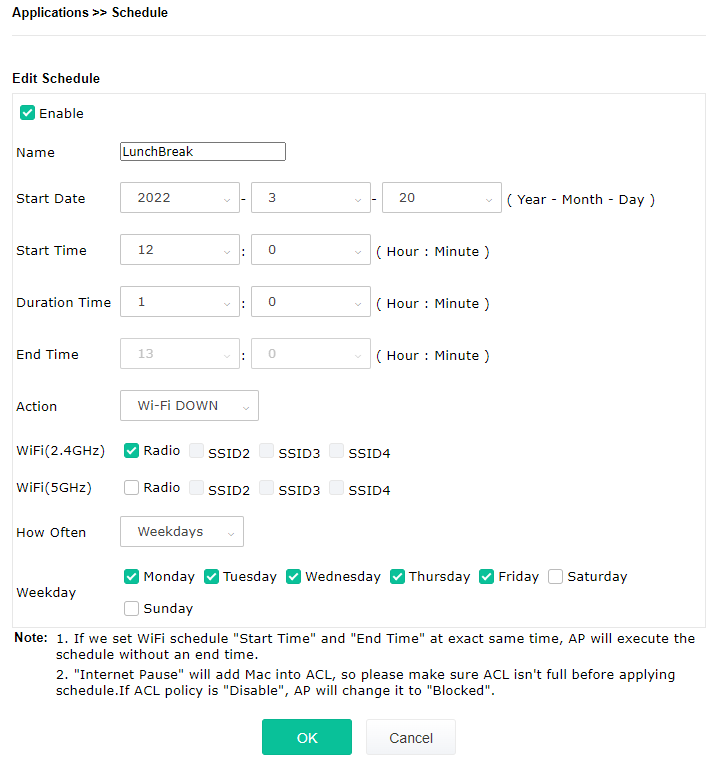
3. Set schedule for the lunch break, click Add button to create a new schedule,
- Enable this profile.
- Select "Wi-Fi DOWN" for Action.
- Set Start Time to the time Wi-Fi should be turned off
- Set Duration Time to how long the Wi-Fi should be turned off.
- Check the SSID to turn off, or "Radio" to turn off the entire 2.4GHz/5GHz Wi-Fi.
- To repeat the schedule, select "Weekdays" for How Often, and select the days to apply.
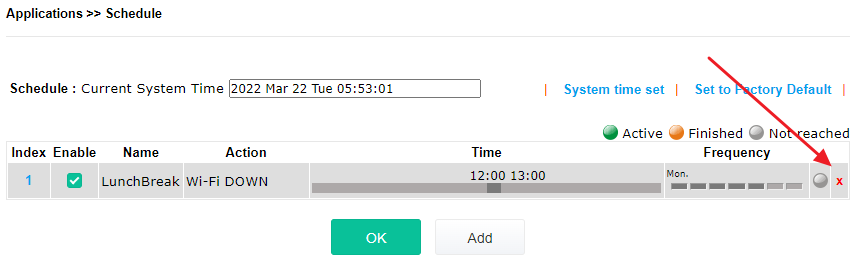
Then it's finished. To delete the schedule, just click "x" on the profile.
DrayTek wireless routers and access points provide a scheduling feature that allows you to control when the wireless interface is active. This can be useful for limiting access in a home environment or enhancing security in a business setting. The scheduler can be configured to operate on specific weekdays or even on individual dates, depending on your requirements.
We’ll use a company Wi-Fi scenario as an example.
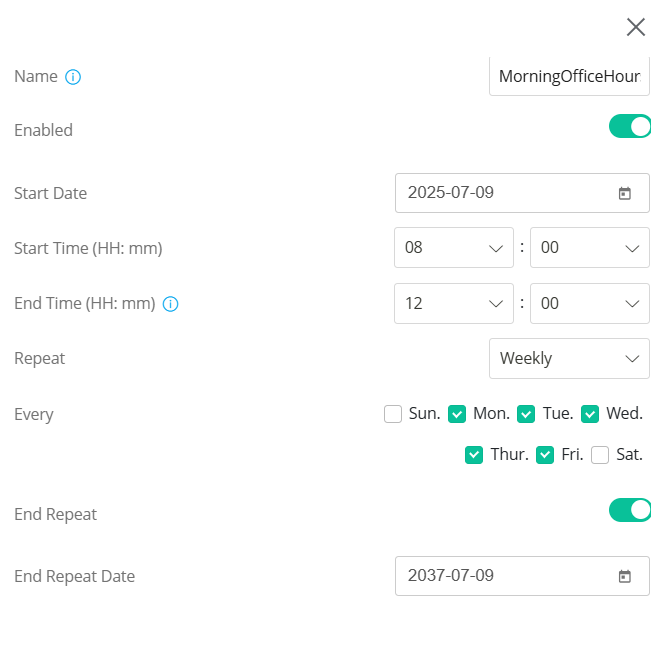
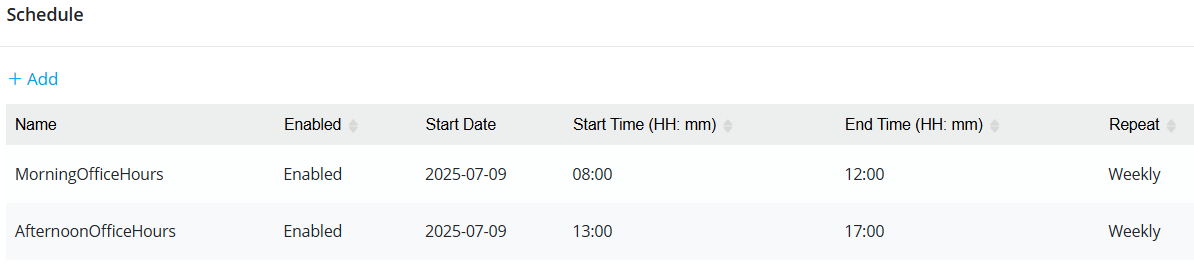
The 2.4GHz Wi-Fi service is only available during working hours 08:00-12:00 and 13:00-17:00.
The following steps demonstrate how to configure a schedule to disable the Wi-Fi during the lunch break (12:00-13:00) and outside of office hours.
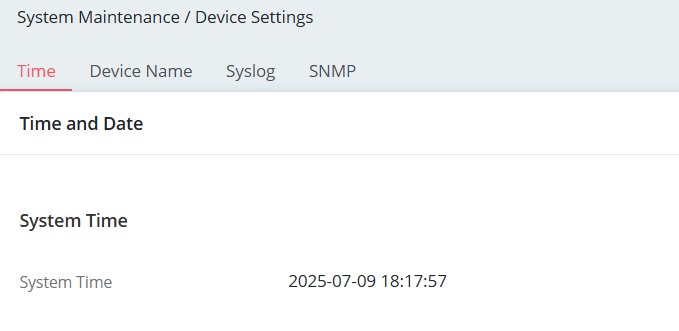
1. Navigate to System Maintenance / Device Settings / Time, and verify the System Time is accurate.
2. Create Schedule Objects
Navigate to Configuration > Objects > Schedule, then click + Add to create a new schedule profile.
3. Apply the schedule objects to Wireless LAN.
Navigate to Configuration / Wireless LAN / Radio Settings, select the desired schedule objects under the Schedule On option, then click Apply to save the settings.
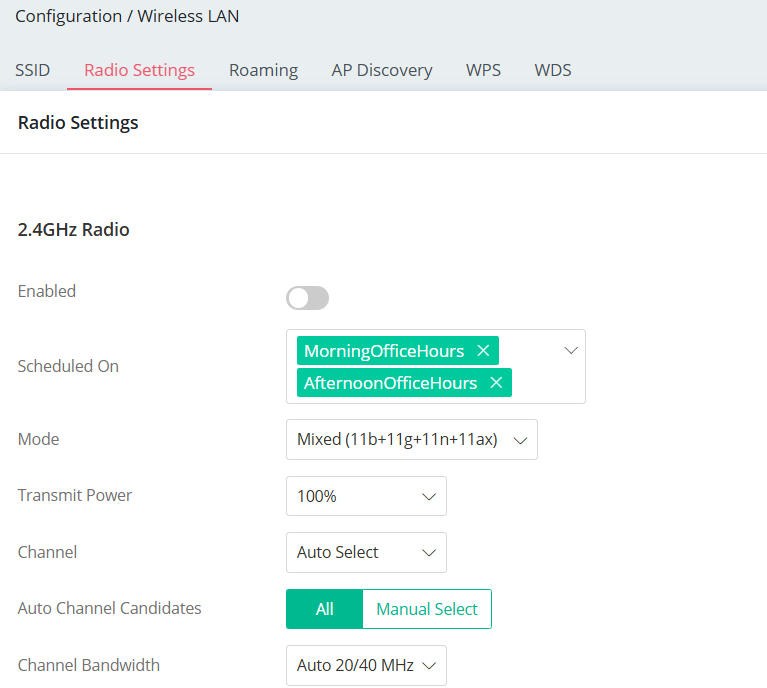
Note: The setting will take effect immediately after clicking Apply. If the current time does not fall within the Scheduled On period, the Vigor Router will immediately turn off the wireless signal. It will then re-enable wireless signal automatically when the scheduled time is reached.
Published On:2025-07-30
ShareWas this helpful?