
Upload Firmware to the VigorAP via TFTP
To upload a firmware file to the VigorAP via TFTP, we need to switch the VigorAP into TFTP server mode first; then, we need a PC running the Firmware Upgrade Utility connected to VigorAP's LAN ports to send the file. This article demonstrates how to turn the VigorAP into the TFTP server mode and upload a file to the VigorAP by Firmware Upgrade Utility on a Windows PC.
Click here to download Firmware Upgrade Utility.
Configure PC's IP address
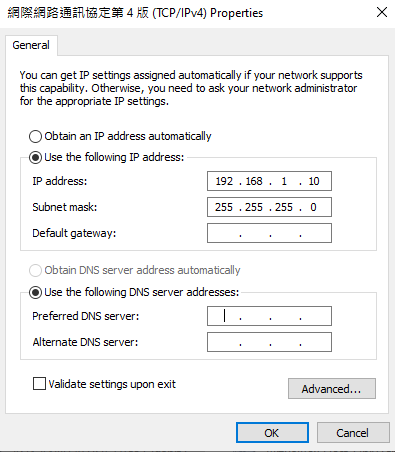
1. Set up the PC's Ethernet adapter IP address with these details:
IP address 192.168.1.10
Subnet mask 255.255.255.0
No default Gateway
Configure the Firmware Upgrade Utility
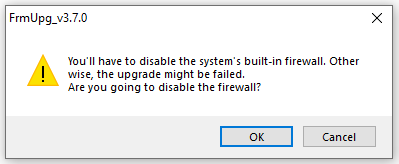
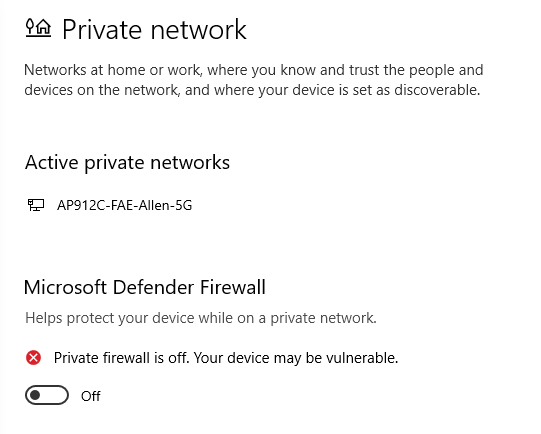
2. Run the Firmware Upgrade Utility. It will pop up a warning. Click OK. Then go to Firewall & network protection page to ensure Windows Firewall is disabled.
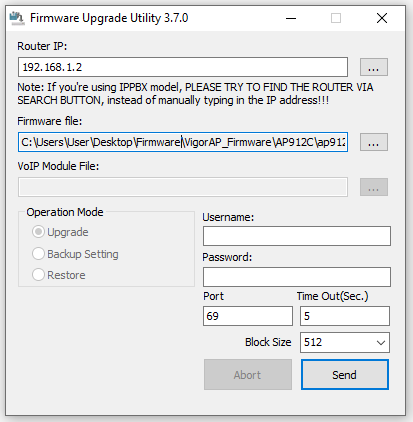
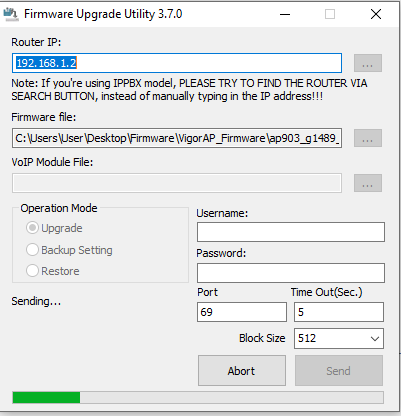
3. In the Firmware Upgrade Utility, configure these settings:
Router IP -> Enter AP's TFTP server IP 192.168.1.2. (For AP960C/AP1060C, the TFTP server IP is 192.168.1.1.)
Firmware file -> Choose the firmware file.
Username -> Leave this blank.
Password -> Leave this blank.
Do not click Send at this moment.
Connect the PC to the VigorAP and run the TFTP Mode
4. Connect the PC directly to the VigorAP.
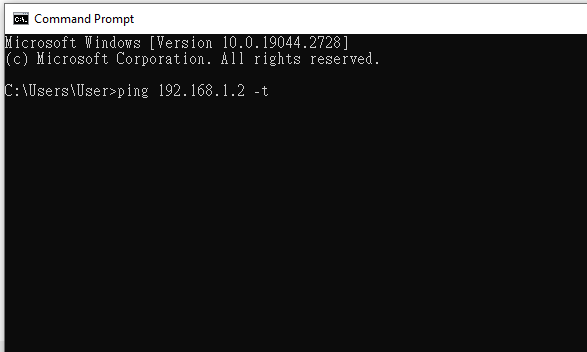
5. Open a Windows command prompt and command "ping 192.168.1.2 -t".
It will ping the AP's IP address constantly, which is useful to determine whether VigorAP's TFTP server is ready to receive the firmware.
Usually, no responses are received at the beginning. Leave it running and move on to the next step.
6. Follow the steps below to force VigorAP to enter the TFTP Mode.
Standard AP(AP903, AP906):
a. Connect the power to the VigorAP.
b. Press the Factory Reset button constantly with a pen or a paper clip.
c. While holding the Factory Reset button, turn on the VigorAP with the power switch. (Please plug in the PoE cable for the model that uses a PoE power supply like AP918.)
d. Release the Factory Reset button when seeing the ACT LED flashing rapidly.
Ceiling AP(AP912C, AP960C):
a. Press the Factory Reset button constantly with a pen or a paper clip.
b. While holding the Factory Reset button, plug in the power switch or PoE cable.
c. Release the Factory Reset button when seeing the ACT LED flashing in orange.
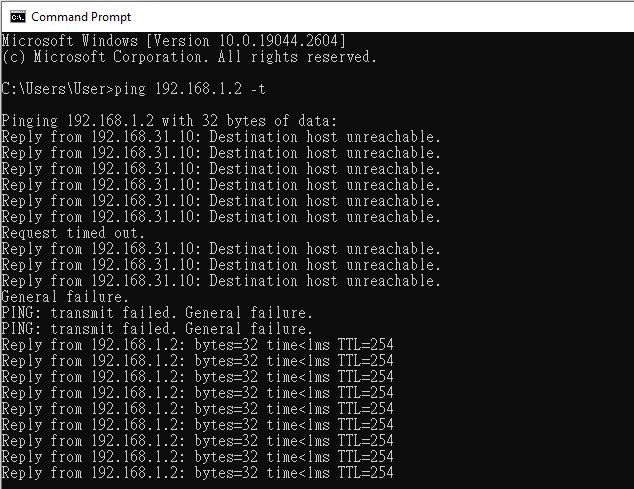
We can see the TFTP server IP reply to ping when TFTP Mode is ready.
ACT light action in TFTP Mode for each VigorAP may be different. Please base on the ping reply to ensure that the VigorAP is already in TFTP mode.
Note:
All VigorAP support responding ping with the latest firmware.
AP912C firmware 1.4.8 and older versions don't respond to ping in TFTP mode.
AP906 firmware 1.4.6 and older versions don't respond to ping in TFTP mode.
Send the firmware to the VigorAP
7. Click Send on the Firmware Upgrade Utility when seeing the TFTP server IP reply to ping. The firmware file will be sent in progress.
Please also make sure the IP is 192.168.1.2 before clicking Send. (For the model AP903/AP960C/AP1060C, the TFTP server IP is 192.168.1.1.)
Wait for the VigorAP to restart with the new firmware
Once the firmware has been sent to the VigorAP, it will spend 2-3 minutes upgrading its firmware. During this time, the VigorAP's ACT light will blink quickly. Do not power off the VigorAP until after it has rebooted.
Published On:2020-06-07
ShareWas this helpful?