
How to deploy Mesh network with Multi-Subnets
The purpose of Multi IP subnets is to allow different LAN client groups to use different network subnets. In order to provide better network security and network management, a common implementation of this is when a different subnet is used for each business department, for marketing, sales, accounting, and visitors.
The following guide demonstrates how to configure multiple wireless SSIDs on an access point, each with its own VLAN and subnet on a mesh network.
Set up multiple SSIDs with different VLANs in the Vigor Router
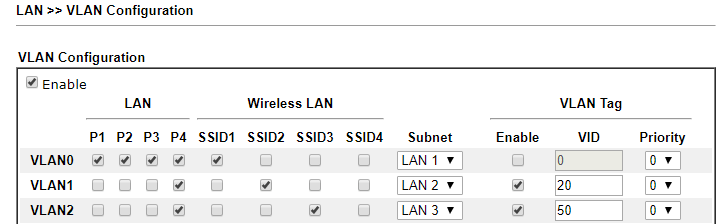
1. First, we need to create two VLANs in the router. Navigate to LAN>VLAN and specify a trunk port for the AP to connect. (P4 in the below example)
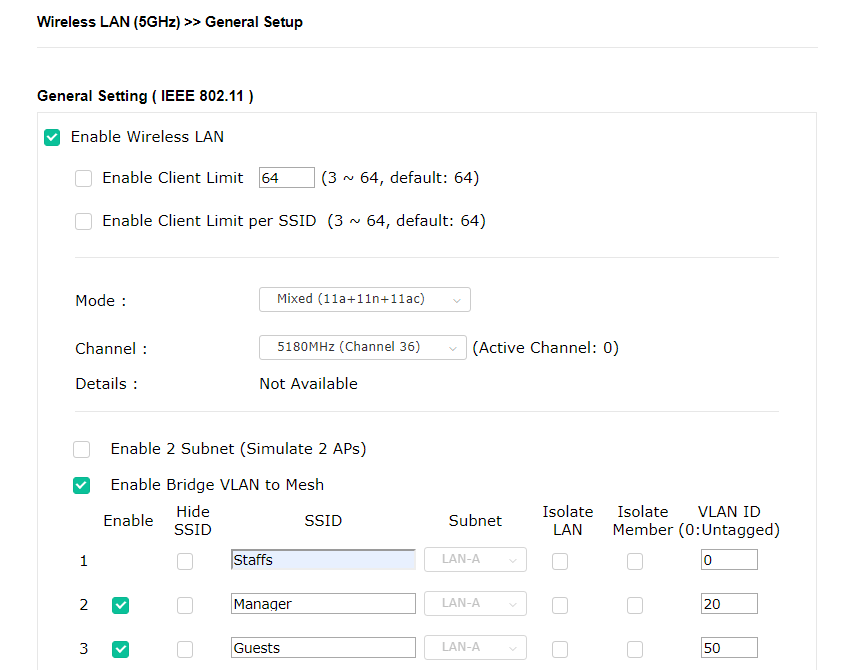
2. Connect the AP to the router's trunk port as configured in step 1, then in the AP WebUI, navigate to Wireless LAN(2.4G/5G) >> General Setup to configure each of the SSIDs:
- Create two SSIDs.
- Specify VLAN ID for each SSID. The VLAN ID should correspond to the VLAN settings in the router.
- VLAN 20 is LAN1; VLAN 50 is LAN2
- Click OK to apply.
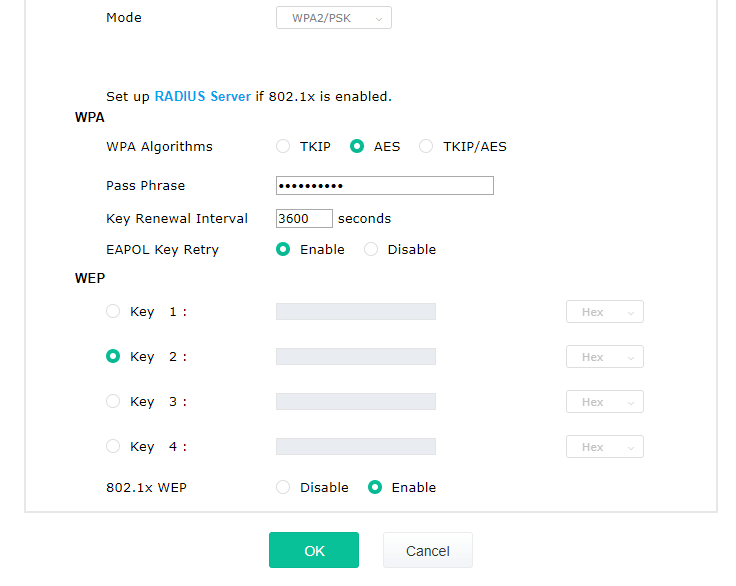
3. Go to Wireless LAN >> Security to set up authentication for each SSID.
- Select an SSID.
- Select the authentication mode.
- Select a WPA algorithm.
- Enter passphrase.
- Click OK to save.
After completing the above configuration, wireless clients connected to the SSID “Staffs” will get the IP from the “LAN1” subnet of 172.16.20.1/24; and the wireless clients connected to the SSID “Guests” will become a client of the router's “LAN2” subnet, therefore obtaining an IP of 172.16.50.1/24.
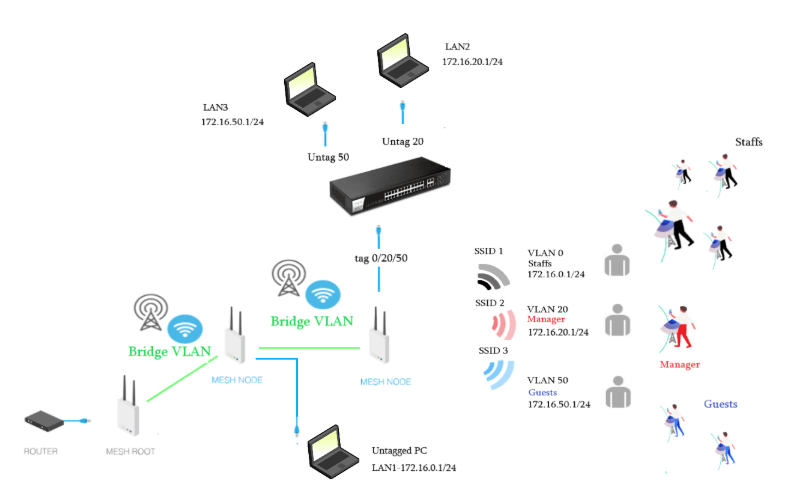
Enable Bridge VLANs in Mesh
DrayTek Mesh supports passing of VLANs over mesh networks. Mesh allows you to extend wireless coverage through, and VLANs allow you to divide the group of your Mesh network. Since access points in the Mesh network can bridge these VLANs, wireless clients connected to each SSID will be separated when they join different SSIDs.
See also: VigorAP Mesh Setup on the Web User Interface
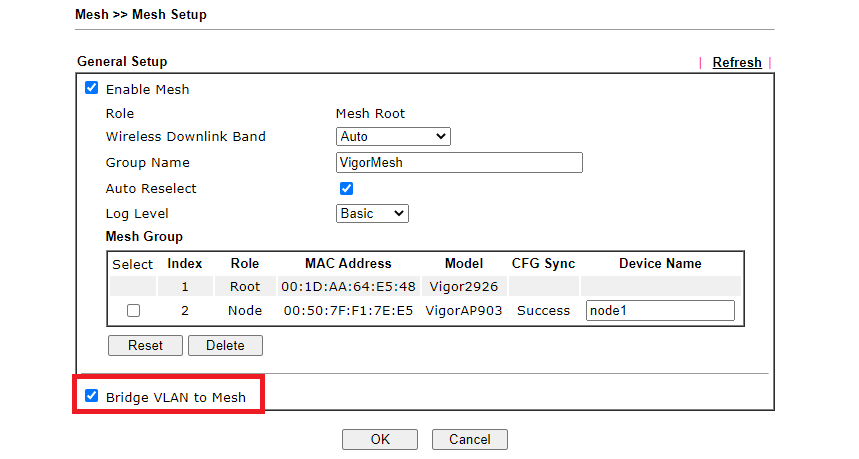
When the Mesh Root is a VigorRouter, there is another step that users should pay attention to. Note: Go to Mesh >>Mesh setup, enable Bridge VLAN to Mesh.
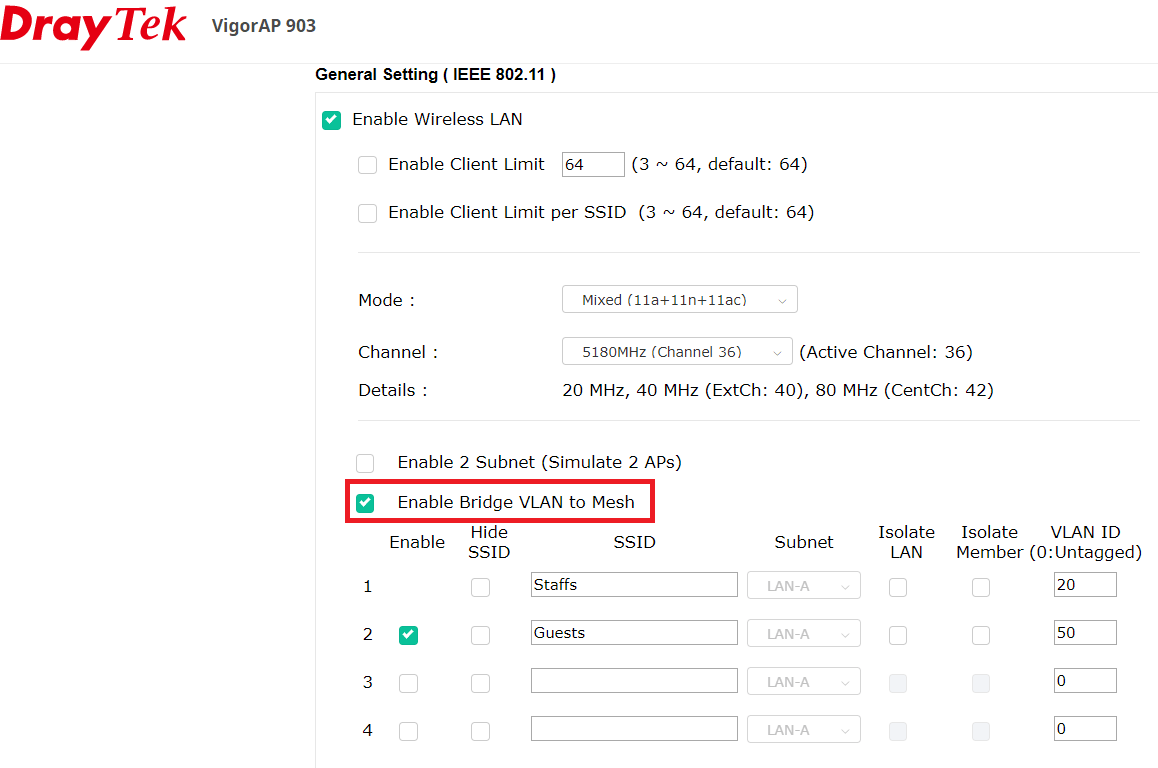
1. To enable this feature, go to Wireless LAN >> General Setup, enable Bridge VLAN to Mesh
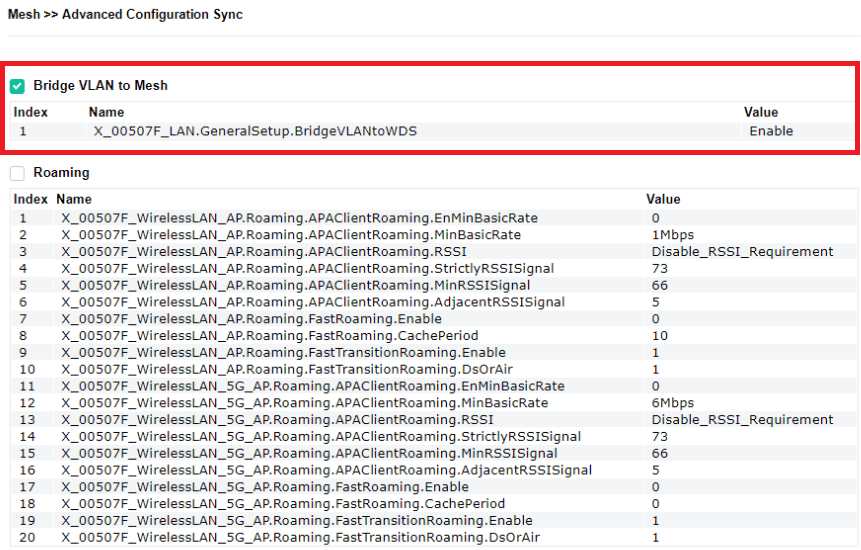
2. To sync the same settings from the Mesh Root to the other Mesh nodes, go to Mesh >> Advanced Configuration Sync then, click apply. Every node in the same Mesh group will enable Bridge VLAN to Mesh.
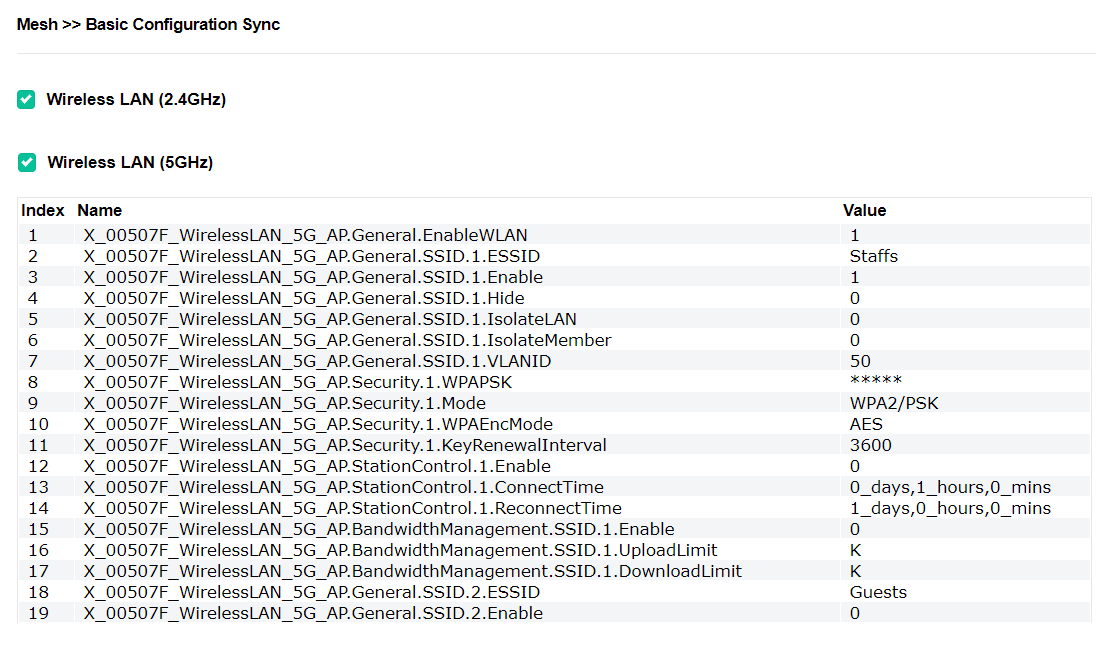
3. Then, enable Basic Configuration Sync for Wireless LAN 2.4G and Wireless LAN 5G. The SSIDs and VLAN IDs will then apply to all of the devices in the Mesh group.
Note: If VigorRouter as the Mesh Root, please enter in the VLAN ID at Wireless 2.4G/5G General Setup after Configuration Sync.
4. After the above configuration, the devices in the Mesh group will have three SSIDs. SSID1 will be Staffs with LAN1; SSID2 will be Manager with LAN2; the SSID3 will be Guests with LAN3. Furthermore, Multi-LAN ports AP provide the flexibility to manage your network. Access points will bridge VLAN tags to the physical LAN ports. The untag device will get the IP address from the untagged LAN. Connecting a switch on AP allows you to configure which VLAN should the port belong.
Published On:2019-10-18
ShareWas this helpful?