
How to set up a mesh network on VigorAP using the Quick Start Wizard
This article shows how to set up a Mesh network from the AP's web user interface. If you are settings up the APs for the first time, you can use the Quick Start Wizard to configure not only the mesh group but also the basic wireless settings. If the AP is already running, you can change the operation mode to Mesh Root, and add other AP's into the mesh network.
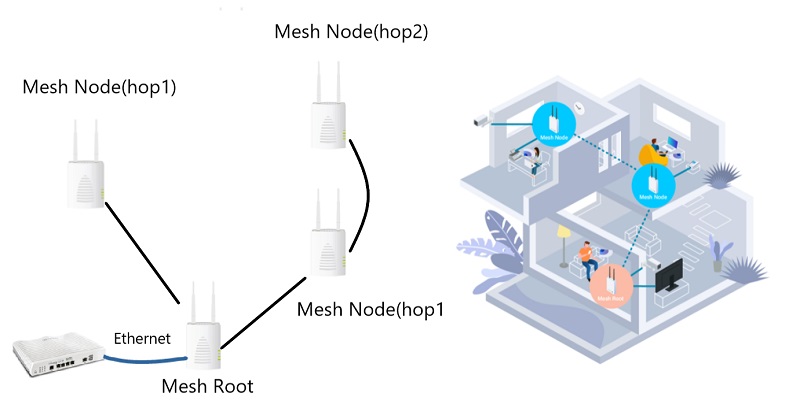
When a group of APs is working as a mesh network, you only need to configure the Mesh Root, which is the AP connecting to the Internet gateway by Ethernet cable. Other AP in the mesh group (the Mesh Nodes) will automatically use the same SSID, method of encryption and the same encryption keys as the Root, and use the same radio channel as its wireless uplink.
Mesh Setup by Quick Start Wizard
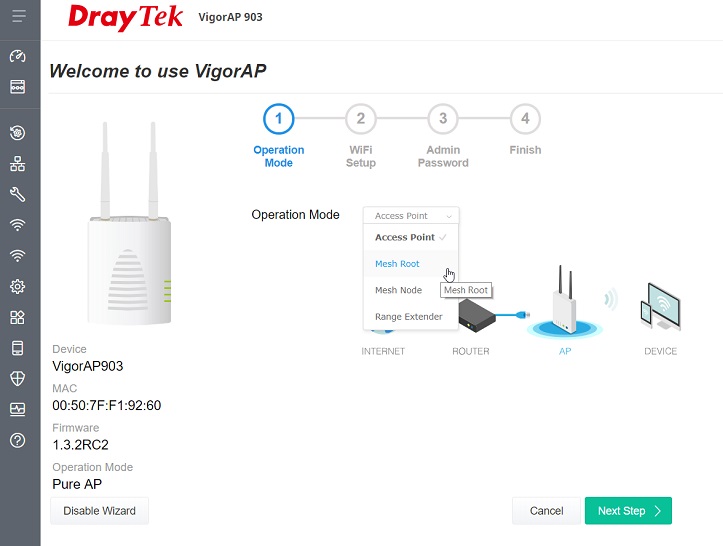
1. Navigate to the WebUI configuration page on the AP you wish to configure as a Mesh Root
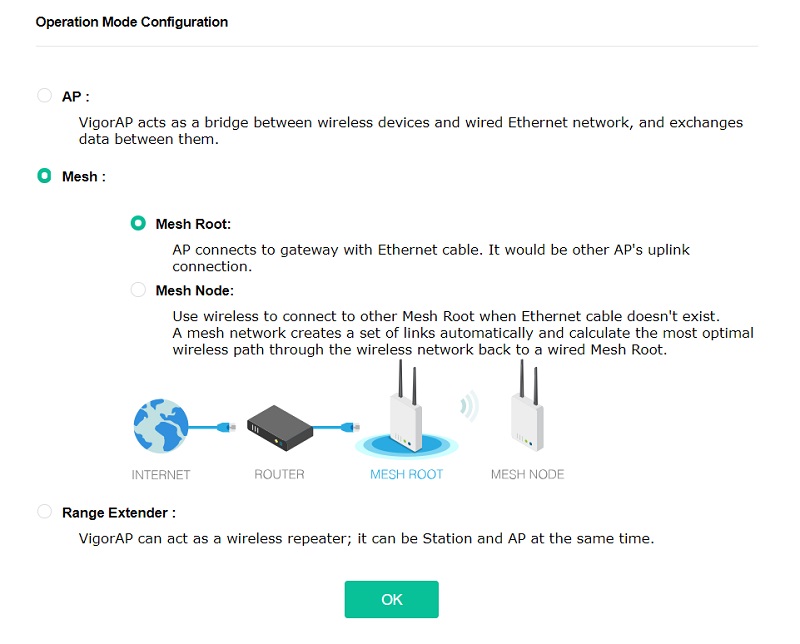
2. Select 'Mesh Root' for Operation Mode then click Next Step.
(NOTE: The default Operation Mode is Access Point when the AP is connecting to a gateway with Ethernet cable.)
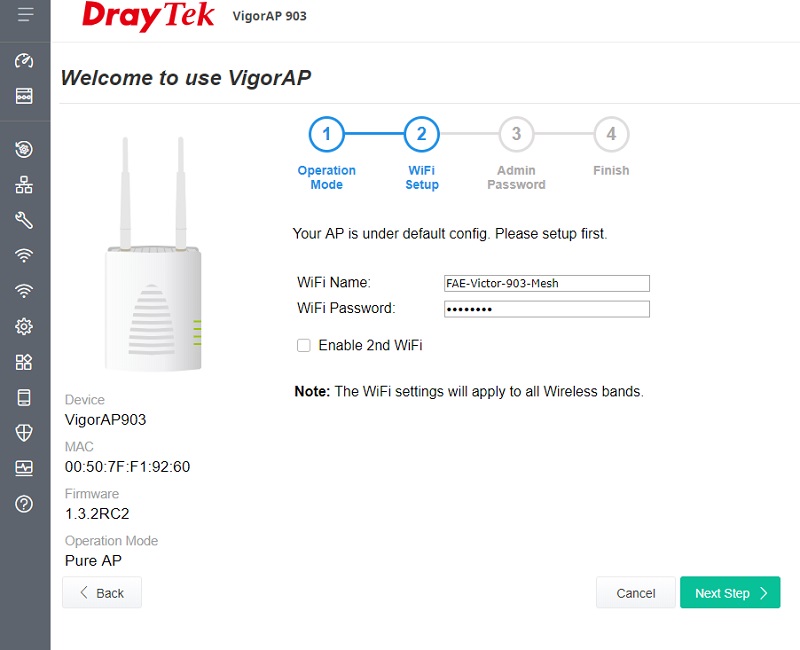
3. Set up the WiFi Name and Password, then click Next Step. All the APs in this Mesh Group will use the same WiFi name and password after configuration sync.
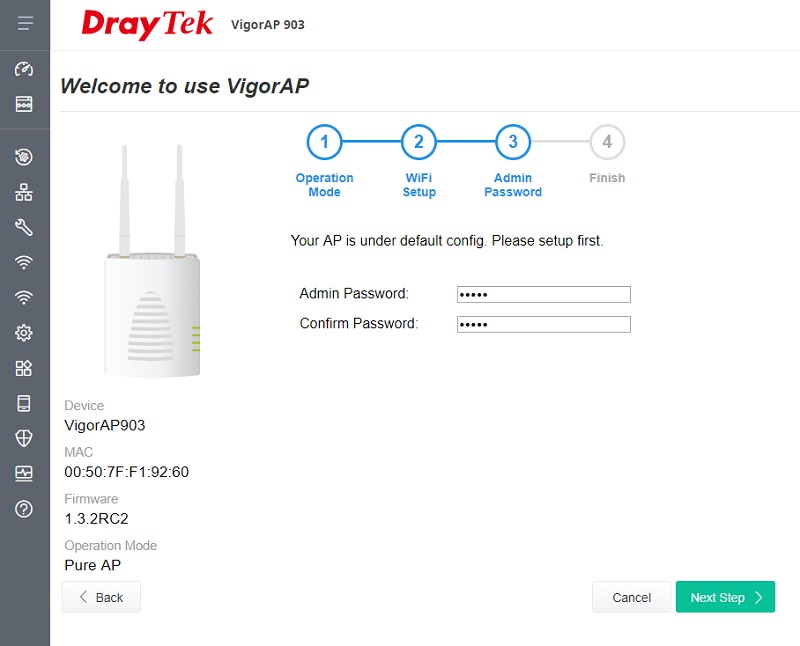
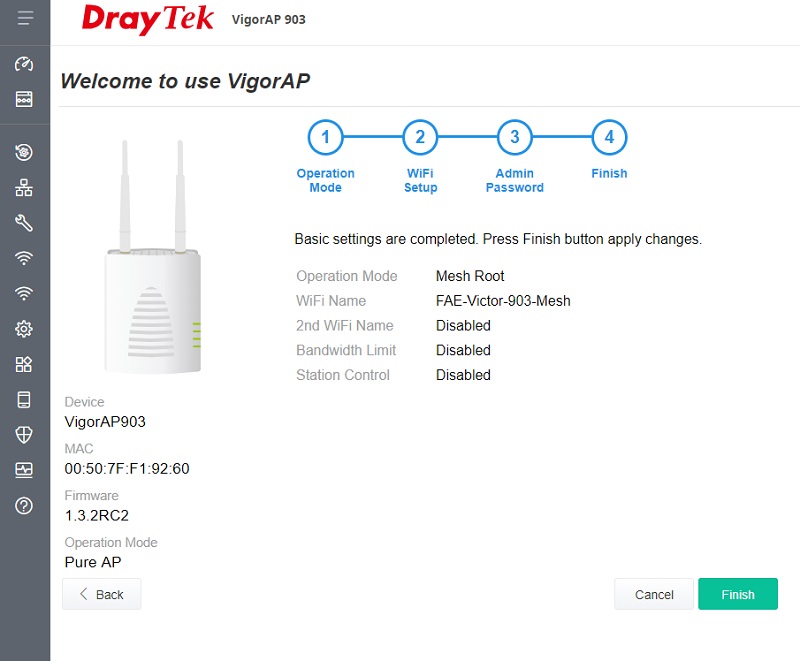
4. Set up the Admin Password for logging in the AP's management page.
5. Now the basic settings are completed. Click the Finish to apply the changes.
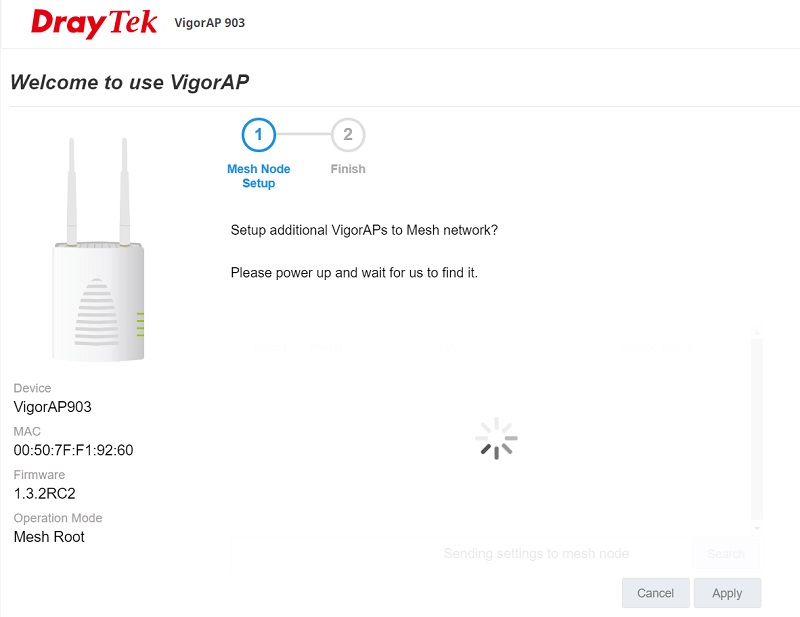
6. After clicking Finish, just power on the other APs that you want to add to this Mesh group, those subsequent APs will be the Mesh Nodes. The Mesh Root AP will search for available APs nearby.
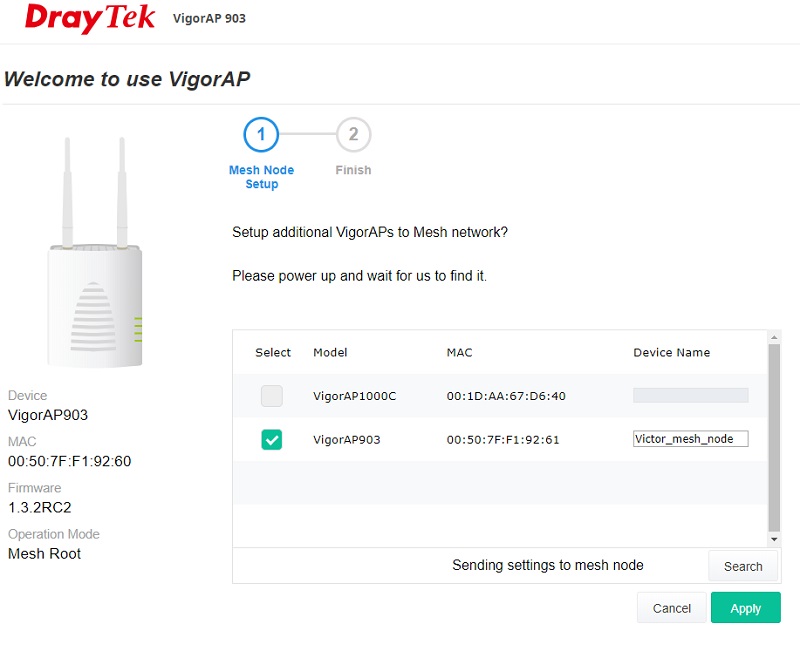
7. Select the AP you want to add to the Mesh group, then click Apply to save the changes.
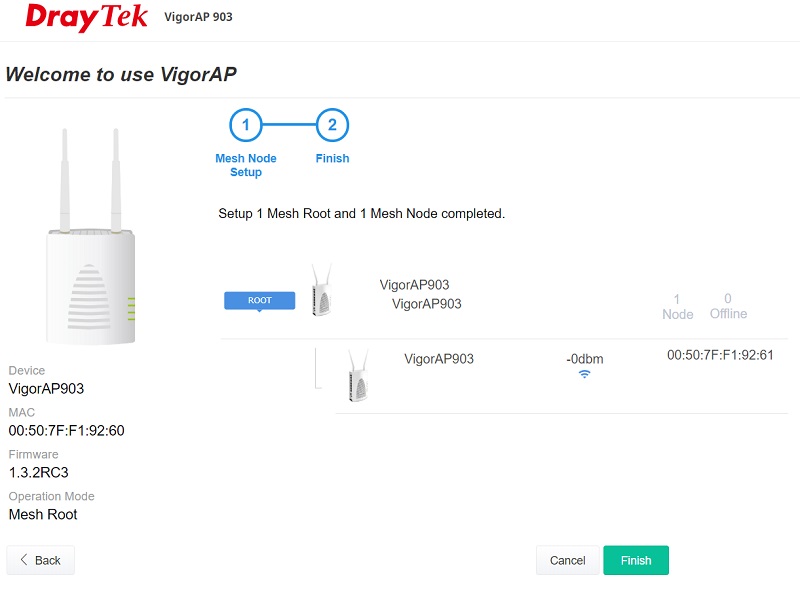
8. When you see the following page, the Mesh Group set up will be complete.
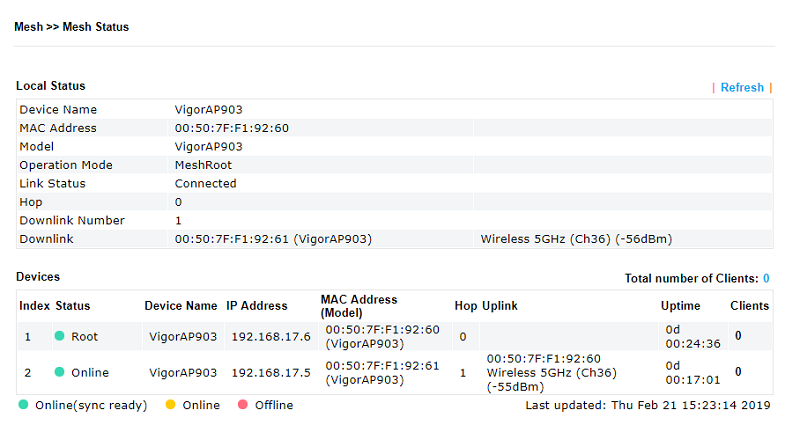
9. You can check the Mesh Members by navigating Dashboard >> Mesh Network.

10. Or view more detail at Mesh >> Mesh Status.
Change Operation Mode to Mesh Root
1. Choose an AP to configure as Mesh Root, go to Operation Mode and select 'Mesh Root'.
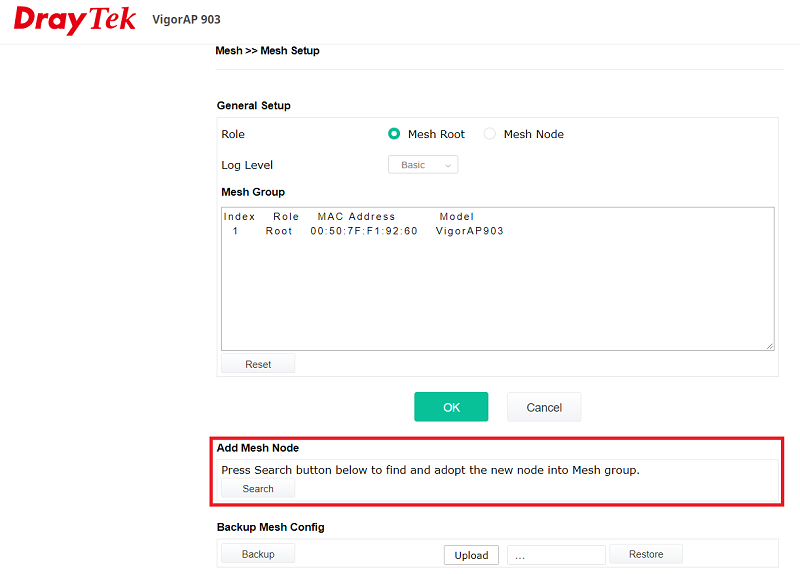
2. Then, go to Mesh >> Mesh Setup, and click the Search button.
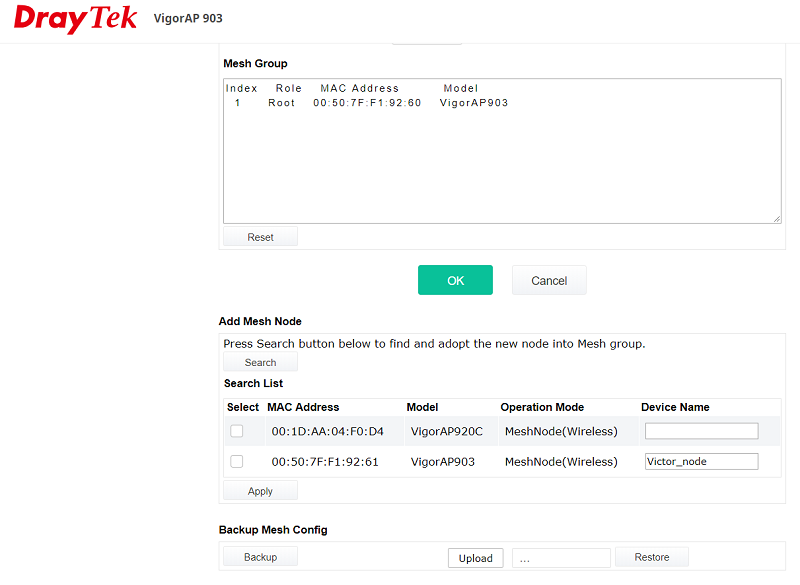
3. Select the member APs, input the device name to add it into the Mesh Group, then click Apply to save the changes
4. Mesh Group is now successfully established.

Please note:
- The node must not be restarted, unplugged, moved until the Mesh Node shows as the green light on the Mesh Status.
- Now Mesh supports choose wireless uplink/downlink band options, which allow the user to select the most suitable Wi-Fi band (2.4GHz/5GHz) for the Wi-Fi Mesh network. For further information please refer here.
Published On:2019-03-11
ShareWas this helpful?