
Vigor3900/2960 Hotspot Setup for Guest Profile Login
This document introduces how to set up Web Portal on Vigor3900 and use the router as a hotspot gateway, and create the guest profiles for the customer to login. To create guest profiles, we may add a username and password one-by-one, or use "Mass Guest Generator" to add guest profiles in bulk.

Create guest profiles
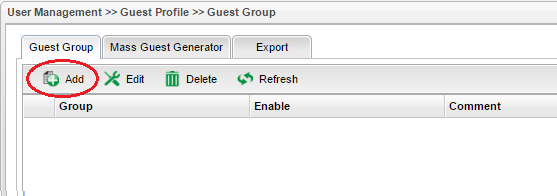
1. Go to User Management >> Guest Group, click Add to add a new group.
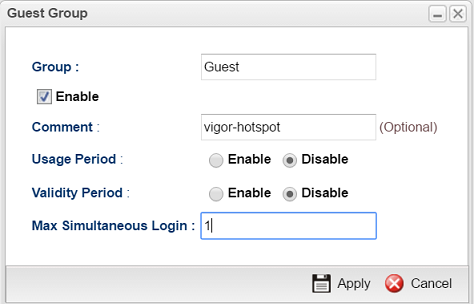
2. Enter a group name, enable this group, simultaneous login limit, and click Apply.
3. In the guest group, there are two ways to create guest profiles. You may create the user profile one-by-one, or create user profiles in bulk.

To create guest profiles one-by-one, click Add in the user group created in step 2, give it a username and password, then click Apply.

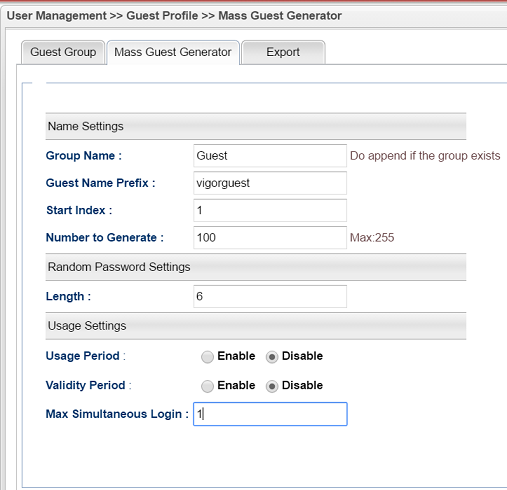
To create guest profiles in bulk, go to the Mass Guest Generator tab. Enter Group Name of the group created in step 2, enter the prefix for the usernames, enter how many guest profiles would you like to generate, simultaneous login limit and click Apply. After that, you will see the user profiles automatically generated under the guest group we just created.
4. After creating the guest profiles, you may print out the username and password combination, which can be provided to the customers.

Set up the web portal
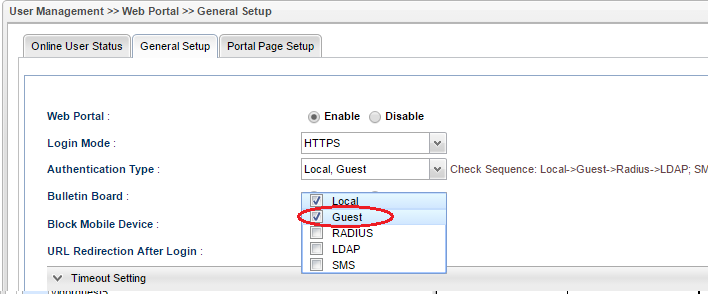
5. Go to User Management >> Web Portal >> General Setup, enable Web Portal, and select "Guest" as Authentication Type.
You may customize the login page from User Management >> Web Portal >> Portal Page Setup.

Hotspot customer Login
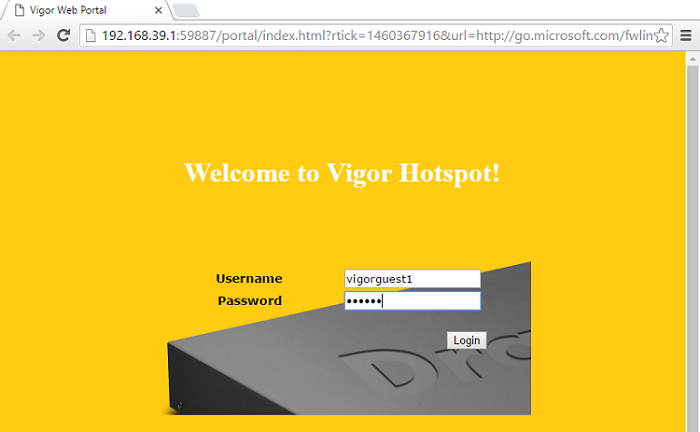
7. Now, when customers join Vigor3900's network and try to access the Internet, they will be redirected to the portal page, which they should log in with the username and password created in step3.
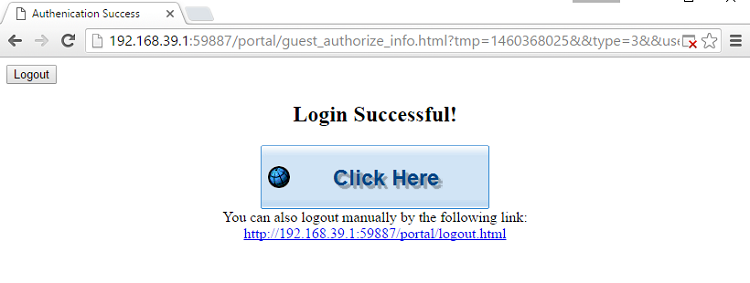
8. If the credentials are correct, they will see the authorization message and be able to surf the Internet.
9. The administrator may check the online users and their IP address from User Management >> Web Portal >> Online User Status page.

Set a time quota for guest profiles
If you'd like to restrict how long can the customer use the Internet service, you may edit the guest group to have Usage Period. When the Usage Period is enabled, the customer can only use the Internet for the usage time specified. It will start to count down after the first login.

Customers will see the remaining time on the successful authentication page.

In User Management >> Guest Profile >> Guest Group, the Administrator may check if the guest account is in use and until when can the customer keep using this account.

Set validity time for the guest profiles
To control when should the guest profiles expire, you may also set a Validity Period for them. In the Guest Group, we may enable the Validity Period and set the time and date when customers can use this account.

Firewall and Bandwidth Management for Guest group
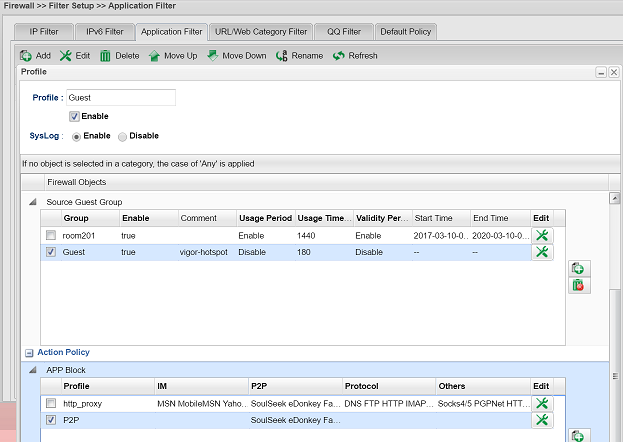
We can apply Firewall rules to a specific guest group by selecting the Guest group in Source Guest Group of the firewall rule.
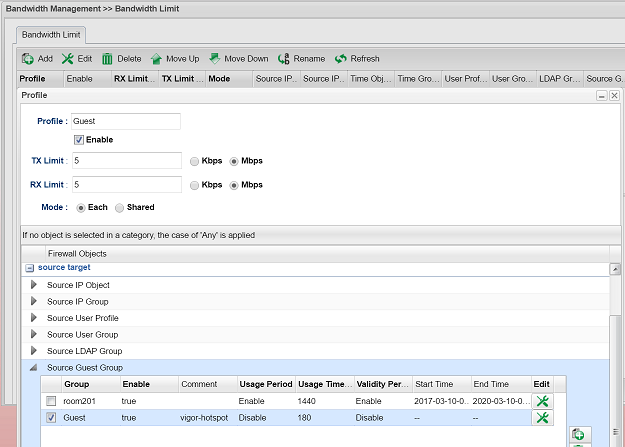
Similarly, we can manage bandwidth by the guest group.
Published On:2015-05-13
ShareWas this helpful?