
How to set up ACS 3 as an external Hotspot Portal Server?
The Hotspot Web Portal function in the Vigor Router enables using an External Portal Server, such as Purple WIFI, to authenticate guests. Starting from version 3.0.0, VigorACS 3 can serve as an External Portal Server to authorize guest Internet access by sending the API(see the step 4 in the diagram) to the Vigor Router.
This application note demonstrates how to set up VigorACS 3 as an External Hotspot Portal Server.
How does VigorACS 3 function as an external hotspot portal server?
A RADIUS server and a portal server are required when an external portal server is needed for the portal method in the Vigor Router.
FreeRADIUS is recommended for authenticating guest devices, while VigorACS 3 is the portal server that provides guests with a login page for authorising internet access.
The diagram below illustrates how VigorACS 3 works as an external Hotspot Portal Server. A summary of the steps involved are:
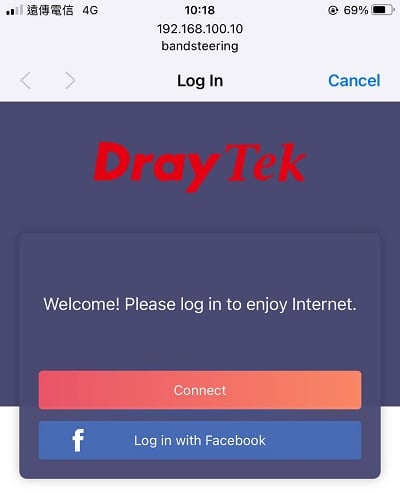
- As a Hotspot Portal Client, the Vigor Router redirects guests to the portal login page for hotspot authentication.
- VigorACS 3, functioning as a Hotspot Portal Server, will add the guest's MAC address and quota policy to the RADIUS database upon successful hotspot authentication.
- Finally, the Vigor Router will send a RADIUS authentication request to the FreeRADIUS server to obtain the guest's information and grant Internet access to the guest.

Benefits of using VigorACS 3 as a Hotspot Portal Server
As a portal server, VigorACS 3 can authorise guests' Internet access and provide other benefits. It is a comprehensive network management system.
Supposing there is a holiday park with multiple routers at different locations. The network manager wants to provide Internet connections with limited PIN codes at each location and promote the park's paid services for customers.
The network manager can choose PIN with Voucher as the login method and design a page in the hotspot profile for guests' login. Once the guests log in successfully, they will be redirected to the web page with the sale information. After finishing the hotspot profile, we can provision it to multiple routers simultaneously. Clients' numbers and visit times at each place can also be monitored on the ACS WUI.
Set up VigorACS 3 as a Hotspot Portal Server
- Before starting, please refer to the following notes when setting up FreeRADIUS with a MySQL database.
- The MySQL database is used for the RADIUS server, not the one on the VigorACS 3.
- VigorACS 3 is set to add/update the database named "radius". Please create the database called "radius" in MySQL database on the FreeRADIUS server.
- Please add the client entry for Vigor ACS 3 and Vigor Router in client.conf to allow remote access to the FreeRADIUS server.
- Vigor ACS 3 must be allowed to access the database "radius" with the account for the FreeRADIUS server.
- Vigor Router restricts hotspot users' bandwidth and sessions with Draytek self-defined attributes. Please follow the steps below to add the Draytek attributes to the FreeRADIUS server.
- Download "dictionary.draytek".
- Move the file to /usr/share/freeradius
- Include the reference of "dictionary.draytek" in the file "dictionary". The file "dictionary" can be found in the path /etc/freeradius/, /etc/freeradius/ or /etc/raddb.
- Restart the FreeRADIUS server.
- On ACS 3 Dashboard
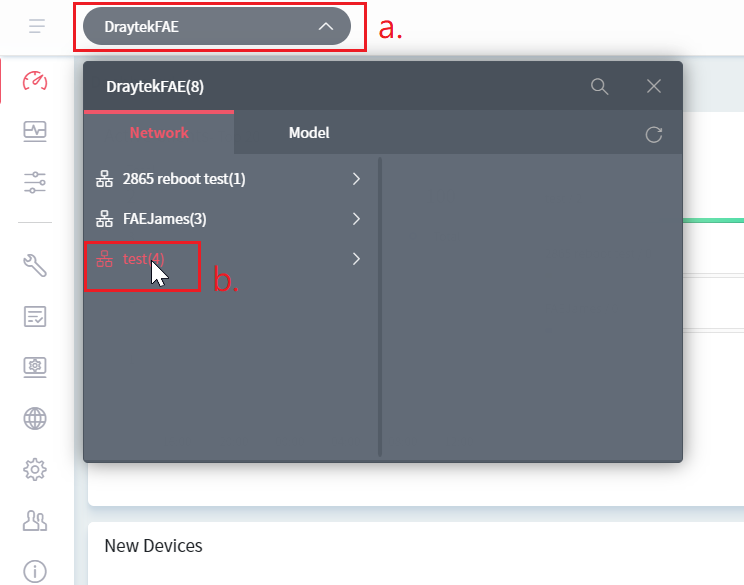
- Tap the Network box which is located at the top.
- Click the network group.
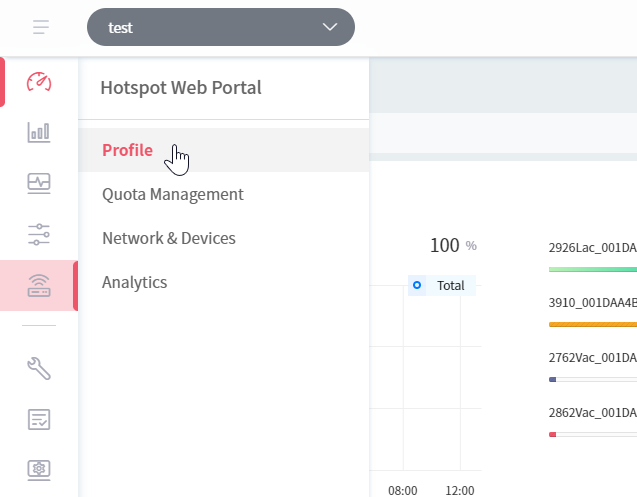
- Go to Hotspot Web Portal >> Profile.
- Click Add and name the new profile
- Click Edit at the new profile
- On the profile setup page,
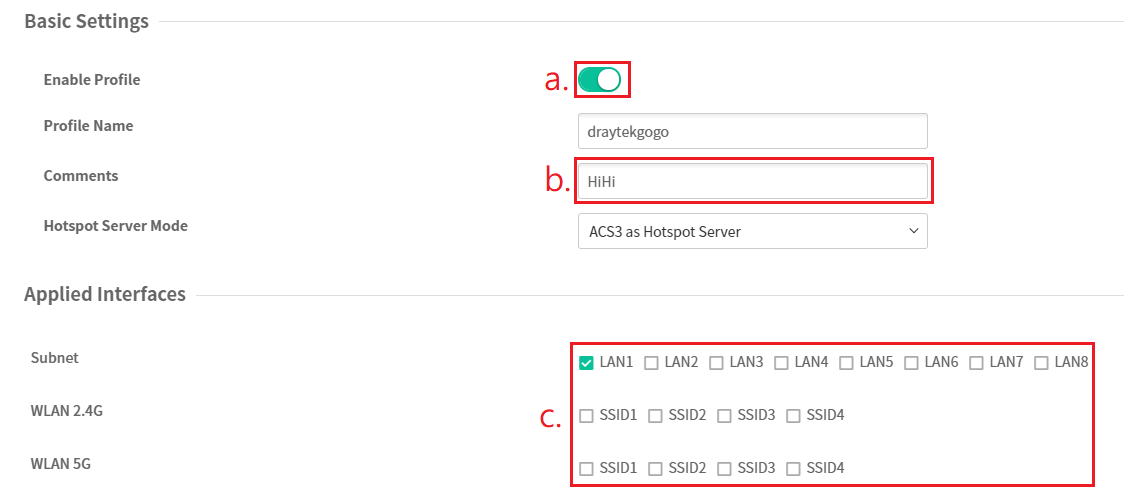
- Basic Settings & Applied Interfaces
- Enable this profile
- Enter comments (It will be applied to the Hotspot Web Portal profile of CPE site.)
- Select the interfaces to apply this profile
- External RADIUS Server
- Click Edit at External RADIUS Server
- Enter the address of RADIUS server
- Set 1812 as Destination Port
- Enter the secret of RADIUS server
- Enter the username of MySQL
- Enter the password of MySQL
- Click Confirm
- (Optional)Enable RADIUS MAC Authentication and select AABBCCDDEEFF as MAC Format.
- Note:
- Enable MAC Authentication is optional. When this option is enabled, Vigor Router will send the request to the RADIUS server first to check if this guest has connected.
- If yes (Access-Accept), the guest can access the Internet directly.
- If not (Access-Reject), the guest will be redirected to the portal login page for the hotspot authentication.
- Portal Server
- Select login methods (multiple selections)
- Enter the Captive Portal URL(ACS server)
- (Optional) Enable Captive Portal Detection to trigger the unauthenticated clients to automatically pop-up the Web Portal page when connect to the selected interfaces
- (Optional) Edit the default Landing Page URL to make the clients visit a specific website after a successful authentication.
- Quota Policy
- Select a Quota Profile in the hotspot profile.
- Click Continue
- Note:
- The Quota Profile can be created in Hotspot Web Portal >> Quota Management. We can customize the validity, number of devices allowed, and bandwidth/session limit per account.
-
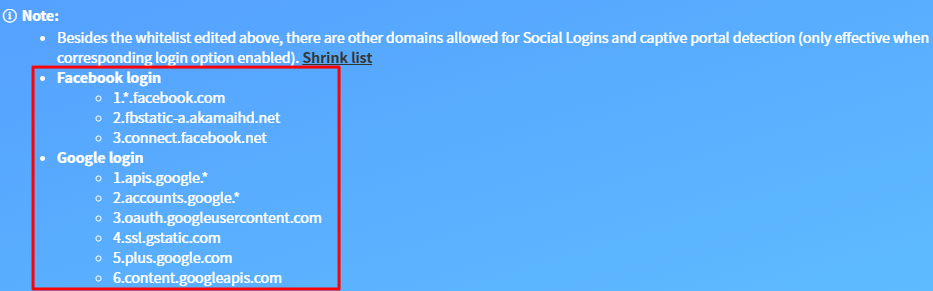
After customizing the Splash page, please add RADIUS server IP and ACS IP to Destination IP on Whitelist Setup page, so that the CPE will pass the traffic to the RADIUS server and ACS.

- If the login method is Google or Facebook, please also add the required domains in the whitelist.
-
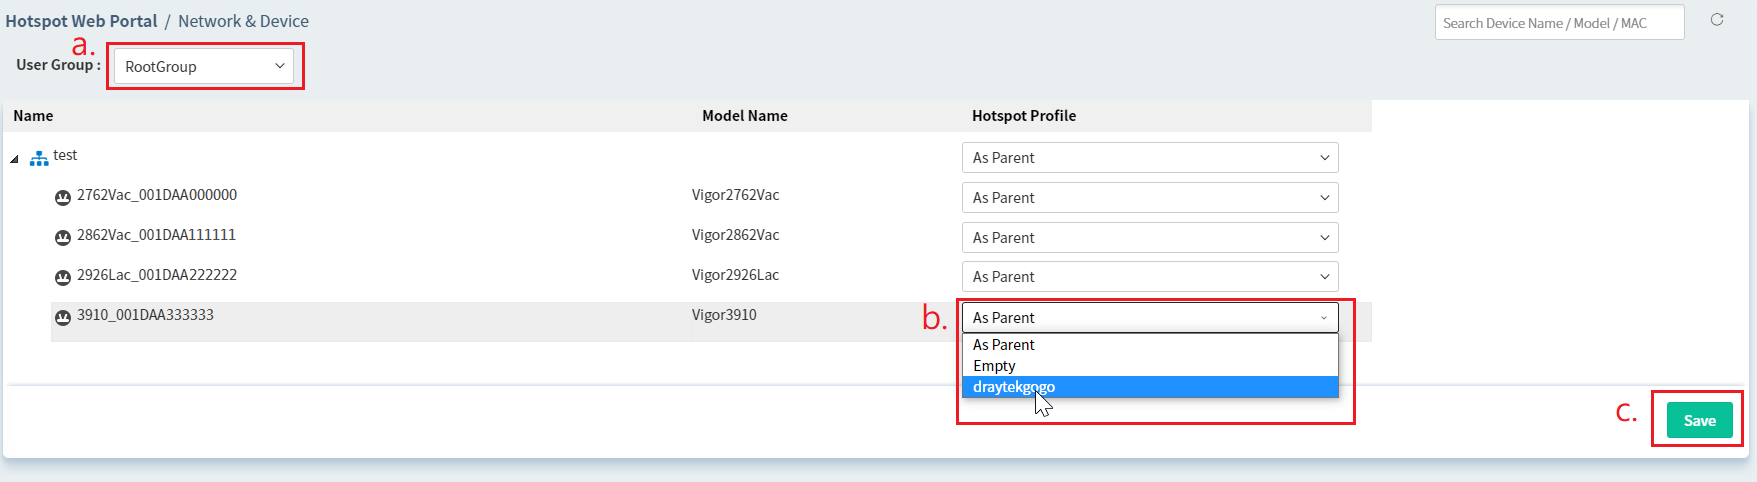
Apply the profile: Go to Hotspot Web Portal >> Network & Device.
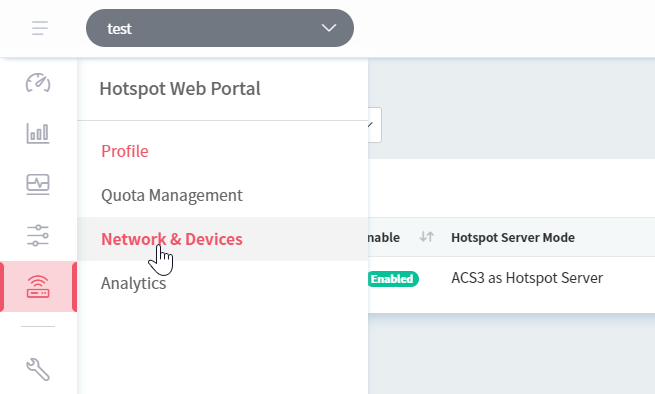
- At Network & Device page,
- Select the User Group
- Select the Hotspot Web Portal profile for the device(s).
-
Click Save
-
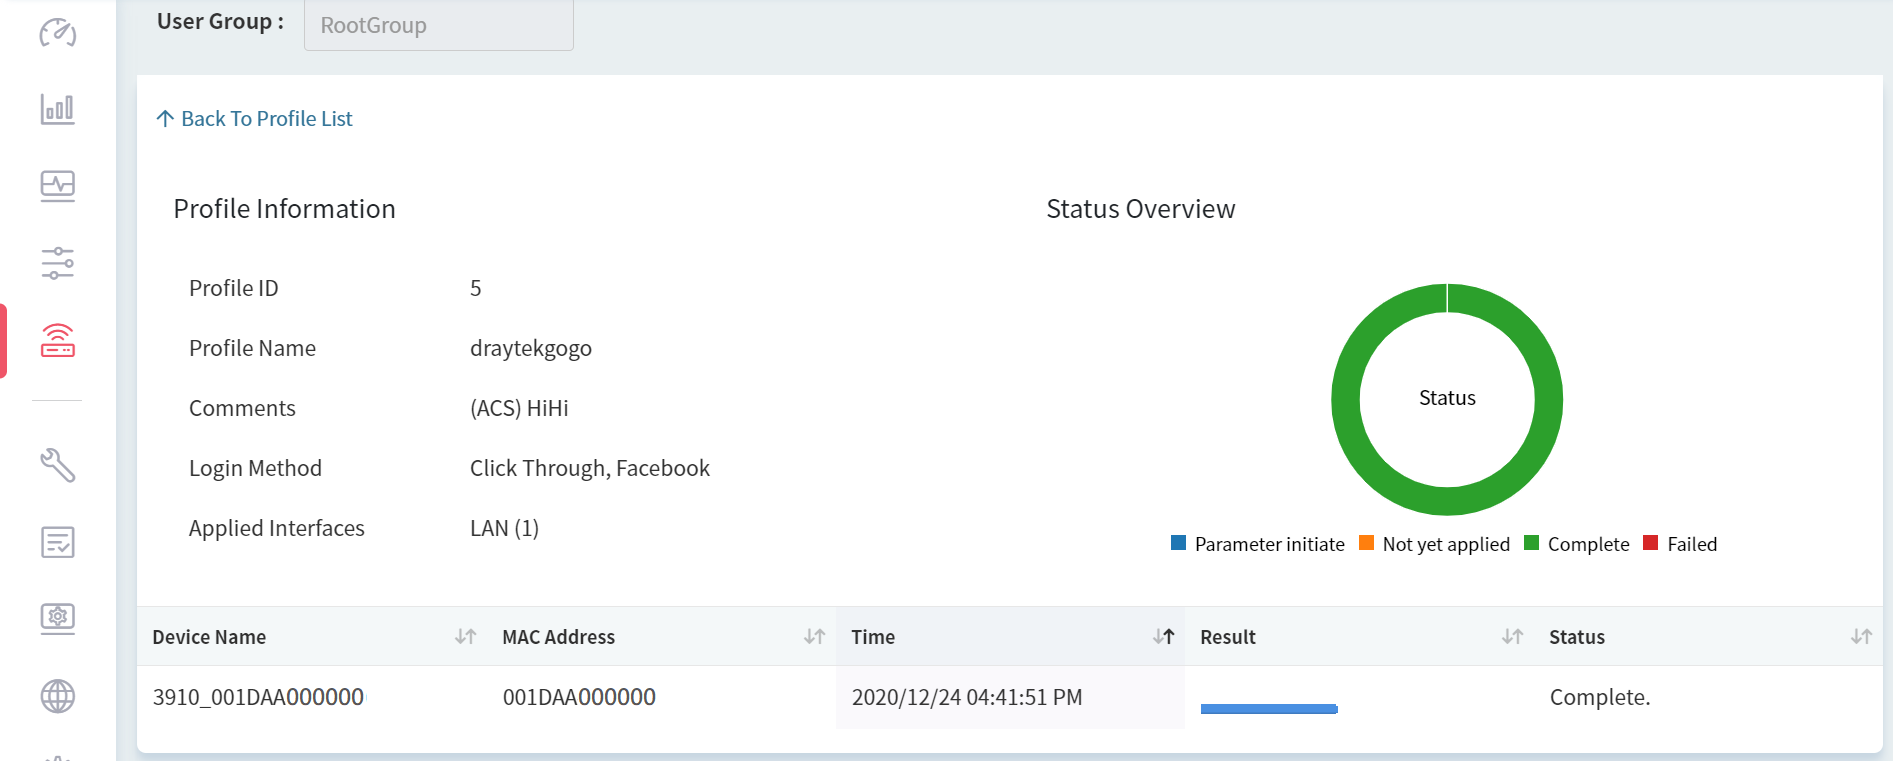
Go to Hotspot Web Portal >> Profile, click View Log

-
Status Overview is available to observe the applied process.
-
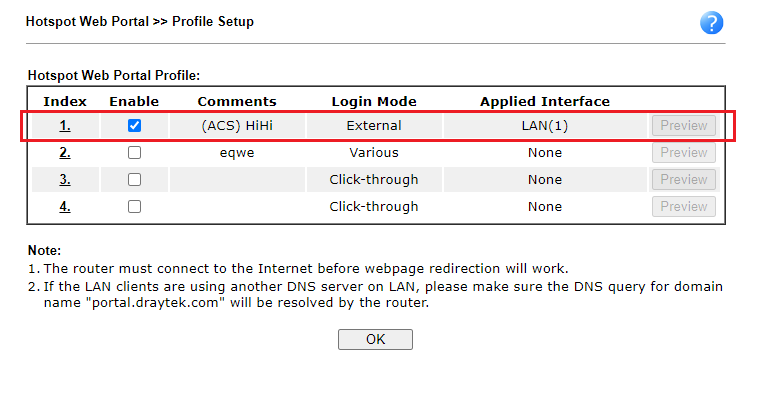
On CPE site, the hotspot profile will be provisioned after the next Inform from the CPE. The CPE will reboot after the hotspot profile is applied.
-
Once new clients connect to the selected interface of the router, they need to use one of the authentications to access the Internet.
-
Go to Hotspot >> Web Portal Analytics, this page will demonstrate all clients’ information.
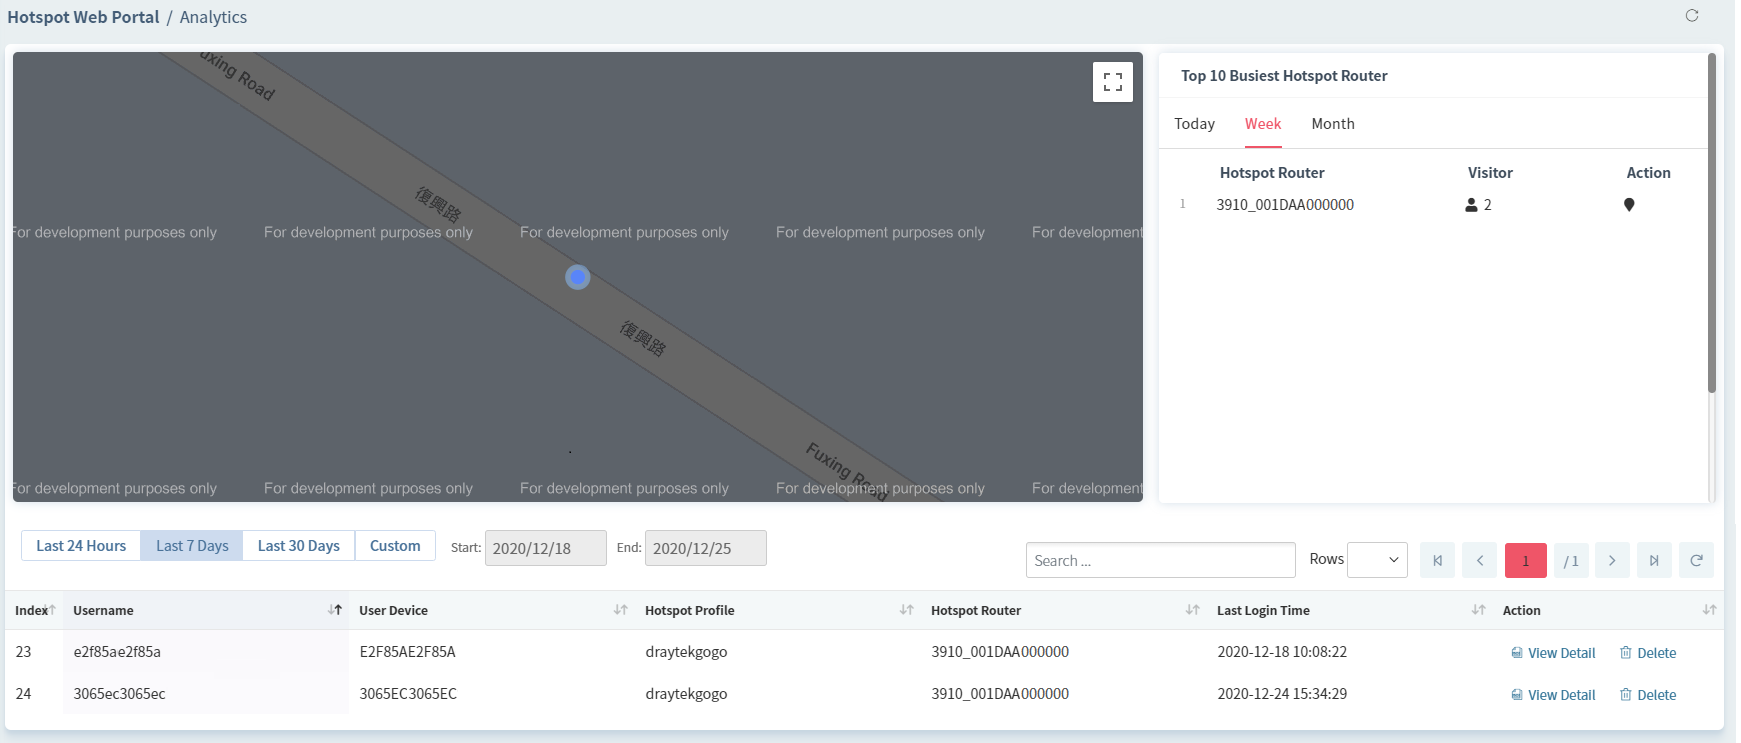
-
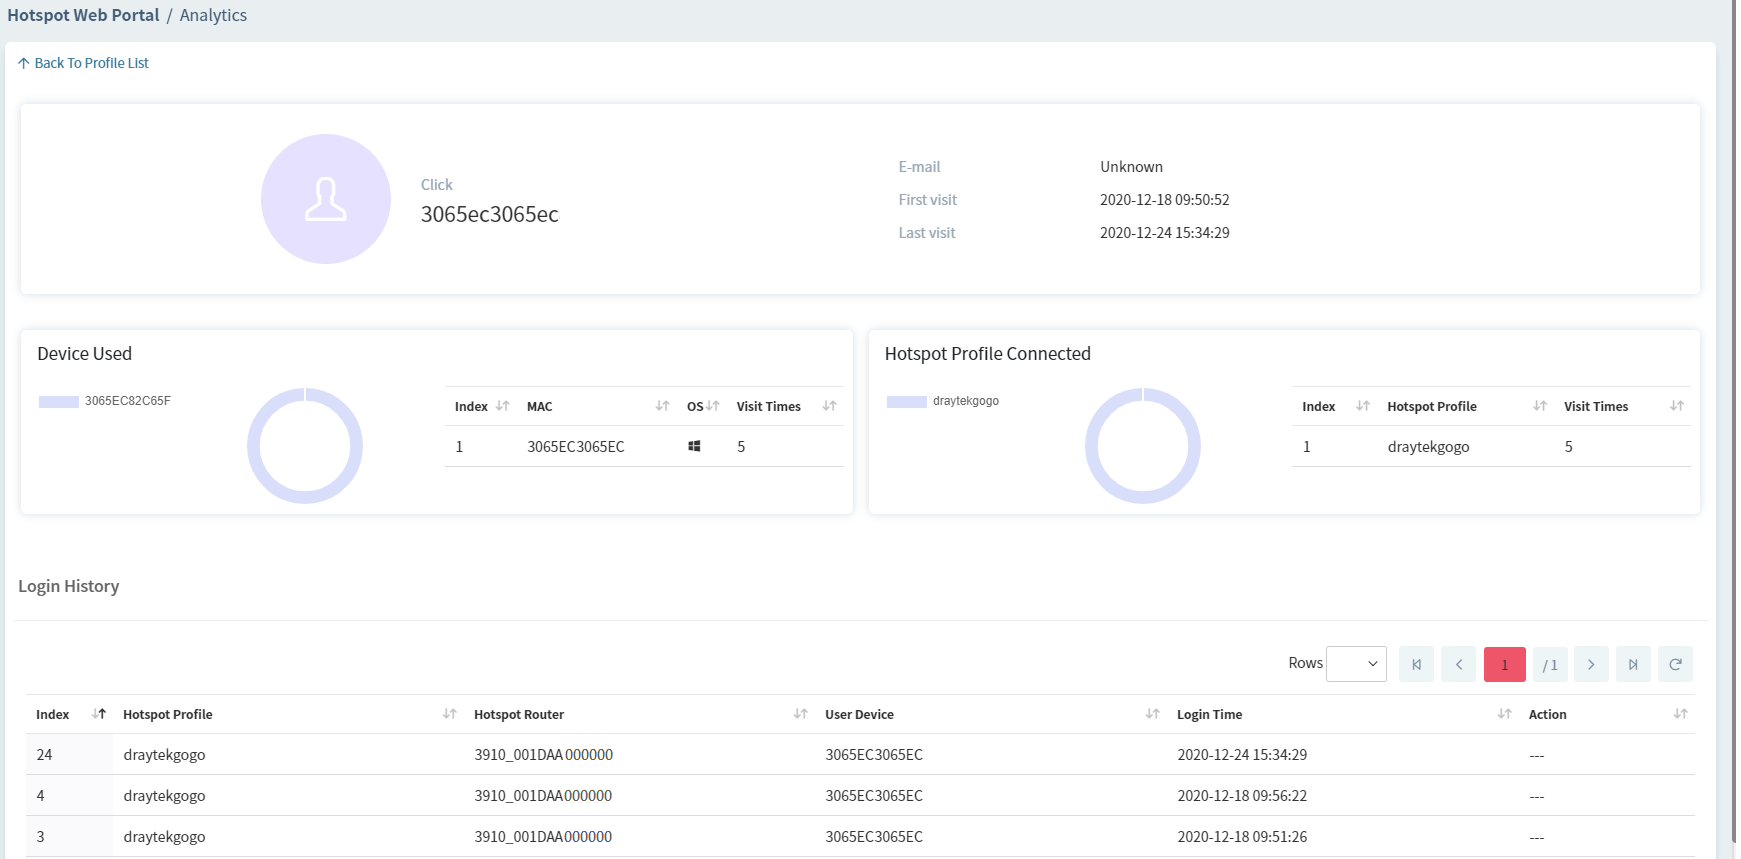
For detailed information, click View Detail at Action.


Note:
Published On:2021-05-19
ShareWas this helpful?