
Provisioning Wireless setting to VigorAP by VigorConnect
This article demonstrates the process in VigorConnect to provision a VigorAP, or a group of VigorAPs, with a new wireless AP Profile. Once the provisioning is completed, we'll check that VigorConnect has successfully provisioned each access point with VigorConnect's Logs.
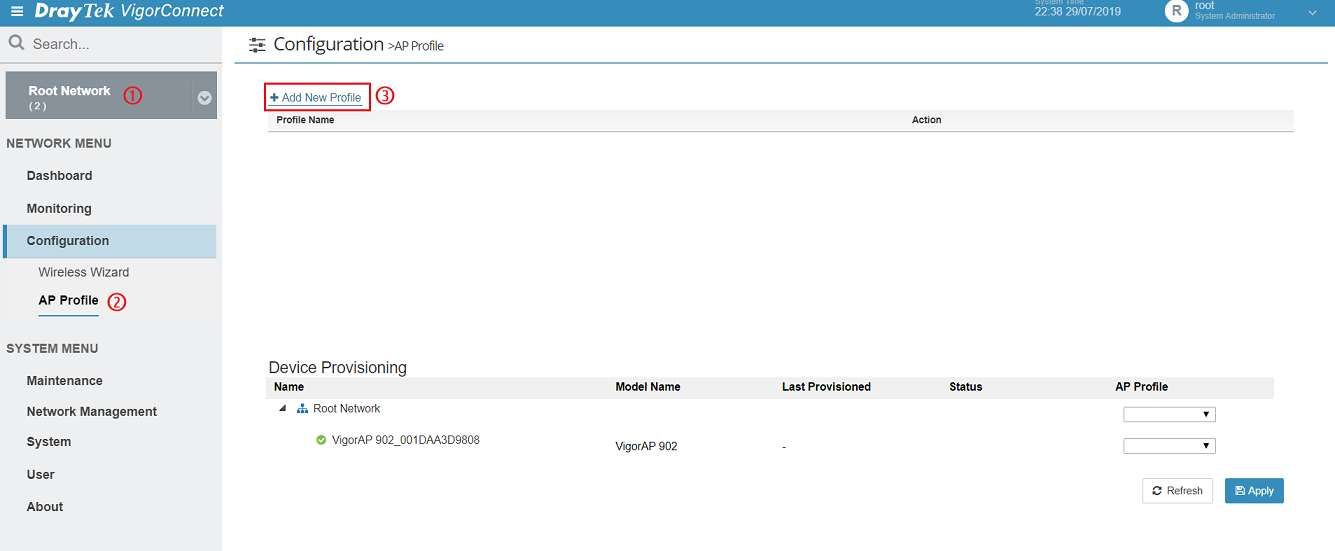
1. Select the network that contains the VigorAPs to provision. Go to the Configuration >> AP Profile page and click + Add New Profile in the upper-left to creat a new AP profile:
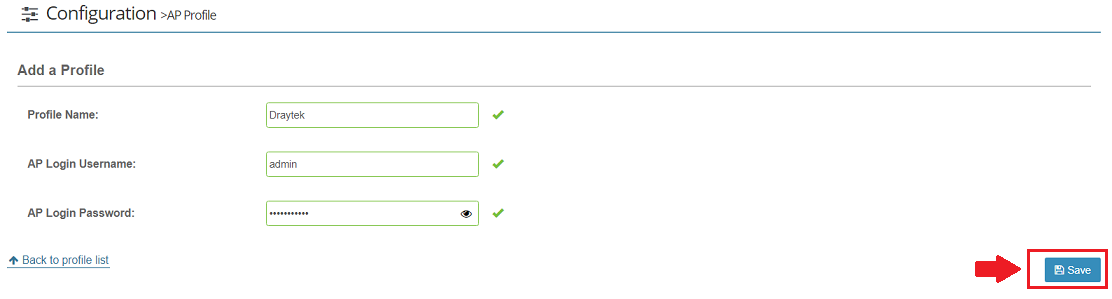
2. Enter a Profile Name. Set the Username, and Password that will be used for accessing the web interface of the VigorAP after provisioning has completed. Click the Save button to proceed:
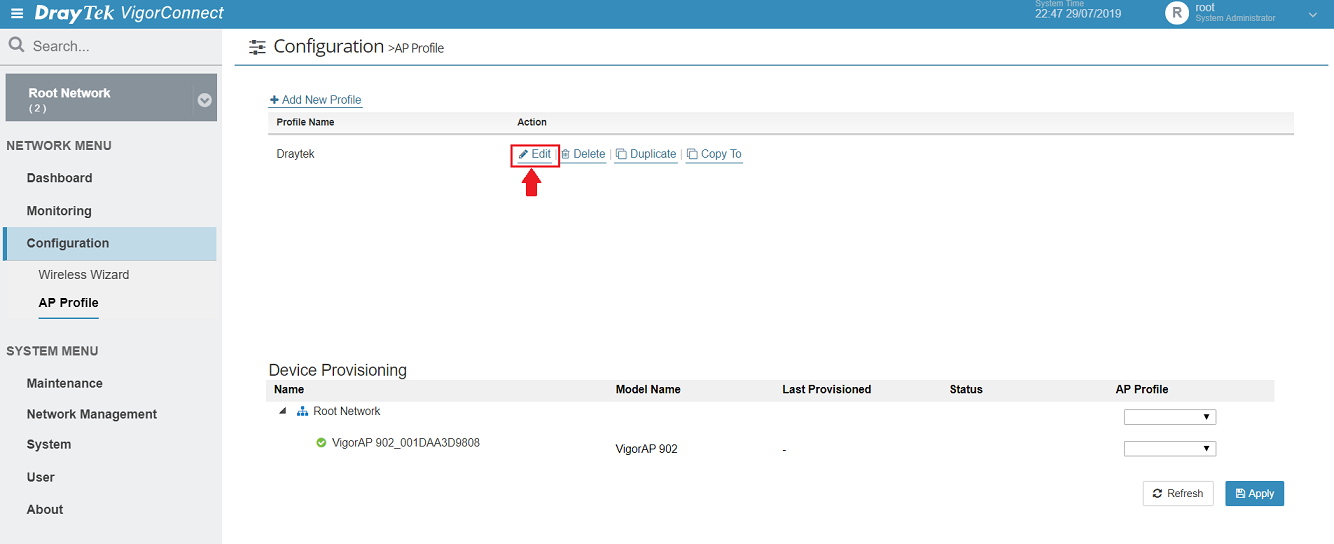
3. Select the newly created profile from the list and click Edit.
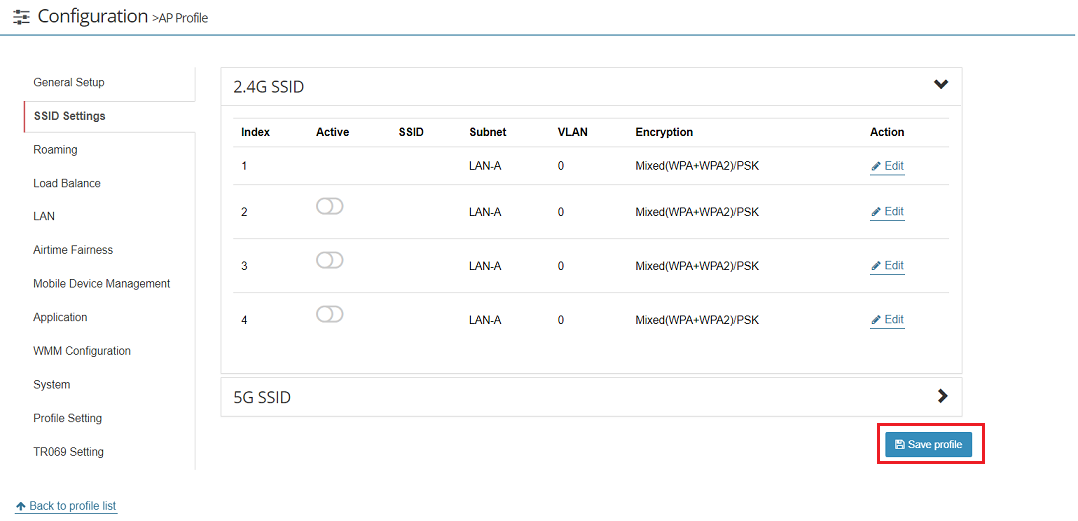
4. Configure the AP profile's settings by selecting items from the menu on the left of the screen. Go through each section to ensure that the settings are correct for your requirements.
Once all of the settings have been configured, click the Save Profile button to proceed.
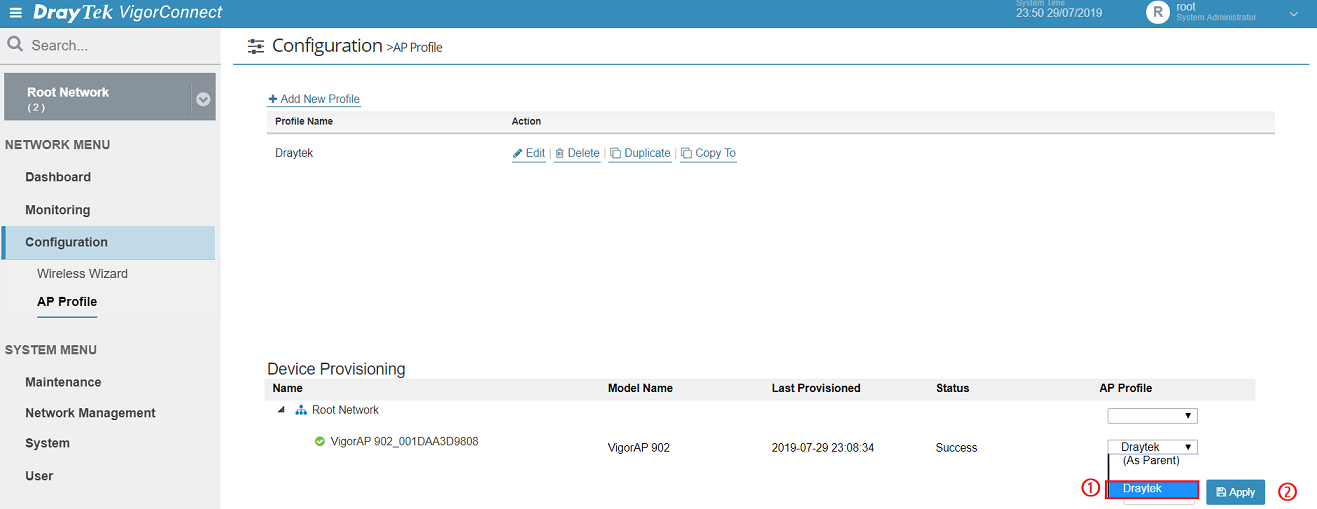
5. After finishing the configuration, go back to the profile list. From the Device Provisioning, select the VigorAP, or Network of VigorAPs that you would like to provisioning with the newly created AP Profile.
Once all of the VigorAP to provision have been selected, click the Save button to have VigorConnect begin the provisioning process.
Note: To skip provisioning for any of the VigorAPs, simply leave the AP Profile selection blank. Selecting "(As Parent)" will apply the AP Profile selected for the parent Network to that VigorAP.
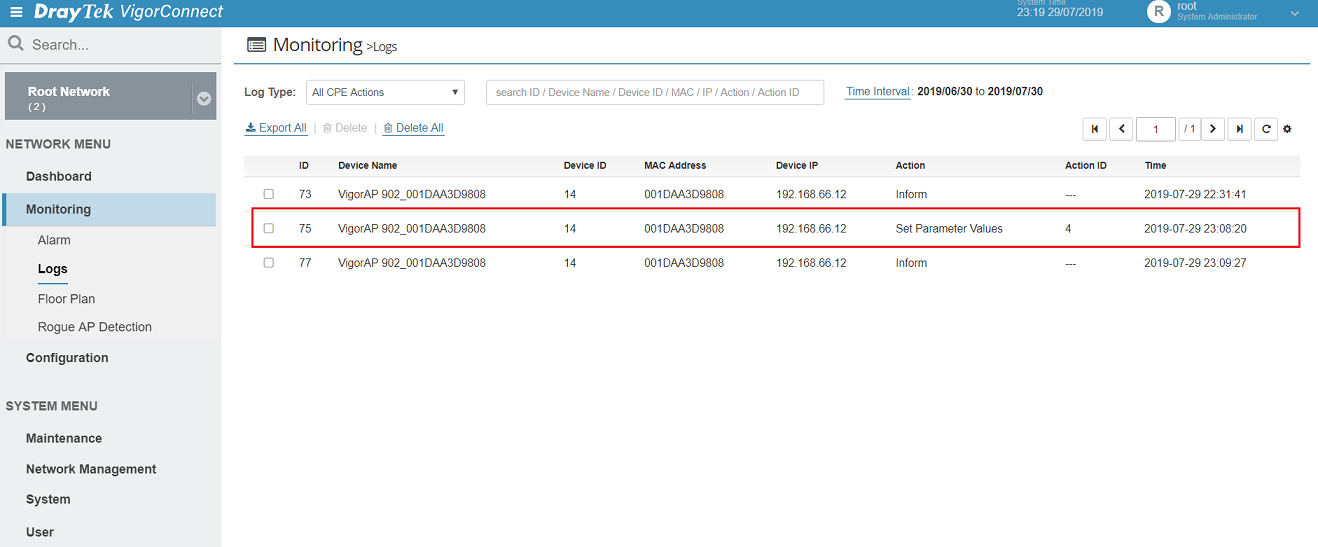
6. To check the status of each VigorAP's provisioning, Go to Monitoring > Log page, each VigorAP that has been configured by VigorConnect with the specified AP Profile will record an action of "Set Parameter Values"
Published On:2019-08-14
ShareWas this helpful?