
Import Certificate for Vigor3900's HTTPS Access
While accessing the router via HTTPS, the browser might say the certificate given by the router is invalid. To improve this, Network Administrator could apply for a certificate from the trusted third party agent then import it to Vigor Router and use it for HTTPS Access.
Vigor3900, Vigor2960, and Vigor300B support three types of certificate:
- Local Certificate: Use this type when the original certificate is generated by the router itself.
- PKCS12: Use this type when the certificate is in this format.
- Certificate and Private Key: Use this type when the certificate and the private key are offered separately.
The following steps will show how to use import a certificate for an HTTPS connection, and in this example, we will use the type "Certificate and Private Key".
1. From the Online Status page, check if the Current System Time of the router is correct.
.png)
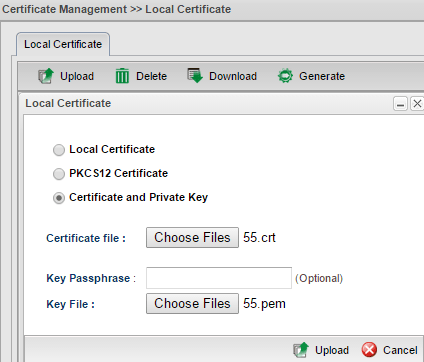
2. Open Certificate Management >> Local Certificate page, click Upload:
- Select Certificate and Private Key.
- Click Choose Files and select the Certificate File downloaded from the third party agent. (File extension should be .crt)
- Click Choose Files and select the Key File downloaded from the third party agent. (File extension should be .pem)
(NOTE: If the certificate file name and the key file name is not consistent, please rename the file name before uploading them) - Click Upload.
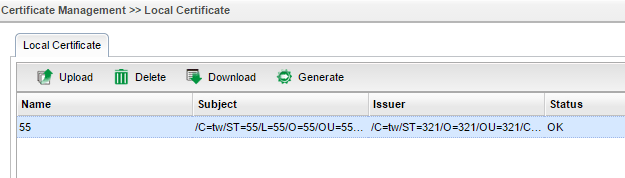
3. At Local Certificate page, the imported certificate will be displayed with Status "OK" if the upload is successful.
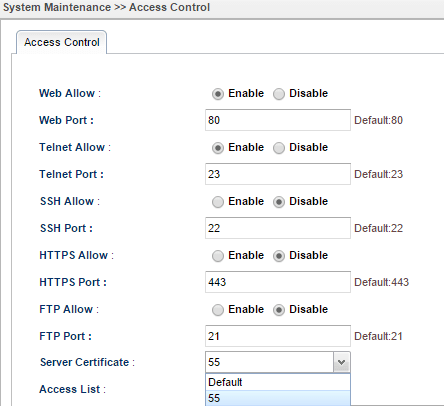
4. At System Maintenance >> Access Control, select the certificate we just imported for Server Certificate, then apply the settings.
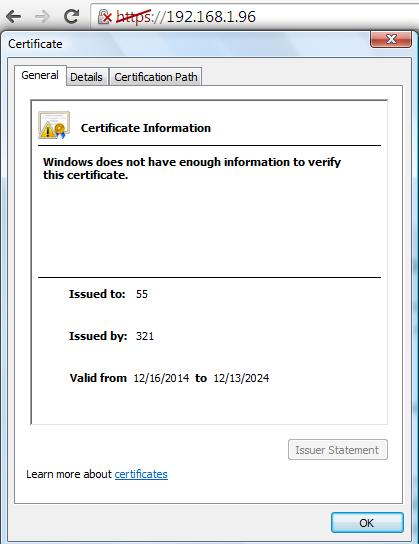
5. Now, access the router's HTTPS management page, and we should see the certificate information is changed. (The default certificate will show the issuer is Vigor3900)
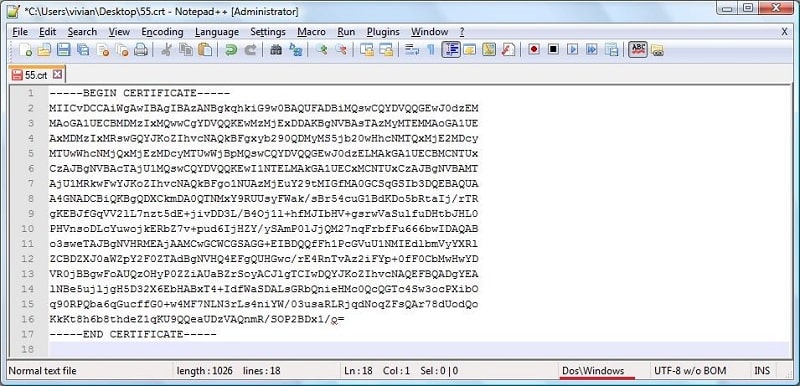
Converting the certificate to UNIX format
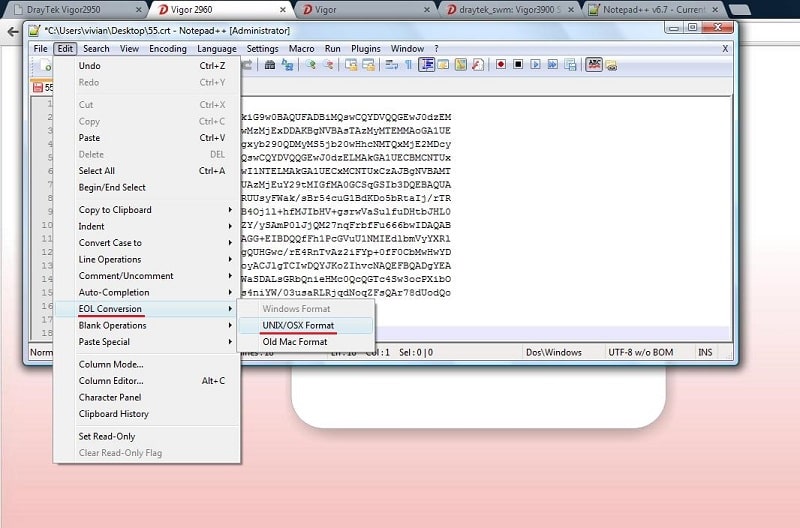
Before uploading a certificate to Vigor3900, it is better to check the certificate file and key file with Notepad++ first. If the file format is Windows format, please convert it to UNIX format with the steps below:
1. Open the certificate with Notepad++ and the file format will be shown in the lower right corner.
2. Select Edit >> EOL Conversion >> UNIX/OSX format.
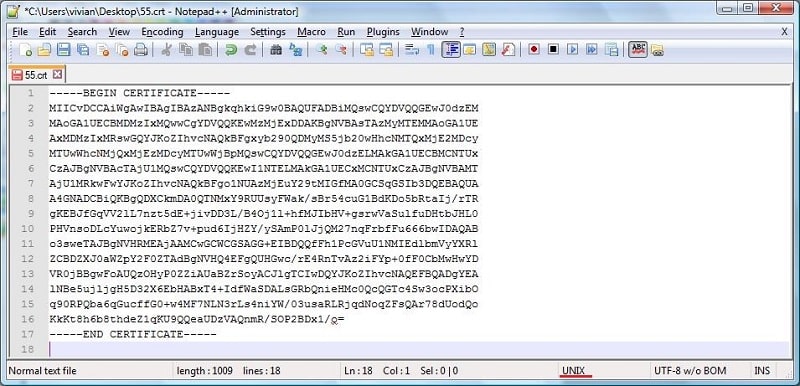
 3. The file format will change to UNIX.
Published On:2016-05-25
ShareWas this helpful?