
Use a Unique Self-Signed Certificate on the Router
Vigor Router allows the administrator to create and sign a custom certificate for SSL VPN and HTTPS connections. Due to security concerns, it is strongly recommended to have a unique private key on each device for self-signed SSL. This article shows how to generate a customized self-signed certificate then replace the default one on Vigor Router
Create Root CA
-
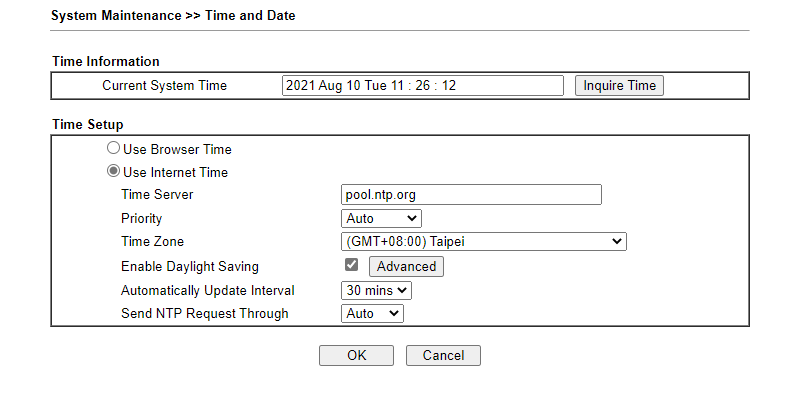
Make sure the router's time settings are correct. We strongly recommend using the time settings that match the
client side.
-
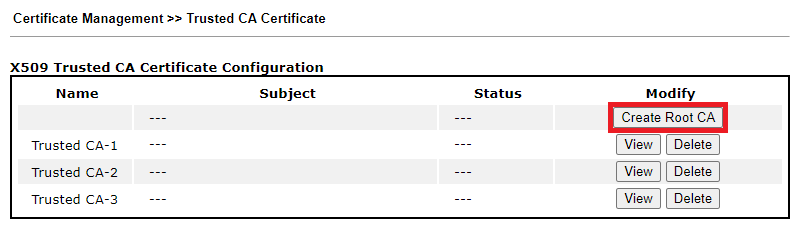
Go to Certificate Management >> Trusted CA Certificate, and click Create Root
CA.
-
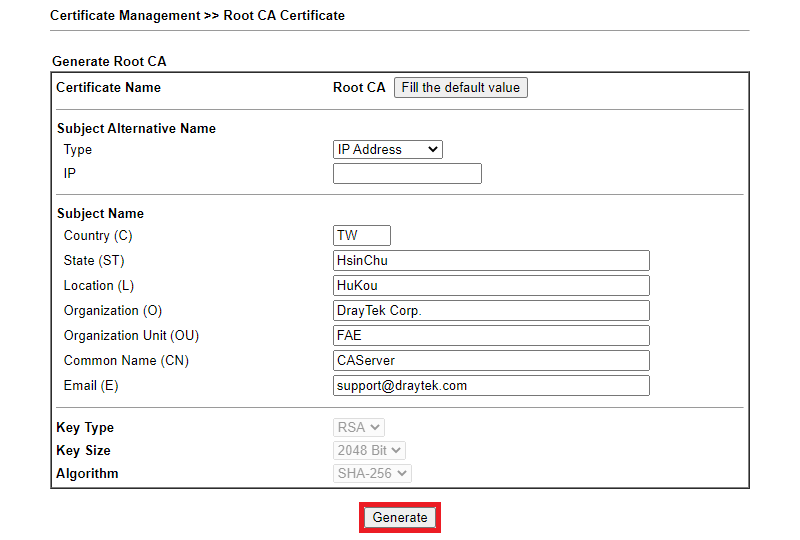
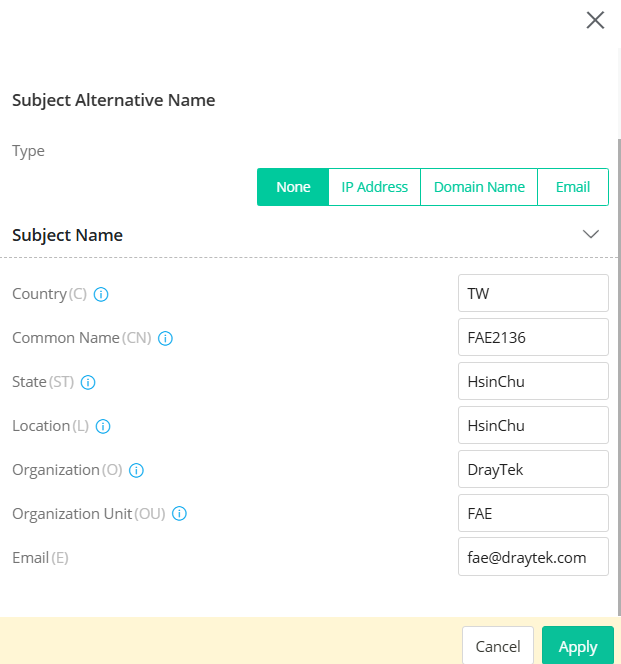
Enter the identity of your organization in the subjects of Root CA, like the example below, and click
Generate.
-
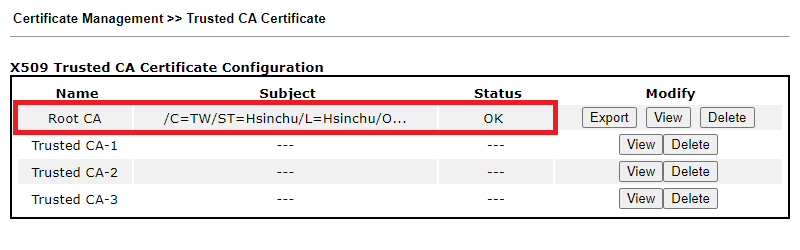
The Root CA will be shown with status "OK". (NOTE: A router can only have one Root CA. To
create a new Root CA, you’ll have to delete the old one first.)
Sign a Local Certificate with Root CA
-
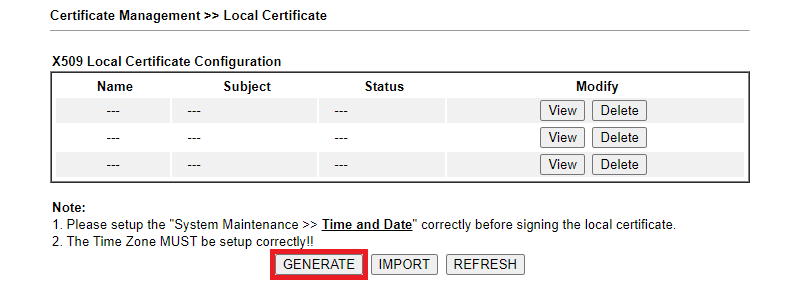
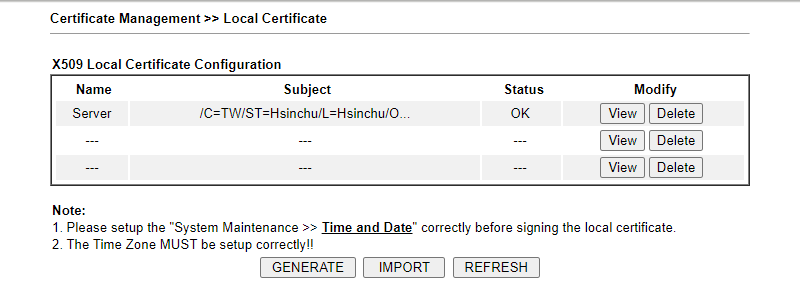
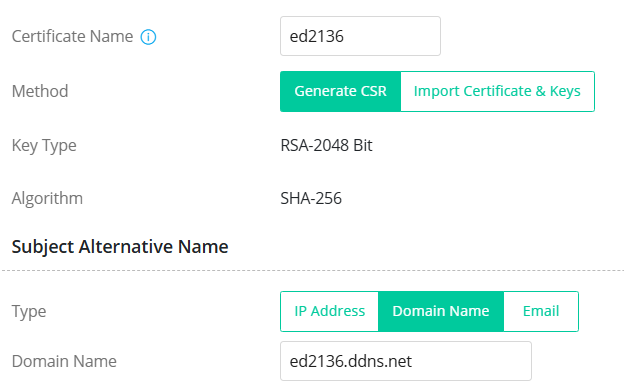
Go to Certificate Management >> Local Certificate, and generate a certificate request.
-
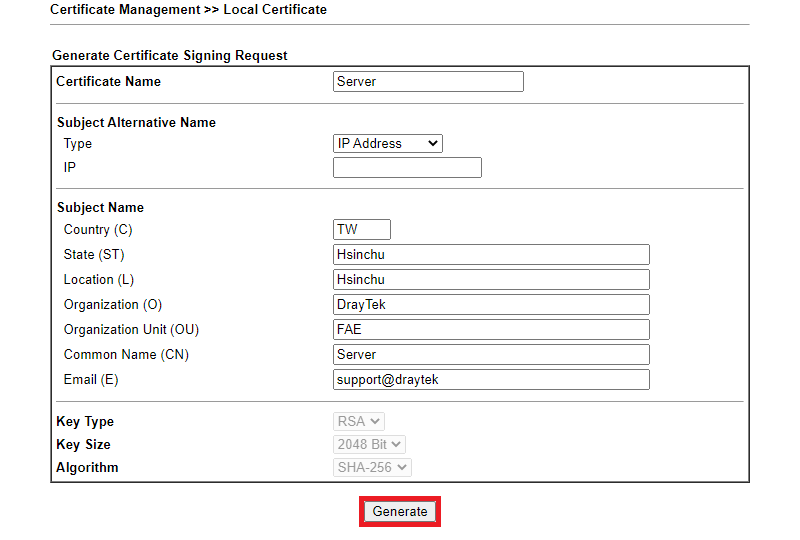
Again, enter the identity of your organization for subjects, and click Generate.
-
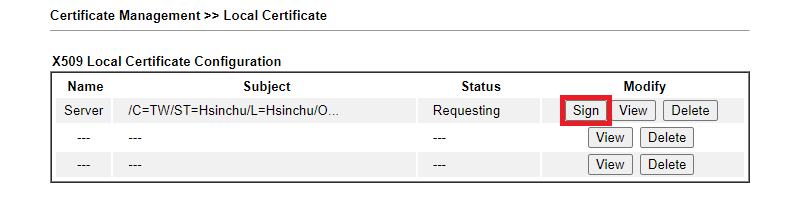
There will be a new local certificate request on the list with status Requesting. Click Sign to
sign the local certificate.
-
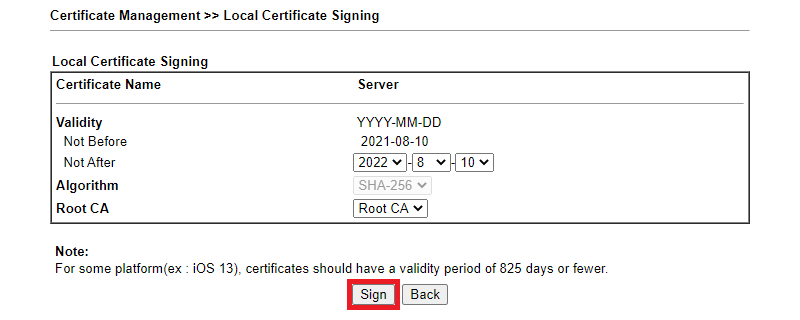
Set the date of Validity, and click Sign.
-
The local certificate status will change to "OK".
Replace the Default Certificate
-
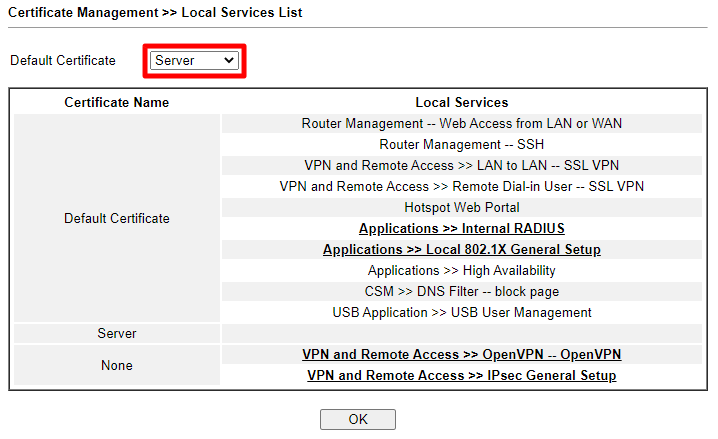
Go to Certificate Management >> Local Services List, and select the new certificate created in
step 6 for Default Certificate.
-
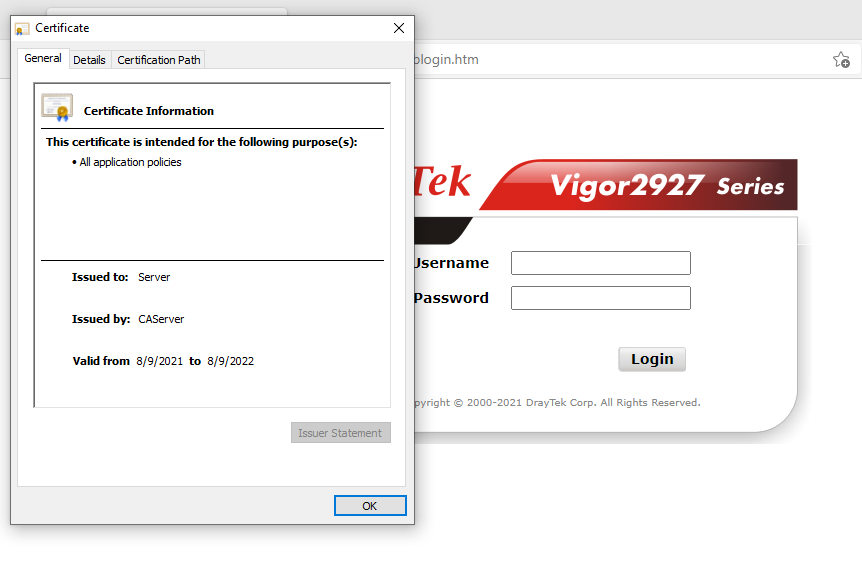
From the browser, we should see the certificate has changed to the one we set. Now the router is using a
customized self-signed certificate.
Import Root CA on the PC
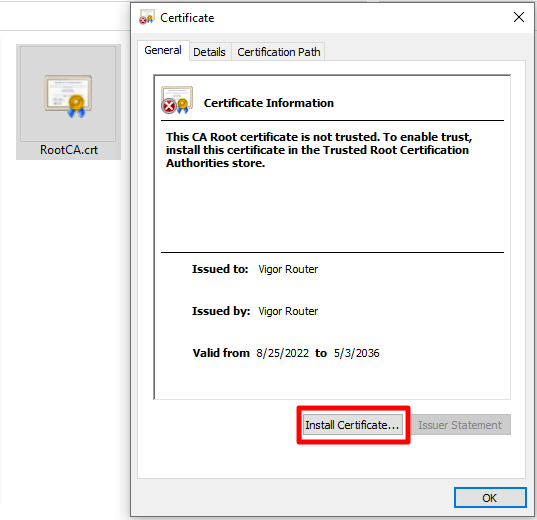
If the VPN Client requires server certificate authentication, please remember to import the router's Root CA on the PC.
- Go to Certificate Management >> Trusted CA Certificate. Export the certificate.

- Open this certificate and install it on the PC.
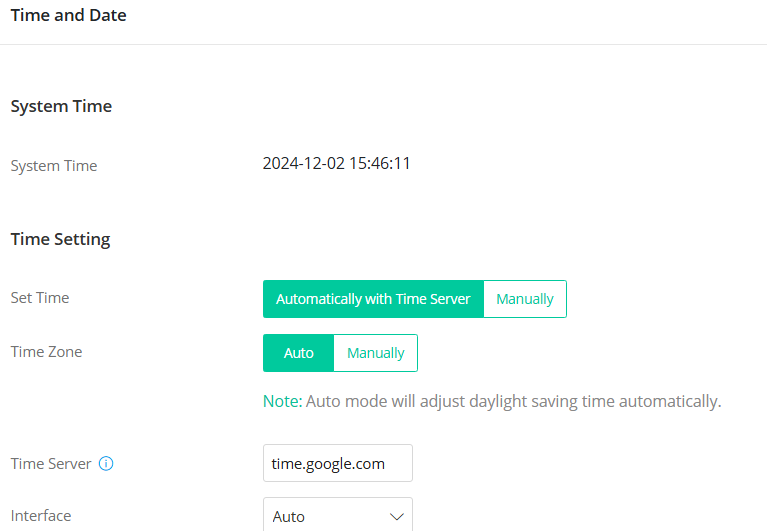
1. Check System Time
Ensure the router's system time is accurate by navigating to System Maintenance / Device Settings.
2. Create a Root CA


3. Generate a Local Certificate


4. Sign the Certificate


5. Verify Certificate Status

6. Use the Self-Signed Certificate


7. Export the Router's Root CA then import to the client computer.
7-1. Export the Router's Root CA
7-2.Import the Root CA to the Client Computer
Windows:
macOS:
8. Verify Trust
Published On:2015-12-07
ShareWas this helpful?