
Access a Vigor130 in Bridge Mode
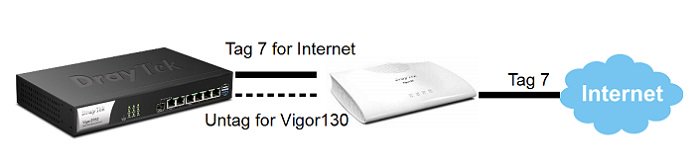
This article describes how to access the management page of a Vigor130 operates in bridge mode. When in bridge mode, a Vigor130 cannot be accessed directly since it acts as a modem; however, if the Internet service is using VLAN tag, we can create a un-tagged virtual WAN interface linked to the LAN of Vigor130 on the Vigor Router and access the management page of Vigor130 from the virtual WAN. The article covers the configuration of Vigor130 and the router.
The Configuration of Vigor130
1. Go to Internet Access >> General Setup, enable VLAN Tag Insertion but leave Tag Value as "0".

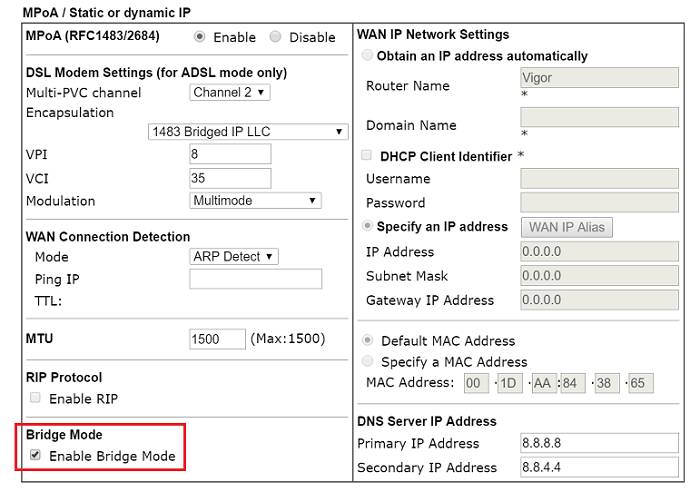
2. Go to Internet Access >> MPoA / Static or dynamic IP, enable Bridge mode.
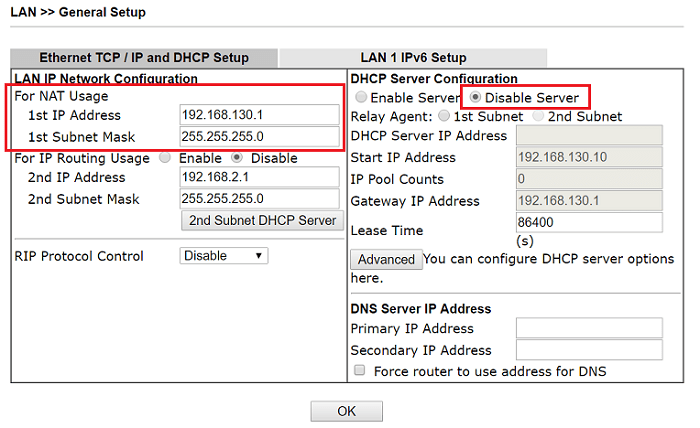
3. Go to LAN >> General Setup,
- Change the 1st IP Address to an IP in a range different from that of the WAN network
- Disable DHCP Server
The Configuration of the Router
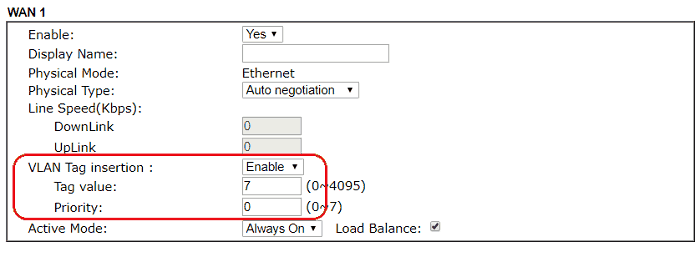
1. Go to WAN >> General Setup,
- Enable VLAN Tag Insertion
- Enter the Tag Value ISP requires, which is "7" in this example.
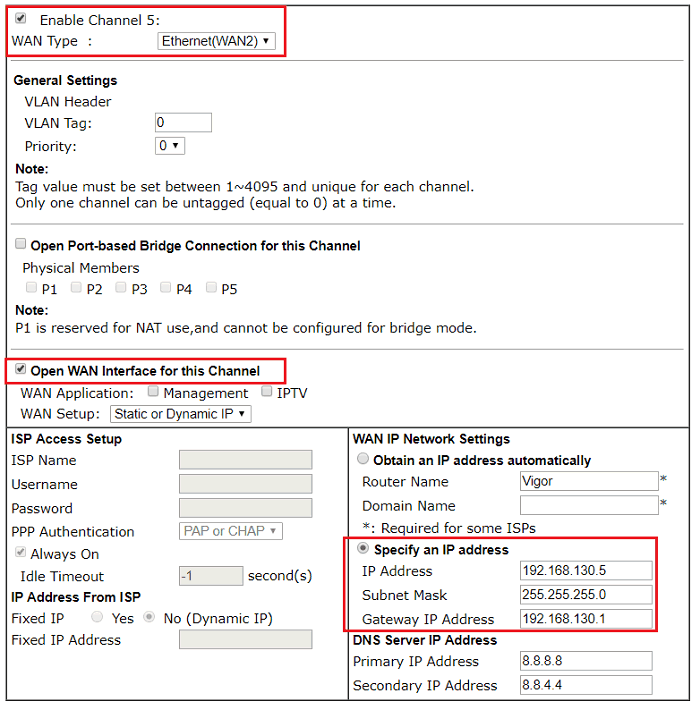
2. Go to WAN >> Multi-PVC/VLAN and click Channel 5
- Check Enable
- Select WAN Type (port) as the interface connecting to the Vigor130
- Check Open WAN Interface for this Channel
- At WAN IP Network Settings, select Specify an IP address, enter an IP Address in the same IP subnet as Vigor130, and enter the LAN IP of Vigor130 for Gateway IP Address.
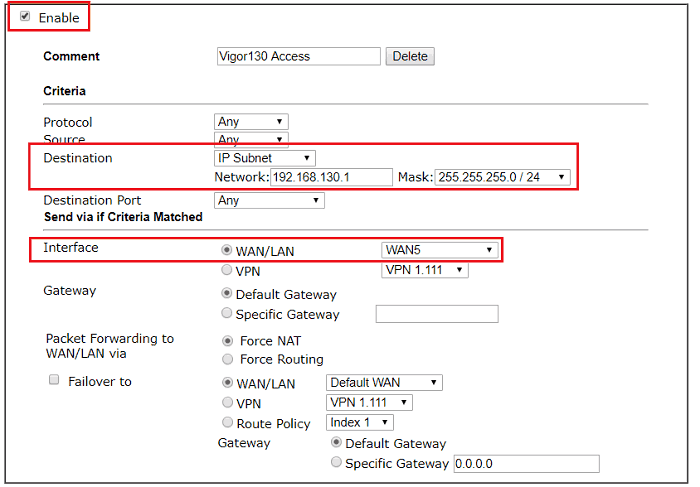
3. Go to Routing >> Load-Balance/Route Policy to add a routing policy as follows:
- Enable the policy
- Enter the LAN subnet of Vigor130 at Destination >> Dest IP range
- Select "WAN5" for Interface
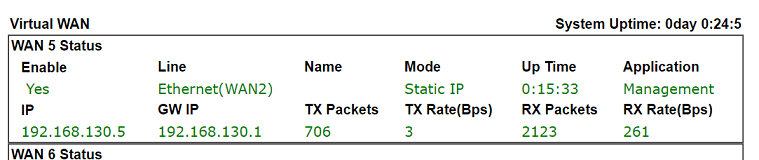
4. Go to Online Status >> Virtual WAN to make sure WAN5 is up.
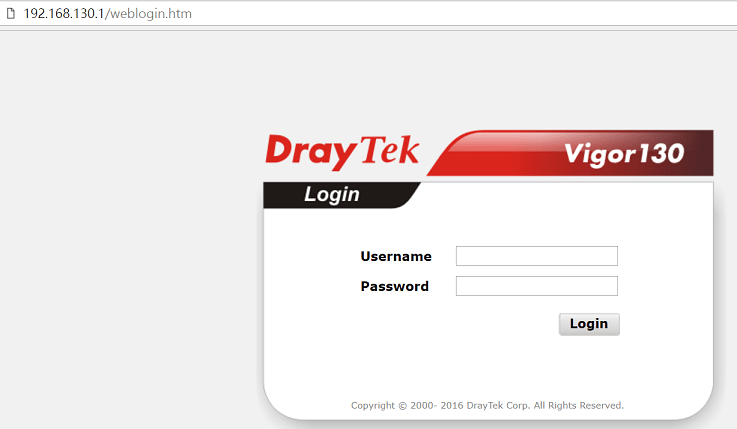
5. Now, LAN clients of Vigor router can access the Vigor130 on its LAN IP 192.168.130.1
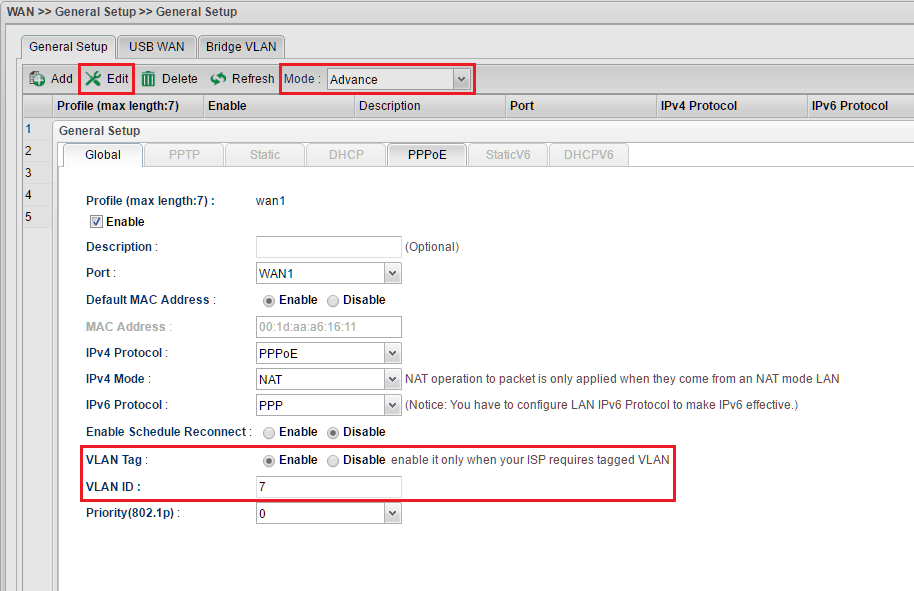
1. Go to WAN >> General Setup and change Mode from Basic to "Advance", the edit the WAN interface connecting to the Vigor130: select "Enable" for VLAN Tag, and enter the VLAN ID ISP requires.
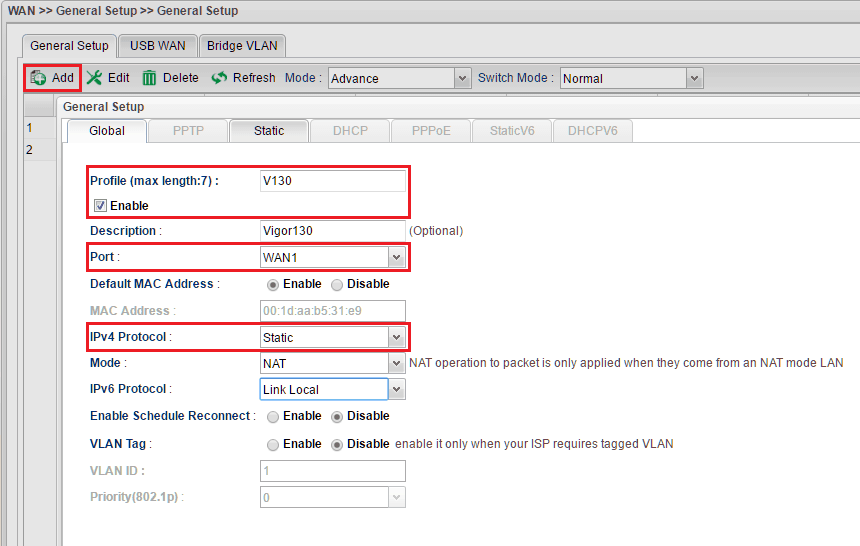
2. Click Add to create another WAN profile:
- Check Enable
- Select the WAN Port connects to Vigor130 for Port
- Select Static for IPv4 protocol
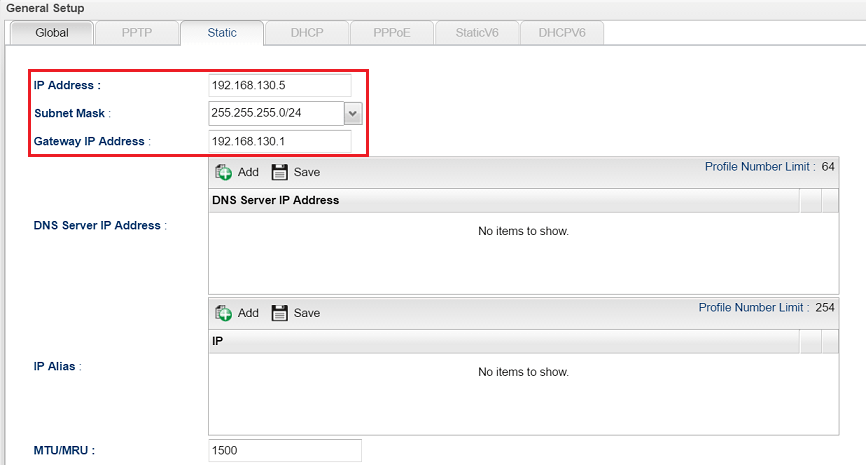
3. Go to Static tab, enter an IP Address in the same subnet as Vigor130, and enter the LAN IP of Vigor130 for Gateway IP Address.
4. Go to Dashboard to make sure the new WAN profile is up.

5. Now, LAN client of the router can access Vigor130 on its LAN IP 192.168.130.1 .
Published On: Mar 28, 2017
ShareWas this helpful?