
Set Up Multi-PVC and Bridge to a LAN Port
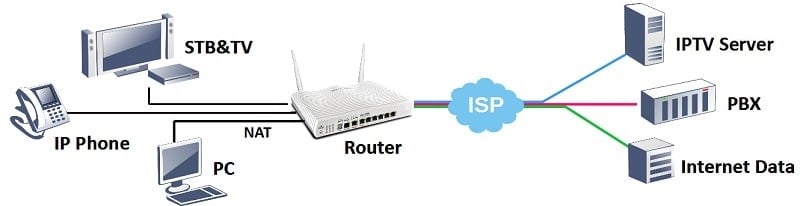
This document demonstrates how to configure the Multi-PVC/VLAN on Vigor Router for the triple-play services, in a way that the set-top box (STB) on a specific LAN port can communicate directly to the service provider.
1. Go to WAN >> Multi-PVC/VLAN, click on a channel to configure.
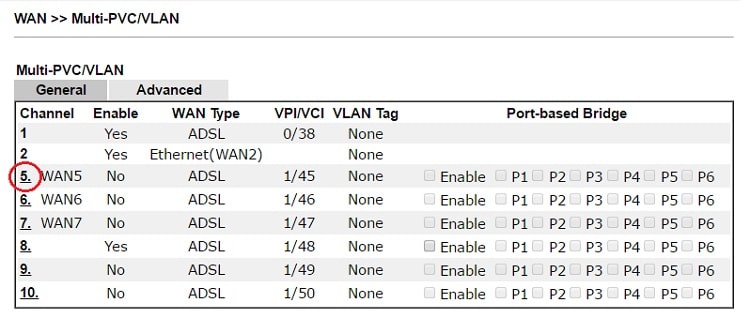
2. Configure the channel as follows,
- Enable the channel.
- Set WAN Type to the WAN interface where the service provider is on.
- If it is an ADSL line, set up VPI and VCI as the service provider requires.
- Enable Add VLAN Header and enter the VLAN Tag and Priority as the service provider requires.
- Check Enable for Bridge Mode, and select the physical port member to which the STB is going to connect.
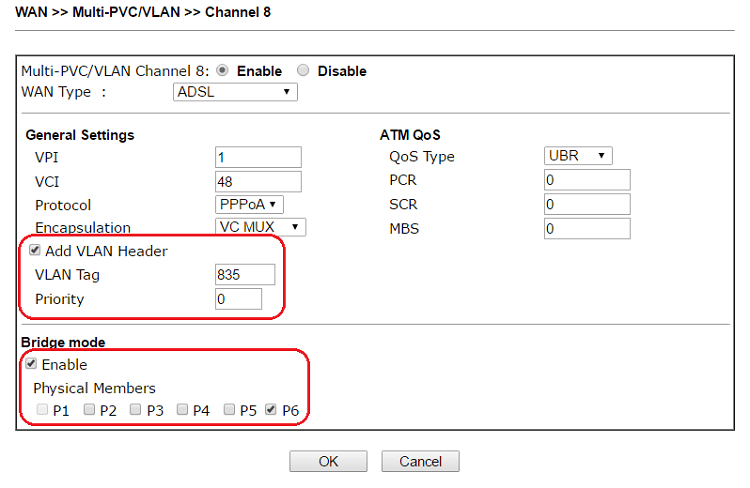
3. Click OK to save the configuration. Now you may connect the STB to the Bridged port for IPTV service.
To create a Virtual WAN, follow these steps:

After configuring, check the status to confirm online status when the physical port is connected. Connect the STB to the bridged port (LAN port 3) to access the IPTV service.

1. Go to WAN >> General Setup >> General Setup to change Mode from Basic to "Advance".
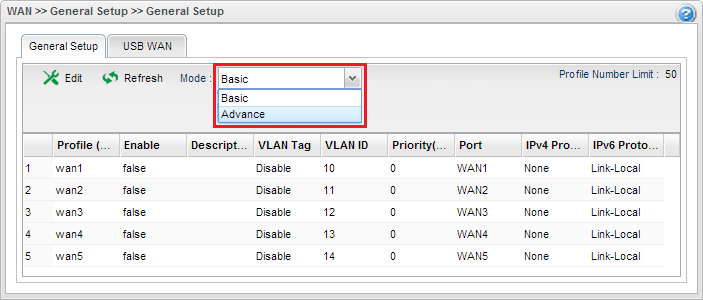
2. Click OK to apply and re-login to the management page.
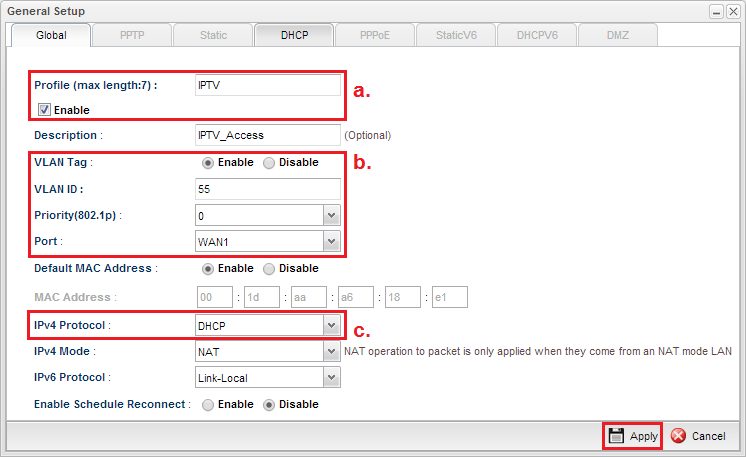
3. At WAN >> General Setup >> General Setup, click Add to create a new WAN Profile for IPTV Service.
- Enter Profile name "IPTV" and check Enable
- Set VLAN Tag to "Enable", enter the VLAN ID ISP requires, (here we use 55) and set Port to the WAN interface where the service provider is on.
- Set IPv4 Protocol to DHCP (or what ISP requires)
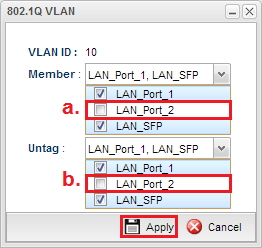
4. Go to LAN >> Switch >> 802.1Q VLAN, and click Edit for the default VLAN (VLAN 10):
- Remove LAN_Port2 from Member
- Remove LAN_Port2 from Untag
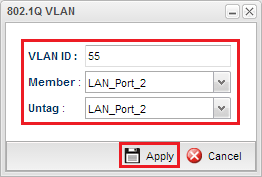
5. At LAN >> Swtich >> 802.1Q VLAN, add a new VLAN for VLAN ID 55:
- Enter VLAN ID
- Add LAN_Port2 for Member (Note: Only LAN_Port2 can be used for WAN bridge.)
- Add LAN_Port2 for Untag Member, or skip this step if the STB requires VLAN tag.
6. Go to WAN >> General Setup >> Bridge VLAN, and click Add create a new profile.
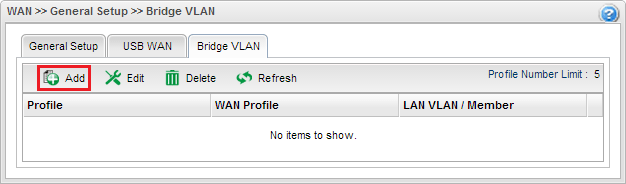
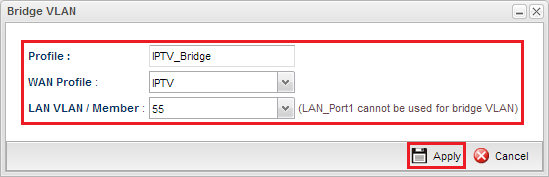
7. Enter a Profile name, select the WAN Profile created in step 3 and select the profile created in step 5 for LAN VLAN/Member.
8. After finishing settings, go to Online Status to check the WAN connection.

Published On:2016-07-29
ShareWas this helpful?