
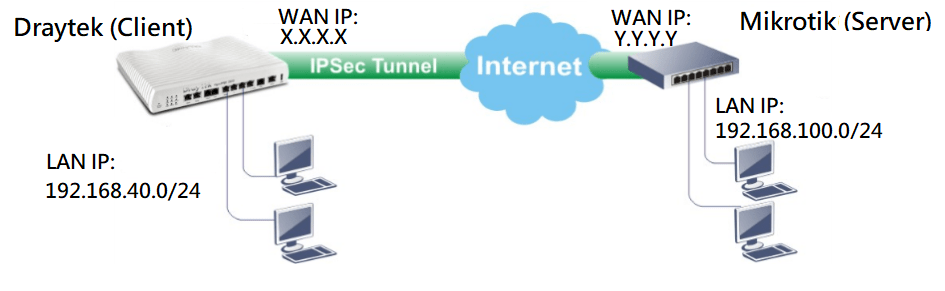
IPsec VPN between Mikrotik(RouterOS v6.47) and Vigor Router
This article demonstrates how to set up an IPsec LAN-to-LAN between a Mikrotik Router (RouterOS v6.47) and a DrayTek Vigor Router.
Before setup the IPsec VPN:
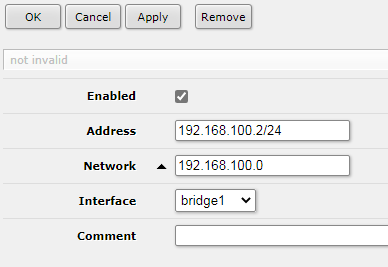
On Mikrotik Router, Go to IP >> Address, Set up and check the LAN IP.
Mikrotik Router Configuration
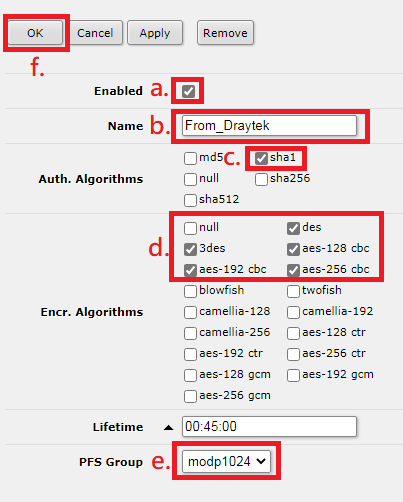
1. Go to IP >> IPsec >> Proposals
- Click Enabled
- Enter Profile Name
- Select sha1 for Auth. Algorithms
- Select des, 3des, aes-128 cbc, aes-192 cbc, aes-256 cbc for Encr. Algorithms
- Select modp 1024 for PFS Group
- Click OK
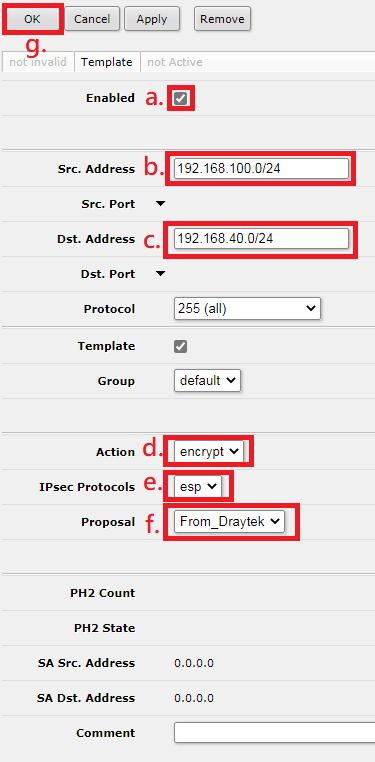
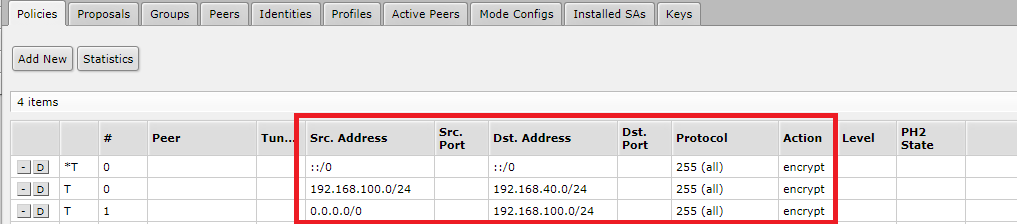
2. Go to IP >> IPsec >> Policies
- Create a file and click Enabled
- Enter the Mikrotik Router LAN Network for Src. Address
- Enter the DrayTek Router LAN Network for Dst. Address
- Select encrypt for Action
- Select esp for IPsec Protocols
- Select the proposal you just set up at the Step 1
- Click OK
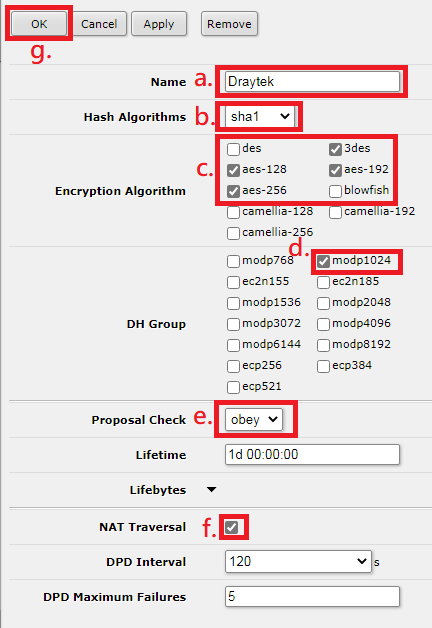
3. Go to IP >> IPsec >> Profiles
- Enter the profile name
- Select sha1 for Hash Algorithm
- Select 3des, aes-128, aes-192, aes-256 for Encryption Algorithm
- Select modp1024 for DH Group
- Select obey for Proposal Check
- Enable NAT Traversal
- Click OK
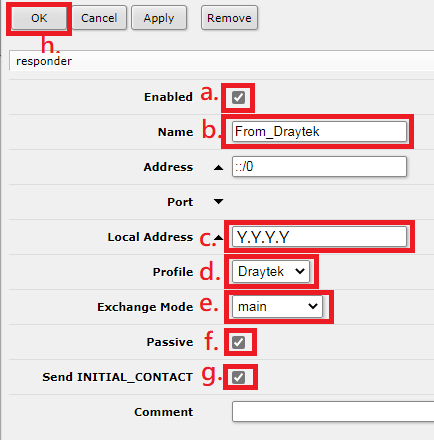
4. Go to IP >> IPsec >> Peers
- Click Enabled
- Enter your profile Name
- Enter Mikrotik Router WAN IP for Local Address
- Select the Profile you set up at Step 3
- Select main for Exchange Mode
- Enable Passive
- Enable SEND INITIAL_CONTACT
- Click OK
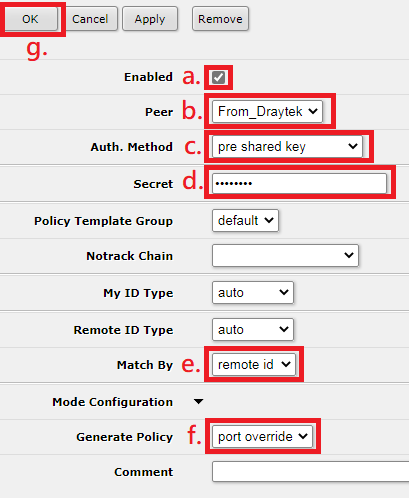
5. Go to IP >> IPsec >> Identities
- Click Enabled
- Select the Peer you set up at Step 4
- Select pre shared key for Auth. Method
- Enter your password of pre-shared key for Secret
- Select remote id for Match By
- Select port override for Generate Policy
- Click OK
6. Go to IP >> Firewall >> Filter Rules
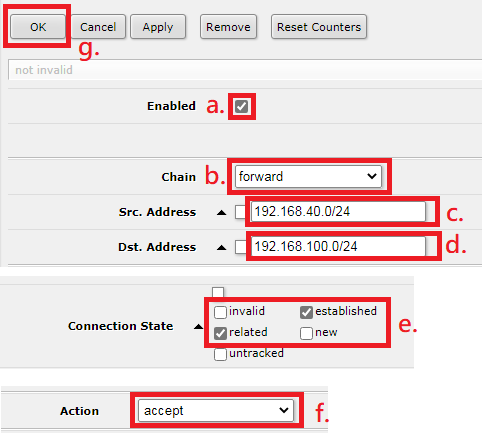
Rule 1:
- Click Enabled
- Select forward
- Enter Draytek Router LAN Network for Src. Address
- Enter Mikrotik Router LAN Network for Dst. Address
- Select established, related for Connection State
- Select accept for Action
- Click OK
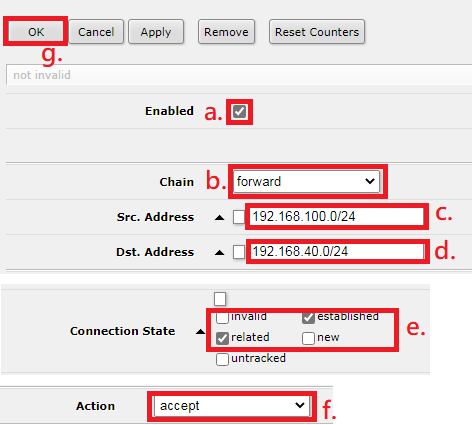
Rule 2:
- Click Enabled
- Select forward
- Enter Mikrotik Router LAN Network for Src. Address
- Enter Draytek Router LAN Network for Dst. Address
- Select established, related for Connection State
- Select accept for Action
- Click OK
Draytek Router Configuration
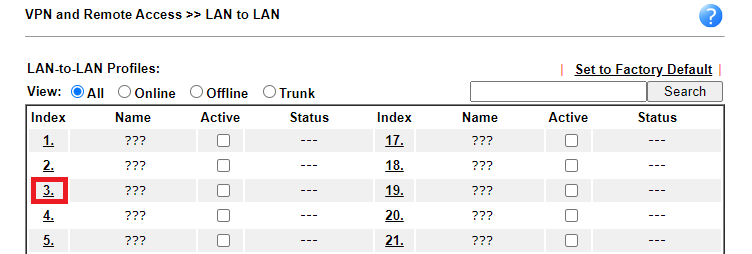
1. Go to VPN and Remote Access >> LAN to LAN, and select any available Index.
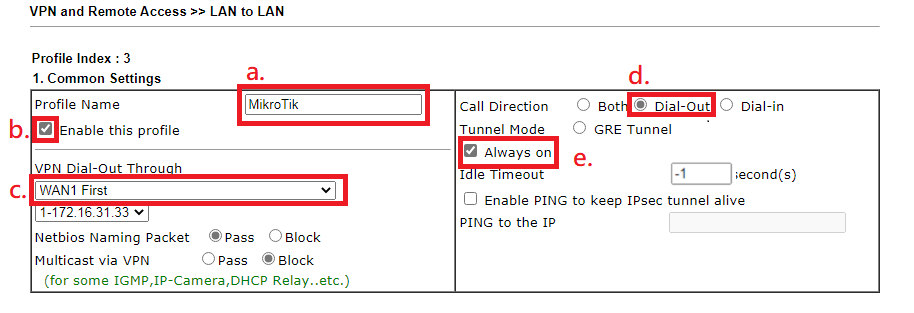
2. In profile Index,
Common Settings
- Enter your profile Name
- Enable this profile
- Select your WAN interface to dial out VPN
- Select Dial-out
- (optional) Enable Always on
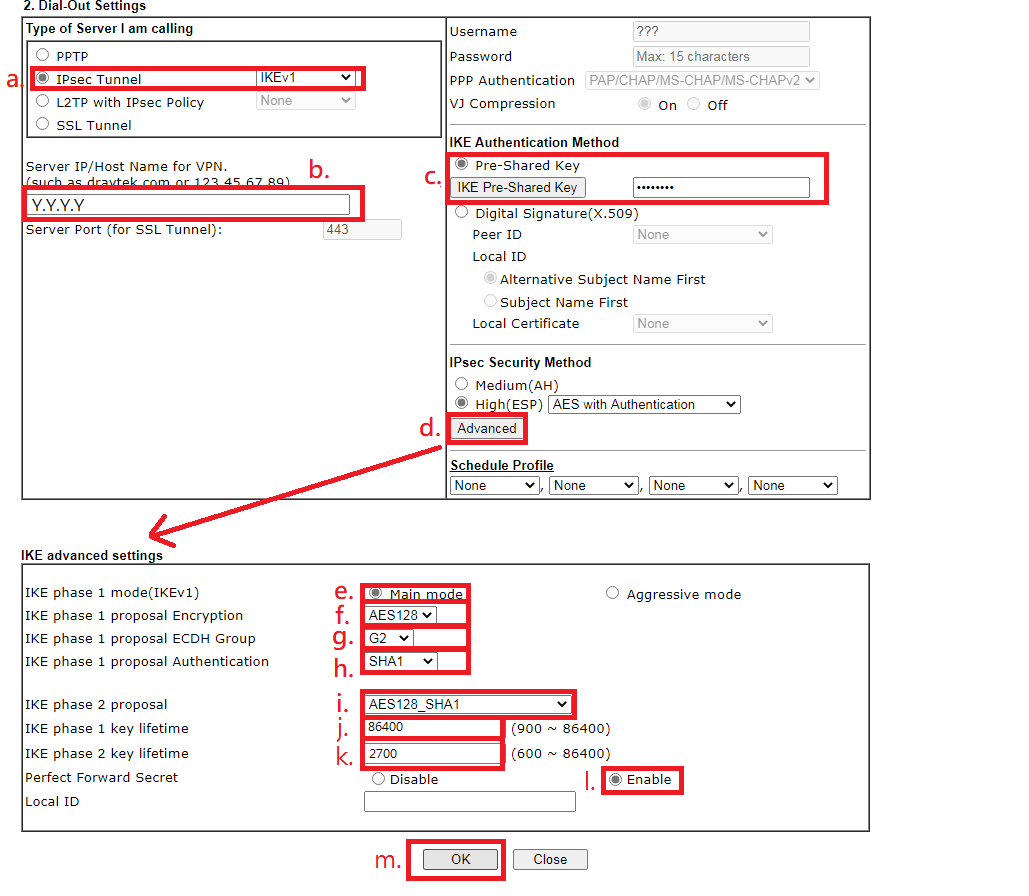
Dial-Out Settings
- Select IPsec Tunnel and IKEv1
- Enter the Mikrotik Router WAN IP or Host Name for Server IP
- Enter the pre-shared key you set on Mikrotik Router.
- Click Advanced
- Select Main mode
- Select AES128 for phase 1 proposal Encryption
- Select G2 for phase 1 proposal ECDH Group
- Select SHA1 for phase 1 proposal Authentication
- Select AES128_SHA1 for phase 2 proposal
- Set 86400 seconds as phase 1 key lifetime (due to Mikrotik site set it as 1 day)
- Set 2700 seconds as phase 2 key lifetime (due to Mikrotik site set it as 45 minutes)
- Enable Perfect Forward Secret
- Click OK
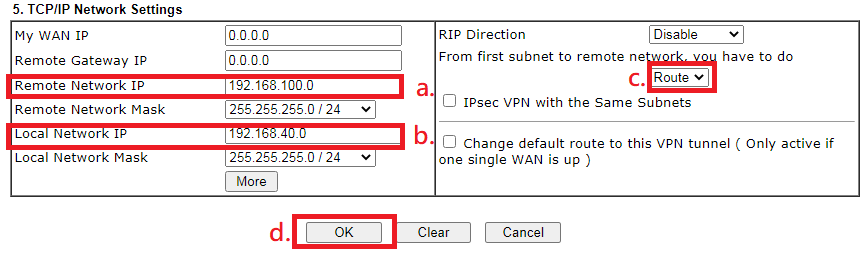
TCP/IP Network Settings
- Enter the Mikrotik Router LAN Network for Remote Network IP
- Enter the Draytek Router LAN Network for Remote Network IP
- Select Route
- Click OK
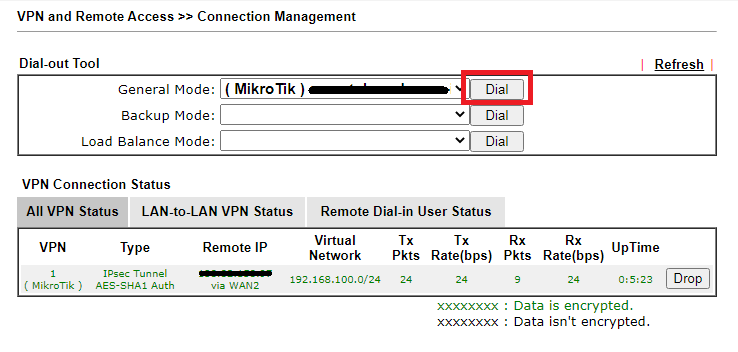
3. Click Dial and the VPN will be connected.
Published On:2020-07-29
ShareWas this helpful?