
IPsec XAuth from macOS to Vigor Router
IPsec is very secure and delivers great performance, and since 2018, Vigor Router also provides IPsec Xauth. If you are not comfortable with every VPN client using the same pre-shared key, you can use IPsec Xauth instead. IPsec Xauth authenticates the VPN clients not only by a pre-shared key but also a unique username and password. This article demonstrates how to set up Vigor Router as a VPN server for IPsec Xauth clients, and the configuration required on macOS to establish the VPN
Setup on Vigor Router
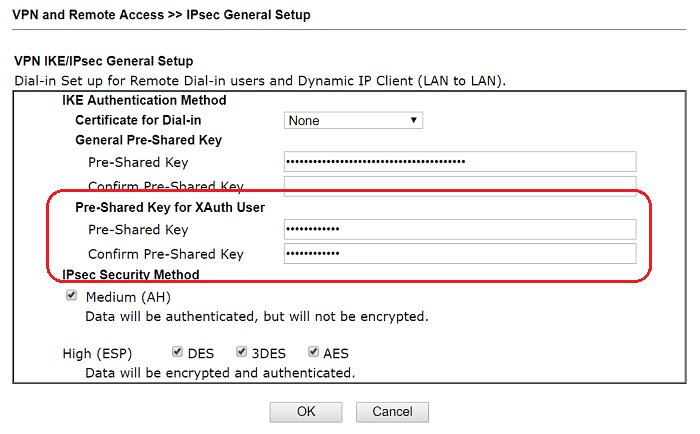
1. Go to VPN and Remote Access >> IPsec General Setup, and enter Pre-Shared Key for XAuth User.
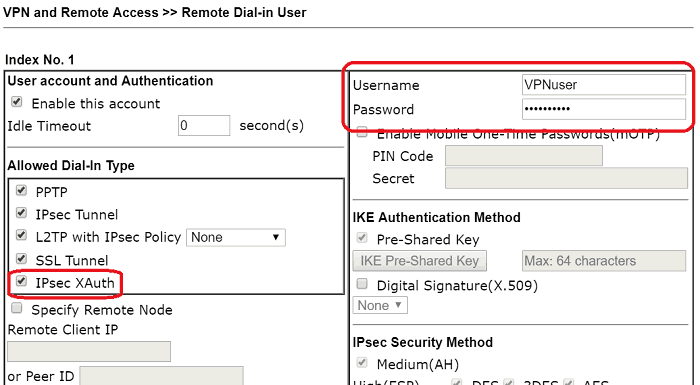
2. Go to VPN and Remote Access >> Remote Dial-in User, and click on an available index:
- Check Enable this account
- Give Username and Password
- Make sure IPsec Xauth is checked at Allow Dial-In Type
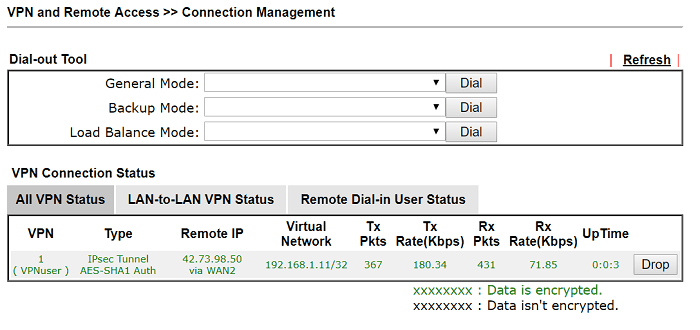
3. You may check if the client is online from VPN and Remote Access >> Connection Management page.
- Go to VPN / General Setup / IPsec page to enable IPsec service as follows:
- Enable IPsec service.
- Enter an XAuth User Pre-Shared Key.
- Click Apply to save the profile.
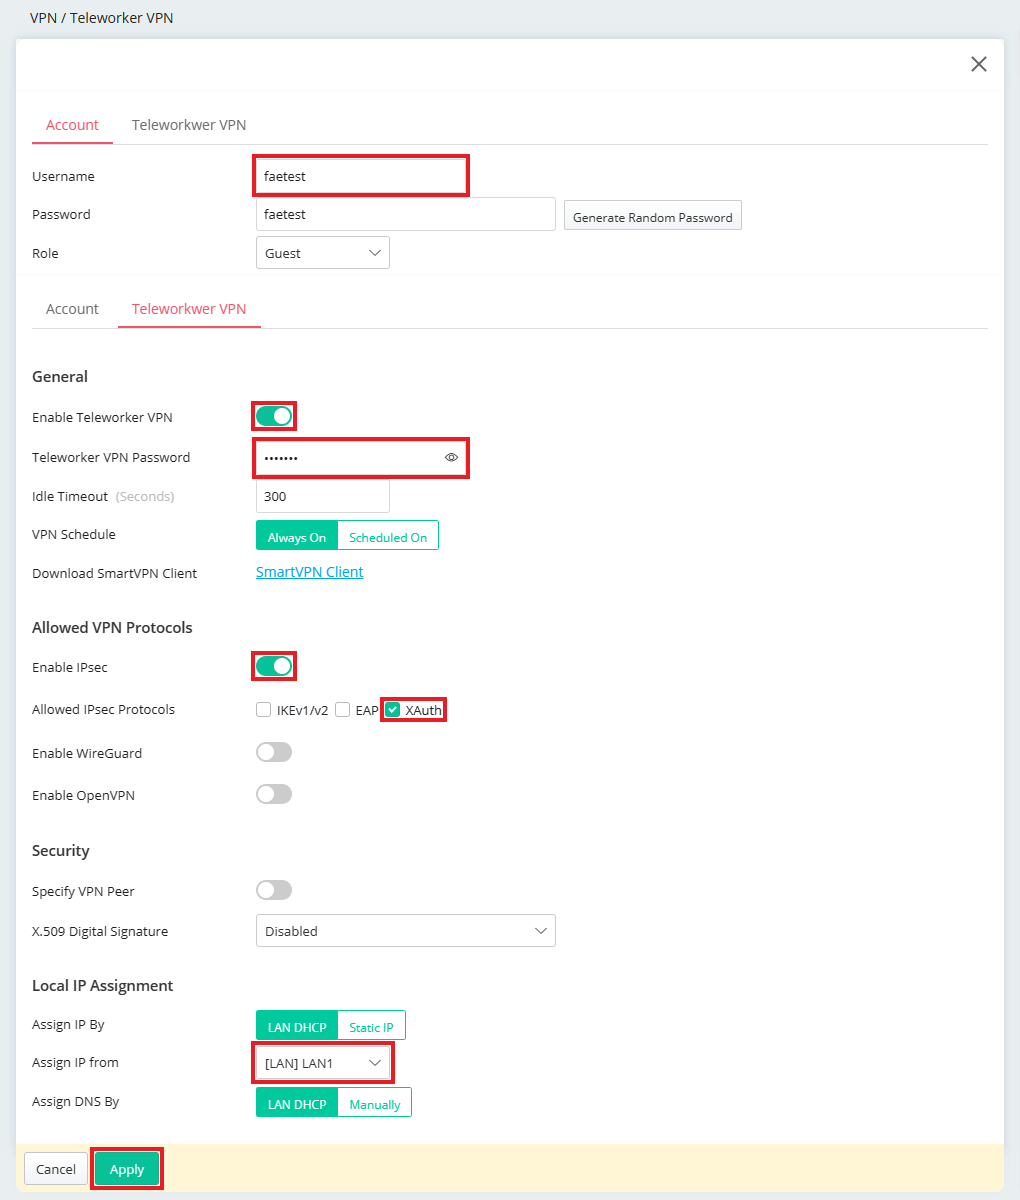
- Go to VPN / Teleworker VPN to create Teleworker VPN profile as follows:
- Enter Username in Account tab.
- Go to Teleworker VPN tab and select Enable.
- Enter Teleworker VPN Password.
- Enable IPsec in Allowed VPN Protocols and select XAuth in Allowed IPsec Protocols.
- Select the LAN subnet assigned to the user.
- Click Apply to save the profile.

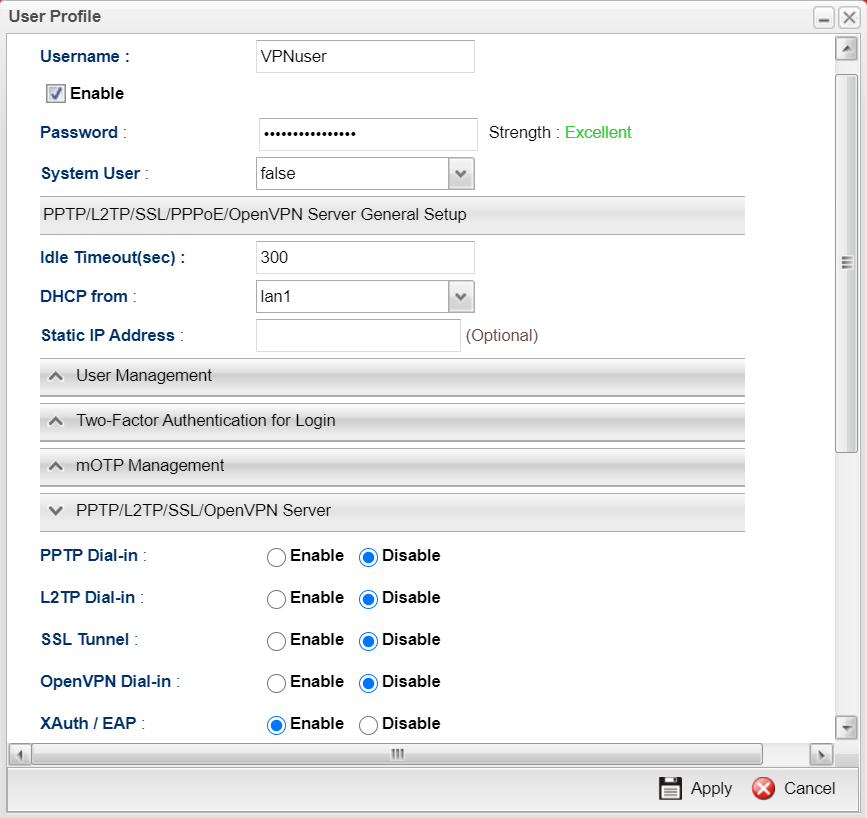
1. Go to User Management >> User Profile and click Add,
- Enter Username and Password
- Check Enable
- Select "Enable" for Xauth/EAP at PPTP/L2TP/SSL/OpenVPN server.
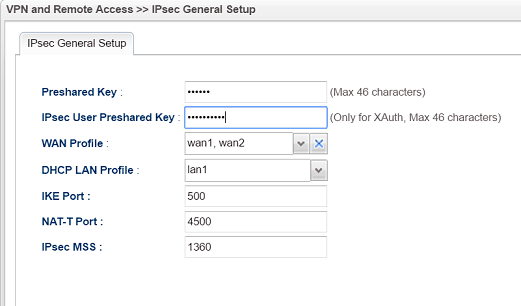
2. Go to VPN and Remote Access >> IPsec General Setup, Enter IPsec User Preshared Key. Then click Apply.
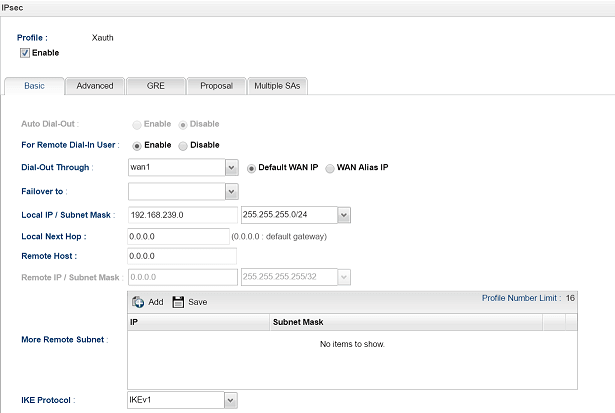
3. Go to VPN and Remote Access >> VPN Profile and add a profile as follows:
- Give a Profile name
- Check Enable
- Select "Enable" For Remote Dial-In User
- Enter the LAN IP of the router at Local IP / Subnet Mask
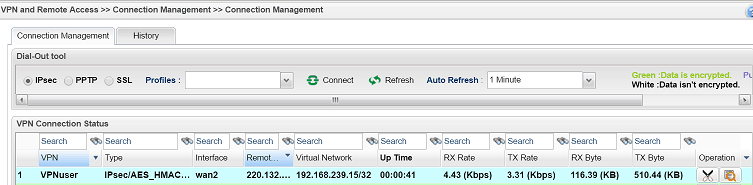
4. You may check if the client is online from Remote Access >> Connection Management page.
VPN Setup on macOS
1. Go to System Preferences >> Network and click '+',
- Select "VPN" for Interface
- Select "Cisco IPsec" for VPN Type
- Give a Service Name
- Click Create

2. Enter the router's domain or WAN IP for Server Address, and enter the Account Name and Password.
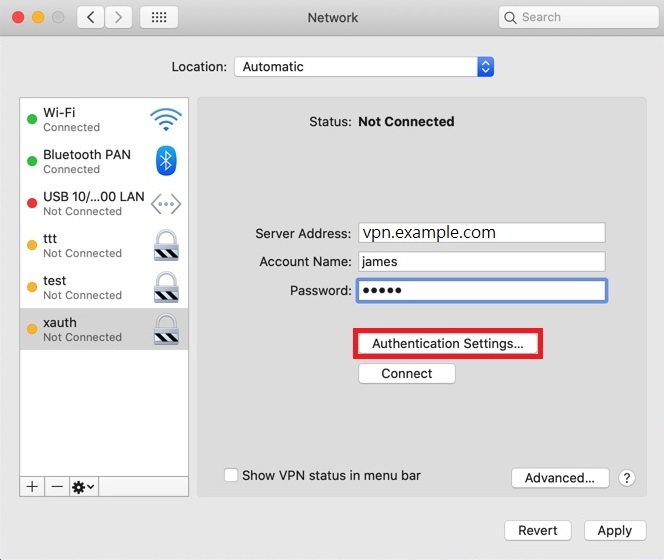
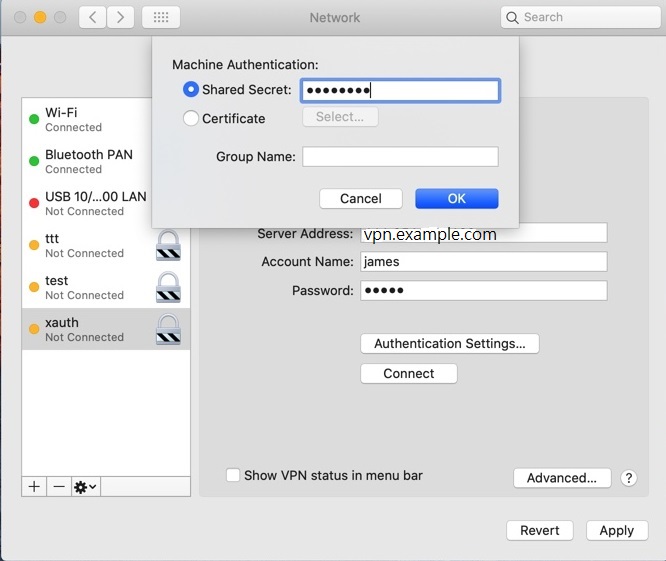
3. Click Authentication Settings and enter the Pre-shared Key for XAuth in Shared Secret. Then, click OK.
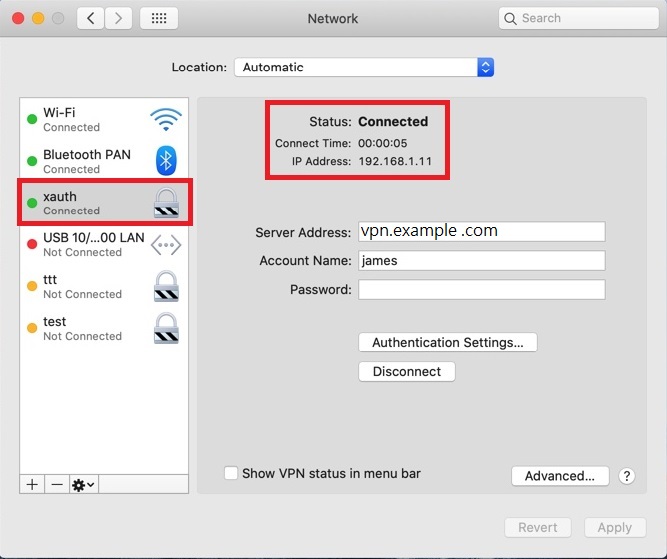
4. Click Connect to start the VPN connection.
VPN Setup on macOS by SmartVPN
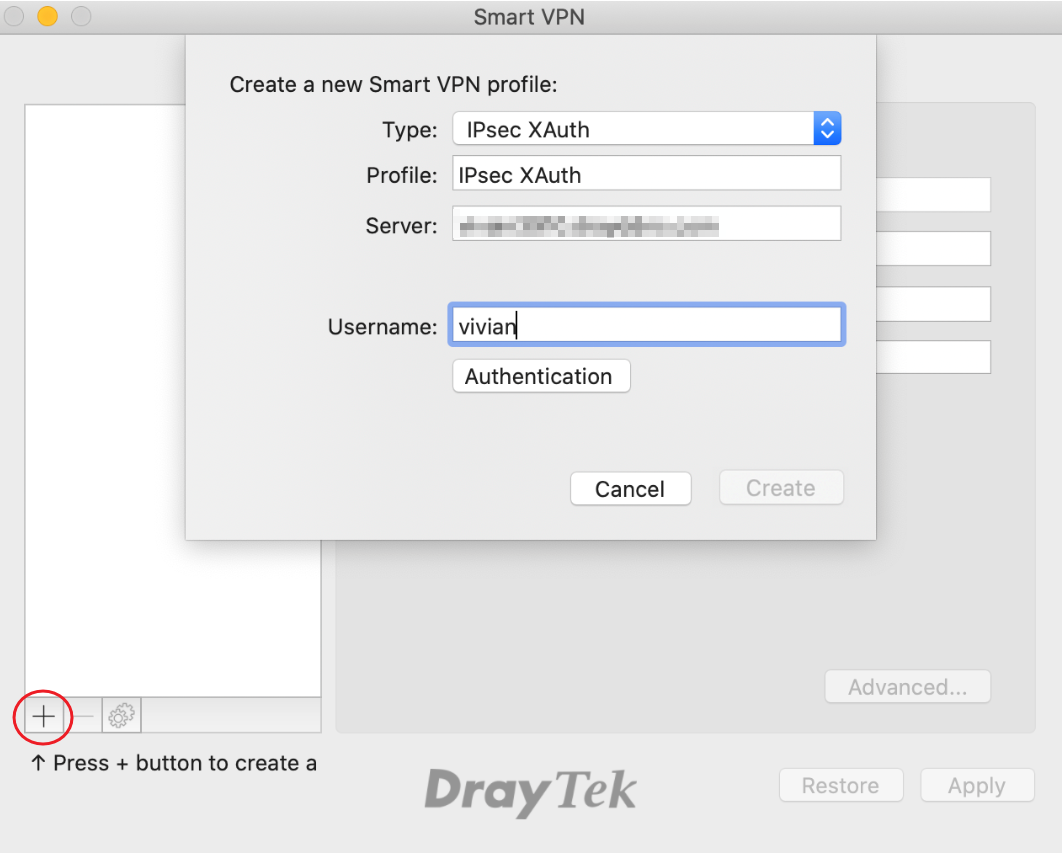
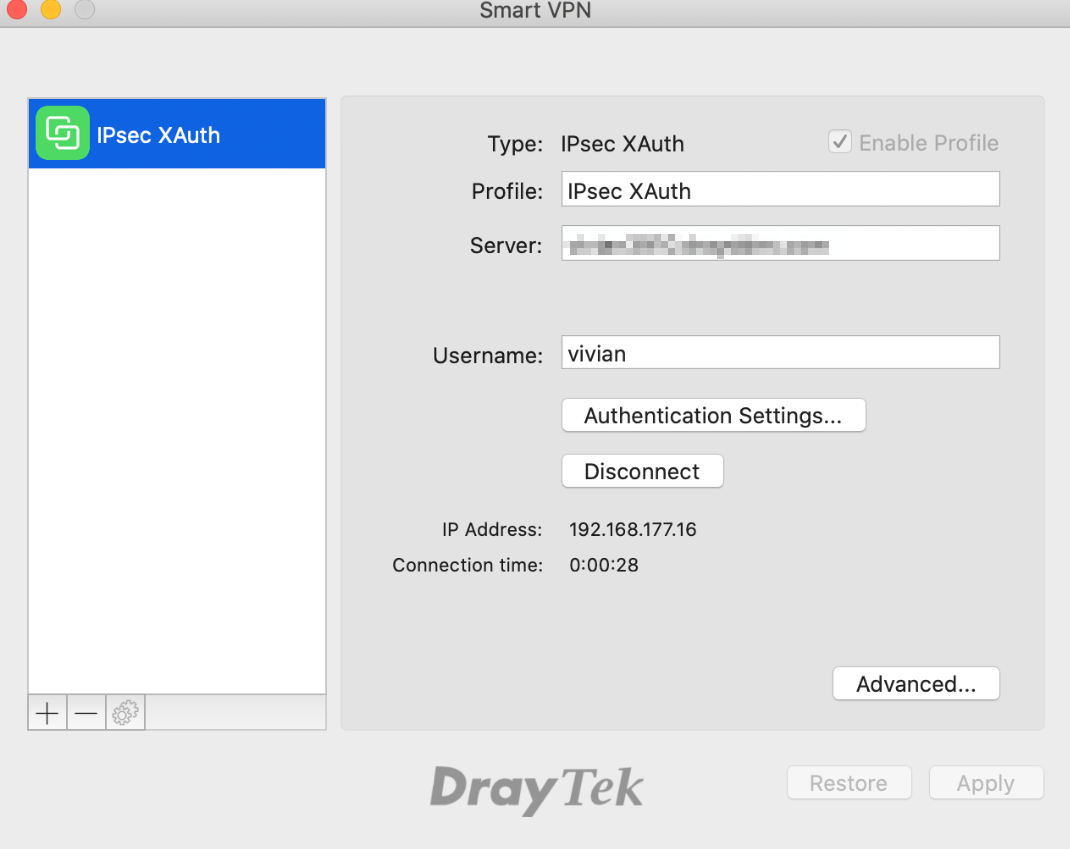
1. Run SmartVPN app. Click + to create a new SmartVPN profile.
- Select IPsec XAuth for Type
- Give a profile name
- Enter the VPN server's IP or Domain name in the Server field
- Enter the Username
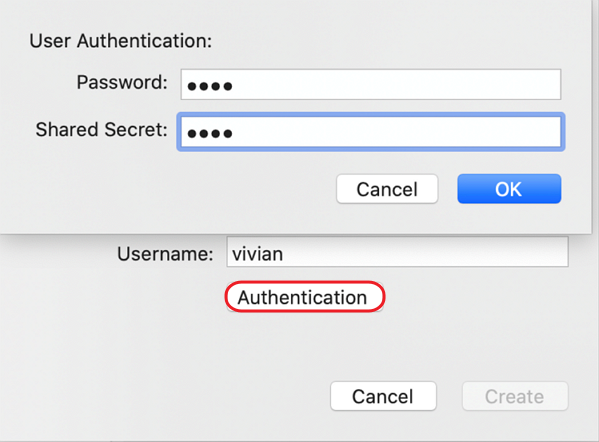
- Click Authentication
2. Enter the Password and the Shared Secret, then click OK
3. Click Connect to dial up the VPN connection

4. When VPN is up, we will see the Connection Icon becomes green, the VPN IP address and the VPN Connection time info.
Published On: Jul 04, 2018
ShareWas this helpful?