
How to fix the SSL VPN connection error after upgrading to iOS 13 and macOS 10.15
Apple has changed their certificate security requirements, and it affects the SmartVPN app on iOS13 and macOS 10.15 to create a connection if the Vigor VPN servers are using Self-Signed Certificate. To meet the new security policy of Apple, we have two solutions: 1. For better security level, we recommend applying a DrayDDNS domain and sign it with Let's encrypt or import a local CA which is signed by a Certification Authority. 2. Using the following firmware version and regenerate the new Self-Signed Certificate
To meet the new security policy of Apple, we have two solutions:
1. For a better security level, we recommend applying for a DrayDDNS domain and sign it with Let's Encrypt or import a local CA signed by a Certification Authority.
After that, selecting the CA on SSL VPN >> General Setup.
For more configuration information, please refer to this article, Use Let's Encrypt Certificate for your DDNS Domain
2. Using the following firmware version and regenerate the new Self-Signed Certificate
3.8.9.6 for Vigor2860/Vigor2925; 3.9.1.2 for Vigor 2952/ Vigor3220; 3.9.1.3 for Vigor 2926/ Vigor2862
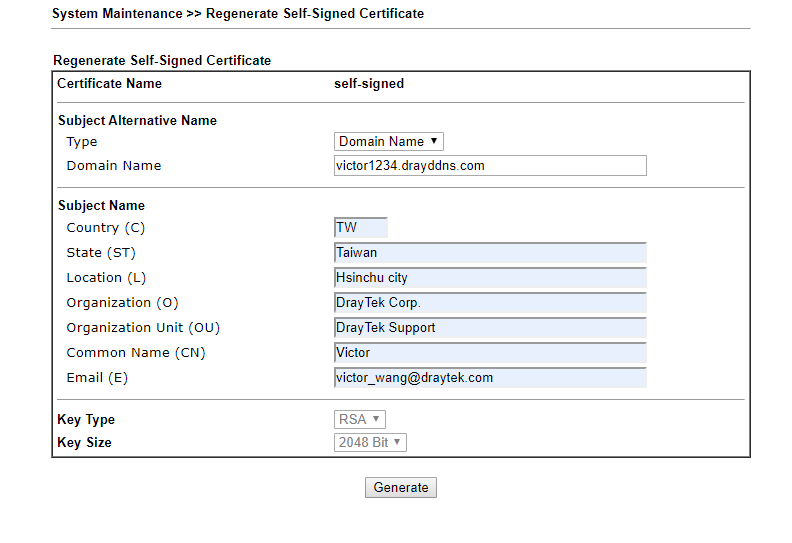
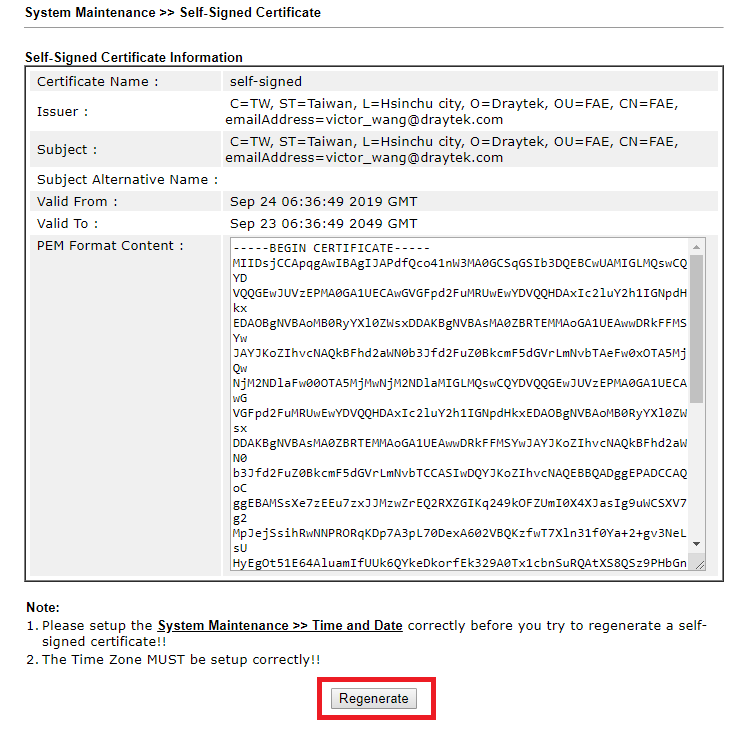
Please follow these steps to regenerate self-signed certificate
- Navigate to System Maintenance >> Self-Signed Certificate (2860/2925) or Certificate Management >> Self-Signed Certificate
- Click Regenerate
- Put the information, then click generate.
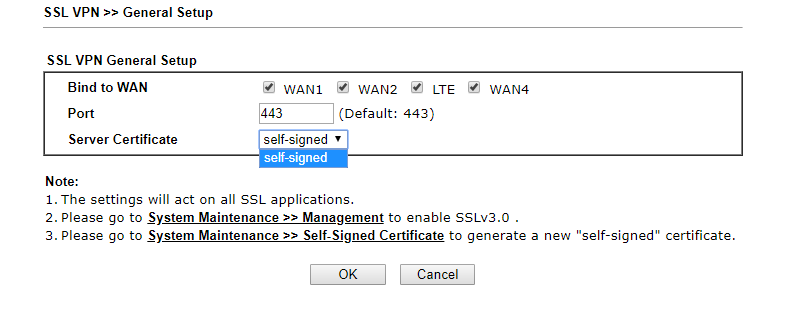
- Make sure your SSL VPN is choosing Self-Signed Certificate.
To meet the new security policy of Apple, we have two solutions:
1. For a better security level, we recommend applying for a DrayDDNS domain and sign it with Let's Encrypt or import a local CA signed by a Certification Authority.
After that, selecting the CA on SSL VPN >> General Setup.
For more configuration information, please refer to this article, Use Let's Encrypt Certificate for your DDNS Domain
Please follow these steps to regenerate self-signed certificate
- Navigate to System Maintenance >> Time and Date to make sure the router's time settings are correct, and it's better to match the client's time zone. Because when authenticating the server's identity, the client will check if the current time and date are within the server certificate’s validity period.

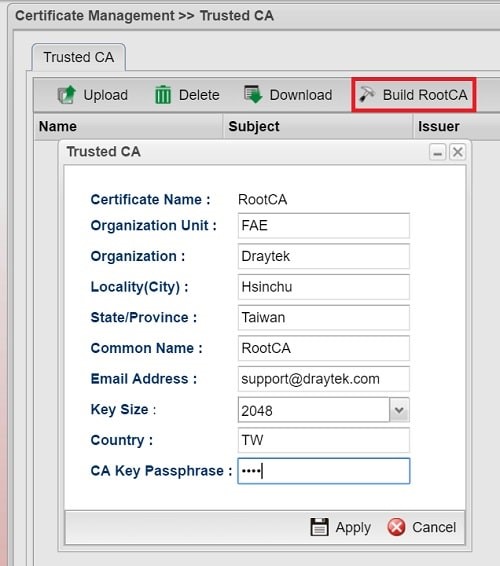
- Navigate to Certificate Management >> Trusted CA, click Build Root CA, fill out all of the information , select Key Size as 2048 and apply the settings
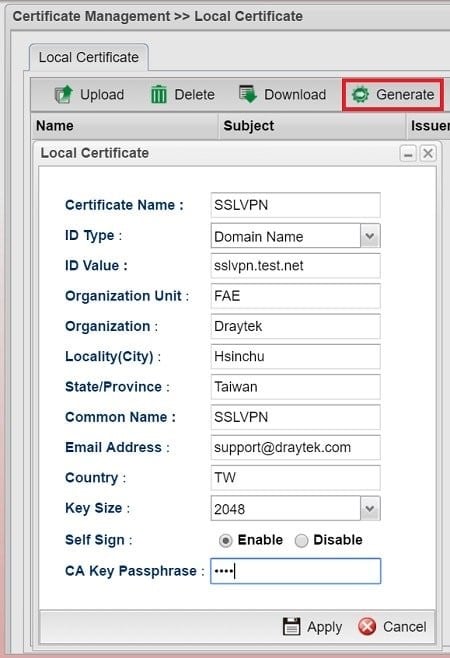
- Go to Certificate Management >> Local Certificate, then click generate a.Select ID Type as either Domain Name or IP address, depends on which one will the VPN client used for connecting to the server.b.Type ID Value as the domain name or IP address of the router. It should be the IP address or domain name which VPN clients use for their Server settings.c.Fill out all the information d.Select "Enable" for Self Signe.Enter CA Key Passphrase to match the CA Key Passphrase of Root CAf.Click Apply to finish
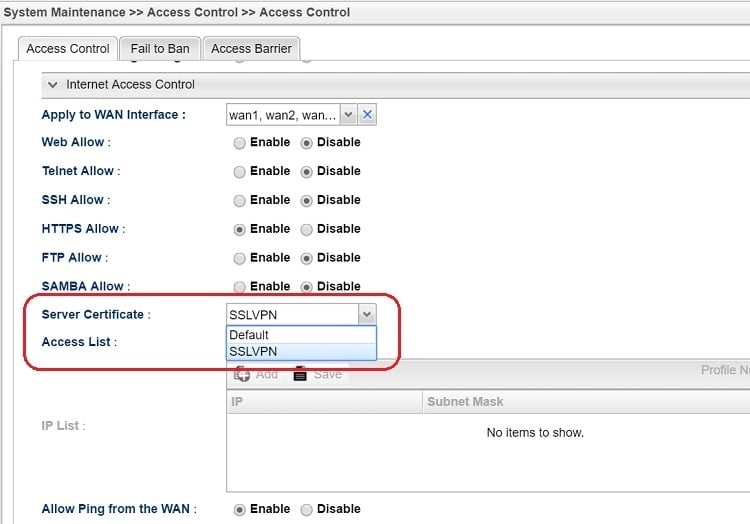
- Go to System Maintenance >> Access Control >> Access Control and select the local certificate created for Server Certificate, then click Apply to save.
- After the above configuration, the SmartVPN on iOS13 can connect successfully.
Published On:2019-11-04
ShareWas this helpful?