
Enable Server Authentication for SSL VPN
Server authentication can protect the SSL clients from man-in-the-middle-attack by ensuring that the client is connecting to the server it requested. As the SSL VPN gateway, Vigor Router can also create the Root Certificate Authority (CA) to issue the server certificates required for SSL connection. You may also export the Root CA and import it to the trusted CA list on client devices so that they can verify the authenticity of the certificate. This article covers how to create a server certificate for SSL VPN, how to import the Root CA to iOS and how to import the Root CA to Android phones.
Creating the Local Certificate
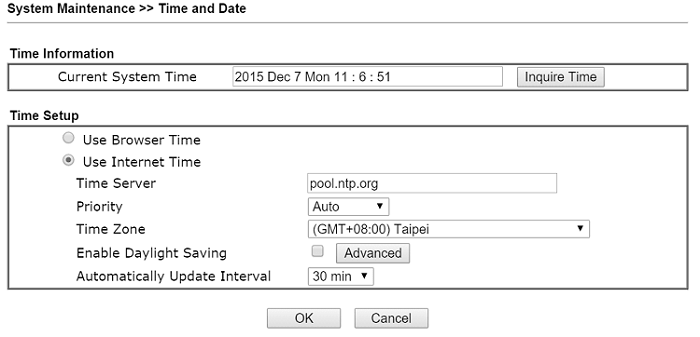
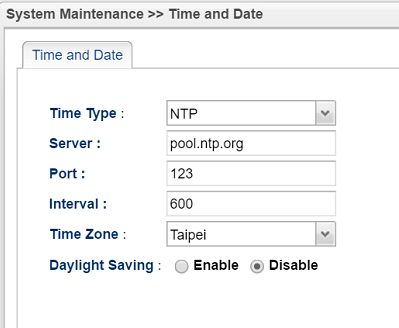
1.Go to System Maintenance >> Time and Date to make sure the router's time settings are correct, and it's better to match the client's time zone. Because when authenticating the server's identity, the client will check if the current time and date are within the server certificate’s validity period.
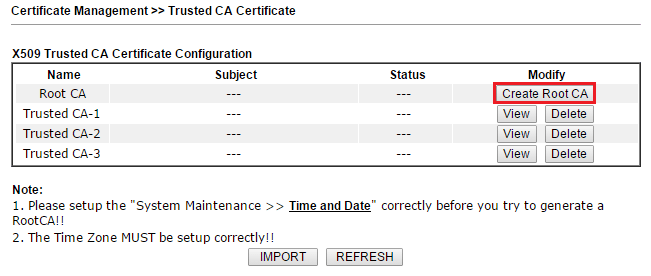
2. Go to Certificate Management >> Trusted CA Certificate, click Create Root CA.
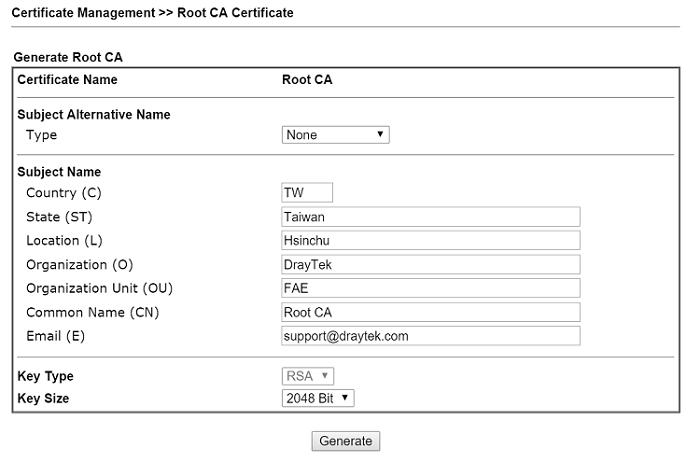
3. Finish the following information:
- Select type “None” for Subject Alternative Name
- Fill out the contents including location, organization, name, and Email.
- Select Key Size as “2048 Bit” for stronger security
- Click Generate to generate the Root CA
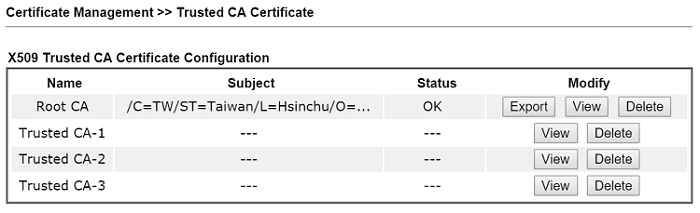
4. It will take a few minutes for the Root CA be created. Wait until the status shows OK.
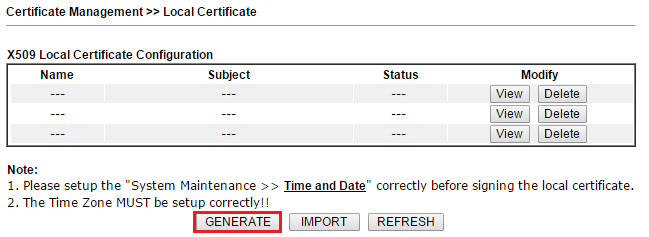
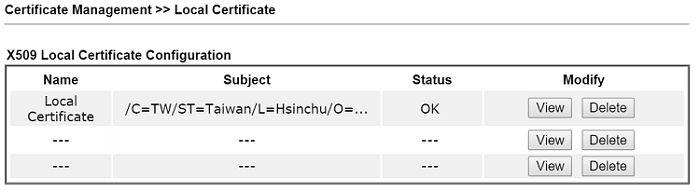
5. Next, generate a Local Certificate, this is the certificate that the router will send to the SSL VPN clients. Go to Certificate Management >> Local Certificate, click Generate.
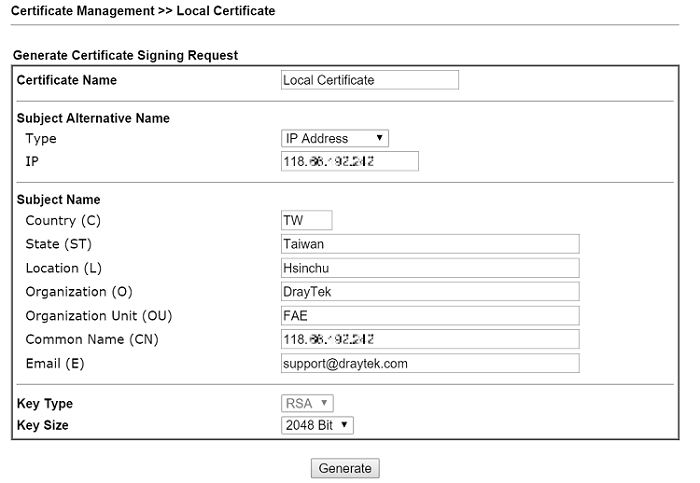
6. Finish the fields below with correct information:
- Enter Certification Name
- For Subject Alternative Name, choose the type how the VPN clients will access the router, here we select IP Address for example.
- Enter the router's WAN IP for IP Address. It should be the IP address which VPN clients use for their Server settings.
- Enter location, organization, Common Name (CN) and Email. CN should be the same as Subject Alternative Name, so we put the IP address here.
- Select Key Size as “2048 Bit” for stronger security
- Click Generate to create the Local Certificate
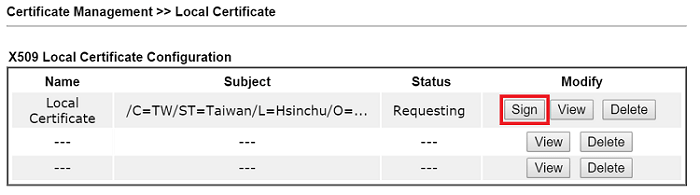
7. Wait a few minutes until the signing request is ready, then click Sign to sign the certificate with Root CA.
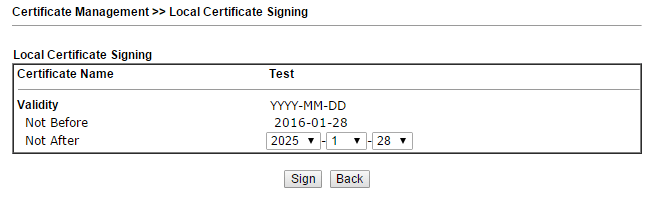
8. Select the expiry date for the local certificate, and click Sign.
9. Make sure the status of the Local Certificate is OK.
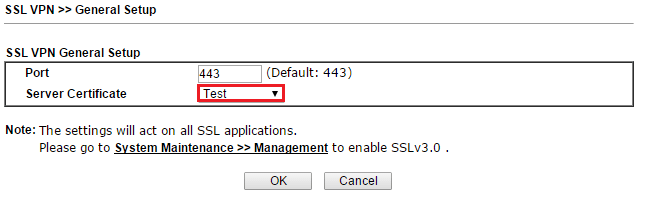
10. Now, we can use the certificate for SSL VPN. Go to SSL VPN >> General Setup, select the certificate created in the previous step for Server Certificate. Click OK to save the settings.
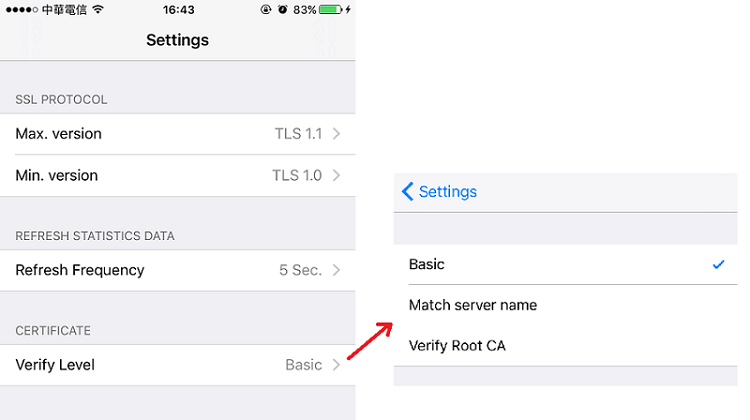
11. Now, the VPN clients can use the "Match Server Name" for verification. That is, when establishing the SSL connection, it will check if the domain name or IP address in the server’s certificate matches the domain name or the IP address it is connecting.
Exporting Root CA to iOS
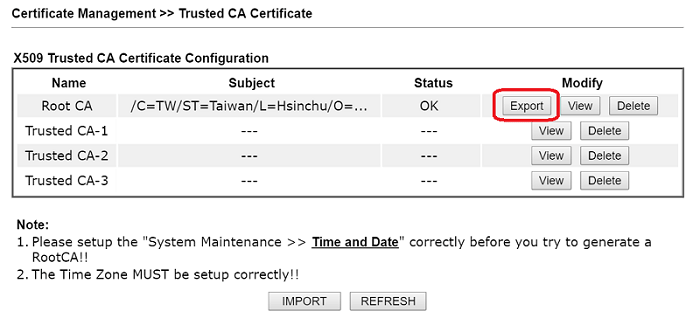
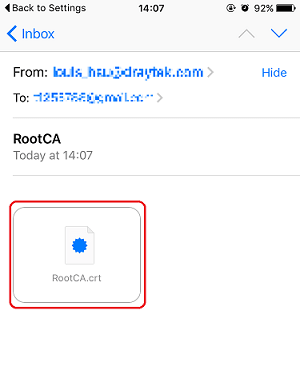
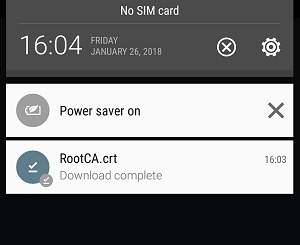
1. After generating the Root CA at Certificate Management >> Trusted CA Certificate, click Export to download the RootCA. Then, send it to the client device by E-mail.
2. On the client device, open the .crt file.
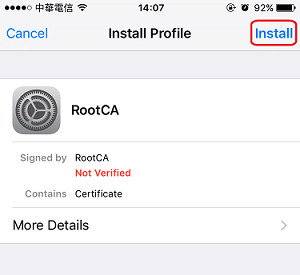
3. Tap Install then enter the passcode to start the installation
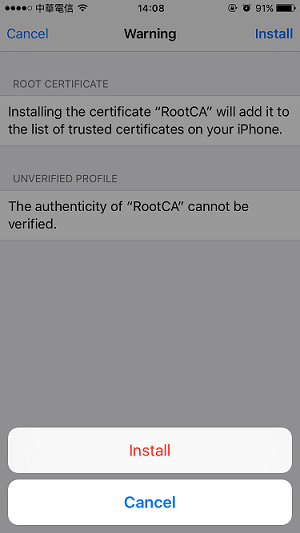
4. Read the warning message then tap Install.
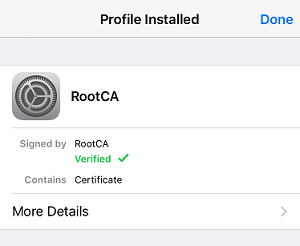
5. After the installation is complete, you will see Root CA became verified.
6. On the client devices, go to General >> About >> Certificate Trust Settings, switch to enable the Root CA installed.
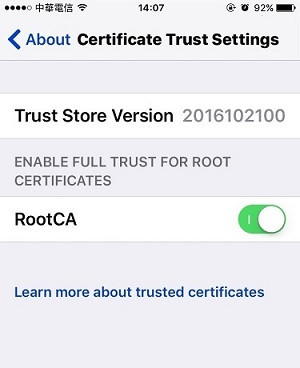
7. Now, we can use Verify RootCA for certificate verification settings. That is, during SSL handshake, the device will not only check the server certificate but also verify issuer of the certificate. It will only establish the VPN only if the server presents a certificate signed by a root CA trusted.
Import RootCA to Android Devices
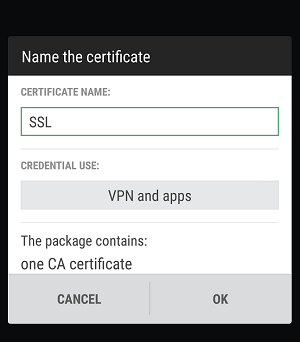
1. Download the Root CA.
2. Open the .crt file and use it for VPN and apps, then tap OK.
1. Go to System Maintenance >> Time and Date to make sure the router's time settings are correct, and it's better to match the client's time zone. Because when authenticating the server's identity, the client will check if the current time and date are within the server certificate’s validity period.
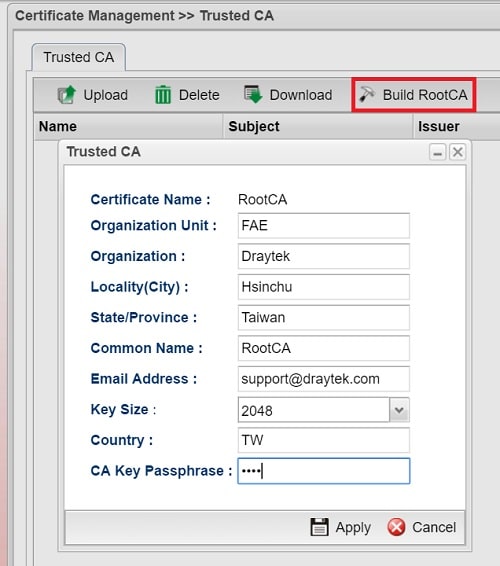
2. Certificate Management >> Trusted CA, click Build Root CA,
- Fill all out all the information
- Select Key Size as “2048 Bit” for stronger security
- Type a CA Key Passphrase
- Click Apply to finish the settings
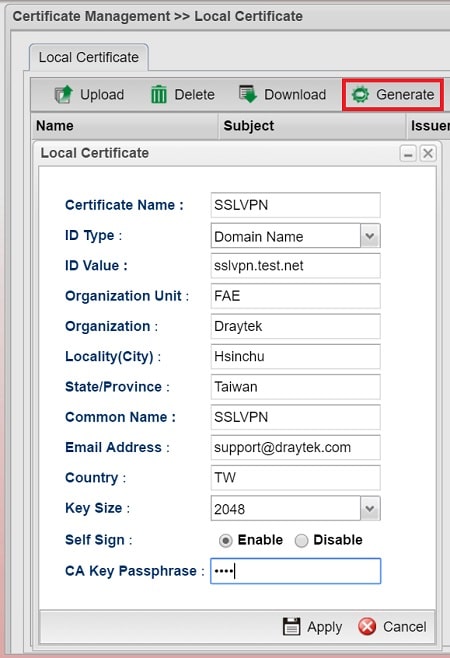
3. Go to Certificate Management >> Local Certificate, then click Generate:
- Select ID Type as either Domain Name or IP address, depends on which one will the VPN client used for connecting to the server.
- Type ID Value as the domain name or IP address of the router. It should be the IP address or domain name which VPN clients use for their Server settings
- Fill out all the information
- Select "Enable" for Self Sign
- Enter CA Key Passphrase to match the CA Key Passphrase of Root CA
- Click Apply to finish
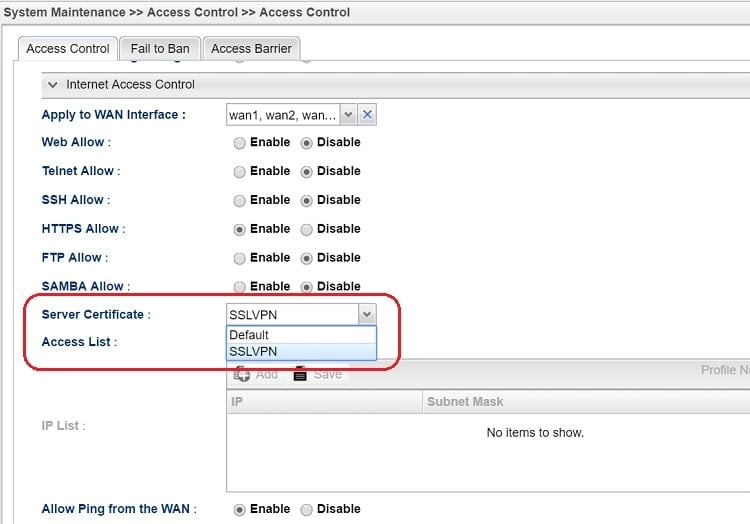
4. Go to System Maintenance >> Access Control >> Access Control and select the local certificate created for Server Certificate, then click Apply to save.
5. Now, the VPN clients can use the "Match Server Name" for verification. That is, when establishing the SSL connection, it will check if the domain name or IP address in the server’s certificate matches the domain name or the IP address it is connecting.
Published On:2016-10-19
ShareWas this helpful?