
SSL VPN between DrayOS Router and Vigor3900/2960
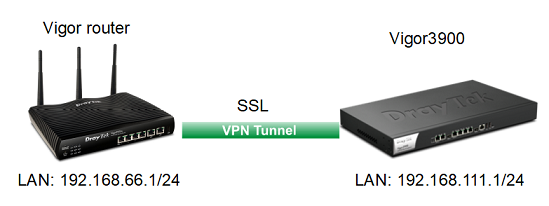
This article demonstrates LAN to LAN SSL VPN between a DrayOS Router (Vigor router) and a Vigor3900/2960 by the following topology. DrayOS Router and Vigor3900/2960 can both be the VPN server and client. Therefore, we separate this article into two parts, to demonstrate how to establish the SSL VPN connection between Vigor Router and Vigor3900/2960, when using one of them as VPN server respectively.
(For SSL VPN tunnel between twoVigor Routers or two Vigor3900s, please refer to the article here.)
The video was presented by DrayTek Aust & NZ.
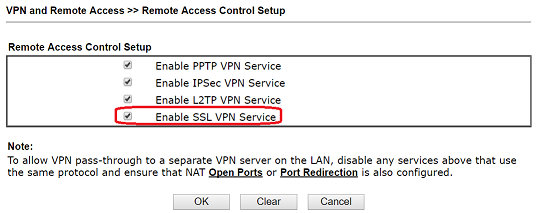
Before constructing the VPN configuration, please make sure SSL VPN service is enabled on VPN and Remote Access >> Remote Access Control page on the router takes up the role as the VPN server.
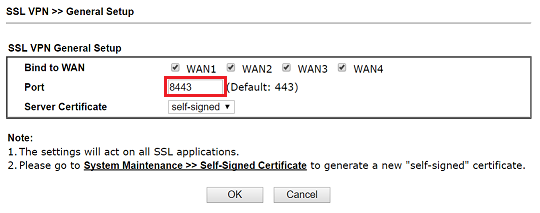
Note: If you are using Vigor3900/2960 as SSL VPN server, it is necessary to allow HTTPS access on System Maintenance >> Access Control page, due to SSL VPN and HTTPS are both using port 443 as the default port.
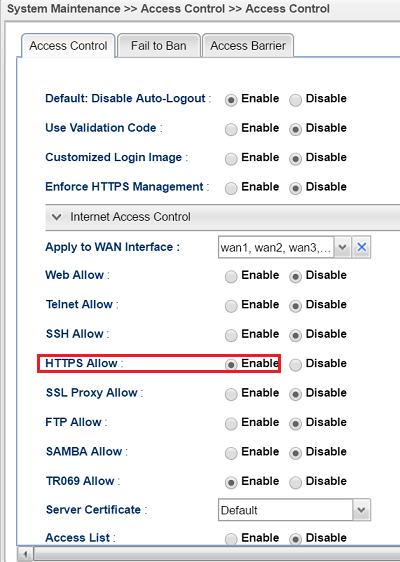
Alternatively, you can change either HTTPS or SSL VPN port, then will be able to disable the HTTPS access without affecting the SSL VPN connection.
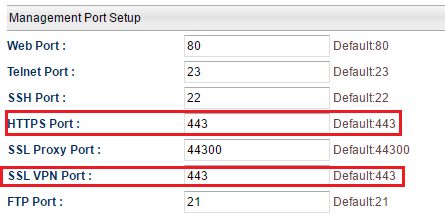
SSL VPN port is configurable on SSL VPN >> General Setup page of Vigor router.
Part A: Take Vigor Router as VPN server
Vigor Router Setting (Dial-in):
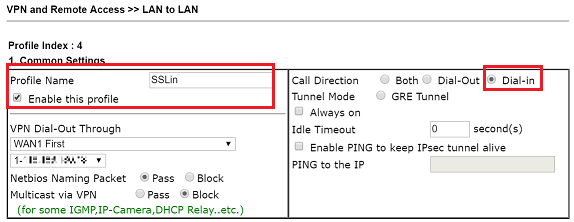
1. Go to VPN and Remote Access Control >> LAN to LAN and click an available index.
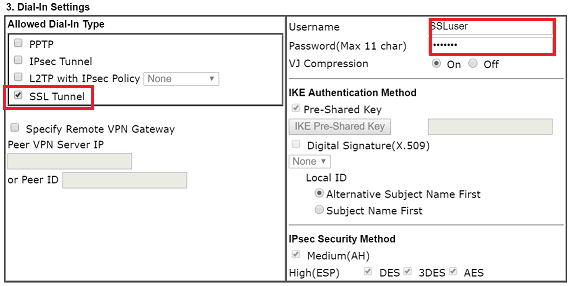
2. Dial-In Settings.
- Enter Profile Name.
- Enable this profile.
- Select Dial-in as Call Direction.
- Allow SSL dial-in.
- Enter Username and Password.
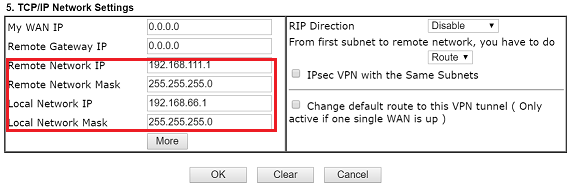
- Enter Vigor3900's LAN in Remote Network IP/Mask.
- Click OK.
Vigor3900 Setting (Dial-out):
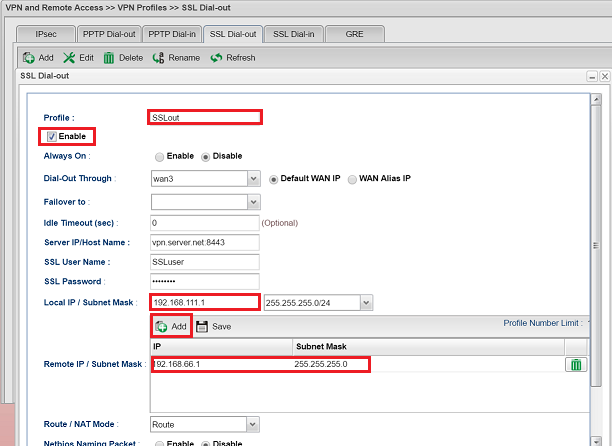
1. Go to VPN and Remote Access >> VPN Profiles, and click Add in SSL Dial-out tab.
- Enter Profile Name.
- Enable this profile.
- Select the WAN interface to dial out.
- Enter Vigor router's WAN IP or domain name and SSL VPN port in Server IP/Host Name.
- Enter SSL Username and Password.
- Enter Vigor3900's LAN in Local IP/Subnet Mask.
- Enter Vigor Router's LAN in Remote IP/Subnet Mask.
- Click Apply.
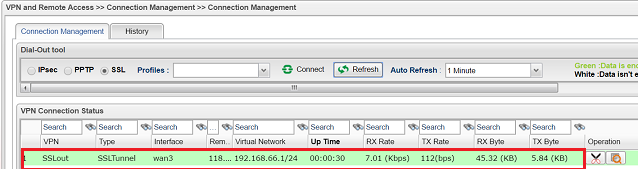
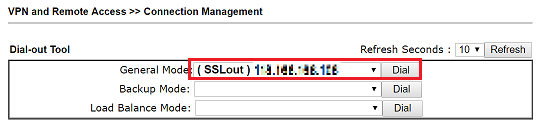
Now we can go to VPN and Remote Access >> Connection Management to dial the VPN.

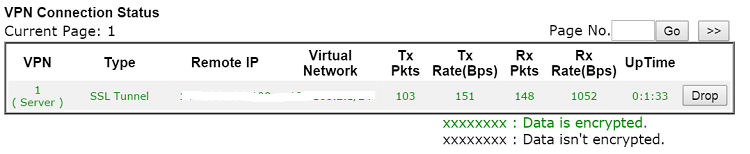
After VPN is connected successfully, we can see the status below.
Part B: Take Vigor3900 as VPN server.
Vigor3900 Setting (Dial-in):
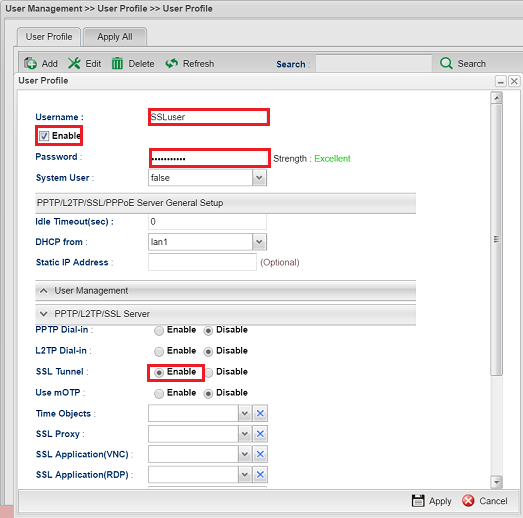
1. Go to User Management >> User Profiles, and click Add.
2. Dial-In Settings.
- Enter Username and Password.
- Enable this profile.
- Enable SSL Dial-in in PPTP/L2TP/SSL Server section.
- Click Apply.
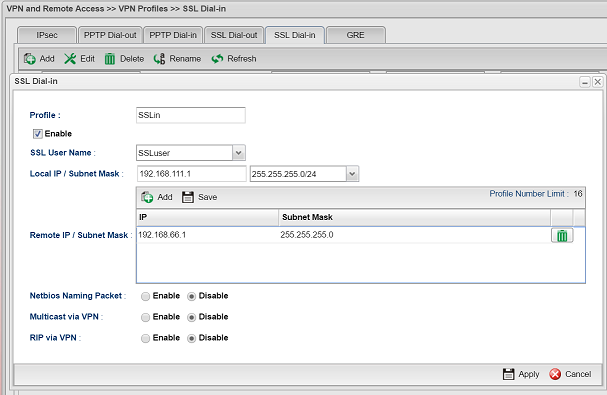
3. Go to VPN and Remote Access >> VPN Profiles, and click Add in SSL Dial-in tab.
- Give a Profile name and Enable the profile.
- Select the user profile in SSL User Name options for SSL VPN connection.
- Enter Vigor3900's LAN in Local IP/Subnet Mask.
- Enter Vigor Router's LAN in Remote IP/Subnet Mask.
- Click Apply.
Vigor Router Setting (Dial-out):
1. Go to VPN and Remote Access Control >> LAN to LAN and click an available index.
2. Dial-out Settings.
- Enter Profile Name.
- Enable this profile.
- Select Dial-out as Call Direction.
- Select SSL Tunnel as dial-out type.
- Enter Vigor3900's WAN IP or domain name in Server IP/Host Name.
- Enter Username and Password.
- Enter Vigor3900's LAN in Remote Network IP/Mask.
- Click OK.

- Enter Vigor3900's LAN in Remote Network IP/Mask.
- Click OK.
Now we can go to VPN and Remote Access >> Connection Management to dial the VPN.
After VPN is connected successfully, we can see the status below.
Published On:2019-07-08
ShareWas this helpful?