
IPsec VPN between Amazon VPC and DrayTek Router
This article demonstrates how to establish IPsec VPN tunnel between Vigor Router and Amazon VPC.
Settings of Amazon VPC
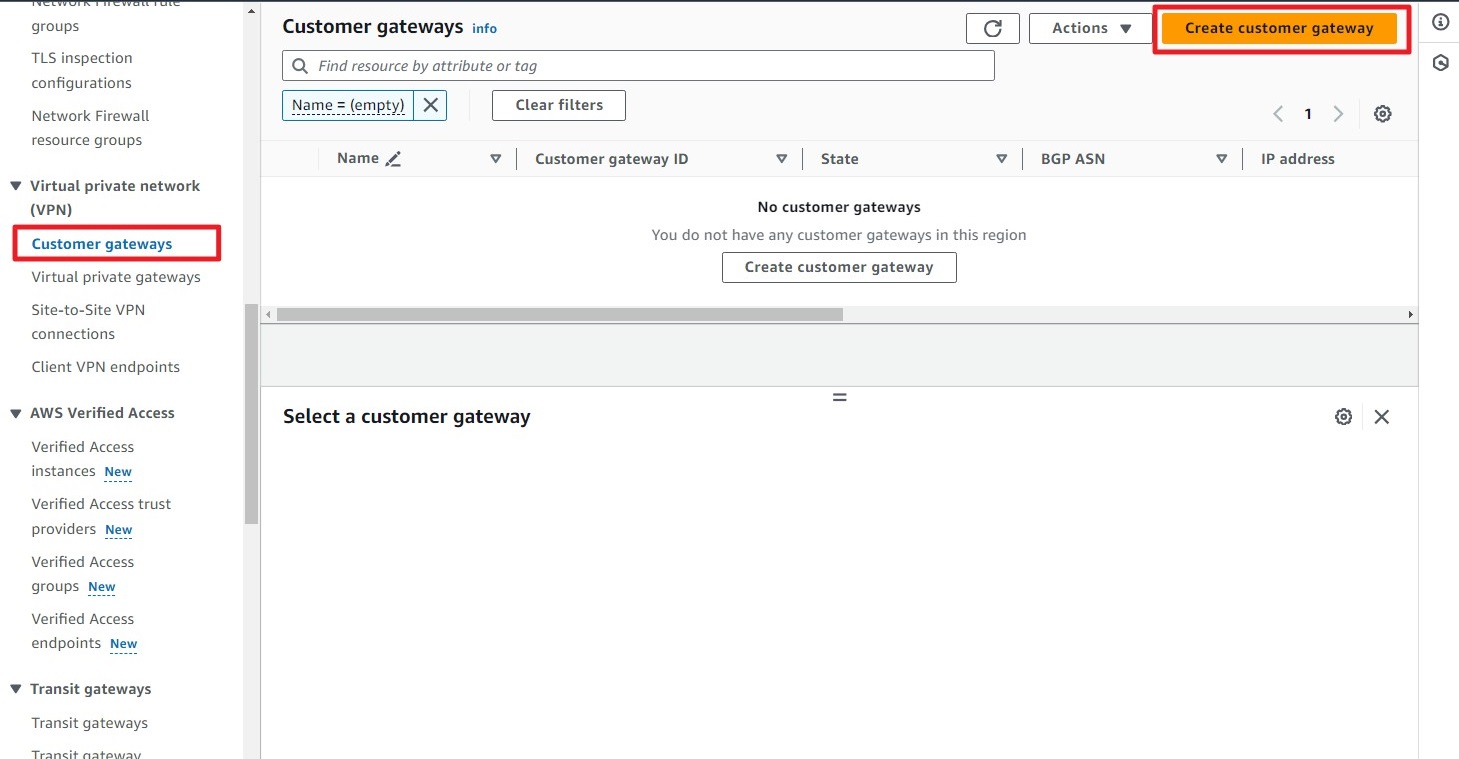
Step 1: Create a Customer Gateway for the Vigor.
Navigate to Customer Gateway and click on Create Customer Gateway.
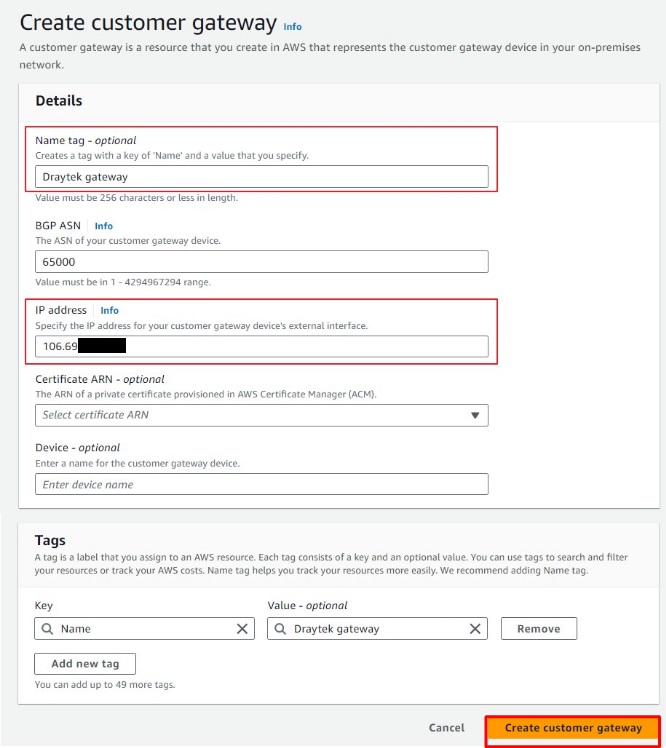
Create a name for the customer gateway and enter the public IP address of the Vigor.
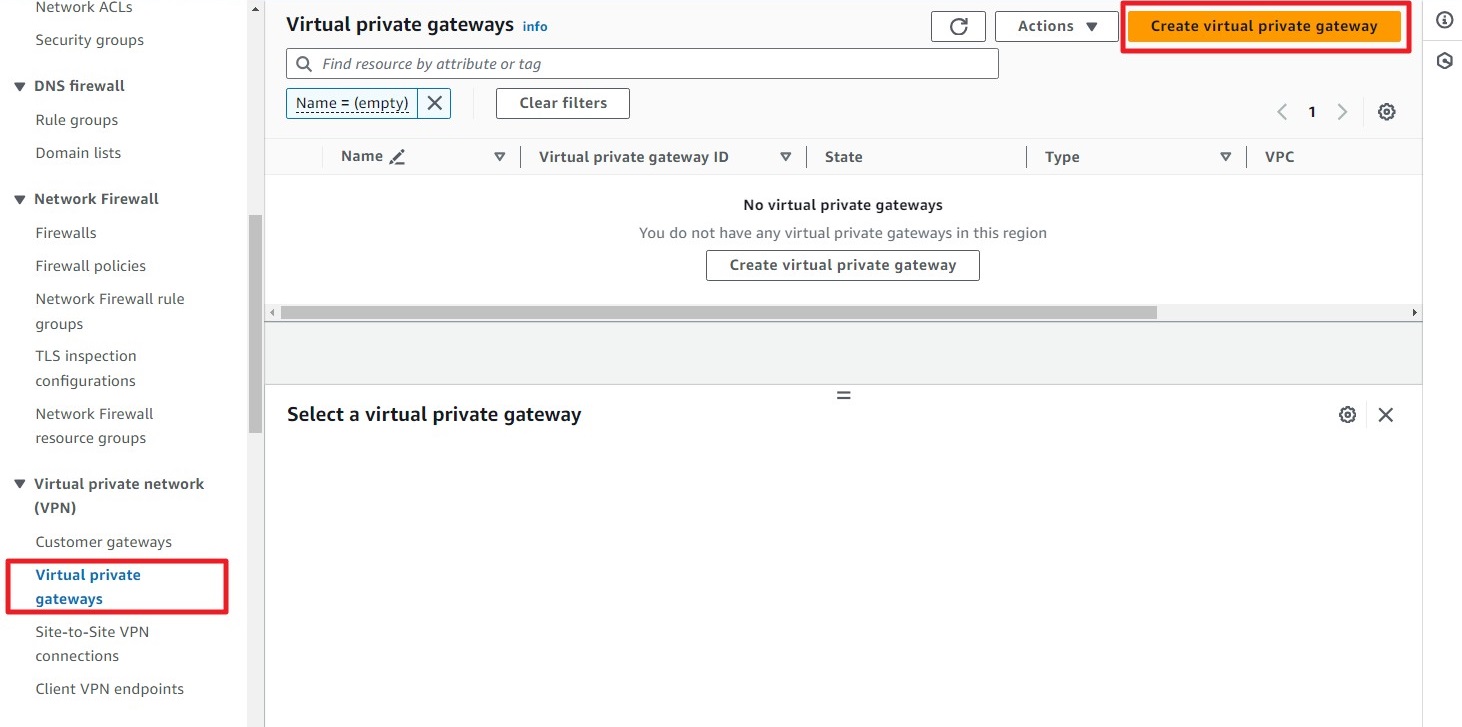
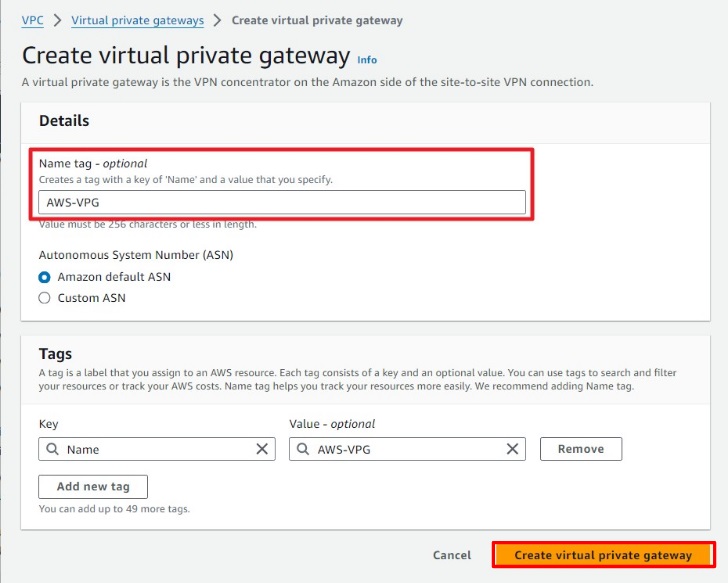
Step 2: Create a Virtual Private Gateway (VPG)
Navigate to Virtual Private Gateways, then click on Create Virtual Private Gateway.
Create a name for the Virtual Private Gateway and click on Create.
Attach the Virtual Private Gateway to the VPC.

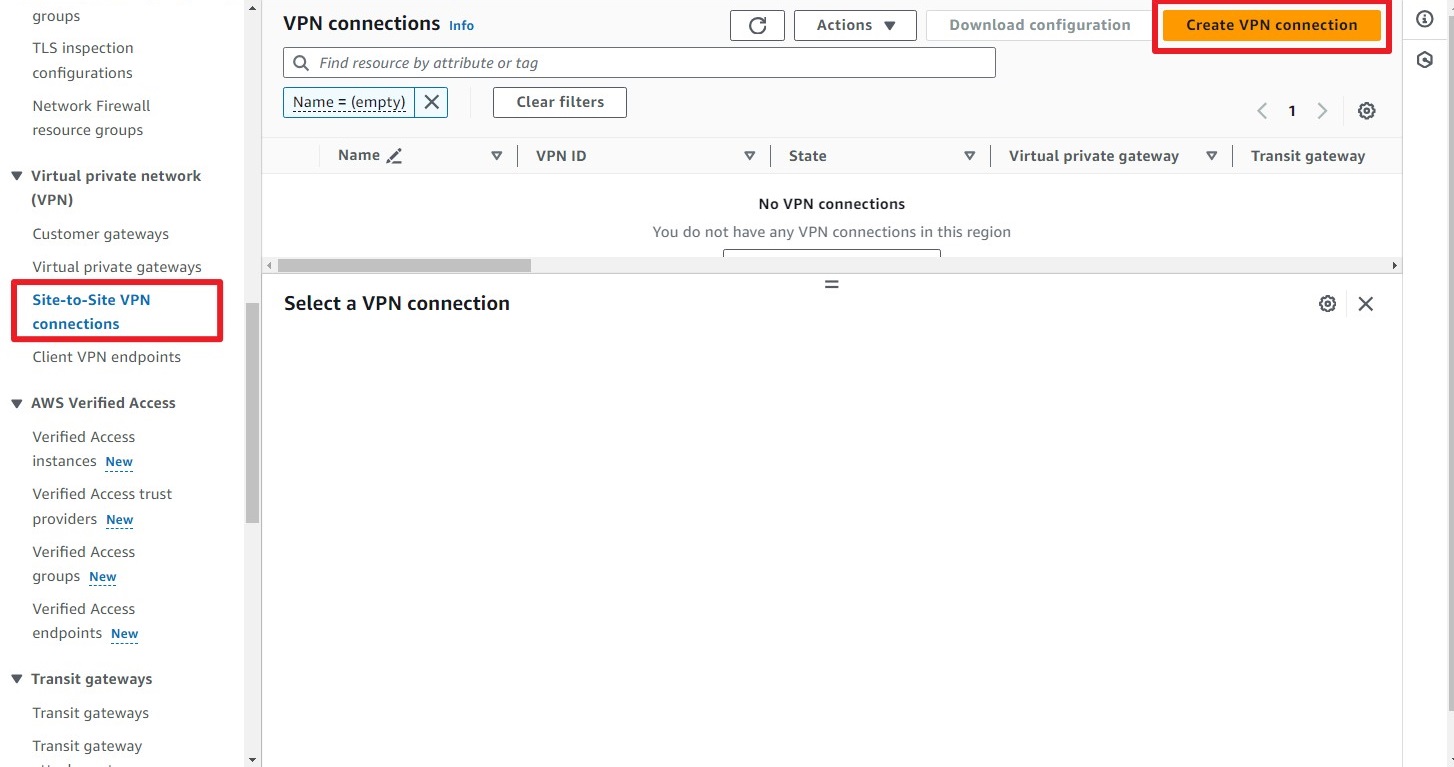
Step 3: Create a Site-to-Site VPN
Navigate to Site-to-Site VPN Connection and click on Create VPN Connection.
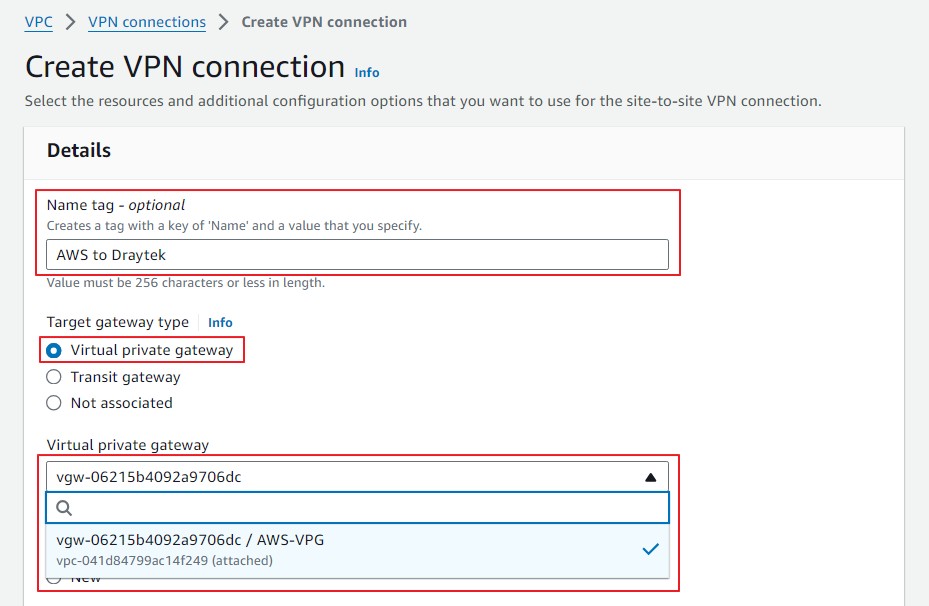
Create a name for the Site-to-Site connection.
Select Virtual Private Gateway (VPG) as the target gateway type and add the virtual private gateway created in Step 2.
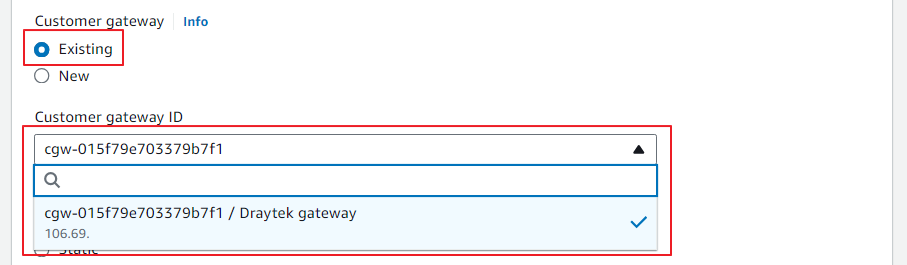
Select Existing Customer Gateway and add the customer gateway created in Step 1.
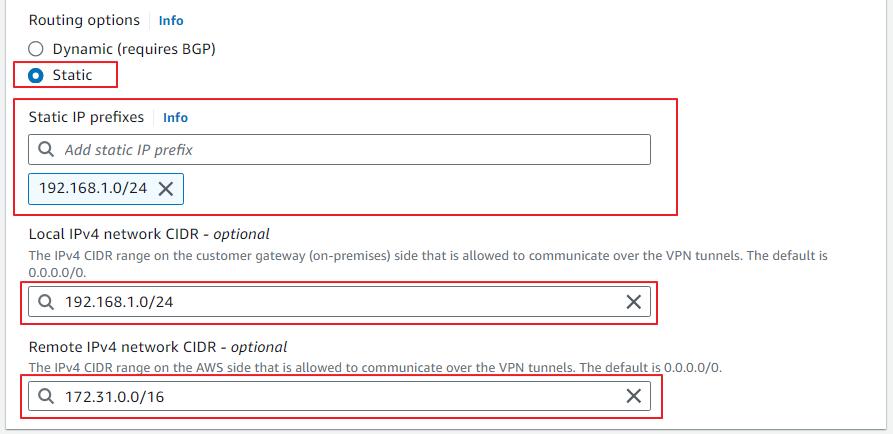
Select Static Routing options and add the Vigor local subnet in the Static IP Prefixes and local IPv4 Network CIDR.
Add the AWS VPC Gateway in the Remote IPv4 Network CIDR.
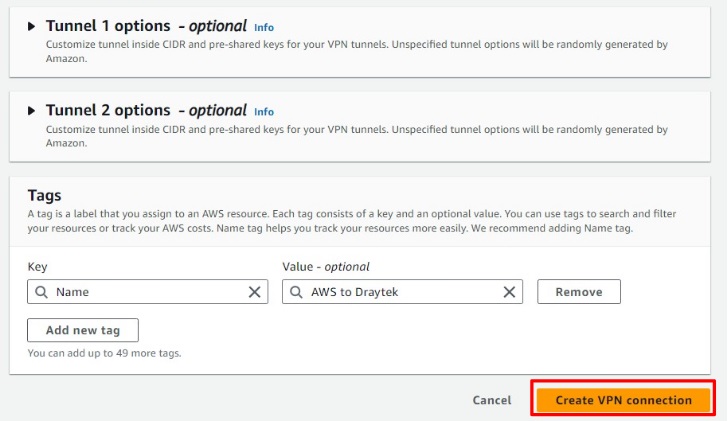
Next, click on Create VPN Connection
Step 4: Edit Route Tables
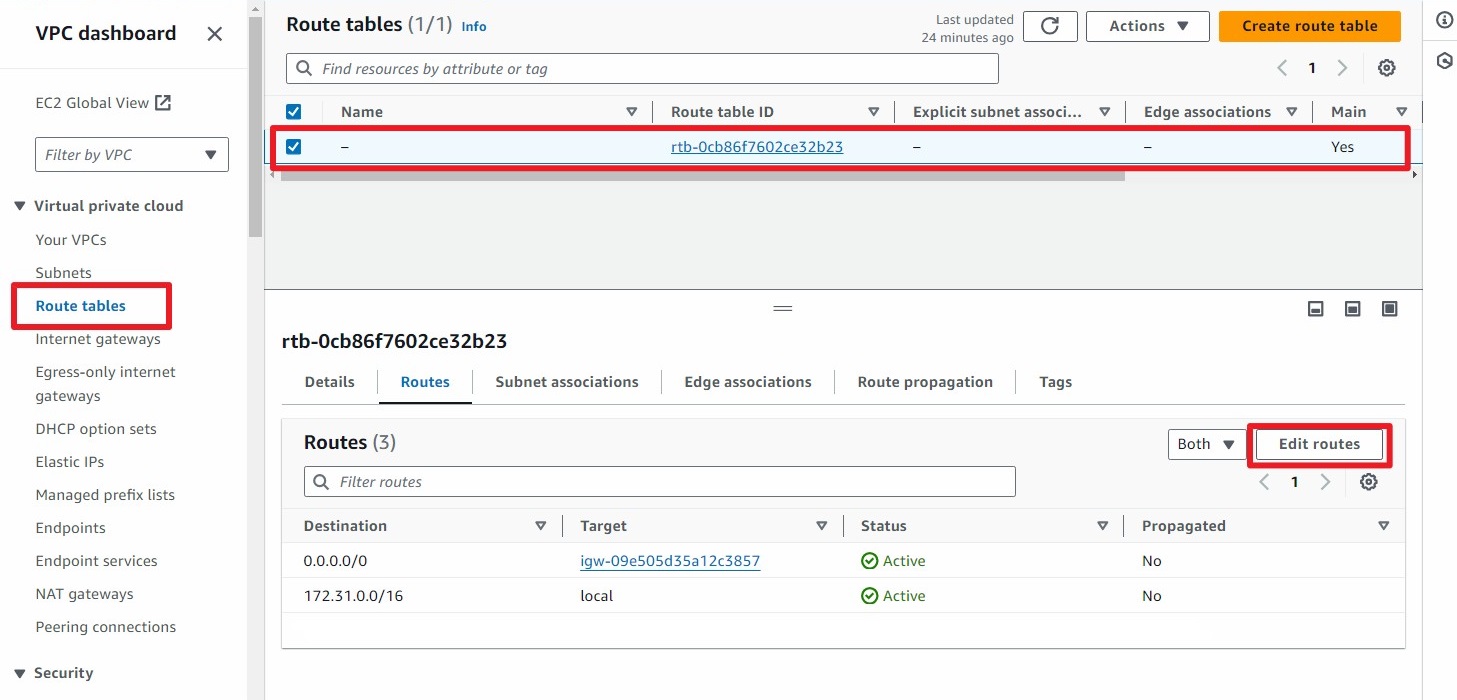
Go to Route Tables.
Select the route table, navigate to the Routes tab, and click on Edit Routes.
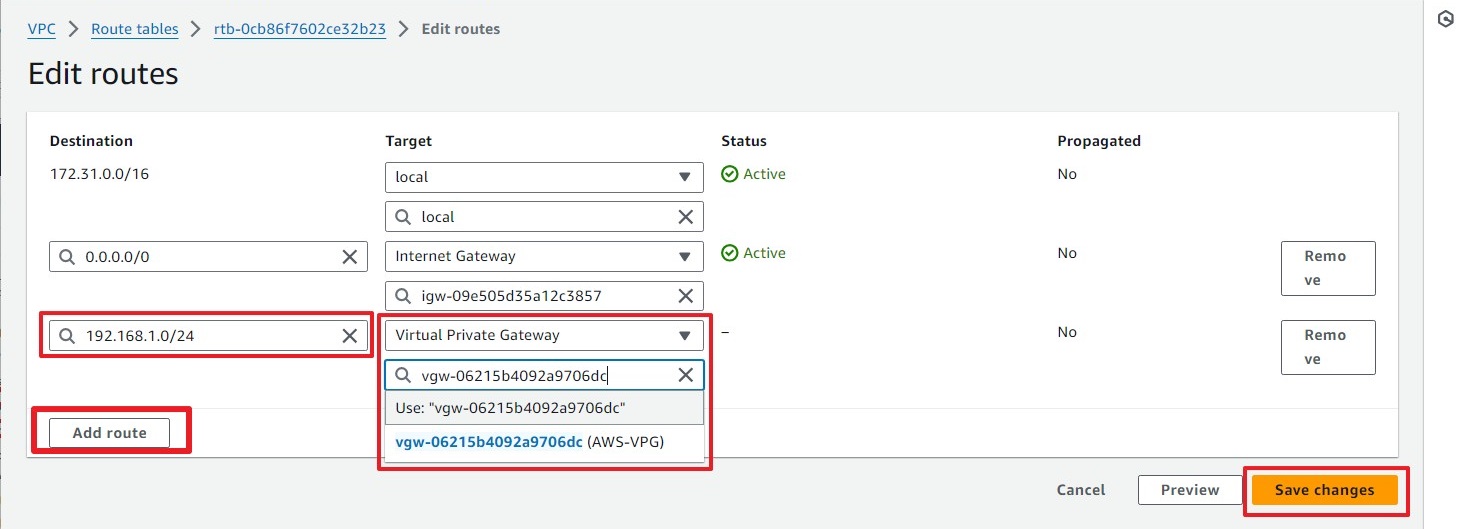
Click on Add Route and add the local subnet (e.g., 192.168.1.0/24) to the VPG created in Step 2.
Click on Save Change.
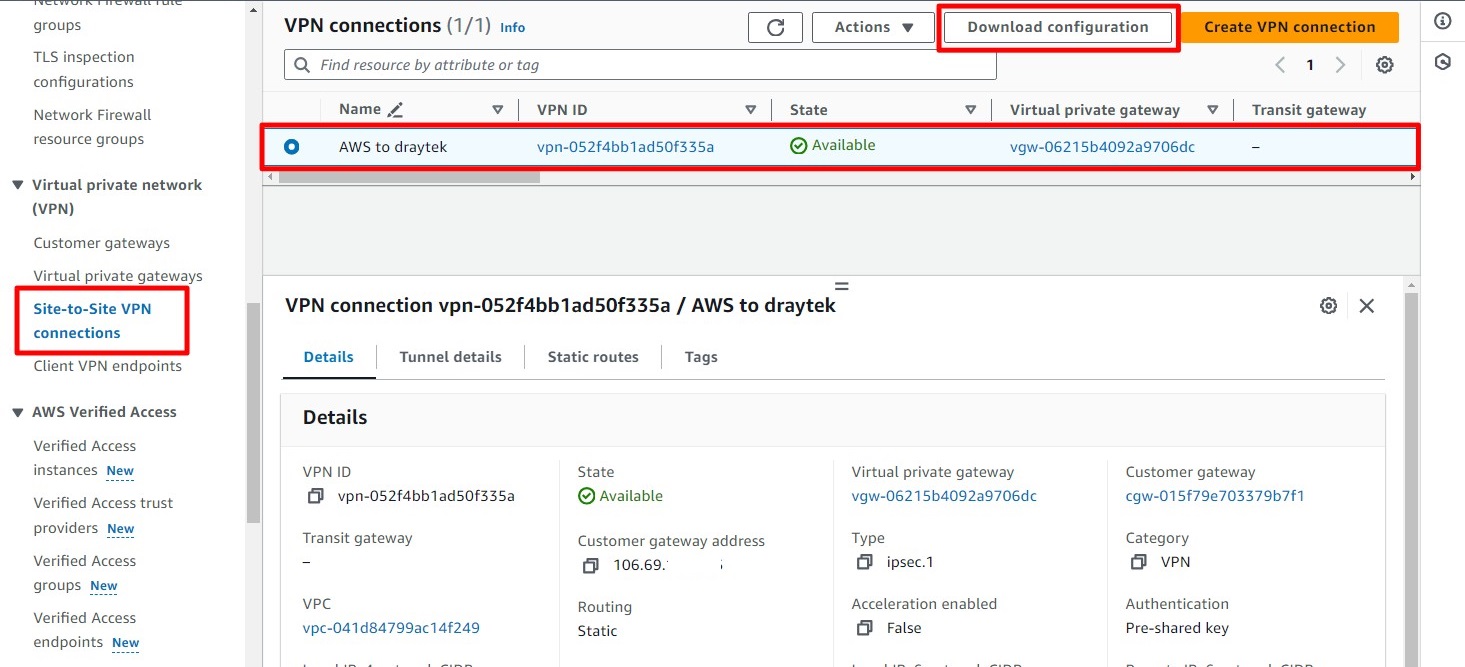
Step 5: Download AWS Configuration
Go to Site-to-Site Connections.
Select the AWS-to-DrayTek VPN connection and click on Download Configurations.
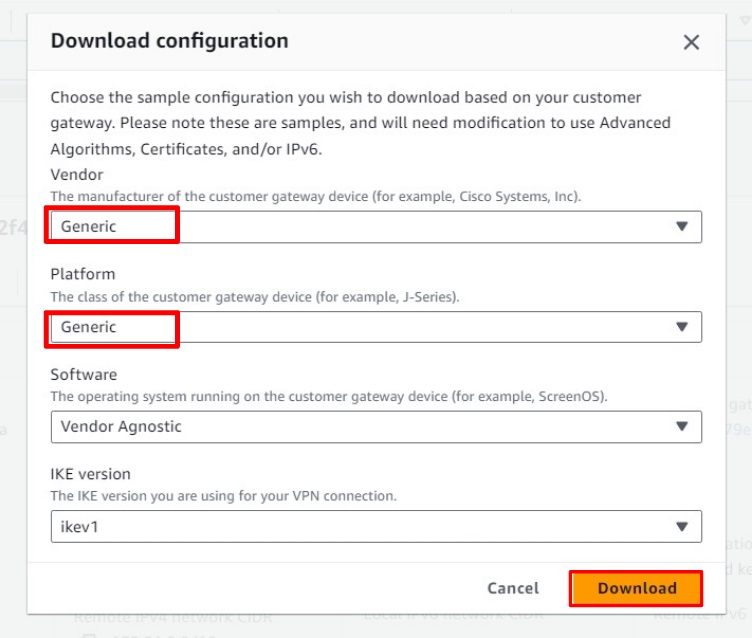
Select Generic for Vendor and Platform, leave the other options at their default settings, and click Download.
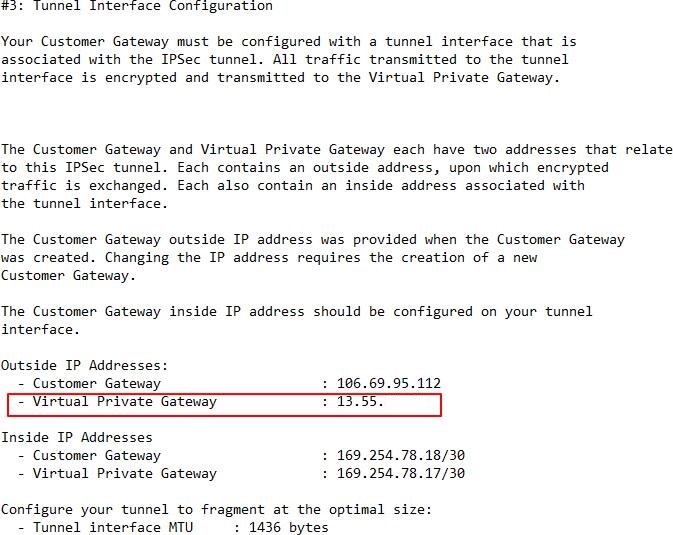
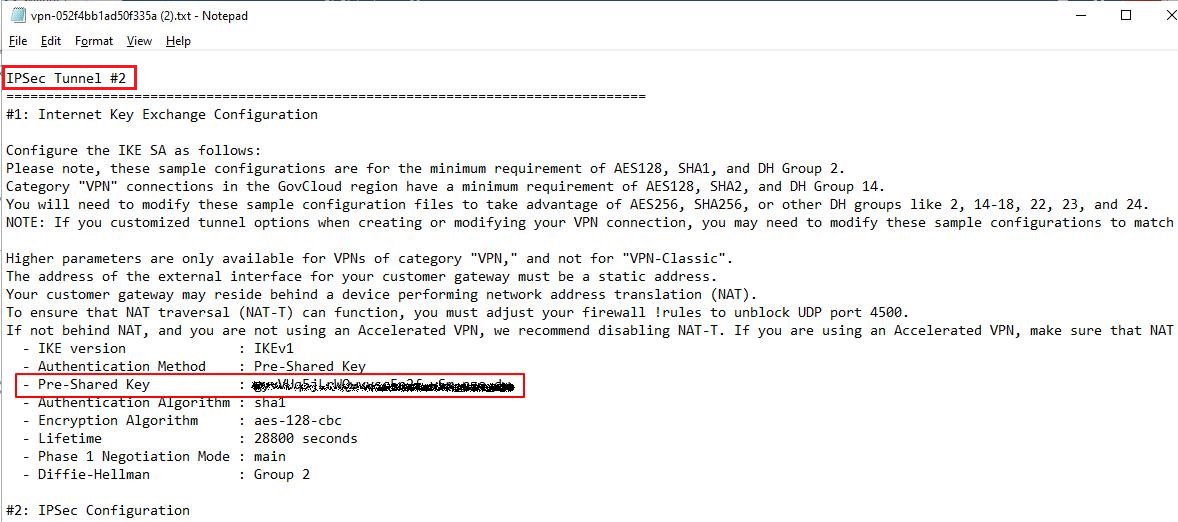
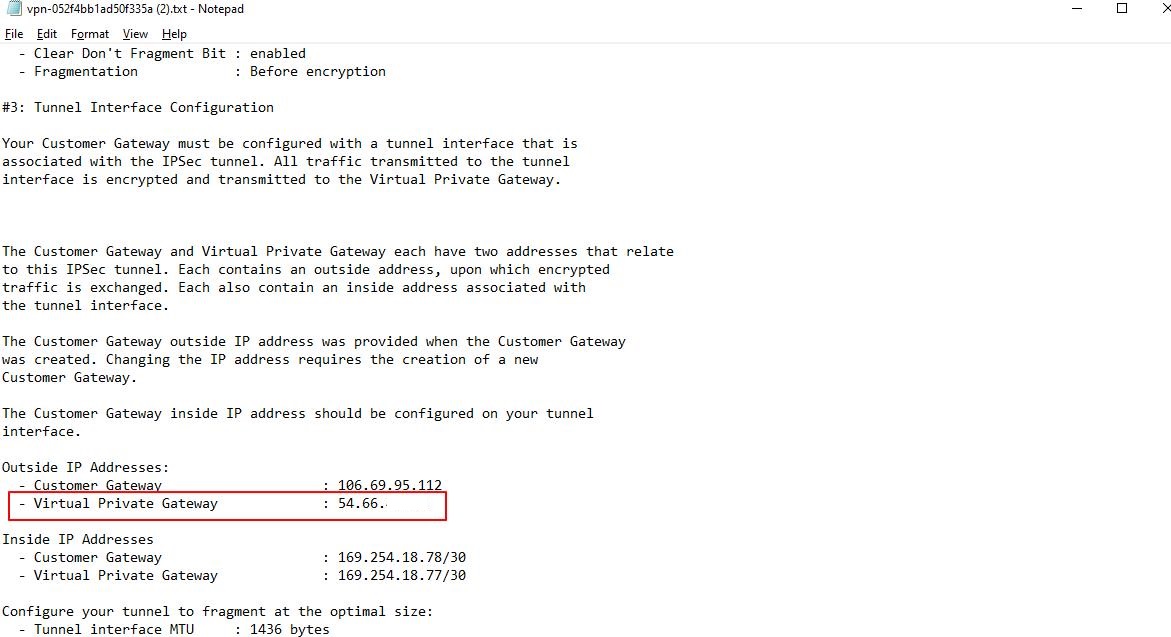
Step 6: Locate the Pre-Shared Key and Tunnel IP Address
Look for the pre-shared key and the tunnel IP address in the downloaded configuration file.
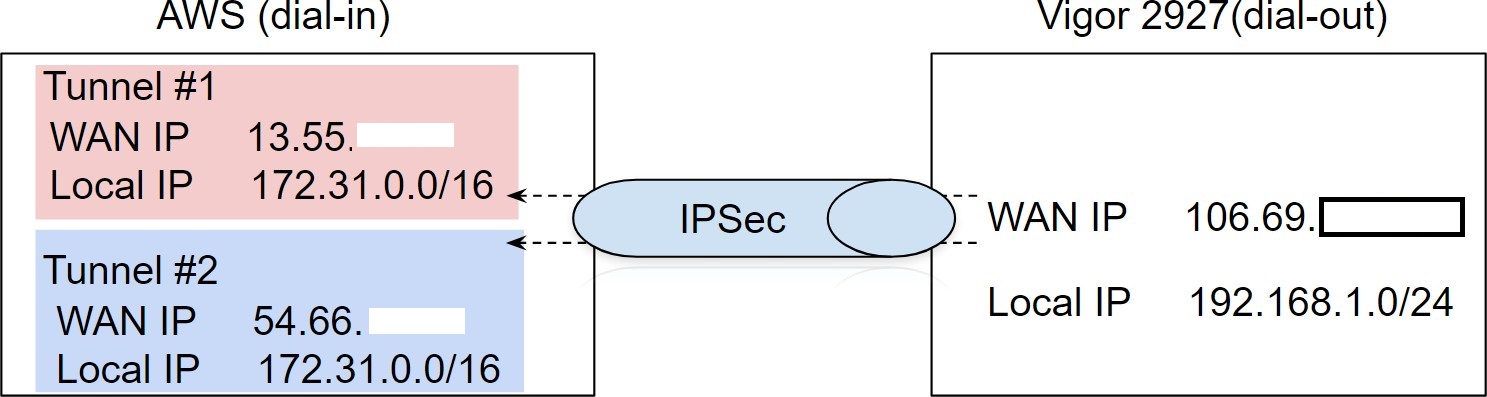
Tunnel #1 Pre-shared key and IP address

Tunnel #2 Pre-shared key and IP address
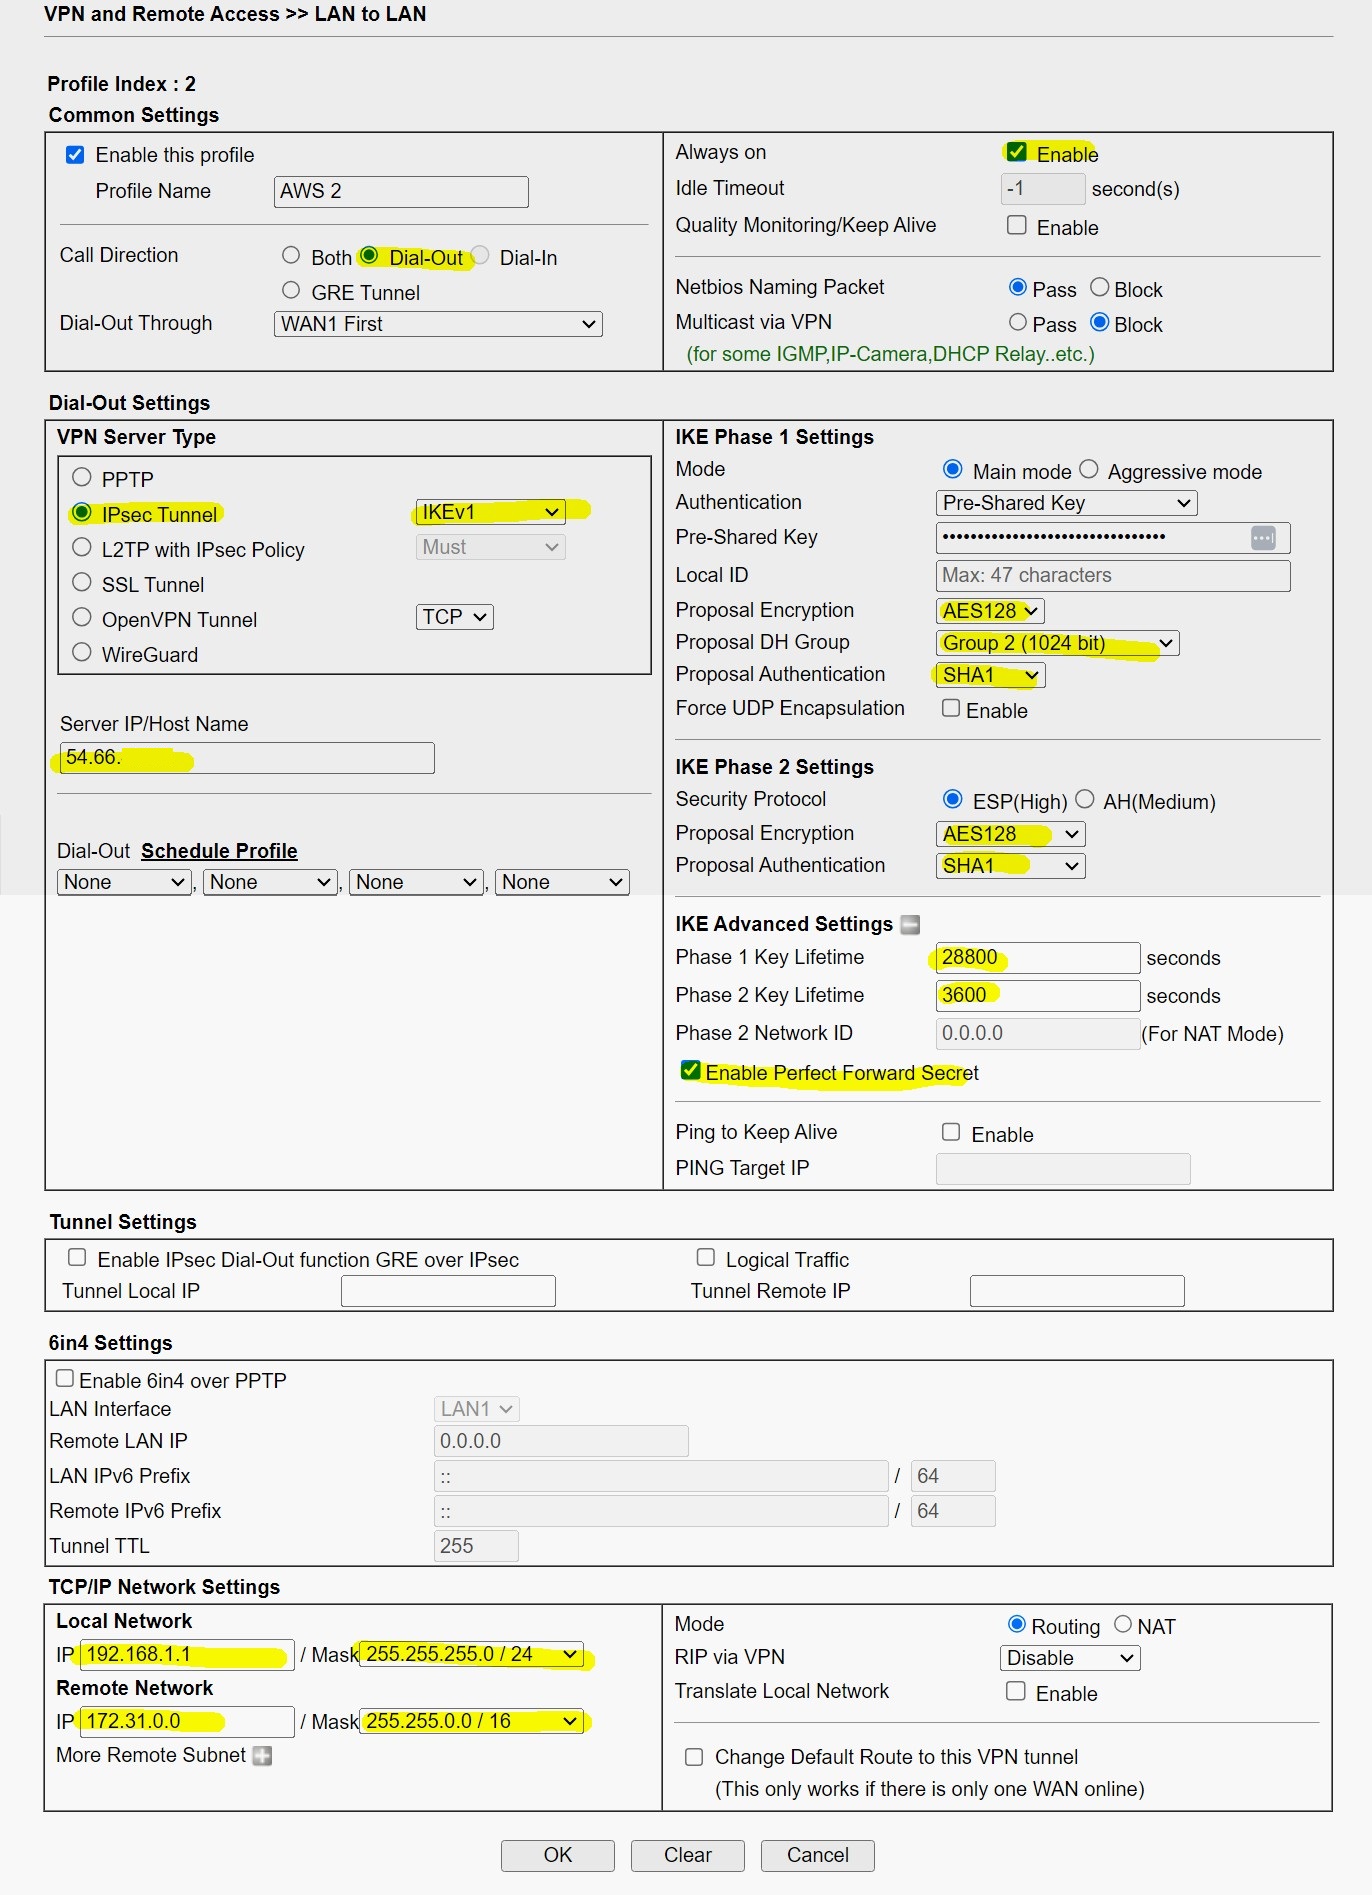
Settings of Vigor2927
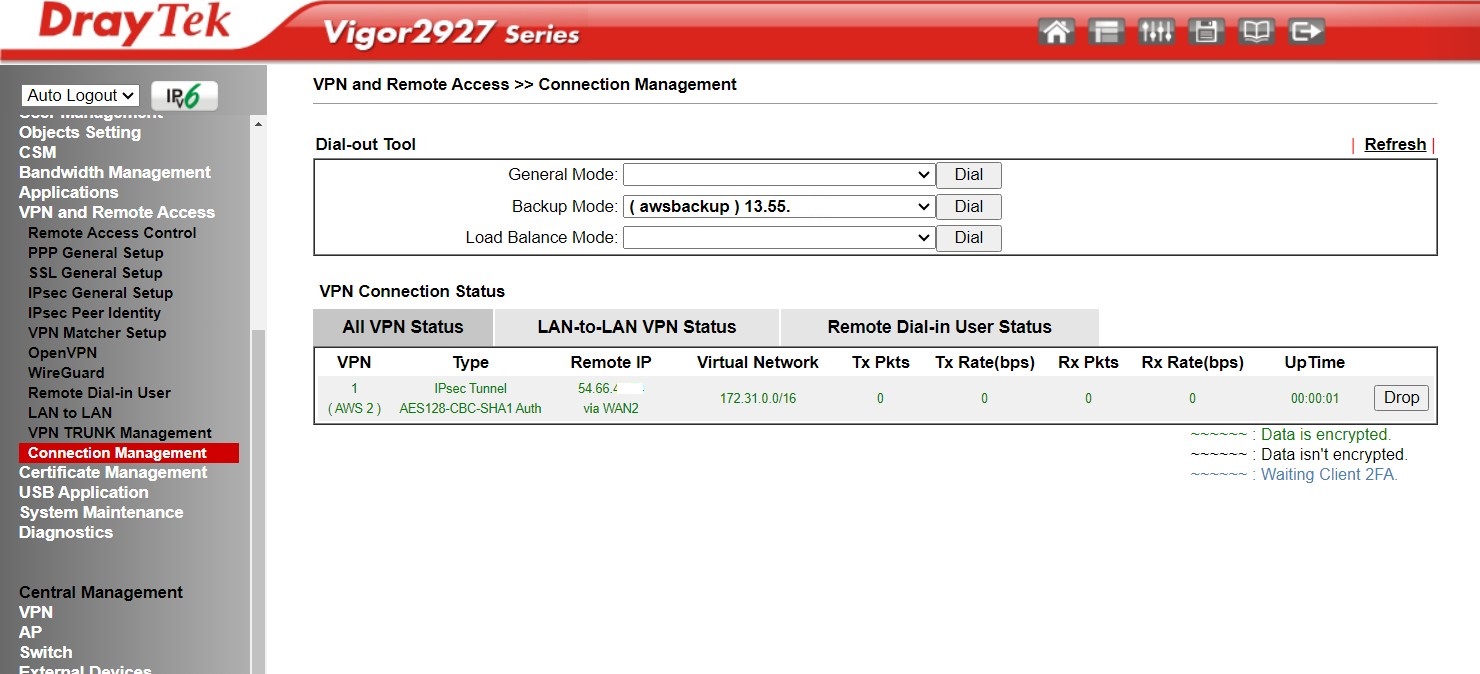
For tunnel #1

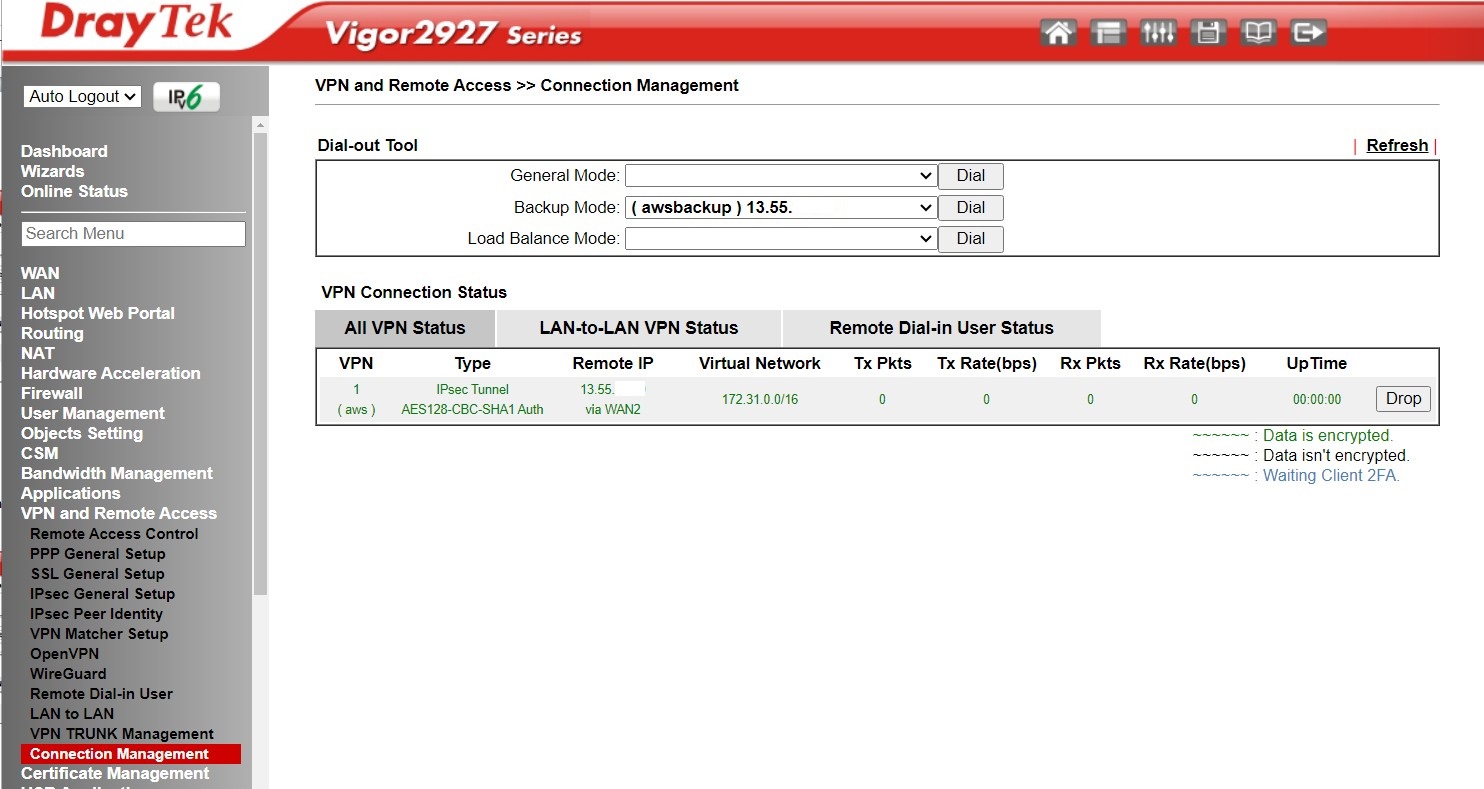
For tunnel #2
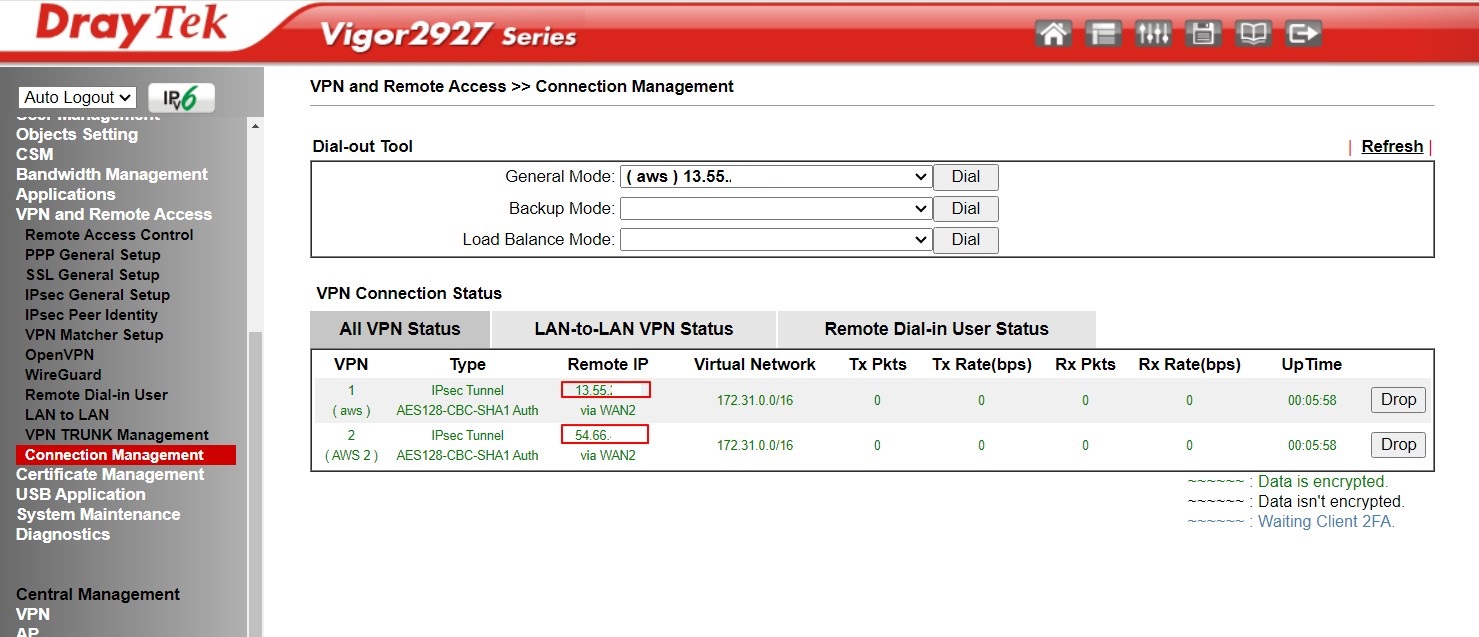
If you follow the instructions correctly, you should be able to get both tunnels up and running.
To configure a backup VPN, go to VPN and Remote Access >> VPN Trunk Management.
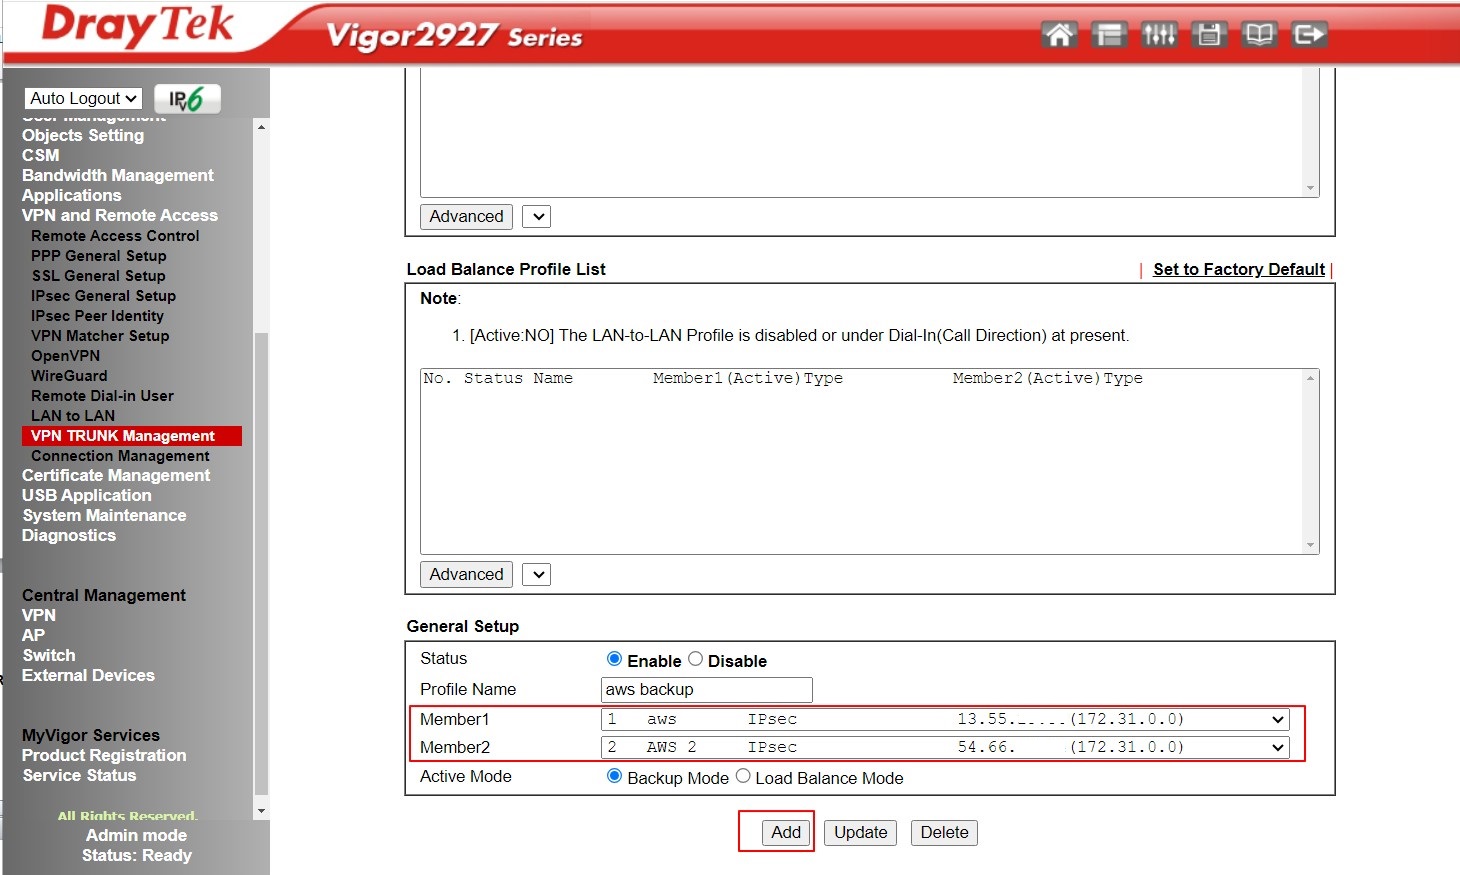

Disconnect both VPN connections. You should then see only one tunnel active, while the second tunnel will be in backup mode.

If you drop the tunnel #2, the tunnel #1 will automatically come up.
Settings of Vigor2926
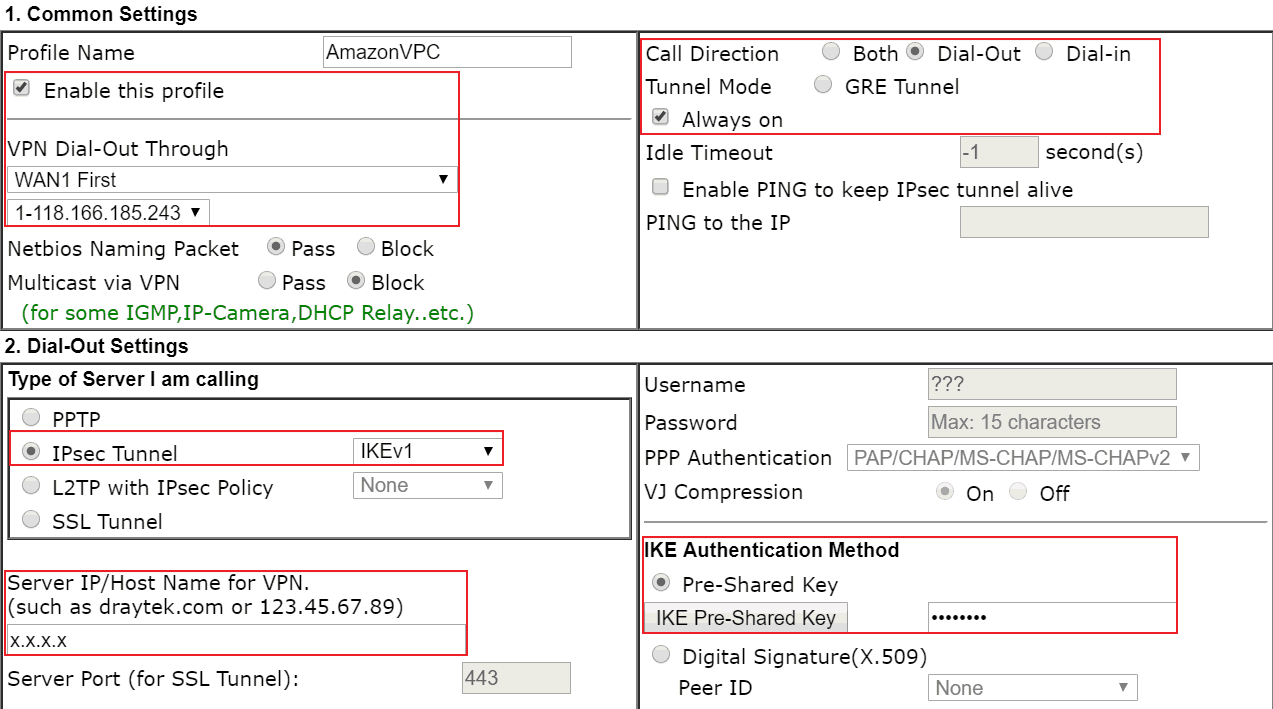
1. Go to VPN and Remote Access >> LAN to LAN, click Profile index to edit a new profile:
- Input Profile Name and Enable this profile
- Select Dial-Out for Call Direction
- Select IPsec Tunnel for Type of Server
- Input Amazon VPC's WAN IP at Server IP
- Click the IKE Pre-Shared Key button to input the Pre-Shared Key
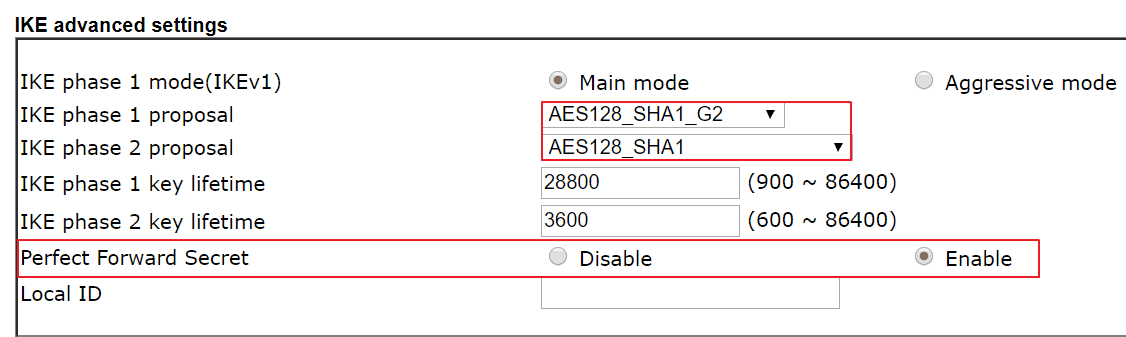
2. Select AES with Authentication for IPsec Security Method and click the Advanced button to open the IKE advanced Settings.
- Select AES128_SHA1_G2 for IKE phase1 proposal
- Select AES128 SHA1 for IKE phase2 proposal
- Enable Perfect Forward Secret
3. In TCP/IP Network Settings, enter AWS’s Virtual LAN network IP and Mask in the Remote Network IP and Remote Network Mask then Apply the settings

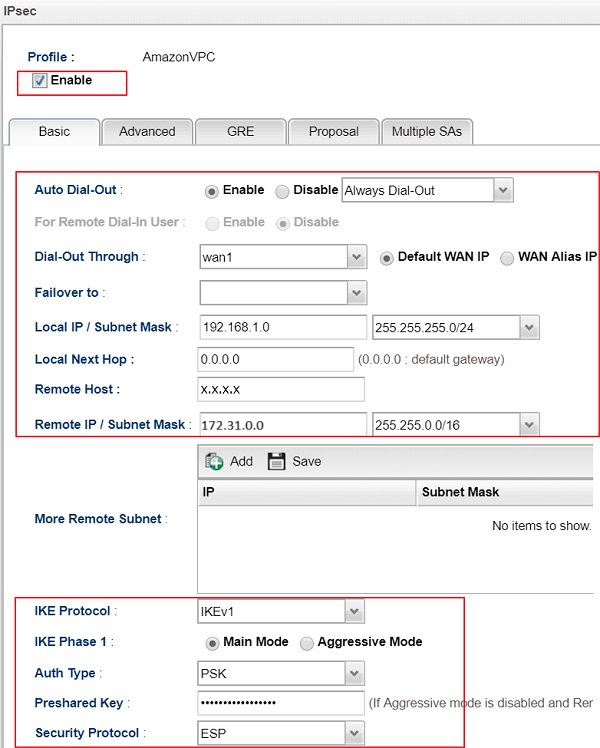
Settings of Vigor3900
1. Go to VPN and Remote Access >> VPN Profile >> IPsec , click Add to add a new profile. In the Basic tab:
- Enter Profile name and Enable this profile
- Enable Auto Dial-Out
- Select the WAN Interface to create the VPN to Amazon VPC for Dial-Out Through
- Enter the local network IP and subnet of Vigor Router in Local IP /Subnet Mask
- Enter Amazon VPC's WAN IP in Remote Host
- Enter your AWS's virtual LAN in Remote IP/ Subnet Mask
- Select IKEv1 for the IKE Protocol and select IKE phase1 as Main Mode
- Input the Pre-Shared Key
- Click Apply to save the profile.
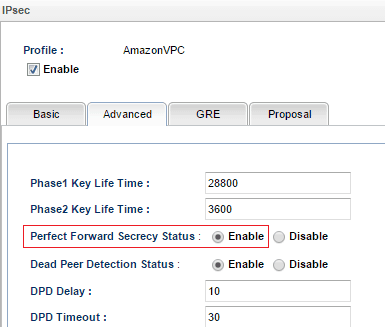
2. In the Advanced tab, enable Perfect Forward Secrecy Status.
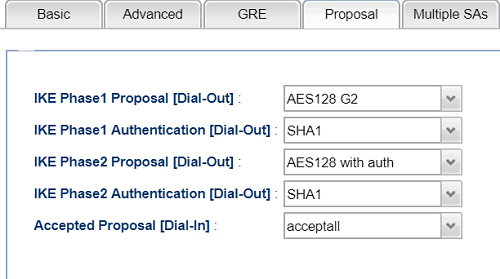
3.In the Proposal tab,
- Select AES128_G2 for IKE Phase1 Proposal [Dial-Out]
- Select SHA1 for IKE Phase1 Authentication
- Select AES128with auth for IKE Phase2 Proposal [Dial-Out]
- Select SHA1 for IKE Phase2 Authentication
- Apply the settings
Published On: Apr 17, 2019
ShareWas this helpful?