
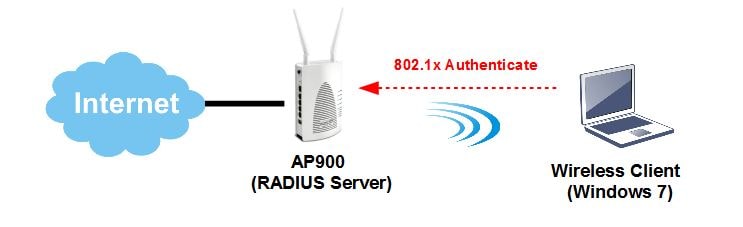
802.1X Authentication for Windows Client without Server Certificate
By default, 802.1X authentication on Window 7, Window 8.1, and Window 10 consists of not only client authentication but also server authentication, which requires the server (here is the VigorAP) to provide certificate information to the client. However, if the AP does not support Certificate Configuration yet, we may set up the Windows client not to verify the server's identity during 802.1X authentication.
NOTE: Since version 1.1.7, VigorAP supports Certificate Configuration to generate the required certificate by itself, and use it for 802.1X authentication. Visit 802.1X Authentication with Self-Generated Server Certificate.
VigorAP Configuration
1. This article applies to VigorAP when it's using WPA2/802.1X for wireless security mode and Use Internal RADIUS Server for 802.1x authentication.
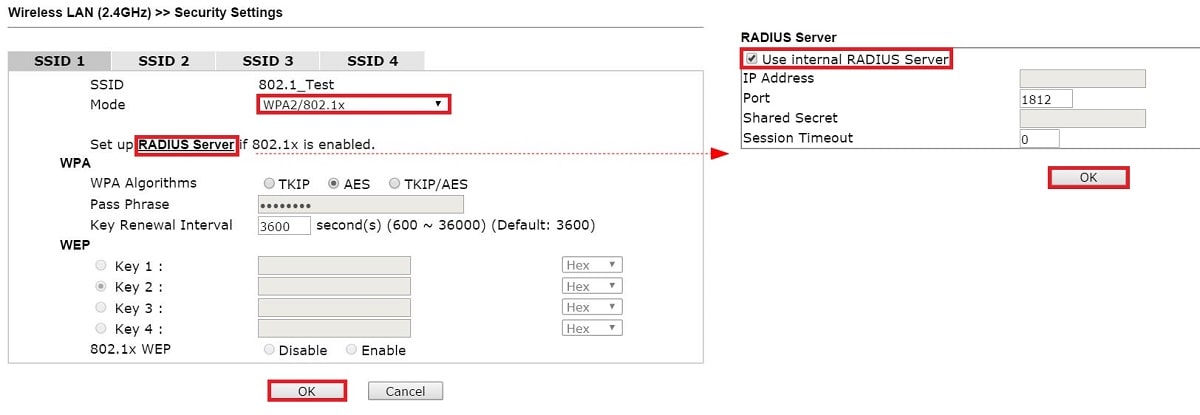
2. To skip server authentication, we need to use PEAP for RADIUS EAP type. Go to RADIUS Setting >> RADIUS Server Configuration, Enable RADIUS Server and set PEAP for RADIUS EAP Type

Windows Client Connecting
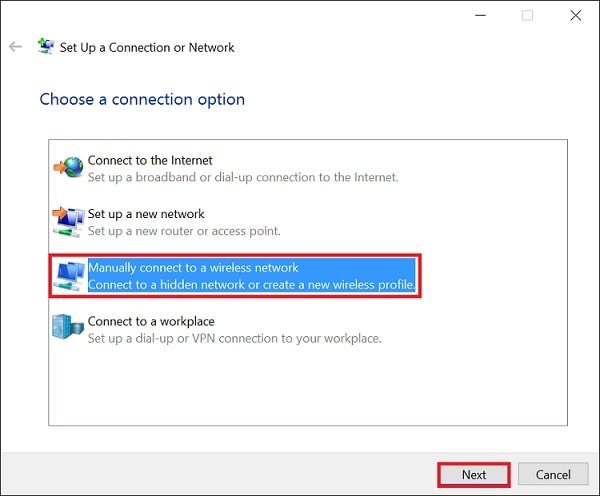
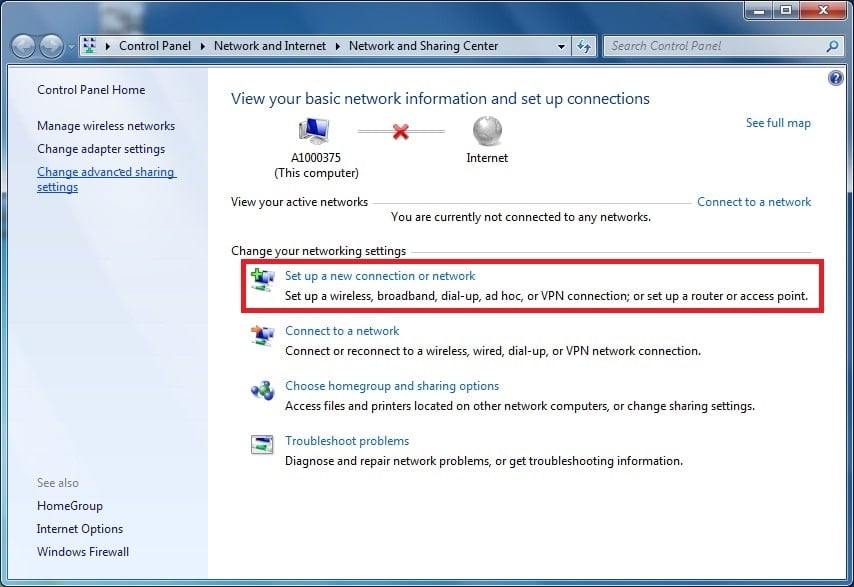
3. On Windows 8.1 or Windows 10 wireless clients, go to Control Panel >> Network and Sharing Center, click Set up a new connection or network.

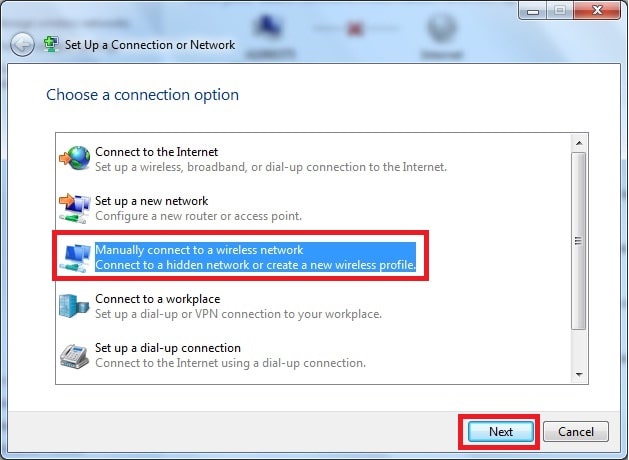
4. Select Manually connect to a wireless network, then click Next.
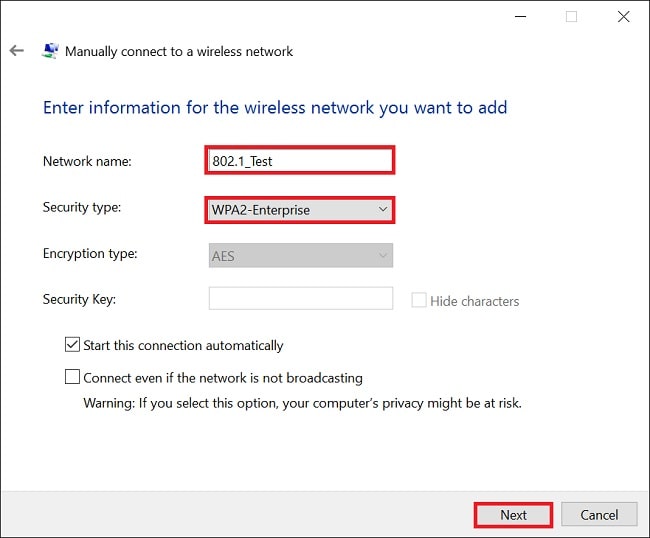
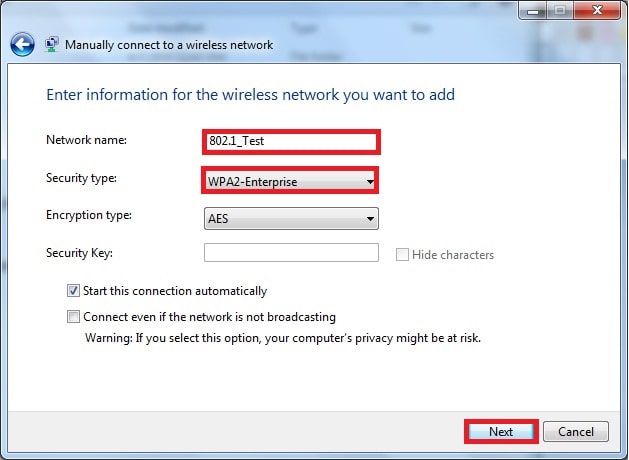
5. Enter the SSID of Vigor AP in Network name, select "WPA2-Enterprise" for Security type, and then click Next.
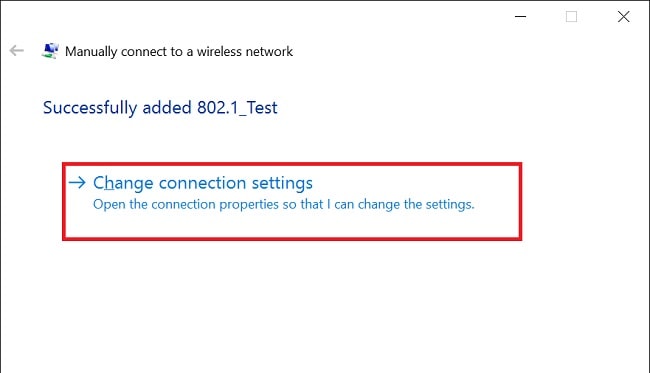
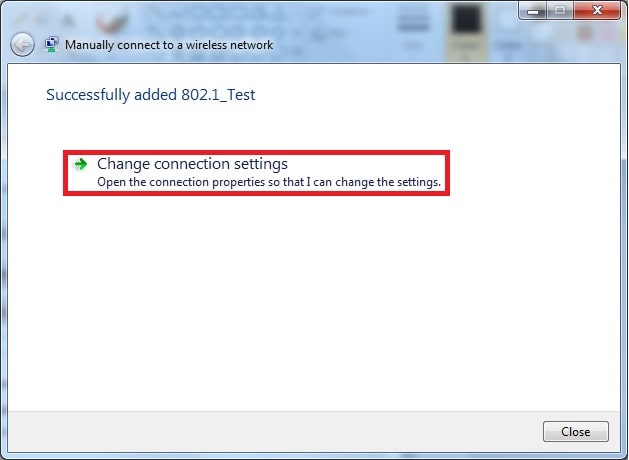
6. Click Change connection settings
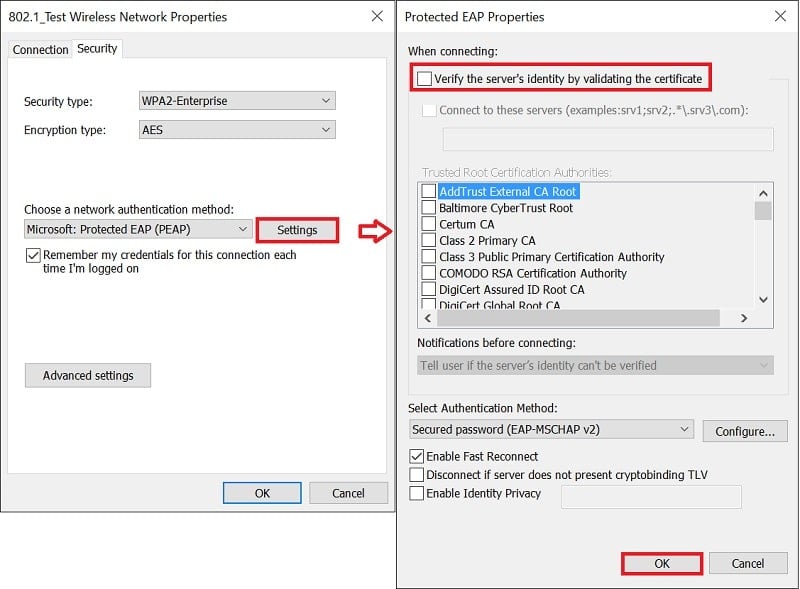
7. In the Security tab, click Settings, un-check Verify the server's identity by validating the certificate, then click OK.
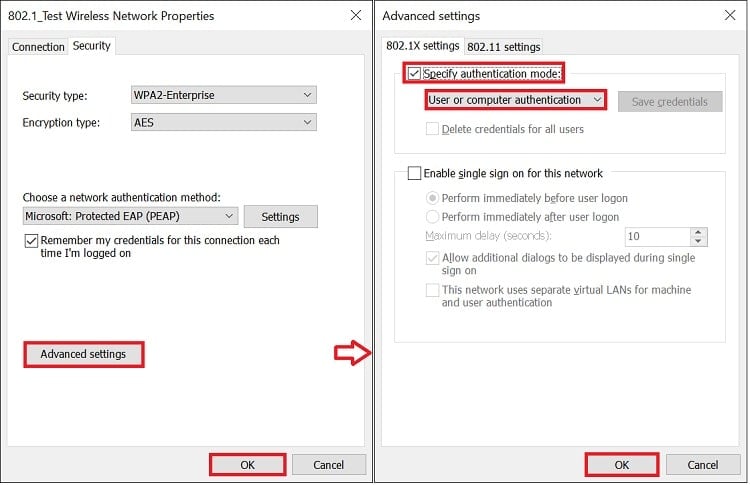
8. Click Advanced settings, enable Specify authentication mode, and choose User or computer authentication, then click OK.
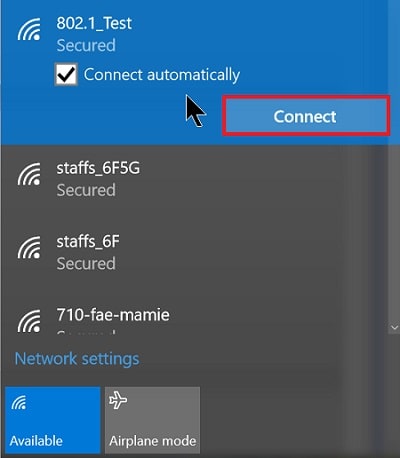
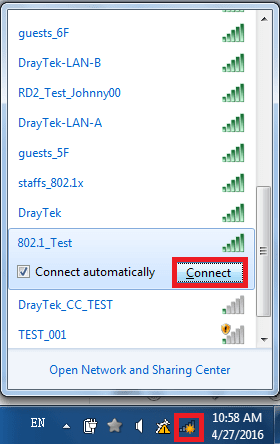
9. After finishing the settings, connect to the wireless network.
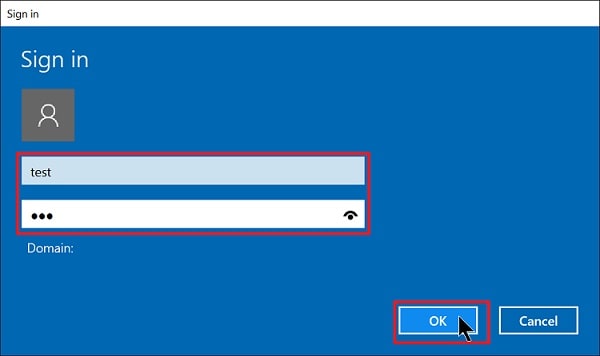
10. When being prompted for the credentials, type the username and password that configured on VigorAP's RADIUS settings, then you will join the network.
3. On Windows 7 wireless clients, go to Control Panel >> Network and Sharing Center >> Set up a new connection or network
4. Select Manually connect to a wireless network, then click Next
5. Enter the SSID of Vigor AP in Network name, select WPA2-Enterprise for Security type, and then click Next.
6. Click Change connection settings
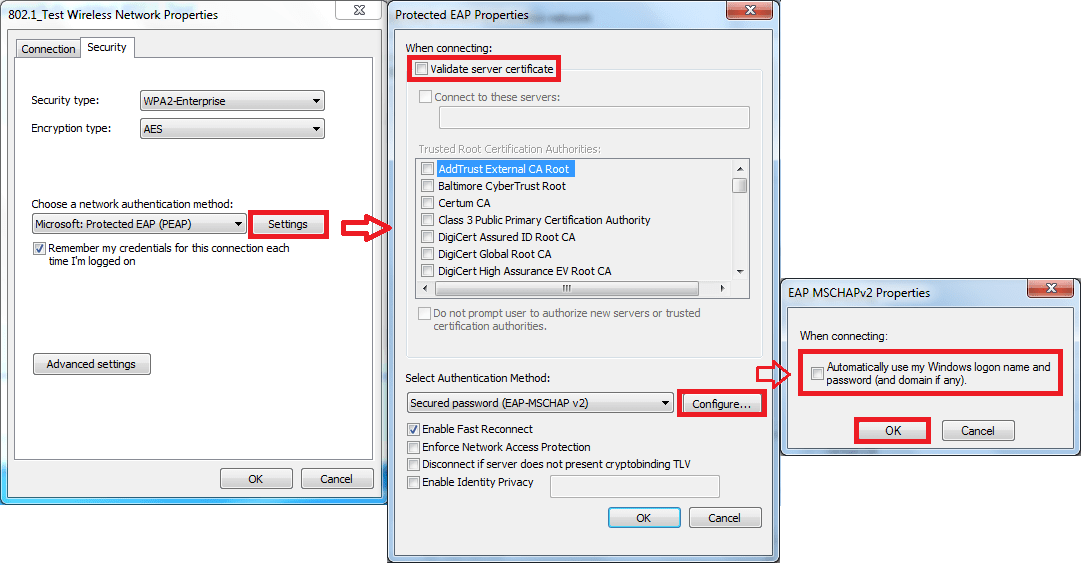
7. In the Security tab, click Settings, un-check Validating server certificate. Click Configure... and un-check Automatically use my Windows logon name and password(and domain if any) then click OK.
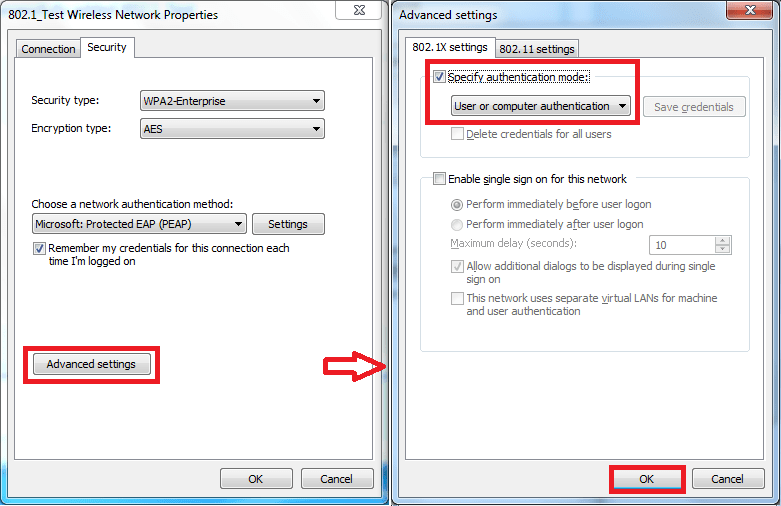
8. Click Advanced settings, enable Specify authentication mode, and choose User or computer authentication, then click OK.
9. After finishing the settings, connect to the wireless network.
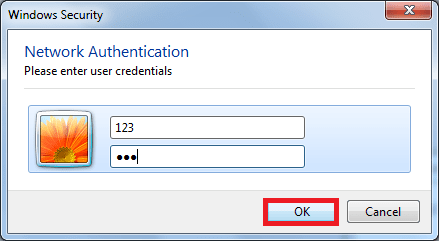
10. When being prompted for the credentials, type the username and password that configured on VigorAP's RADIUS settings, then you will join the network.
Published On: Feb 26, 2016
ShareWas this helpful?