
Adjust NAT Session Timeout Value by CLI
When a session initiates, the router will add a dynamic entry for the address and port mapping. NAT session timeout is the length of time that the router will keep that connection even if it's inactive. After that, the router will remove the entry, and stop accepting the incoming traffic.
Check the Current Value
Vigor Router has a different default timeout value for each application. We can check and tweak the timeout value via CLI. By input command portmaptime-l, the router will list the current value for each application.
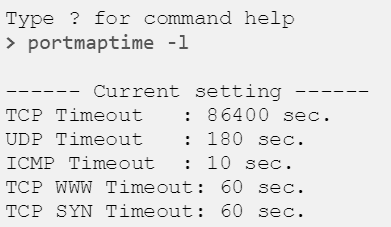
Adjust the timeout value
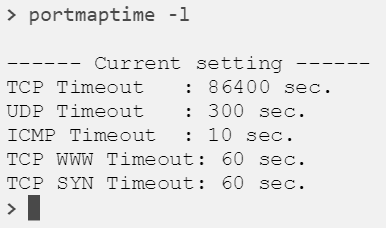
To change the NAT timeout value, enter command portmaptime -[protocol] [time], where [protocol] is a character represents the application (use command portmaptime ? to check the options available), and [time] is the time value in seconds. For example, if you'd like to set the timeout value of UDP session to 5 minutes (300 seconds), this can be done by entering the command portmaptime -u 300.

After that, you may use the command portmaptime -l to check if the current value has changed.
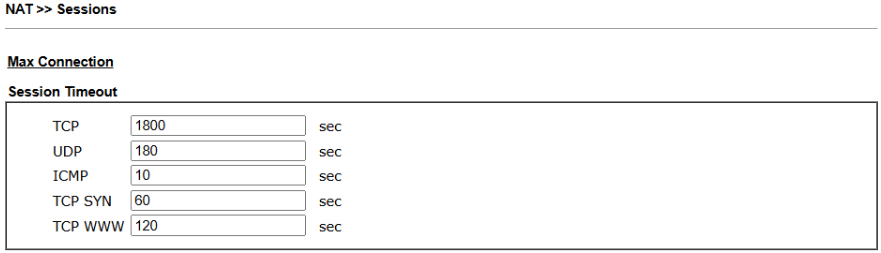
Vigor2962, Vigor3910 and Vigor3912 support the settings on WUI.
When a session initiates, the router will add a dynamic entry for the address and port mapping. NAT session timeout is the length of time that the router will keep that connection even if it's inactive. After that, the router will remove the entry, and stop accepting the incoming traffic.
Adjust the Value via WUI
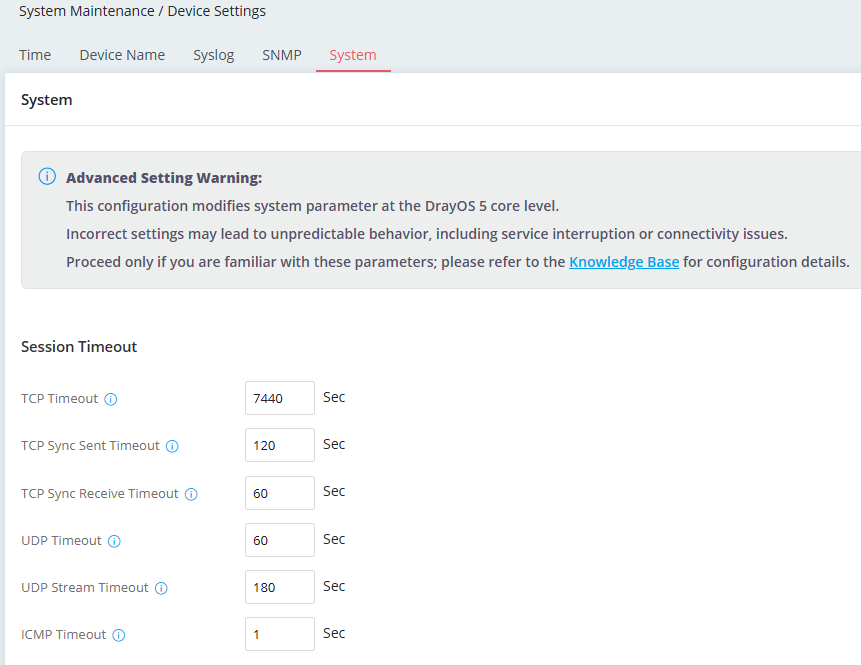
DrayOS 5 routers support configuring the session timeout values through the WUI.
To adjust these settings, navigate to System Maintenance > Device Settings and modify the timeout values in System menu.
Adjust the Value via CLI
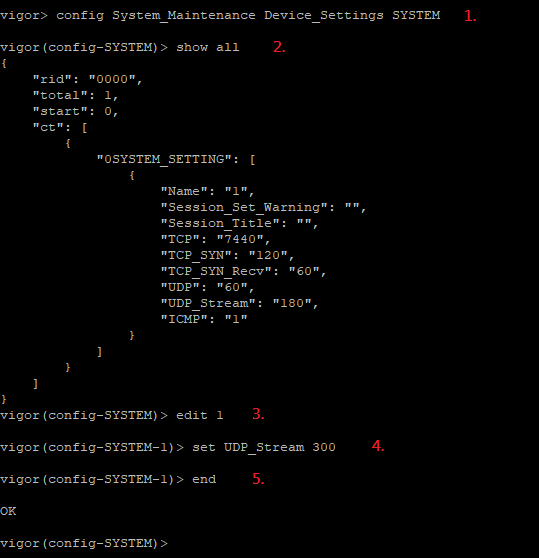
The settings can also be configured through the CLI. Follow the steps below to modify the timeout values using CLI commands:
1. Run config System_Maintenance Device_Settings SYSTEM to enter the configuration mode.
2. Run show all to view the current timeout values and all available parameters.
3. Run edit 1 enter edit mode.
4. Modify the timeout value using the command set [protocol name] [timeout value]
For example, to change the UDP Stream timeout to 300 seconds, we can run set UDP_Stream 300.
5. Run end to save and apply the settings.
Published On:2016-05-12
ShareWas this helpful?