
Upgrade VigorACS 2 on Linux
This document is going to demonstrate how to upgrade VigorACS 2 on Linux platform. ACS 2 is compatible with all of the Linux distribution, including Ubuntu, OpenSUSE, CentOS, Debian and RedHat. Here we will use CentOS 7 for example.
Before the upgrading the ACS, please pay attention to the following item:
- Please contact your local distributor to get the installation file of the latest version VigorACS 2.
- This article is for upgrading the version of VigorACS 2 on Linux platform.
Upgrade VigorACS 2 on Linux
1.Before upgrading the ACS 2, please make sure you're using the root privilege, also, there're some necessary dependencies for VigorACS 2
- unzip (necessary before running installation script)
- bzip2 (necessary before running installation script)
- net-tools (It's included in the installation script)
- vim (It's included in the installation script)
- libaio1/libaio-devel (MariaDB 10 dependencies, it's included in the installation script)
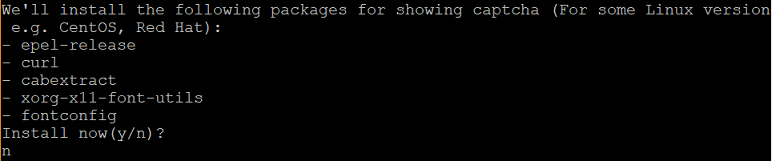
- epel-release/cabextract/xorg-x11-font-utils/fontconfig (fonts package is necessary if you have the minimum install with the linux distribution. It's included in the installation script)
- libcap (the libcap is required for packet capture feature since ACS 2.4.0. It's included in the installation script)
NOTE: The installation script for the standard Linux distributions should include most of the required dependencies, but if you are using a not-so-common distribution, you might need to install the dependencies manually.

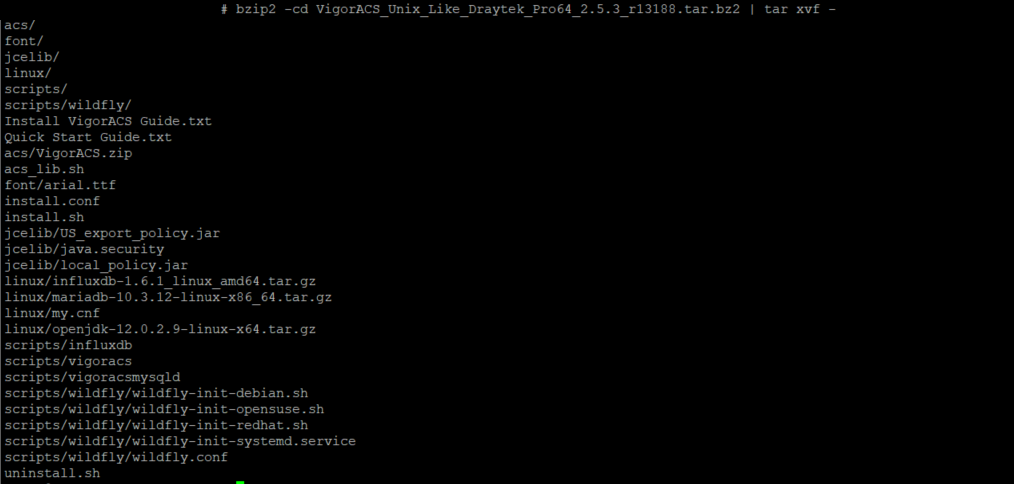
2. Download the VigorACS 2 installed package and extract it via the command: #bzip2 -cd VigorACS_Unix_Like_xxxxxx_xxxxx.tar.bz2 | tar xvf -
or #tar -jxvf VigorACS_Unix_Like_xxxxxx_xxxxx.tar.bz2
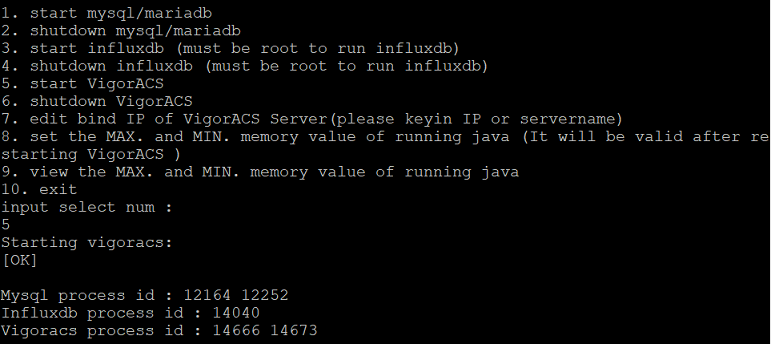
3. Go to the path /usr/local/vigoracs/VigorACS/bin and execute the script vigoracs.sh. Enter the index for stopping the VigorACS2 service first. 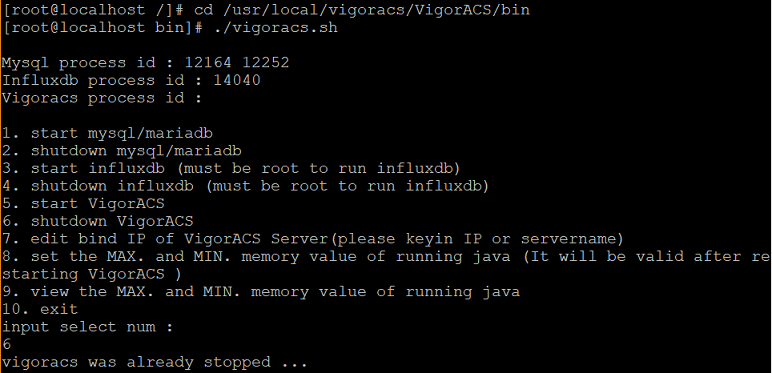
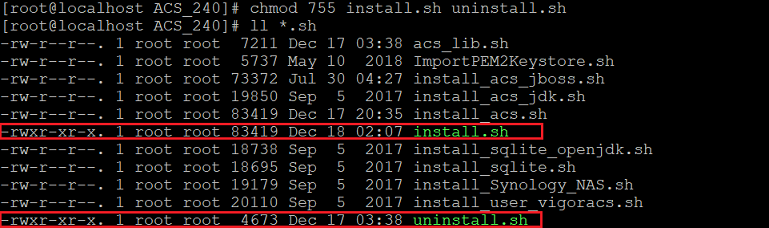
4. Change the privilege of the script install.sh and uninstall.sh via the command:
#chmod 755 install.sh uninstall.sh
5. Execute ./install.sh installation file. The installation program may request you to install some dependencies first. If you already installed it before, enter n to ignore this process.
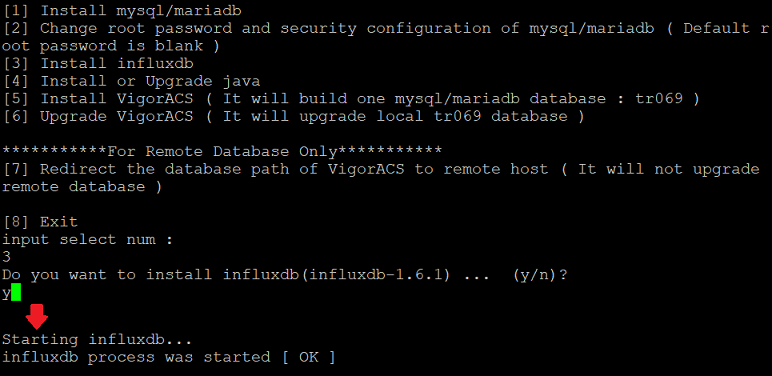
6. Install InfluxDB: If you upgrade the ACS from the version before 2.4.0, enter "3" to install influxDB for recording statistic graph data of ACS. If you have already installed the influxDB, you could ignore this step.
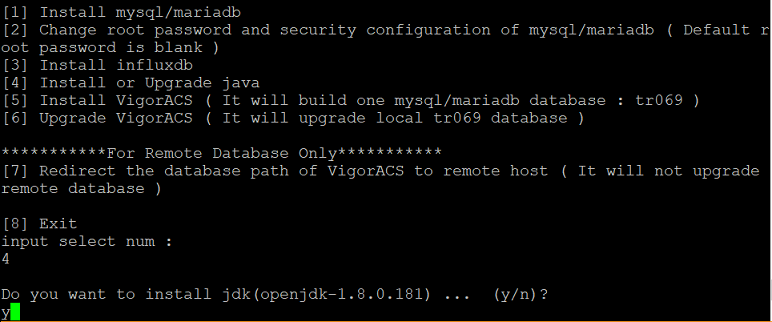
7. Upgrade OpenJDK: If your OpenJDK has updated to the latest one, you could ignore this step. Enter "4" to upgrade Java (OpenJDK). ACS 2.4.0 is compatible with OpenJDK 1.8.0_181, please update the OpenJDK if you use the older version.
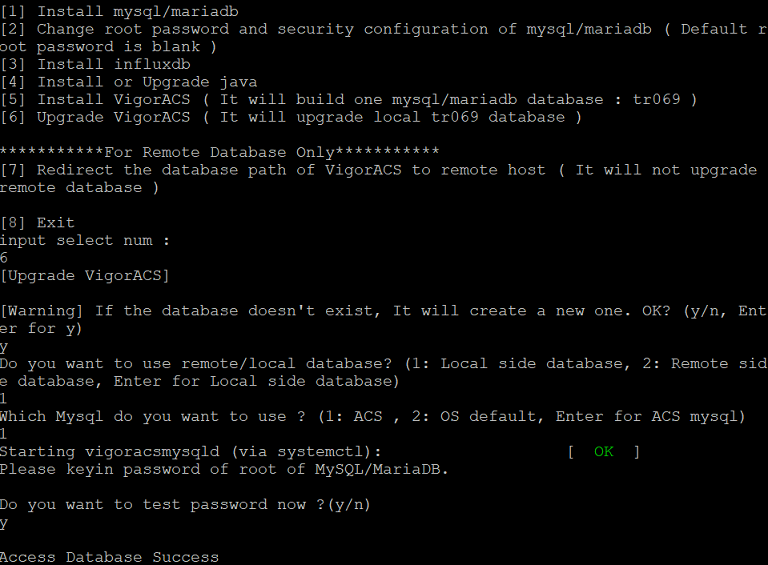
8. Upgrade VigorACS 2: Enter "6" to upgrade the VigorACS. When being asked to enter MySQL password, press "Enter" directly if you still use the default password and make sure you could access the database successfully. Finally, confirm TR-069 database was created successfully and press option 8 to exit the script.NOTE: If you forgot the password, you may refer the article here to reset the MySQL password.
9. After we finished all the installed steps, move to the folder of VigorACS /usr/local/vigoracs/VigorACS/bin/ and execute ./vigoracs.sh, enter the index number to start VigorACS service.
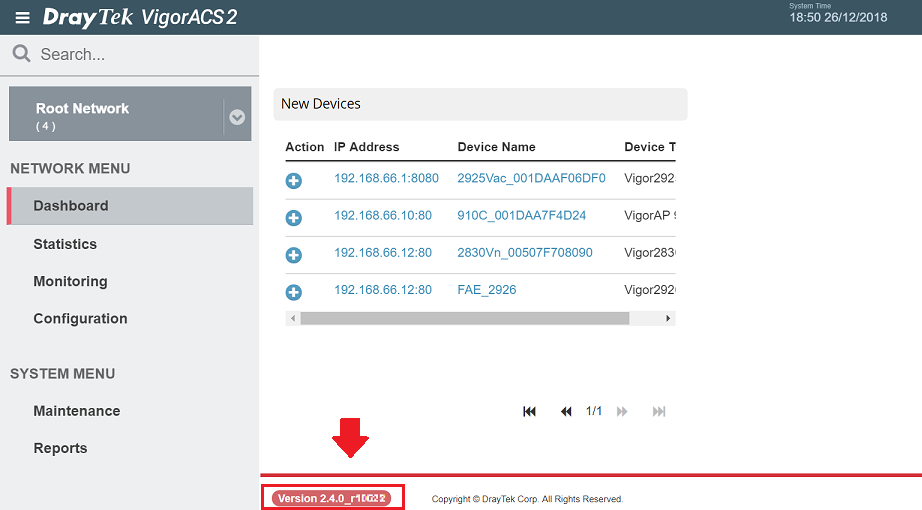
10. Log in to ACS and check if the server has upgraded to the new version.
How to check if the VigorACS 2 services started successfully?
If VigorACS 2 couldn't work normally, please check if there is a starting message in the server log, which could be found in the path:
tail -f /usr/local/vigoracs/VigorACS/standalone/log/server.log

If you didn't see the message in Syslog, please provide the log and all the VigorACS install information to DrayTek technical support
Published On:2019-01-16
Was this helpful?