
IPsec VPN between Cisco ASA and Vigor3900/2960
This document introduces how to set up an IPsec tunnel between CiscoASA and Vigor3900/2960. The scenario is that Vigor2960 has two WAN interfaces and will dial out to Cisco through WAN2 when WAN1 is down.
In this example, the WAN1 of Vigor2960 has a public IP address 1.1.1.1, WAN2 has 2.2.2.2, and the local subnet IP is 192.168.0.0/2. The Cisco ASA 5515 has a public WAN IP 4.4.4.4, and the local subnet IP is 10.1.0.0/24.

Configuring Cisco as the VPN server (Dial-In)
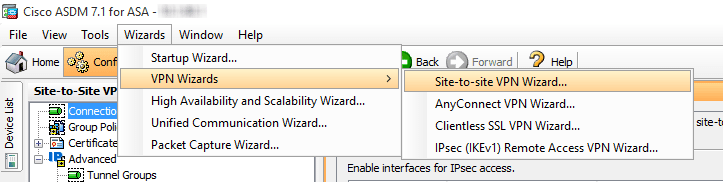
1. Use VPN Wizards to create Site-to-site VPN profile for Vigor2960 Dial-In.
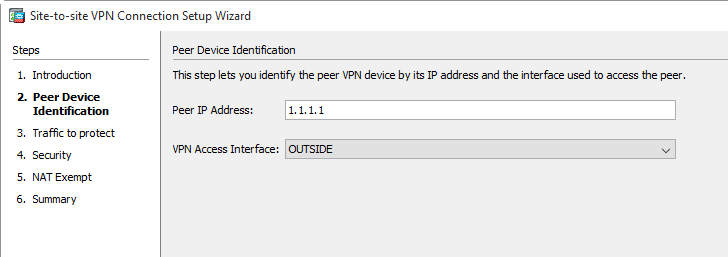
2. Specify Vigor2960's WAN1 IP "1.1.1.1" as Peer IP Address.
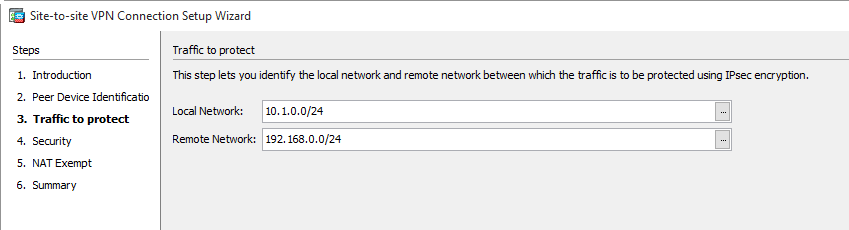
3. Specify Local Network and Remote Network.
4. Input Pre-shared Key.

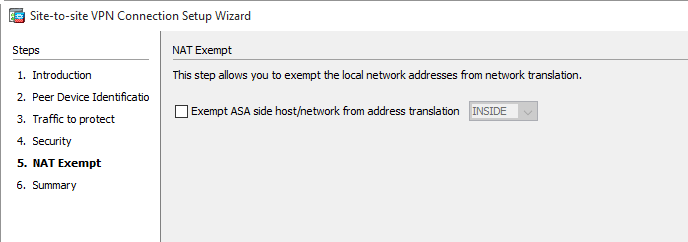
5. Do NOT select Exempt ASA side host/network from address translation option.
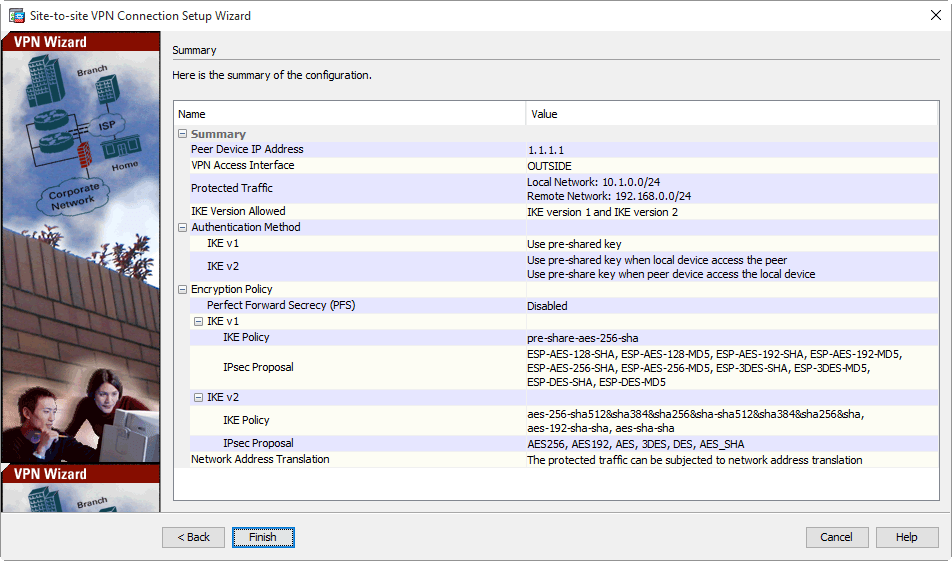
6. The summary of this VPN profile will be displayed as follows, includes the accepted IKE protocol, IKE Policy, and IPsec Proposal.
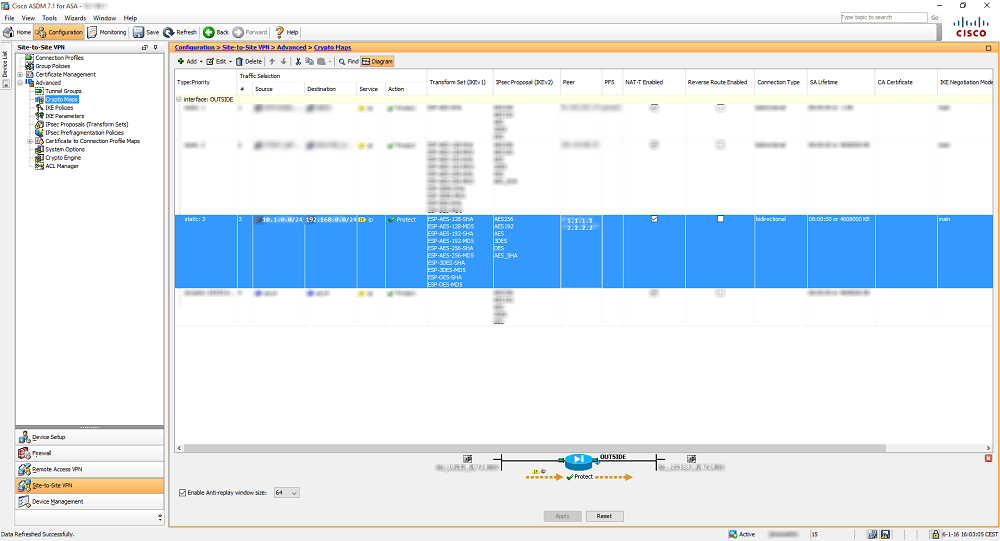
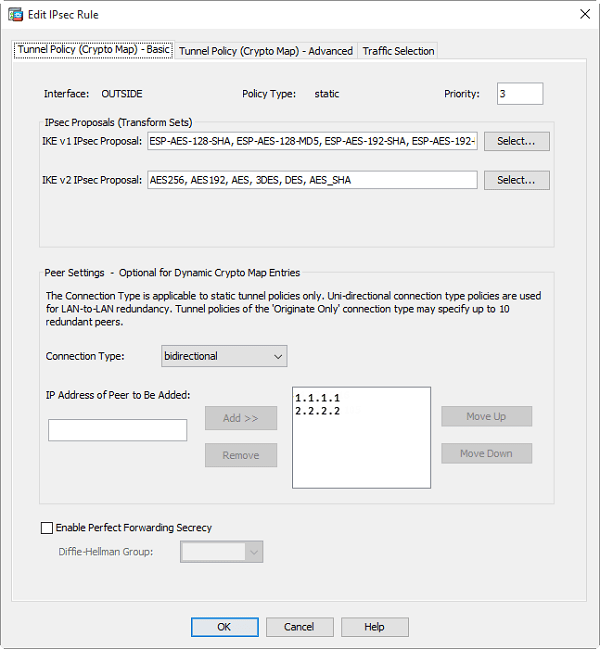
7. Go to Crypto Maps and edit the specified Crypto Map by adding(allow) the second peer IP Address (It is the WAN2 Public IP 2.2.2.2 of Vigor2960).
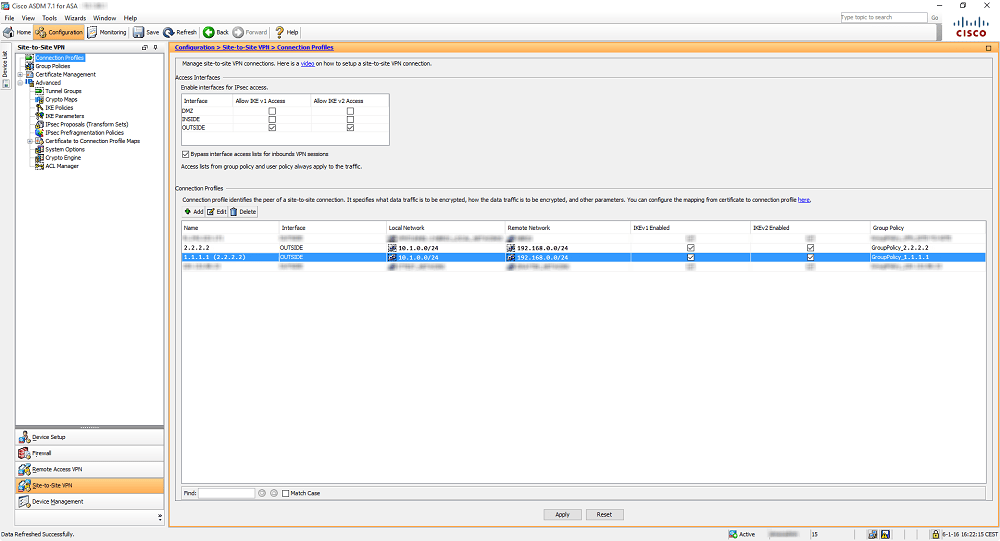
8. Now add the second VPN Connection through the VPN wizard. Use the same settings, except for the Peer Public IP. Now use 2.2.2.2 instead of 1.1.1.1
9. After that, the config should look similar to below.
Configuring Vigor2960 as the VPN Client (Dial-Out)
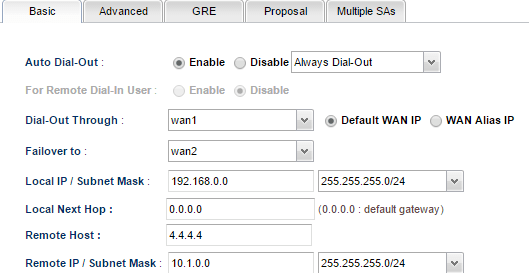
10. Go to VPN and Remote Access >> VPN Profile >> IPsec click Add to create a new profile:
- In the Basic tab, enter the Profile name and Enable this profile
- Select Always Dial-Out for Auto Dial-Out
- Select wan1 for Dial-Out VPN Through.
- Select wan2 for Failover to
- Enter Local IP /Subnet Mask as the LAN network on the Vigor router
- Enter Cisco WAN IP in Remote Host
- Enter Remote IP/ Subnet Mask as the Cisco's local network.
- Select IKEv1
- Enter Pre-Shared Key.
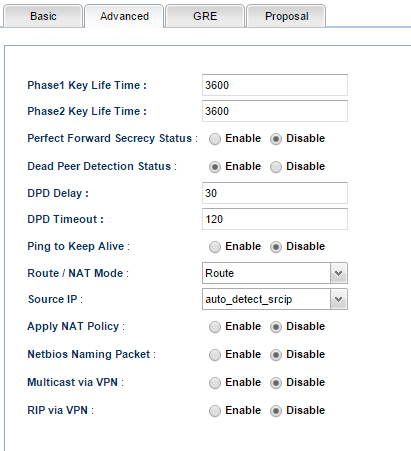
11. In the Advanced tab, change Phase1 Key Lifetime from 28800s to 3600s. (Because Cisco VPN configuration has the phase1 key lifetime as 3600 seconds.)
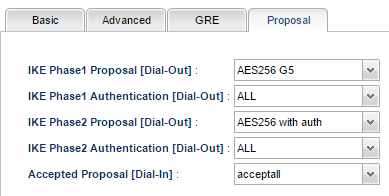
12. In Proposal Tab, select the accurate proposal that matches the proposal setting on Cisco. Click Apply to save the profile.
After completing the above configurations, Vigor2960 will dial up the IPsec tunnel to Cisco automatically through WAN1 and dial it up to Cisco through WAN2 as Failover when WAN1 is down.
Published On:2016-03-28
ShareWas this helpful?