
PPTP VPN between DrayTek Routers
This note will explain how to establish a PPTP LAN-to-LAN VPN between two DrayTek Vigor Routers.

VPN server (Dial-In) Setup
1. Go to VPN and Remote Access >> LAN to LAN, edit a profile as follows:
- Enter Profile Name
- Check Enable this profile
- Set Call Direction to "Dail-In".
- In Dial-In settings, enter Username and Password.
- In TCP/IP Network Settings, enter Remote Network IP as the LAN network of the peer router.

VPN Client (Dial-out) Setup
2. Go to VPN and Remote Access >> LAN to LAN, edit a profile as follows:
- Enter Profile name
- Check Enable this profile
- Set Call Direction to "Dial-Out".
- Enable PPTP in the Dial-out settings
- Enter Server IP as the WAN IP of the peer router
- Enter Username and Password as the same as the one set on the peer router
- Enter Remote Network IP as the LAN Network of the peer router

3. Go to VPN and Remote Access >> Connection Management to dial the VPN and check the VPN connectivity.

Vigor3900 in Headquarter
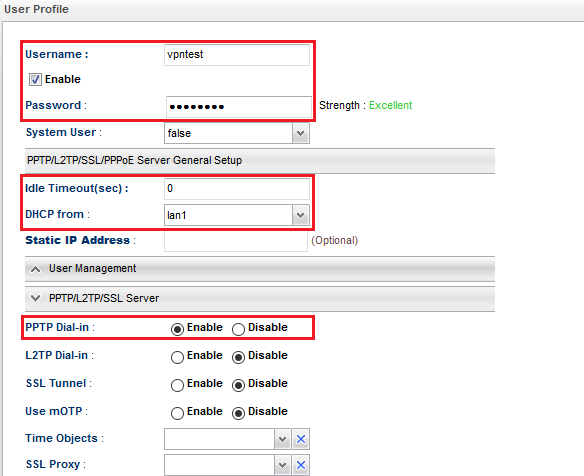
1. Go to User Management >> User Profile, click Add to create a new profile:
- Enter Username
- Check Enable
- Enter Password
- (Optional) Enter 0 for Idle Timeout to avoid VPN disconnecting when there's no traffic
- Select a LAN interface for the peer router at DHCP from
- Select "Enable" for PPTP Dial-in
- Click Apply to save the profile.
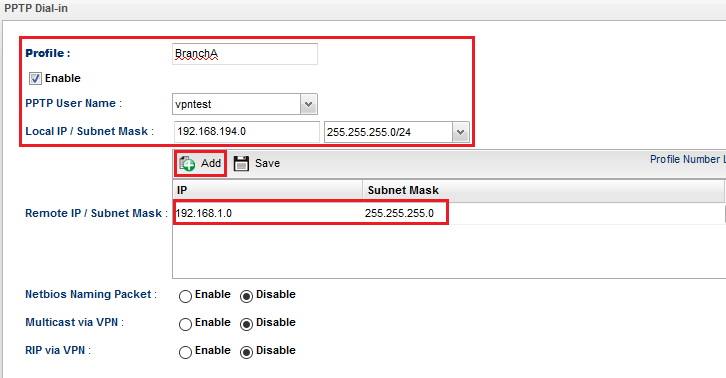
2. Go to VPN and Remote Access >> VPN Profile >> PPTP Dial-In, click Add to create a new profile:
- Enter a Profile name
- Check Enable
- Select the PPTP profile created for the Branch office to dial in at PPTP User Name
- Enter Local IP / Subnet Mask as the LAN network of Vigor3900 in Headquarter you'd like to link to the branch office
- Click Add in Remote IP / Subnet Mask and enter the LAN network of Vigor3900 in Branch Office
- Click Apply to save the profile.
Vigor3900 in Branch Office
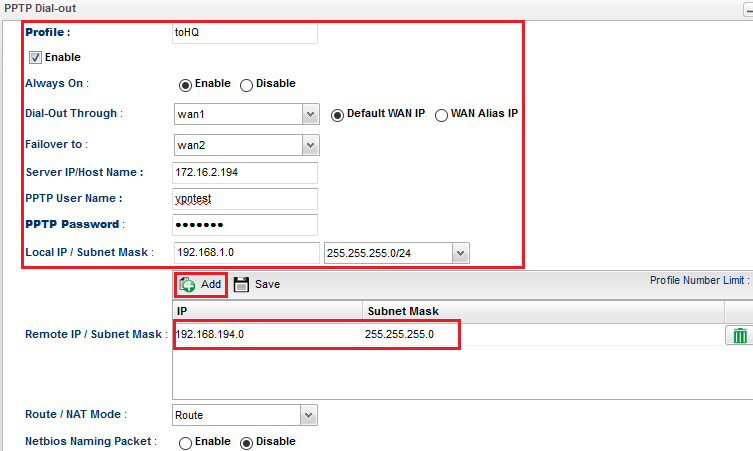
3. Go to VPN and Remote Access >> VPN Profile >> PPTP Dial-Out click Add to create a new profile:
- Enter a Profile name
- Check Enable
- Select "Enable" for Always On
- Select wan1 for Dial-Out Through (the primary WAN to build the VPN)
- (Optional) Select wan2 for Failover to (the backup WAN to build the VPN)
- Enter PPTP User Name and PPTP Password as the same as step 1.
- Enter Local IP / Subnet Mask as the LAN network of Vigor3900 in Branch Office (must be the same as step 2-e)
- Click Add in Remote IP / Subnet Mask and enter the LAN network of Vigor3900 in Headquarter (must be the same as step 2-d)
- Click Apply to save the profile.
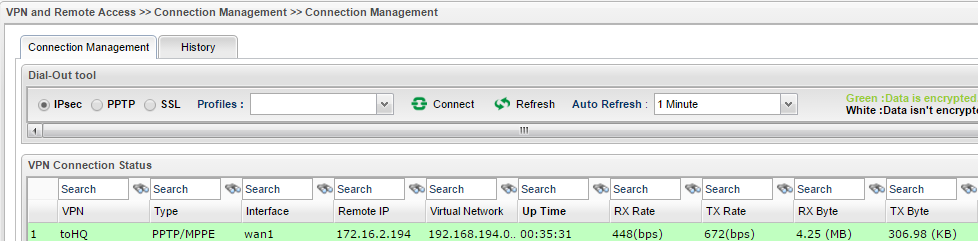
4. After finishing the above configurations, the PPTP VPN between the Vigor3900s is up. We may go to VPN and Remote Access >> Connection Management to check the status.
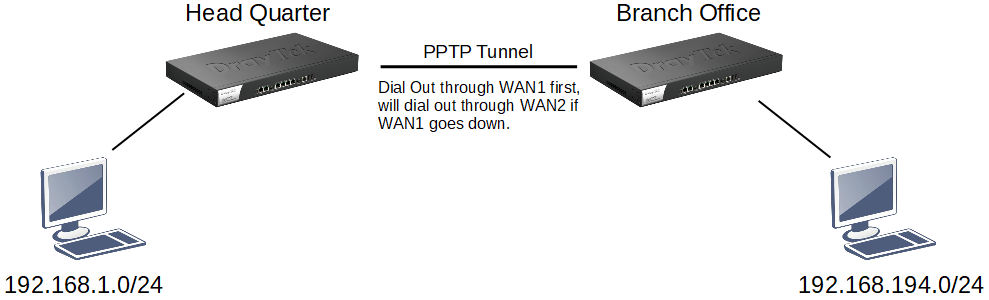
5. Because the Failover To settings in step 3, When WAN1 of Vigor3900 in the branch office goes down, Vigor3900 will dial out the PPTP tunnel through its WAN2 interface to the Vigor3900 in the headquarter.

Published On:2017-08-01
ShareWas this helpful?