
IKEv2 EAP between NordVPN and Vigor Router
Since firmware version 3.9.6.1, Vigor Router supports dialing out an IKEv2 EAP VPN tunnel to NordVPN server. This article introduces how to create IKEv2 EAP VPN tunnel from Vigor Router to NordVPN server in this document.
Note: Vigor2960/3900 support it since v1.5.0
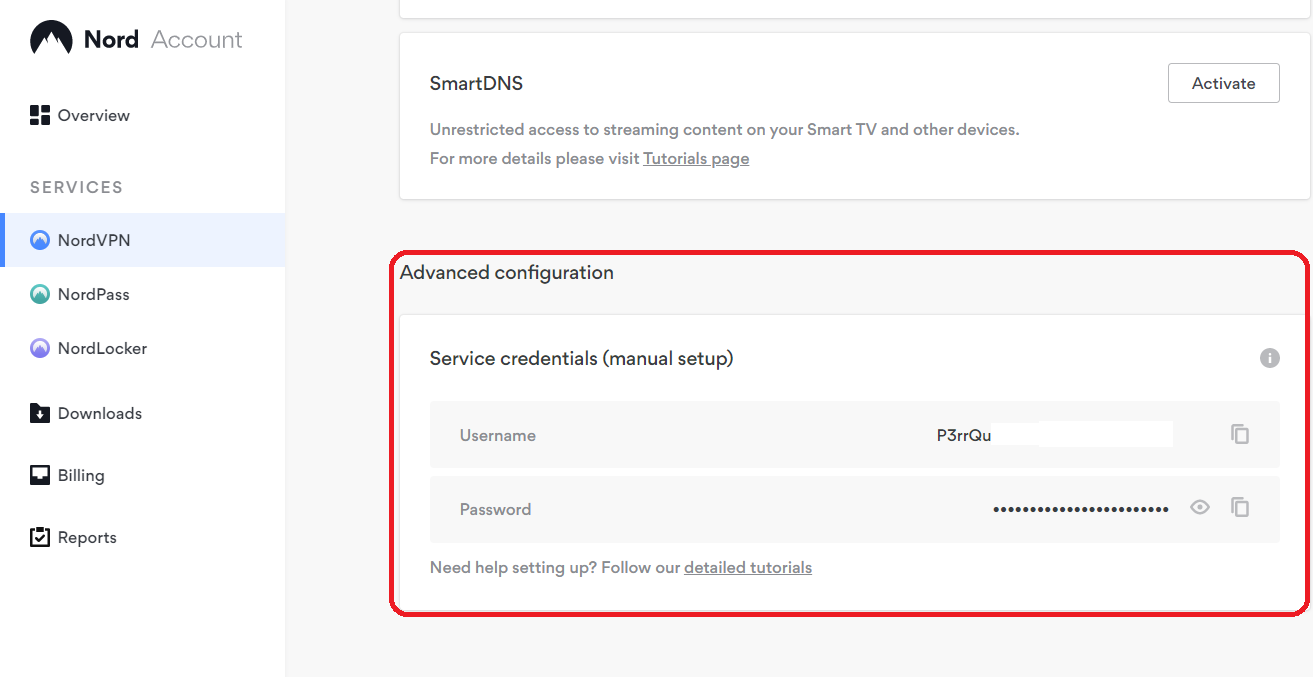
1. You will need a NordVPN account and download the NordVPN root CA certificate from https://downloads.nordvpn.com/certificates/root.der
And copy Service Credentials in NordVPN.
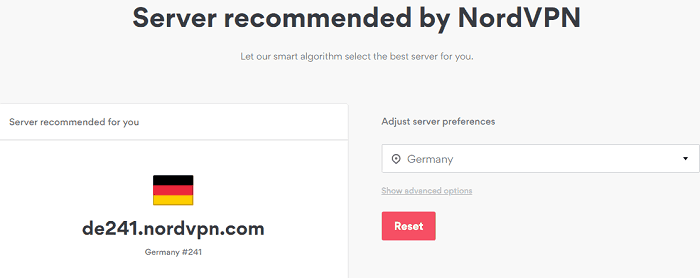
2. Get the NordVPN server domain from https://nordvpn.com/servers/
You may get a recommended server by selecting the country you located. In the following picture, de241.nordvpn.com is the hostname of the VPN server.
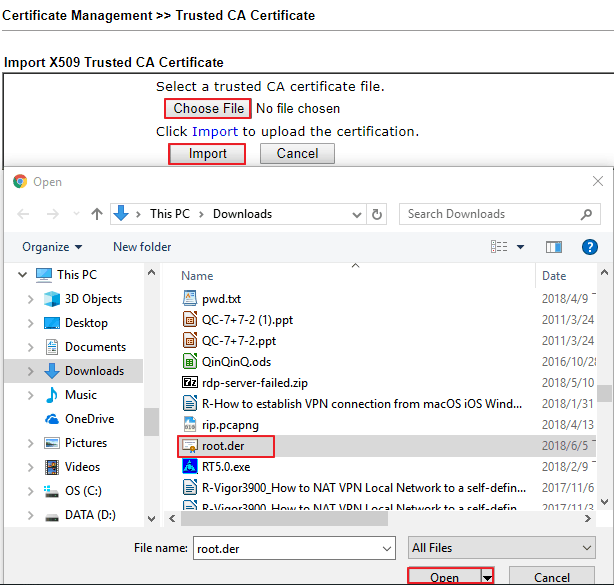
3. Log into the router's management page. Go to Certificate Management >> Trusted CA Certificate page, and click IMPORT. Click Choose File to select the root.der file we downloaded in step 1. Then, click Import.
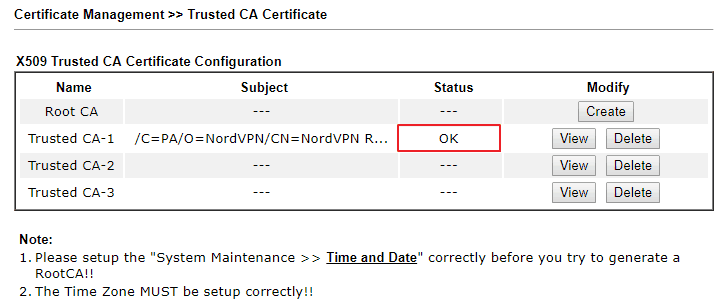
4. Wait for few seconds until the router responds “Import Success” and the Certificate Status shows OK
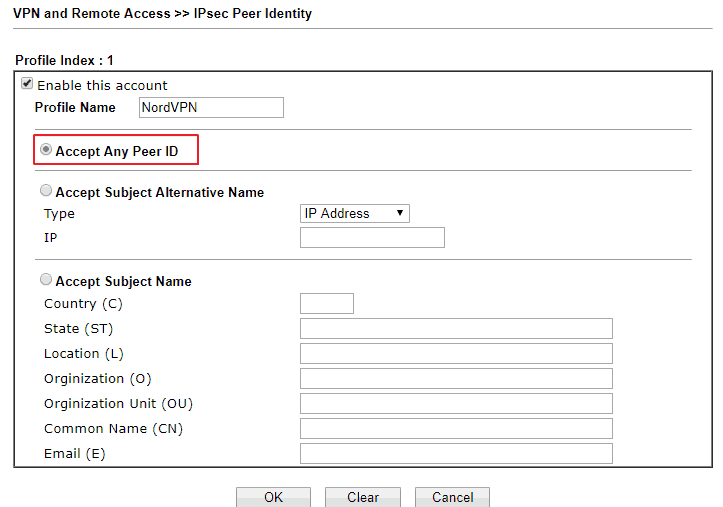
5. Go to VPN and Remote Access >> IPsec Peer Identity, edit a profile to for NordVPN server.
- Check Enable this account
- Select Accept Any Peer ID
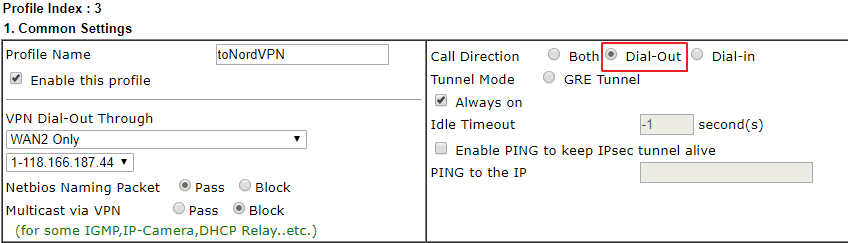
6. Go to VPN and Remote Access >> LAN to LAN, click on an available index number, and edit the profile as follows. In Common Settings,
- Give it a profile name
- Check Enable this profile
- Set Call Direction to "Dial-Out"
- At Dial-Out Through, select the WAN interface for VPN connection
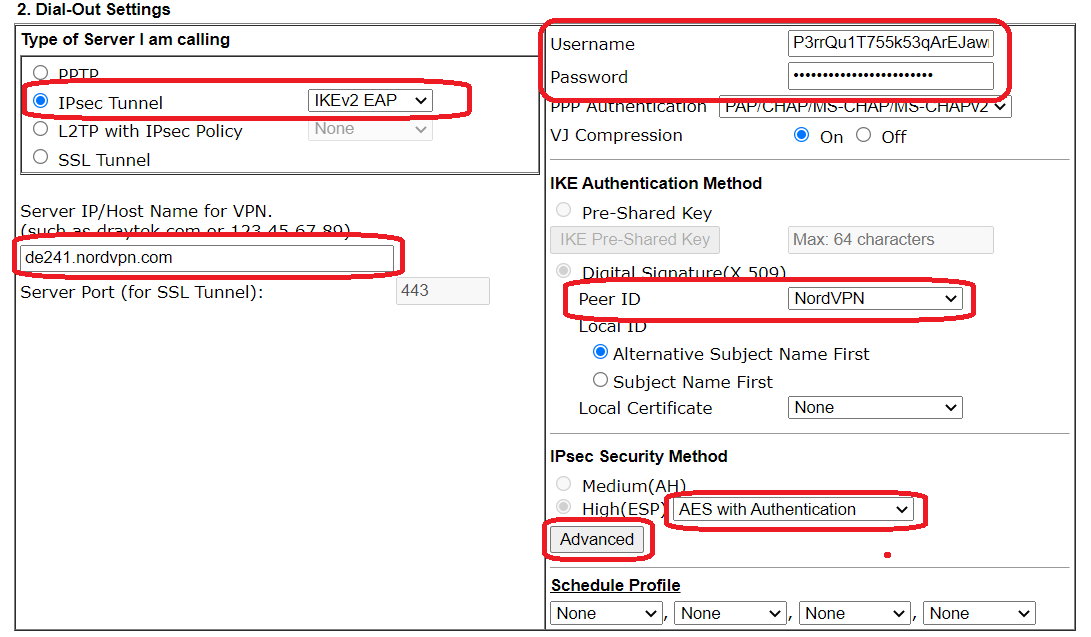
7. In Dial-Out Settings,
- Select IKEv2 EAP for the VPN server type
- Enter the domain of VPN server we get in step 3 at Server IP address/Hostname
- Enter service credentials as Username and Password
- Choose "Digital Signature" for IKE Authentication Method, and select the IPsec Peer Identity Profile created in step 6 for Peer ID
- Select "AES with Authentication" for IPsec Security Method
- Click Advanced
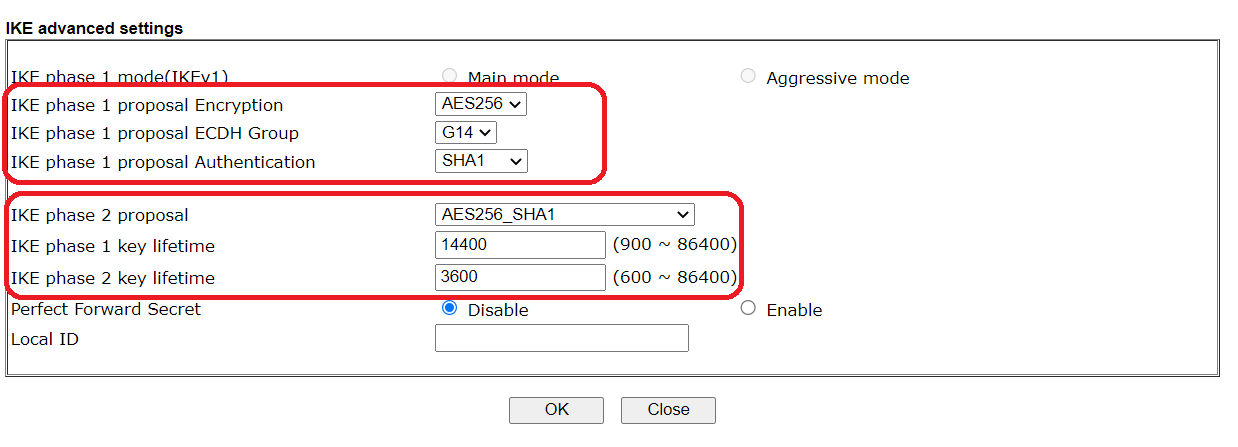
8. Click Advanced button, In the IKE advanced settings pop-up windows, confgure:
- IKE phase 1 proposal as "AES256_SHA1_G14"
- IKE phase 2 proposal as "AES256_SHA1"
- IKE phase 1 key lifetime as "14400"
- IKE phase 2 key lifetime as "3600"
9. Click OK o close the window. At TCP/IP Network Settings:
- Enter Remote Network IP as "0.0.0.0"
- Select Remote Network Mask to "0.0.0.0/0"

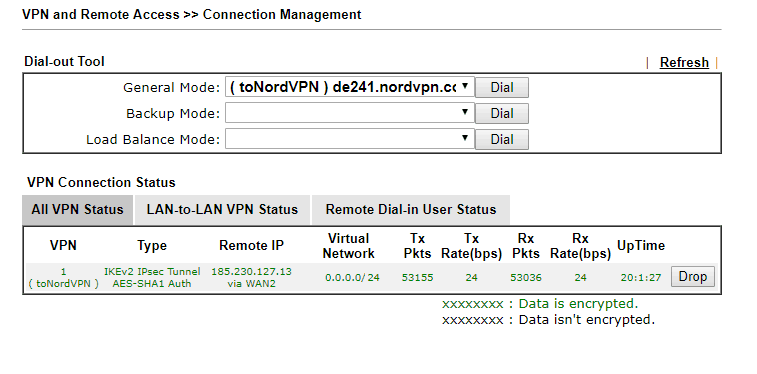
10. After finishing above settings, we can check the VPN status via VPN and Remote Access >> Connection Management page.
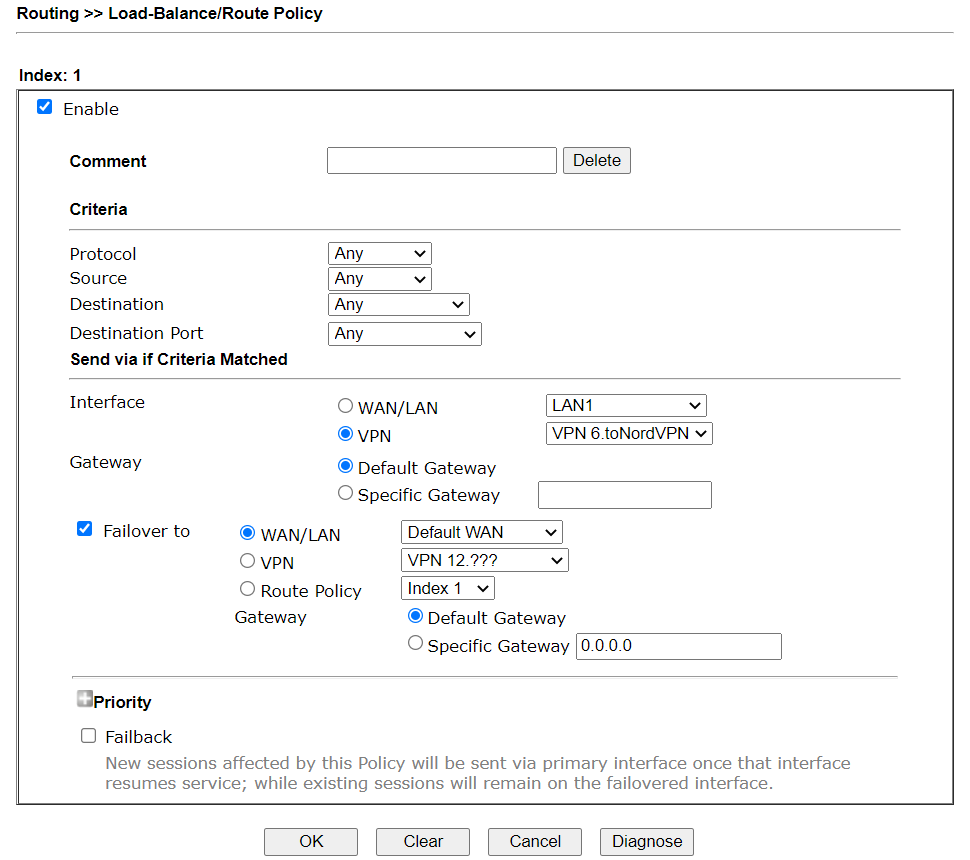
11. Go to Routing >> Load-Balance/Route Policy and set up a route policy to send all traffic to NordVPN.
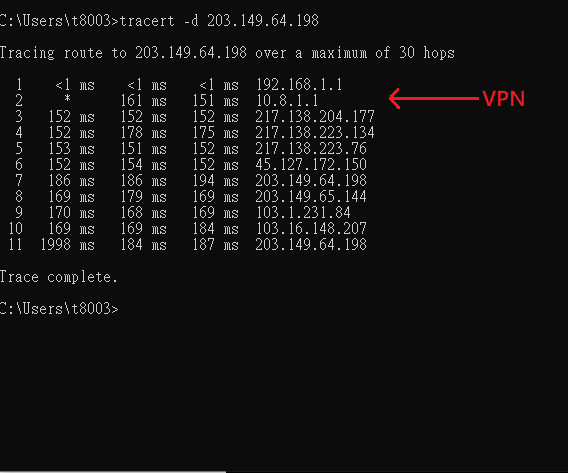
12. We can use the command “tracert” to check if the traffic is going through the VPN tunnel correctly.
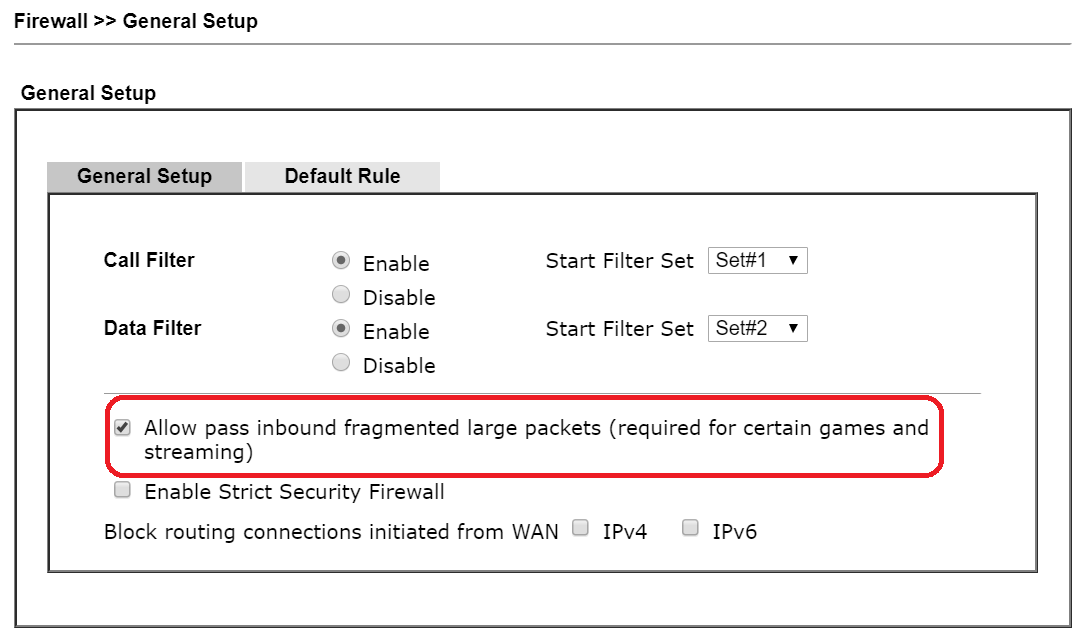
Note: In order to accept large packets from NordVPN, Allow pass inbound fragmented large packets (required for certain games and streaming) should be enabled.
1. You will need a NordVPN account and download the NordVPN root CA certificate from https://downloads.nordvpn.com/certificates/root.der
And copy Service Credentials in NordVPN.
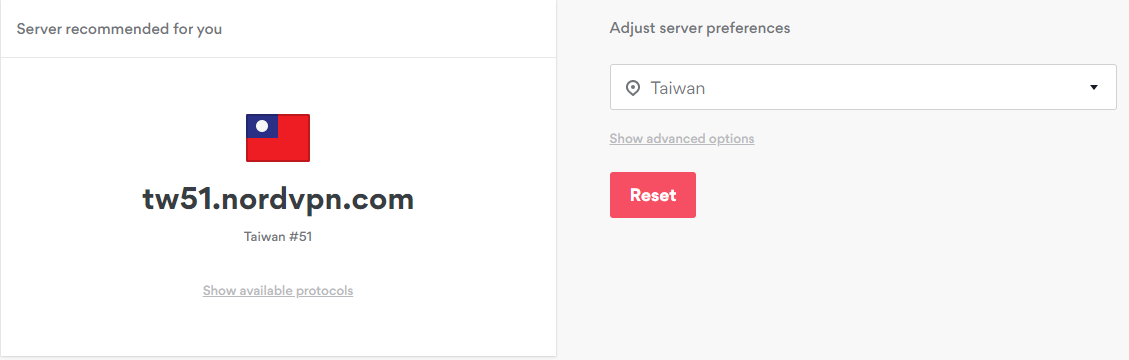
2. Get the NordVPN server domain from https://nordvpn.com/servers/
You may get a recommended server by selecting the country you are located in. The following picture, tw51.nordvpn.com is the hostname of the VPN server.
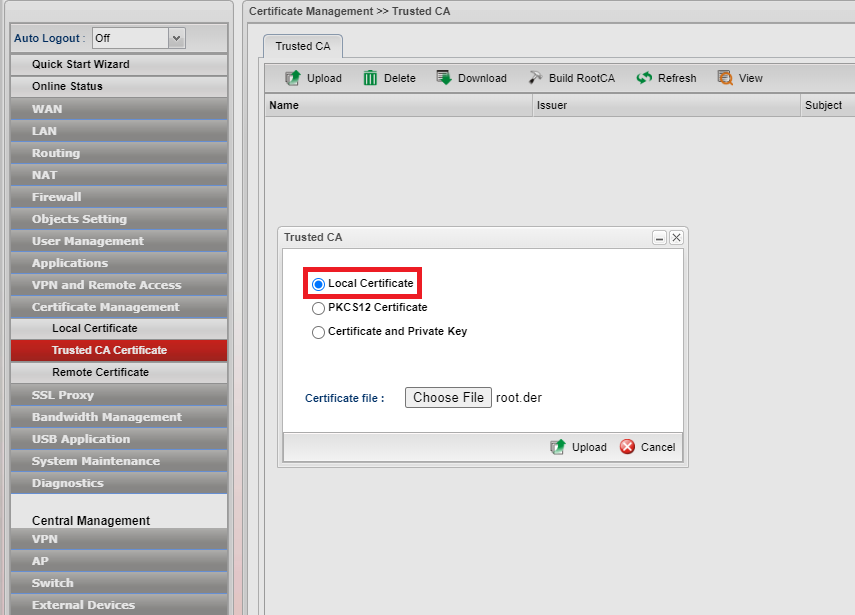
3. Now, On the Router. Go to Certificate Management>>Trusted CA Certificate page, click upload, and select Local Certificate. Click Choose file to select the root.der file which we download from Step1. After uploading the file, you can see the status shows ok.
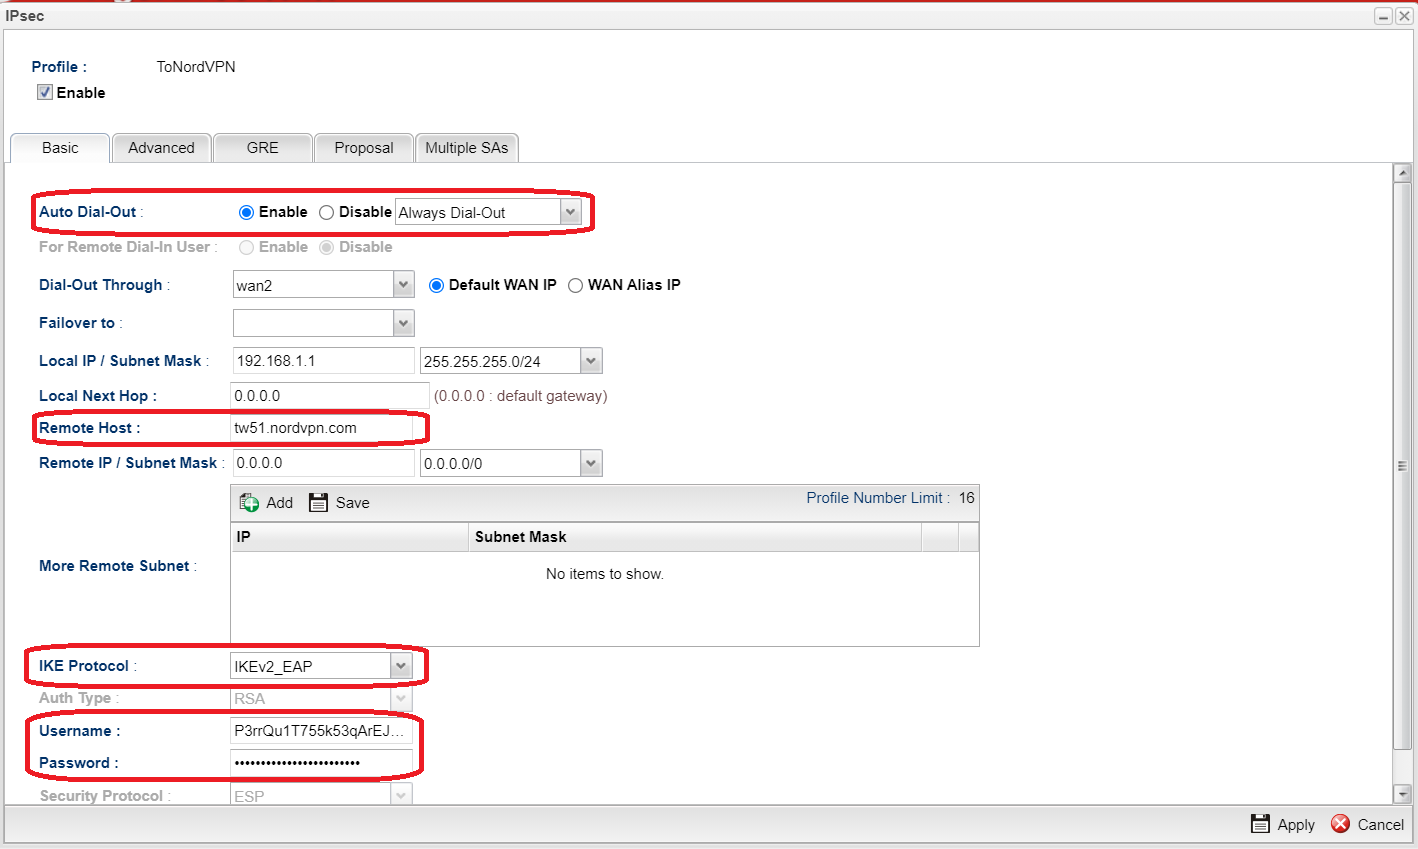
4. VPN and Remote Access >> VPN profile>>IPsec, and click Add, configure the settings at basic page.
- Enable the profile
- Enable Auto Dial-Out and select Always Dial-Out
- Enter the domain of VPN server we get in step 2 at Remote Host
- Enter the NordVPN account and password at Username and password.
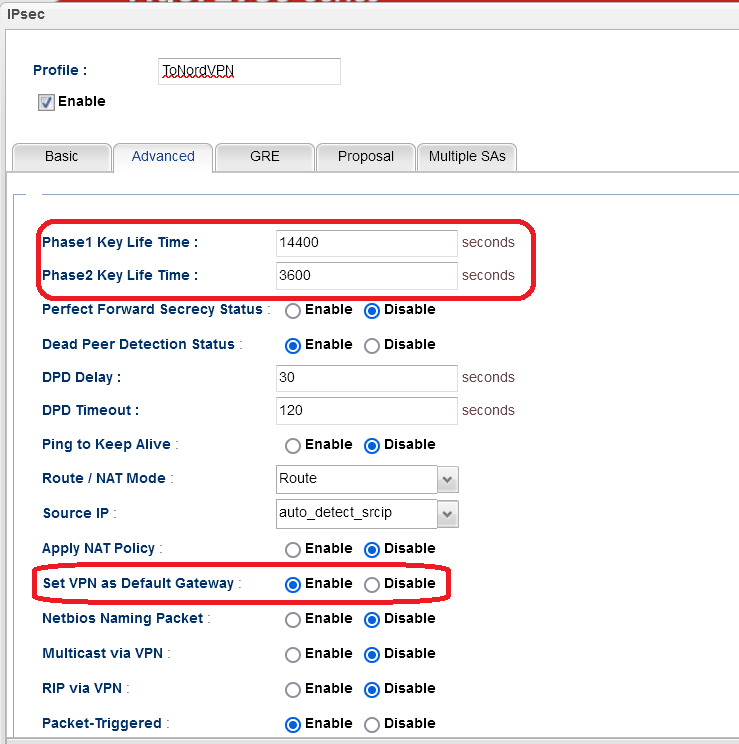
5. Switch to Advanced page, set phase1 key lifetime to 14400, phase2 key lifetime to 3600, and enable Set VPN as Default Gateway
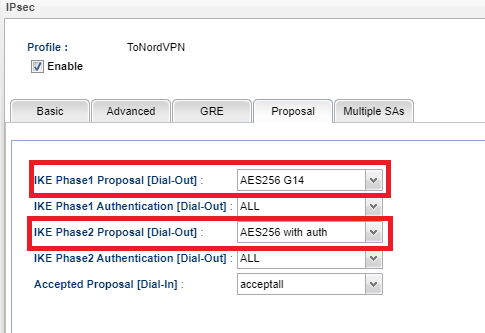
6. Switch to Proposal Page.
- Select AES256 G14 as IKE Phase 1 proposalㄡ
- Select AES256 with auth as IKE phase 2 proposal.
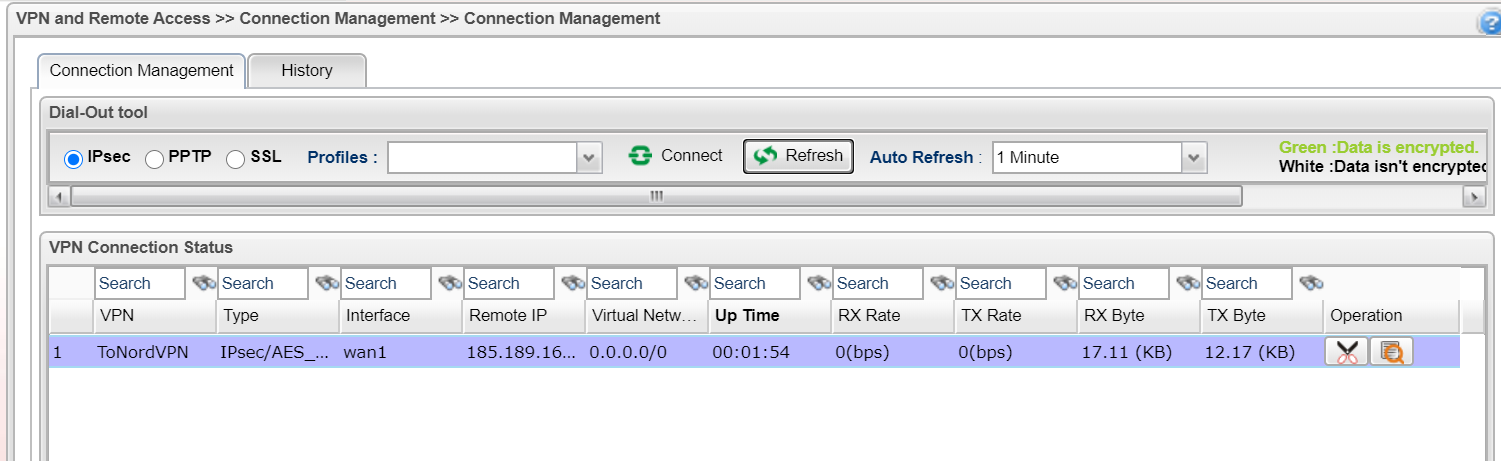
7. Go to VPN and Remote Access>>Connection Management.
You can check the status of the VPN porfile.
Published On:2020-06-04
ShareWas this helpful?