
Install VigorACS 3 on Linux
This document demonstrates how to install VigorACS 3 on Linux platform. Before you install, please note that:
- Make sure you have the 64-bit operating system, VigorACS 3 can only run on the 64-bit platform. Please check the compatible CPE list and hardware requirement from here first.
-
Contact your local distributor to get the latest installation file.
- Make sure you're using the root privilege. Also, there are some necessary dependencies for VigorACS 3:
- unzip (necessary before running installation script)
- bzip2 (necessary before running installation script)
- net-tools (It's included in the installation script)
- vim (It's included in the installation script)
- libaio1/libaio-devel (MariaDB 10 dependencies, it's included in the installation script)
- xfonts-base/fontconfig/libncurses5 (fonts package is necessary if you have the minimum install with the linux distribution. It's included in the installation script)
- libcap (the libcap is required for packet capture feature since ACS 2.4.0. It's included in the installation script)
-
Download the VigorACS 3 installation package and extract it via the command:
$ tar -jxvf VigorACS_Unix_Like_Draytek_Pro64_xxxxxx_xxxxxx.tar.bz2 (-C /path/for/extract/file)
※ you can use the parameter: -C to designate extracted file path.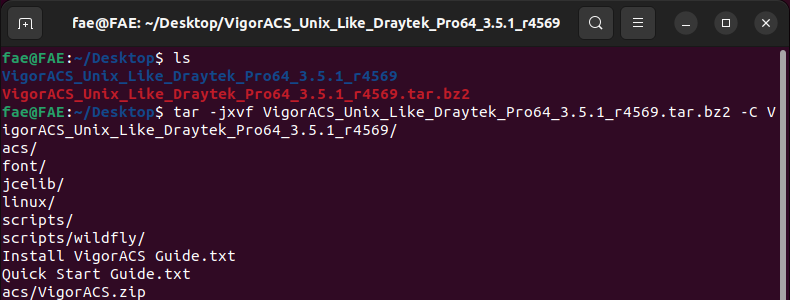
-
Modify the permission of install.sh and uninstall.sh
$ cd /path/for/extract/file
$ chmod 755 install.sh
$ chmod 755 uninstall.sh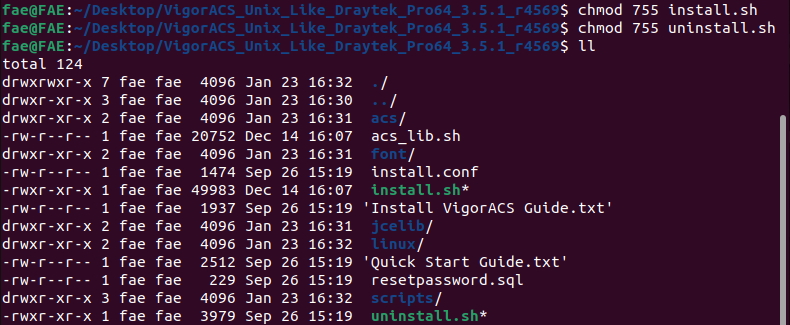
-
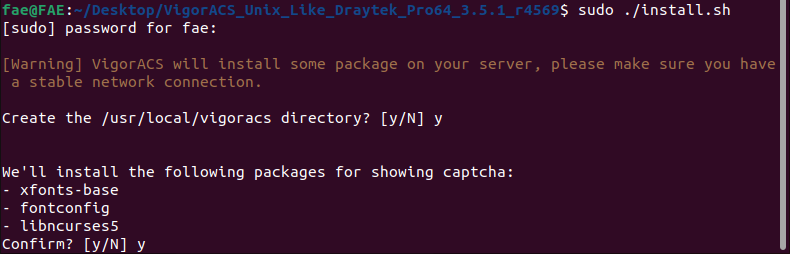
Execute install.sh
Then Input y to install required packages.$ sudo ./install.sh
-
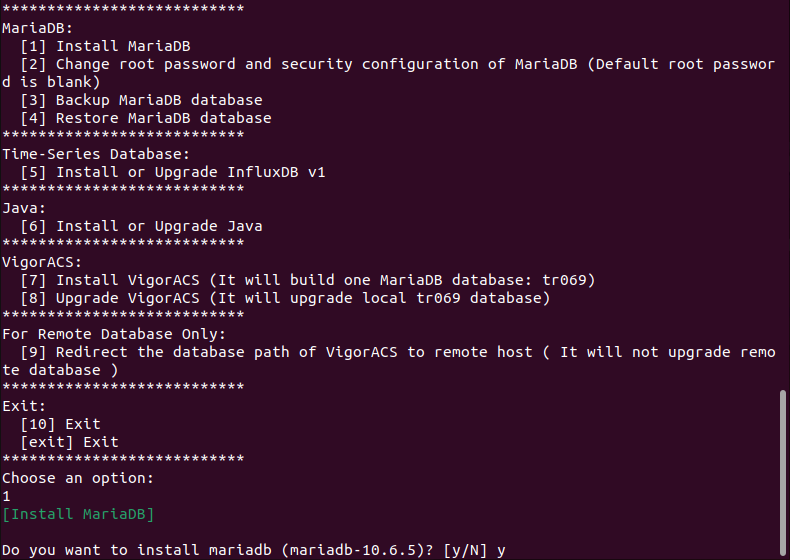
Input 1 to install MariaDB. We strongly recommend you use the MariaDB which ACS program installed.
Input 2 to change root password for MariaDB.
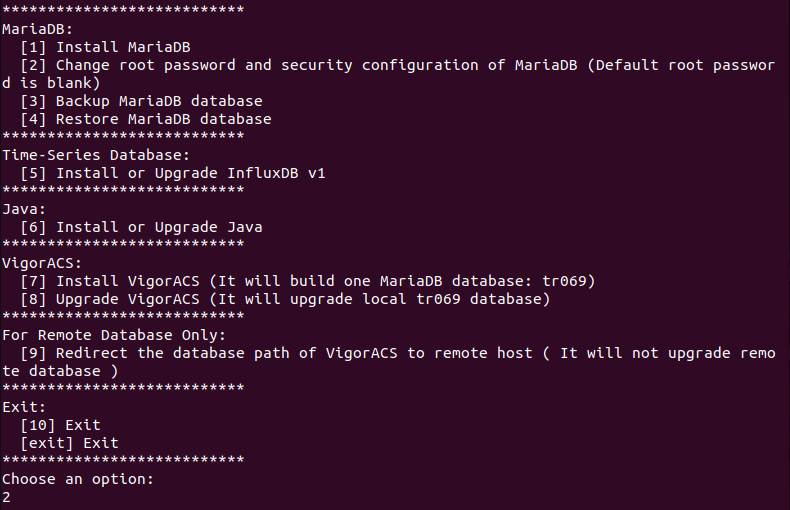
Press enter to continue since the default root password is blank.

Enter a new password and re-enter again to confirm.

-
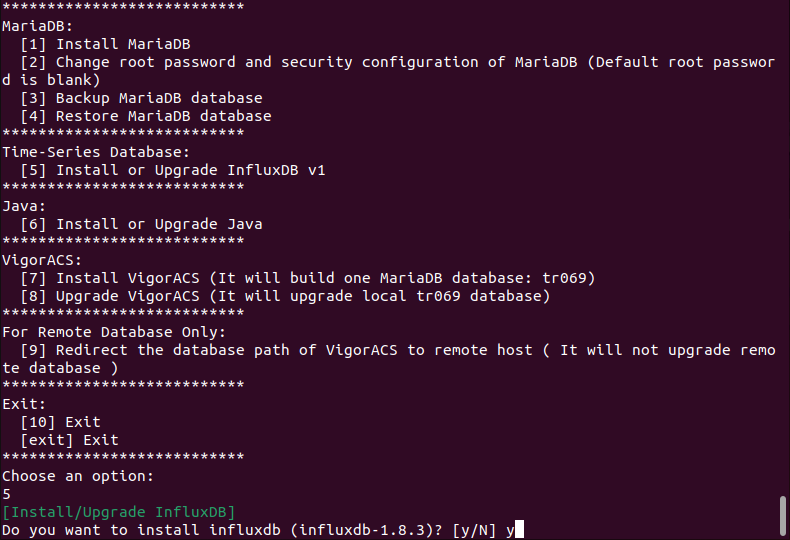
Input 5 to install InfluxDB.
-
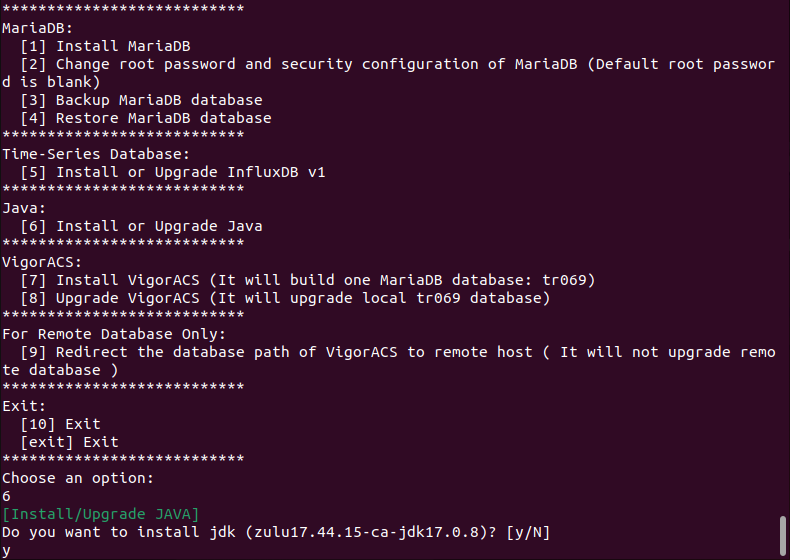
Input 6 to install Java.
-
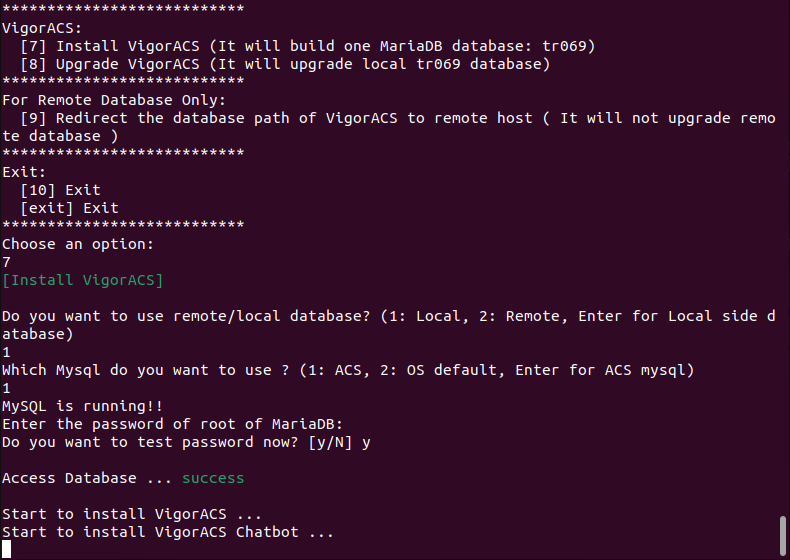
Input 7 to Install VigorACS and create the tr069 database.
Input 1 to use local side database.
Input 1 to use ACS MySQL.
When being asked to enter MariaDB root password, enter the password specified in step 5 and input y to test.
Input 1 for InfluxDB version

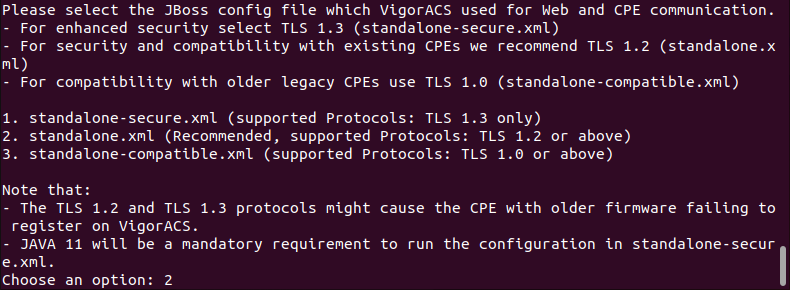
Input 2 to set up Jboss configuration for standalone.xml
-
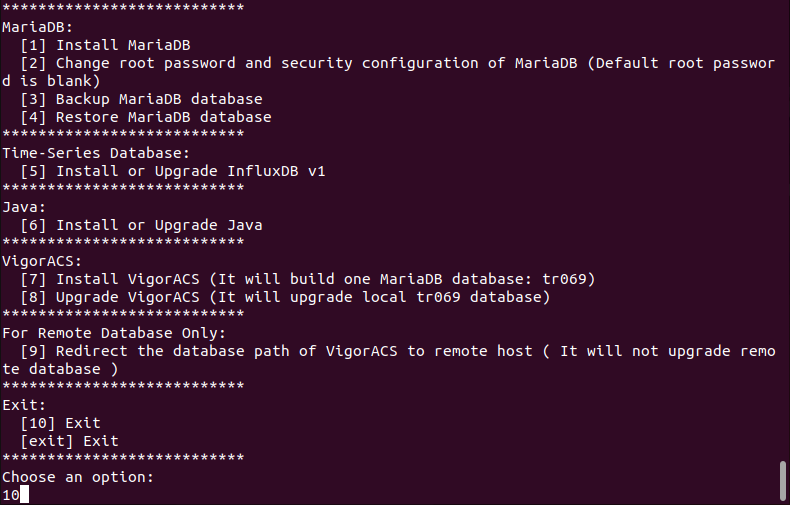
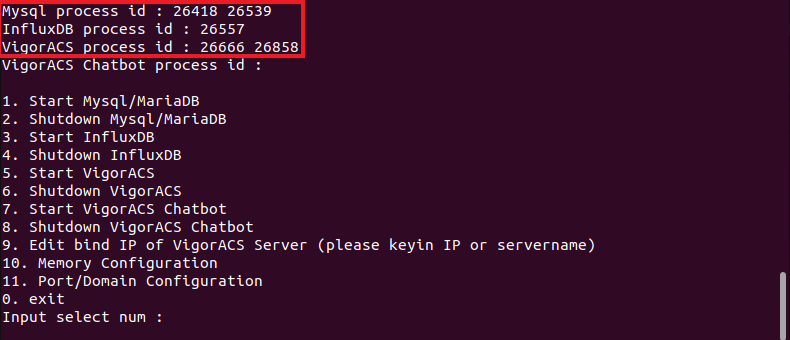
Input 10 after VigorACS install finishes.
-
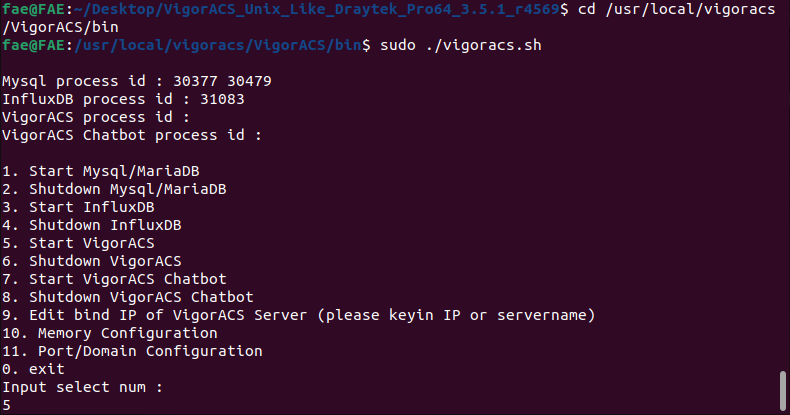
Start ACS3 service
execute vigoracs.sh in path= /usr/local/vigoracs/VigorACS/bin
Input 5 to start ACS$ cd /usr/local/vigoracs/VigorACS/bin
$ sudo ./vigoracs.sh
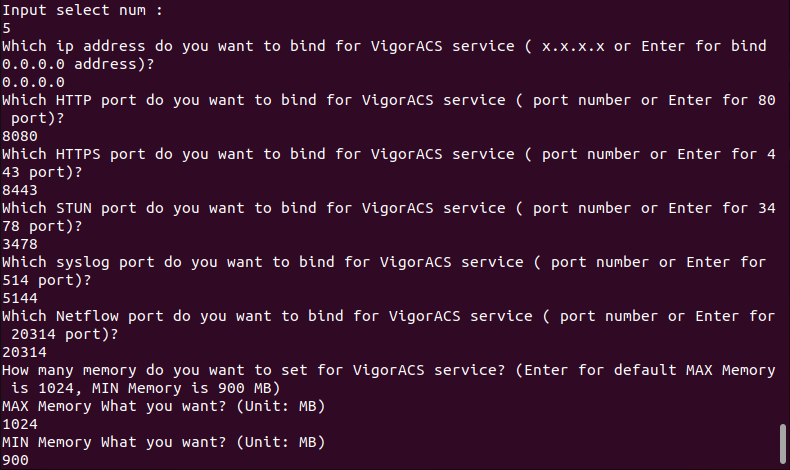
Enter ACS3 port and memory configuration.
We can also check VigorACS status via command
$ systemctl status vigoracs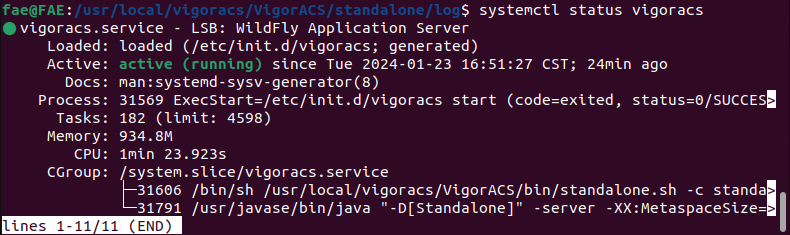
-
Now new VigorACS 3 is ready to go.
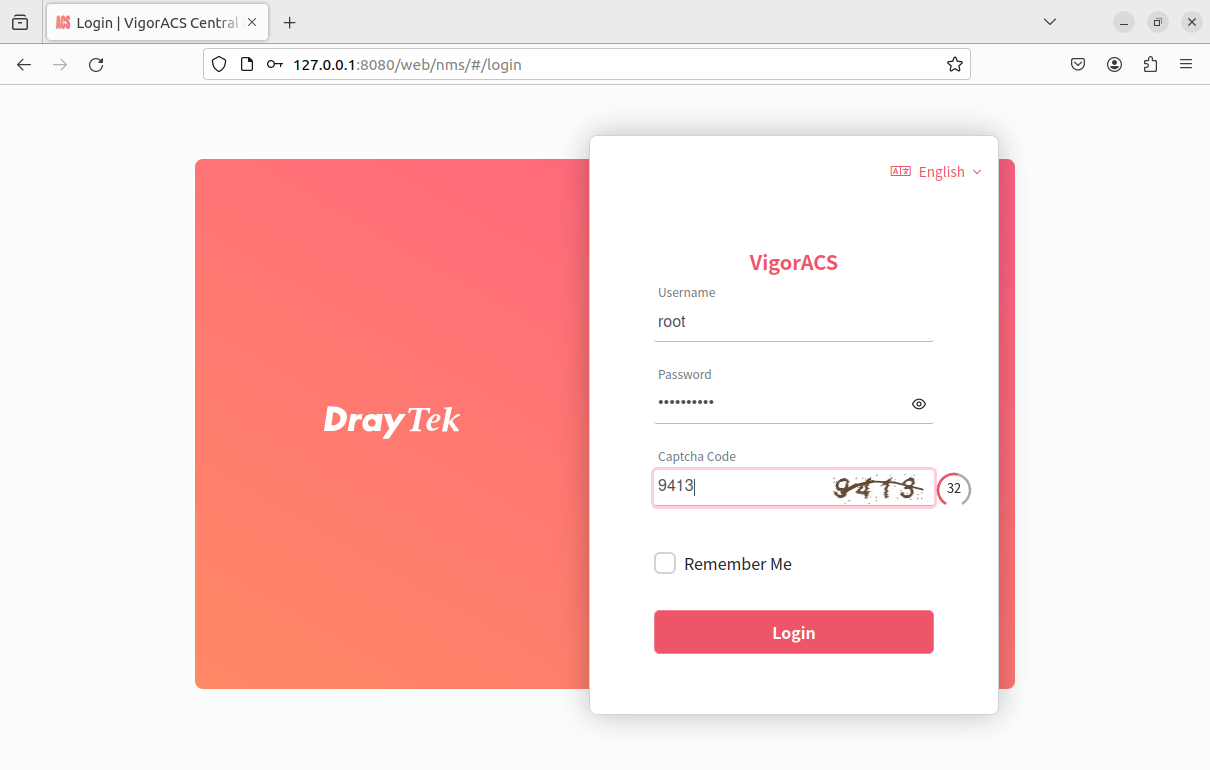
Launch a browser and type the IP or the domain name of the PC with the port number specified in the URL, then you'll see the login page. If you are using the PC that has VigorACS 3 installed, you may just enter "localhost" or "127.0.0.1" with the port number. On the login page, use the default username and password root/admin123 to log in. When you log in for the first time, you will need to activate the license to continue the service (see instructions here)
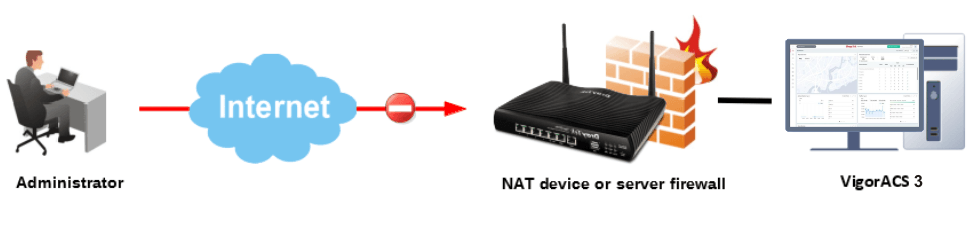
Note: To access VigorACS 3 from the Internet, you will need to open the service port on the firewall and NAT settings. Scan or telnet the port from the Internet to check whether the HTTP and HTTPS ports are opened on this server.
Troubleshooting
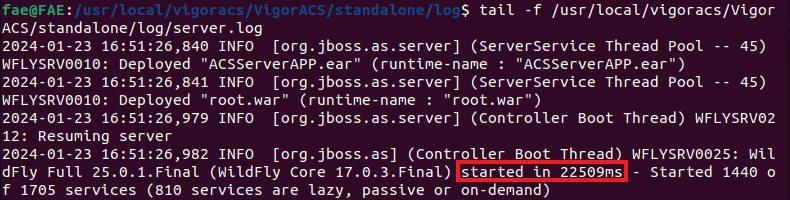
If VigorACS 3 couldn't start successfully, please ensure there is a start message in the server log, which can be found in the following
path= /usr/local/vigoracs/VigorACS/standalone/log/server.log
$ tail -f /usr/local/vigoracs/VigorACS/standalone/log/server.log
If you couldn't see the start message in the log, please provide the logs and all the VigorACS install information to DrayTek technical support via [email protected]
Published On:2017-07-18
Was this helpful?