
IPsec VPN between SonicWALL and Vigor Router
This article demonstrates how to configure Site-to-Site IPsec VPN between a SonicWALL NSA250 and Vigor Router.
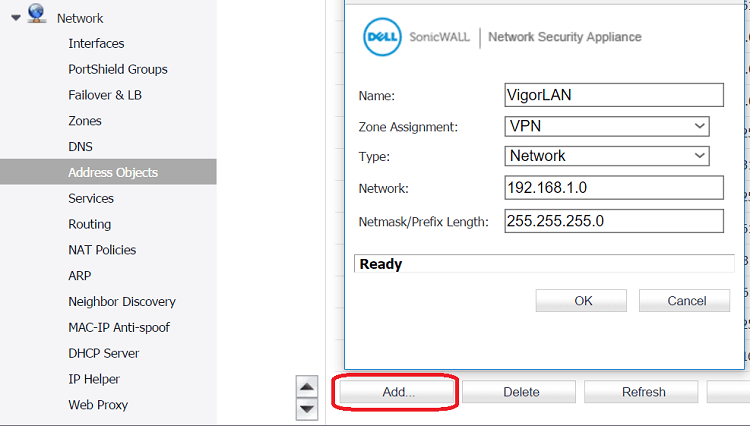
1. Go to Network >> Address Objects, and click Add.
- Select "VPN" for Zone Assignment
- Select "Network" for Type
- Enter the LAN IP and Mask of Vigor Router at Network and Netmask/Prefix Length
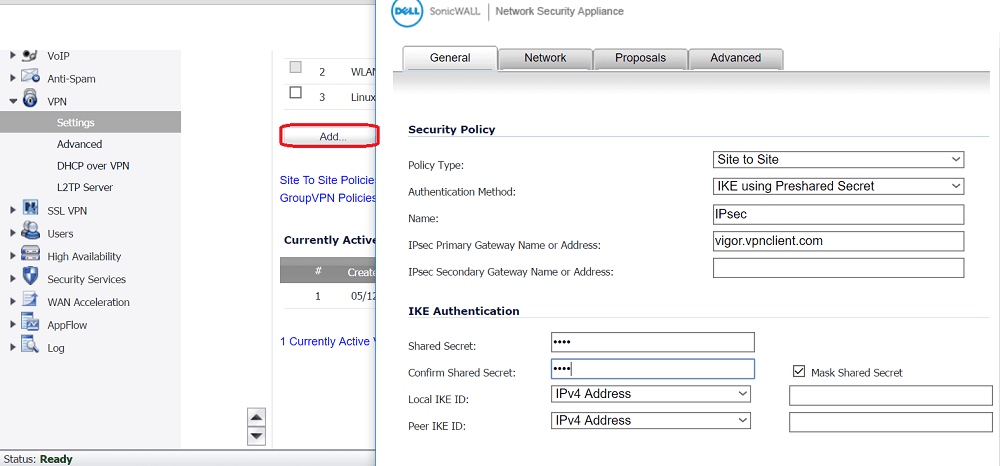
2. Go to VPN >> Settings, and click Add. In General tab,
- select "Site to Site" for Policy Type
- Input the WAN IP or Domain Name of Vigor Router in IPsec Primary Gateway Name or Address
- Enter a Shared Secret and Confirm Shared Secret.
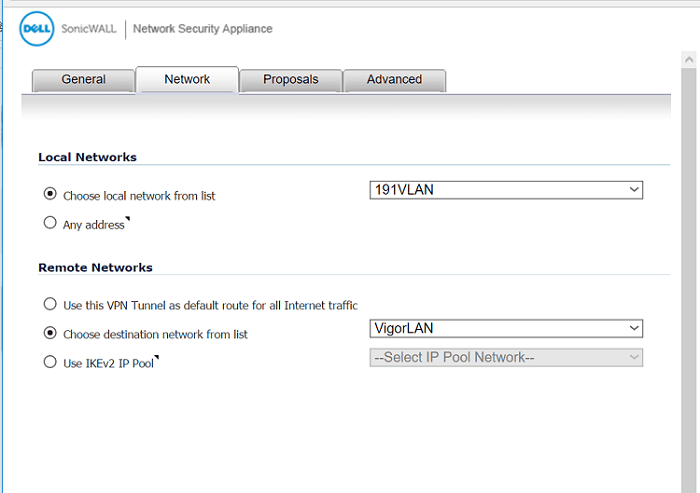
3. Go to Network tab,
- Choose the Address Object of Sonicwall's LAN in Local Networks
- Choose Address Object of Vigor Router's LAN in Remote Networks
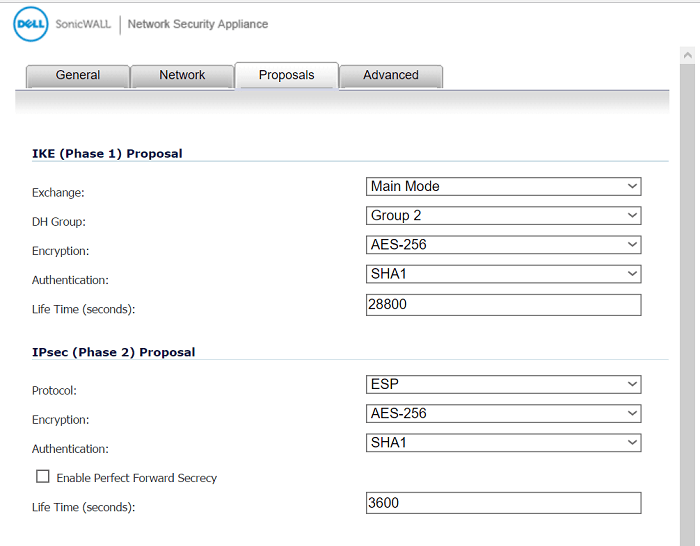
4. Go to the Proposals tab,
- Select "Main Mode" for Exchange
- Select IKE Phase 1 and Phase 2 proposals. Remember that Vigor Router should have match configurations.
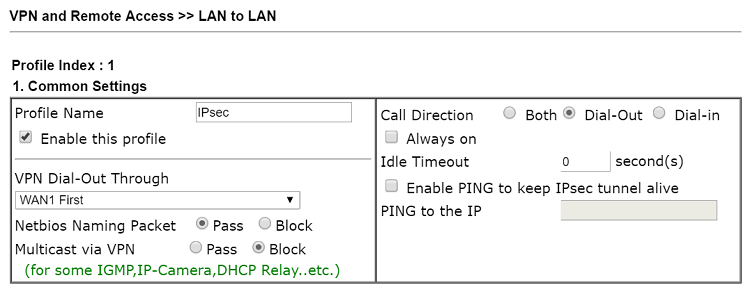
1. Go to VPN and Remote Access >> LAN to LAN, and click on an empty index number to edit the profile. In Common Settings,
- give a Profile Name
- check Enable this profile
- select "Dial-Out" for Call Direction
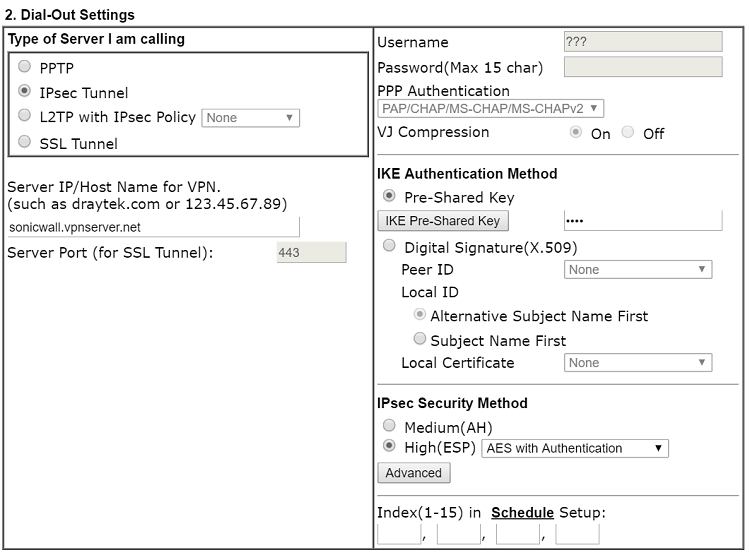
2. In Dial-out settings,
- select "IPsec Tunnel" for Type of Server I am Calling,
- type the WAN IP of SonicWALL in Server IP,
- Type the same Pre-shared Key as the Shared Secret of SonicWALL
- In IPsec Security Method, select "High(ESP) AES with Authentication"
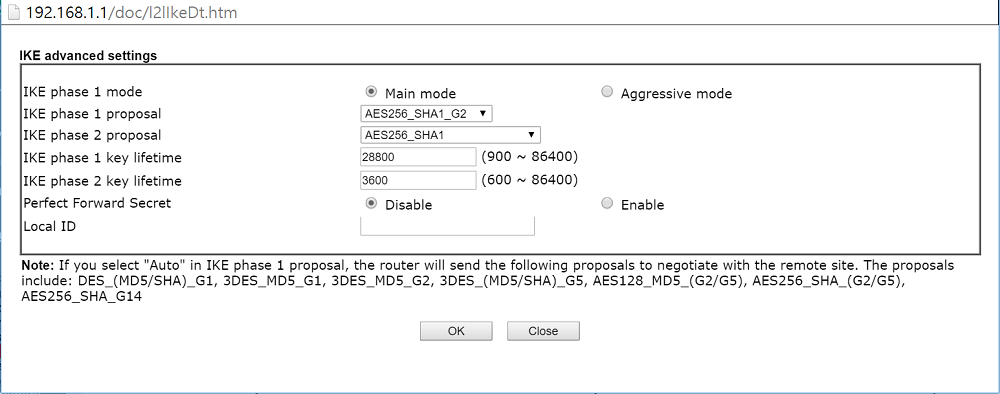
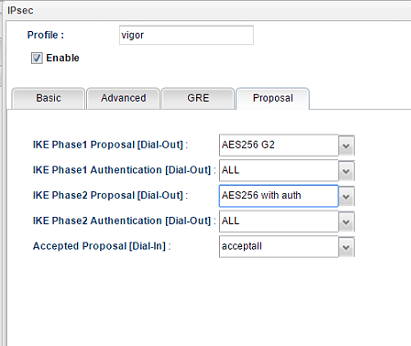
3. Click Advanced at IPsec Security Method. In IKE advanced settings, select the IKE phase 1 and phase 2 proposal to match the SonicWALL configuration. Then, click OK to save.
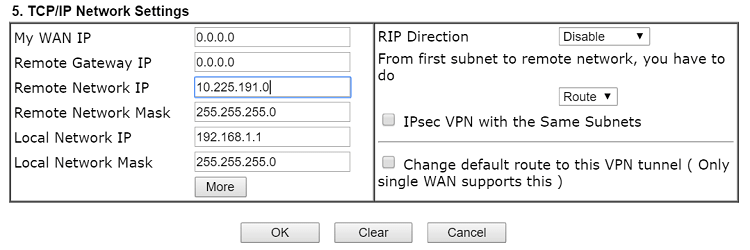
4. In TCP/IP Network Settings, type the LAN IP of the Sonicwall router in Remote Network IP. Then, click OK to apply.
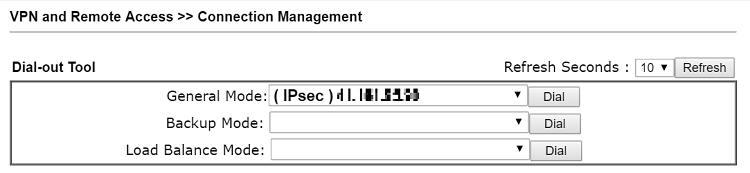
5. To Initiate the VPN, go to VPN and Remote Access >> Connection Management, select the VPN profile just created and click Dial.
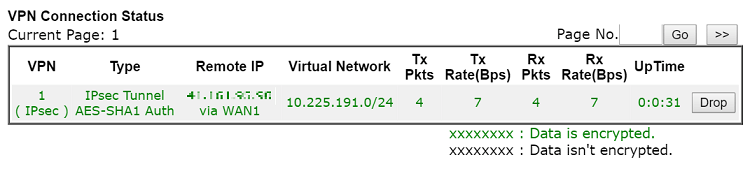
6. We will see the VPN status when VPN is connected successfully.
1. Go to VPN and Remote Access >> VPN profiles >> IPsec to add a new profile. In the Basic tab,
- Give a profile name
- Check Enable
- Type LAN subnet of Vigor3900 for Local IP and Subnet Mask
- Type the WAN IP or Domain Name of SonicWALL in Remote Host
- Type LAN subnet of SonicWALL for Local IP and Subnet Mask
- Enter Preshared Key

2. Go to the Proposal tab,
- Select IKE Phase 1 and Phase 2 proposals to match the configuration of SonicWALL
- Click Apply to save the settings
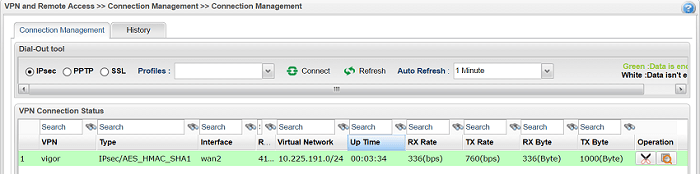
3. To initiate the VPN go to VPN and Remote Access >> Connection Management, click Connect for the VPN profile created.

4. We can see the VPN status when VPN connected.
Published On: Jun 01, 2016
ShareWas this helpful?