
7 Tips to Improve Wi-Fi Performance
If your Wi-Fi speed is slow or you get disconnected quite often, you may try the following to improve the Wi-Fi performance of Vigor Router or VigorAP, including:
- Change the channel
- Adjust channel bandwidth
- Deploy 5GHz Wi-Fi and enable band steering
- Lower RTS Threshold
- Enable Airtime Fairness
- Adjust the antenna
- Keep away from the obstruction and interference
1. Change the wireless channel
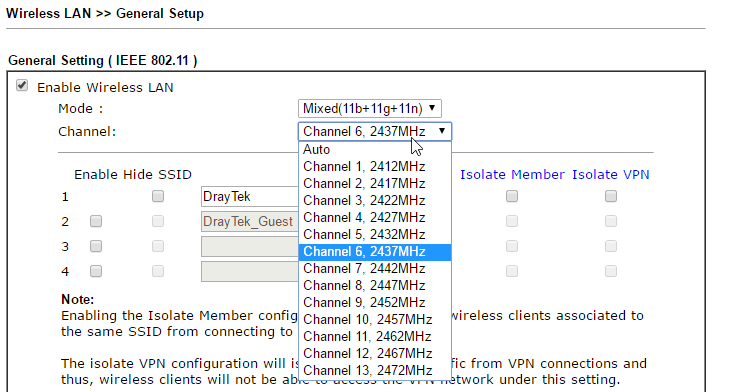
The Wi-Fi will have a lot of interference and start dropping packets if it is using a channel too crowded. You may use AP Discovery or Interference Monitor function to check the nearby AP and the channels they're using, then use a channel that is less used by the others. Channel settings are on Wireless LAN >> General Setup page.
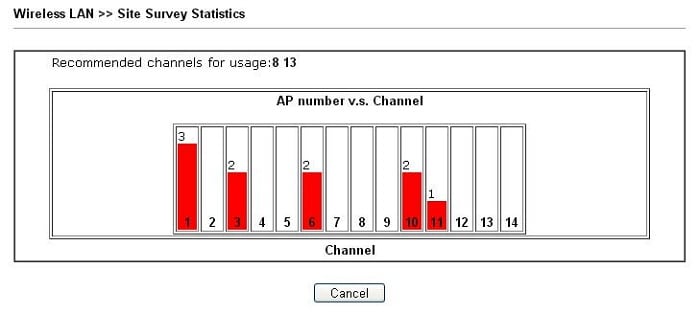
AP Discovery shows the recommended channel to use at Statistics after a scan.
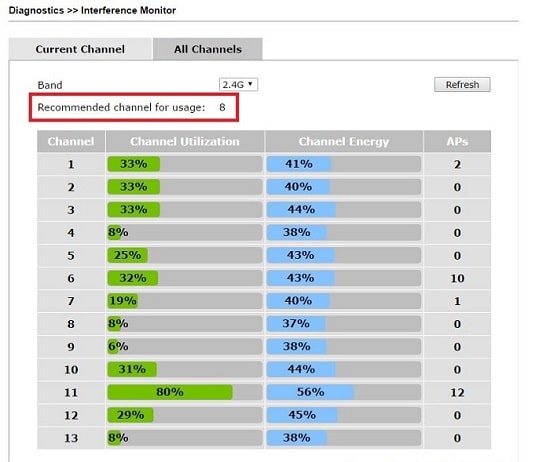
Selected VigorAP also provides Interference Monitor under the Diagnostic menu. It recommends the best channel based on the traffic on each channel (Channel Utilization), as well as the electromagnetic field detected on each channel (Channel Energy, not necessarily generated by APs, can also by the electronic devices).
2. Adjust channel bandwidth
By default, the wireless channel bandwidth is 20/40MHz, which means the router or AP may use two 20MHz channels at the same time to double the throughput. Stay on the default settings if there's not much interference on your network. However, if there is a lot of interference, lower the bandwidth to 20MHz so it would use only one least-crowded channel. Channel Bandwidth option is on Wireless LAN >> Advanced Setting page.

3. Deploy 5GHz Wi-Fi and Enable Band Steering
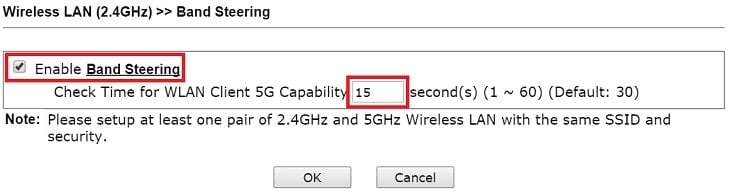
5GHz radio is usually much less crowded than the 2.4 GHz band so that it can offer better Wi-Fi performance. If you are using a dual-band AP, try to enable Band Steering to redirect the 5GHz-capable clients to the 5GHz SSID. On Vigor Router and Vigor AP, this can be achieved by setting up a pair of same SSID and password on both 2.4GHz and 5GHz WLAN, then check Enable Band Steering at Wireless LAN (2.4GHz) >> Band Steering page.
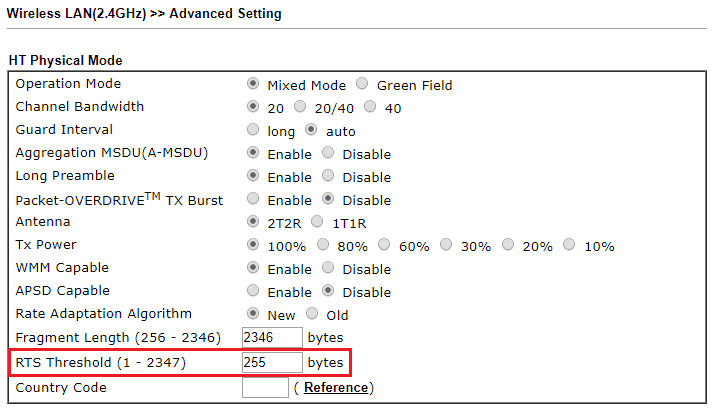
4. Lower the RTS Threshold
RTS (Request to Send)/CTS (Clear to Send) is a mechanism to reduce collision among stations, but using RTS/CTS will add more overhead; therefore, by default, the AP only use RTS/CTS when transmitting a packet larger than 2347 bytes. In a network having many stations far apart from each other, you may lower RTS threshold to several hundred bytes to implement the RTS/CTS more often. RTS threshold option is on Wireless LAN>> Advanced Setting page.
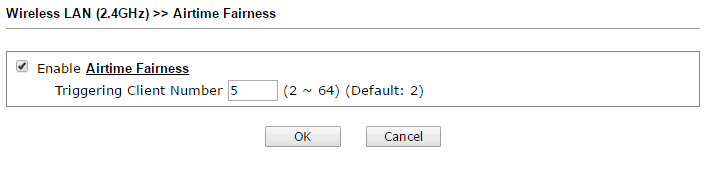
5. Enable Airtime Fairness
APs are using packet fairness by default; therefore, a slow device might slow down the whole wireless network because the AP would need to spend more time on them to transmit the equal amount of packets. In this case, Airtime Fairness can be the solution. If there are plenty of wireless clients on the network and some of them might have weak signal strength, you can enable Airtime Fairness to make sure the AP spend the equal of time on each client and prevent most of the clients from being delayed by those slow ones.
6. Adjust the antenna
First, make sure the antennas are connected firmly to the router or AP, then tweak the direction of the antenna to make a better signal.
7. Keep away from obstruction and interference
Walls, ceiling, doors, and cabinet will all decrease the radio signal. Remove the obstacles between the router/AP and the clients as much as possible. And note that a microwave oven, cordless phone, or Bluetooth devices are also operating on the 2.4 GHz radio thus can interfere with the APs.
Published On:2017-01-17
ShareWas this helpful?