
IPsec VPN between Cyberoam and DrayTek
This article demonstrates how to establish IPsec VPN tunnel between Cyberoam router and Vigor router.
Settings of Cyberoam
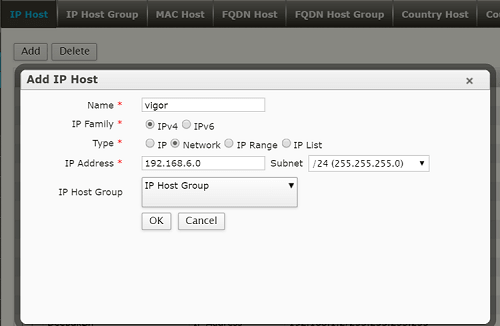
1. Go to OBJECTS >> Hosts >> IP Host, add a host as follows:
- Select Network for Type
- Enter the LAN IP and subnet mask of Vigor Router in IP Address and Subnet
- Click OK to save
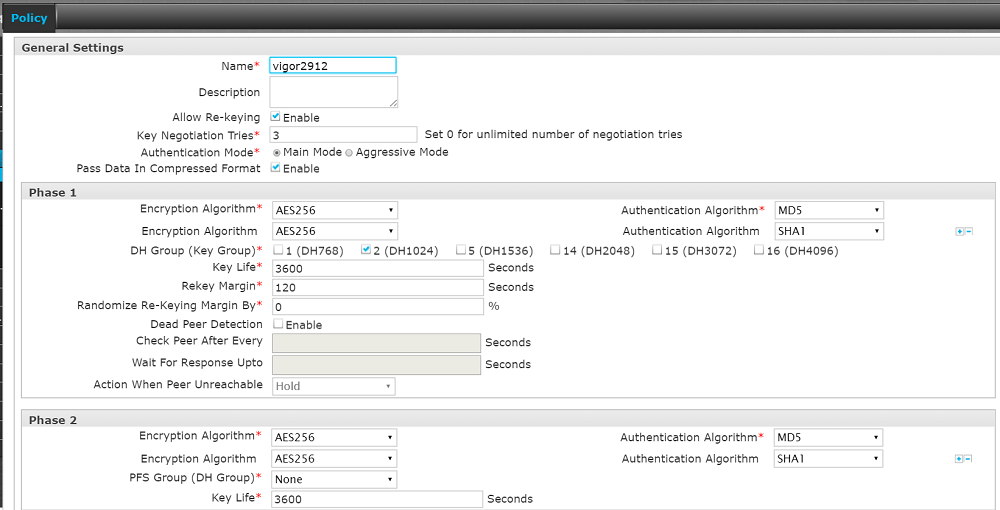
2. Add a policy at VPN >> Policy, configure Encryption Algorithm, DH Group(Key Group) and Key Life of Phase 1 and Phase 2 as you want, and the Vigor Router needs to have the matched configuration.
3. Go to VPN >> IPsec >> Connection and add a profile as follows:
- In General Settings, give a name for the profile
- Select "Site to Site" for Connection Type
- At Policy, select the policy created in the previous step
- In Authentication Details, use "Preshared Key" as Authentication type and enter a Key.
- In Endpoints Details, select WAN Interface where the Vigor Router is for Local
- Enter the WAN IP or domain name of the Vigor Router for Remote
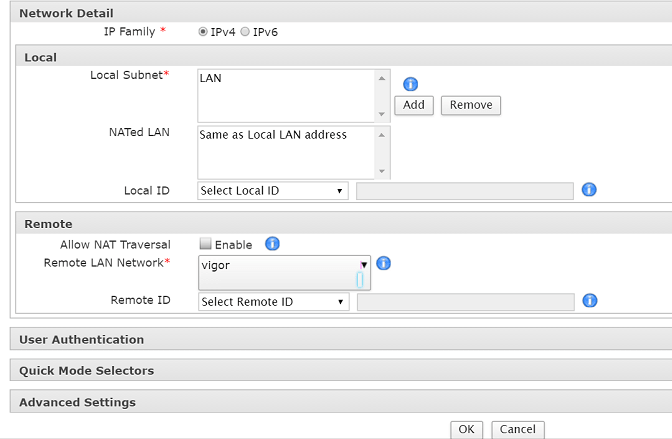
- In Network Detail > Local, click Add and select the LAN object you want to be linked to the Vigor Router
- In Network Detail > Remote, click Add and select the LAN object created in the first step.
- Click OK to save

Settings of Vigor Router
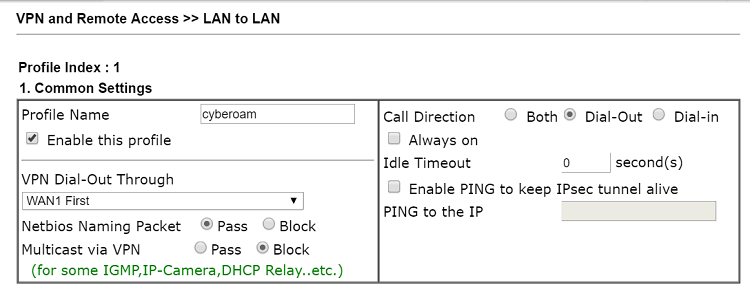
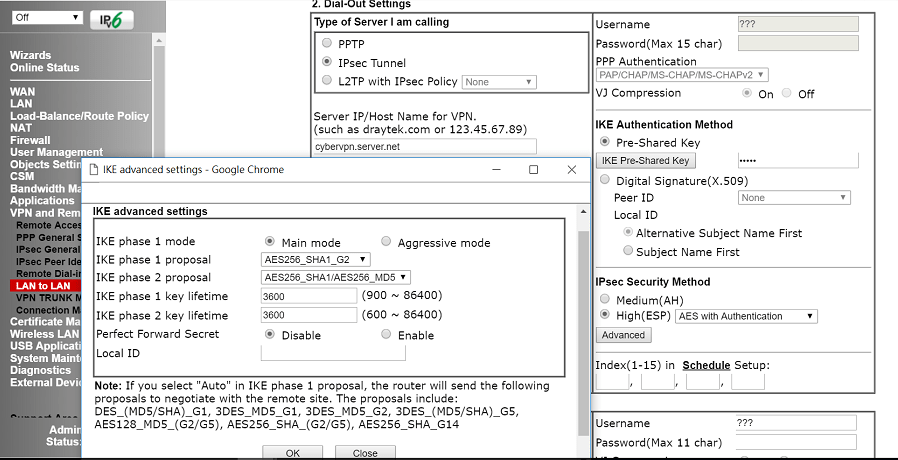
1. Go to VPN and Remote Access >> LAN to LAN, and click an available index to create a profile as follows:
- In common settings, give a profile name, Check Enable this profile, and select "Dial-Out" for Call Direction.
- In Dial-out settings, select "IPsec Tunnel" for Type of Server I am Calling, type the WAN IP of Cyberoam router in Server IP
- Enter the Pre-shared Key as the same as the settings of the Cyberoam router.
- In IPsec Security Method, select "High(ESP) AES with Authentication" then click Advanced.
- In the Advanced Settings window, configure Key Lifetime and Proposal of IKE phase1 and 2 as the same as the settings of the Cyberoam router.
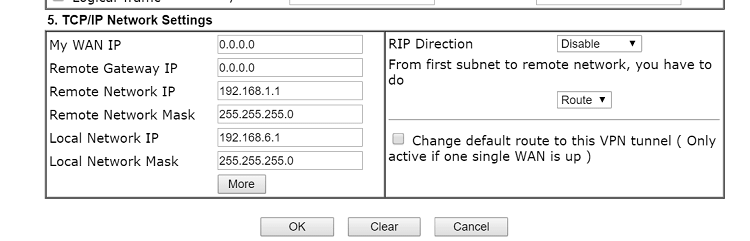
- In TCP/IP Network Settings, type the LAN IP of the Cyberoam router in Remote Network IP.
- Click OK to save the profile
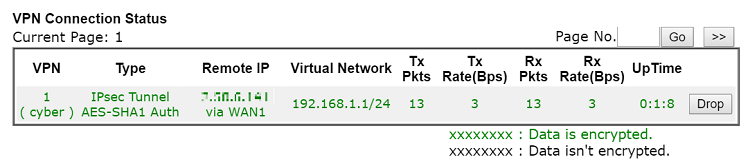
2. After you save the profile, Vigor Router will try to establish the VPN as long as the profile is enabled. However, you can manually dial the VPN from VPN and Remote Access >> Connection Management by selecting the profile and click Dial.

3. We will see the VPN status when VPN connected successfully.
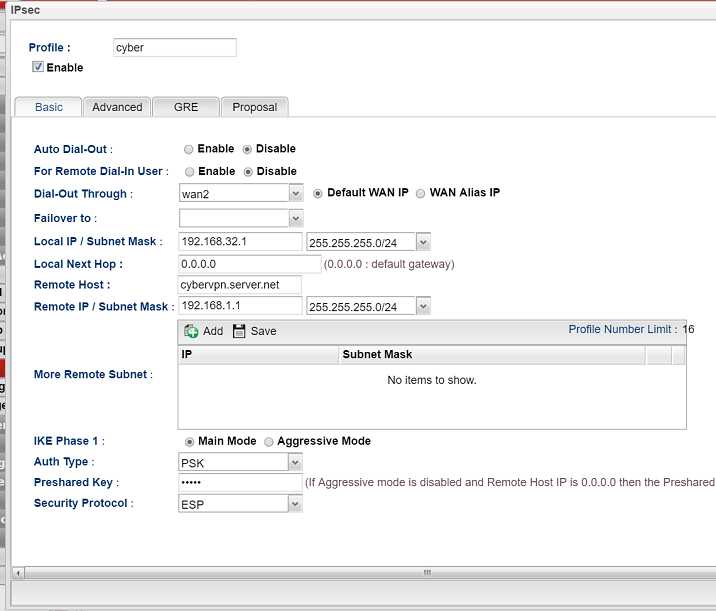
1. Go to VPN and Remote Access >> VPN profiles >> IPsec, and click Add to create a profile as follows:
- In Basic Tab, Give a profile name and check Enable.
- For Local IP, enter the IP and mask of the local network which you want to be linked to the Cyberoam router.
- Type WAN IP or Domain Name of the Cyberoam router in Remote Host
- For Remote IP, enter the IP and mask of the local network on the Cyberoam router
- Enter Preshared Key as the same as what was configured on the Cyberoam router.
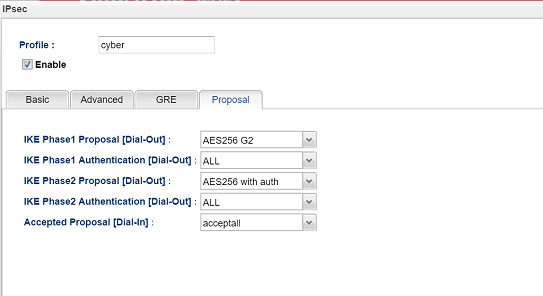
2. In the Proposal tab, select the proposals which match the configuration on the Cyberoam router. Then, click Apply to save the profile.
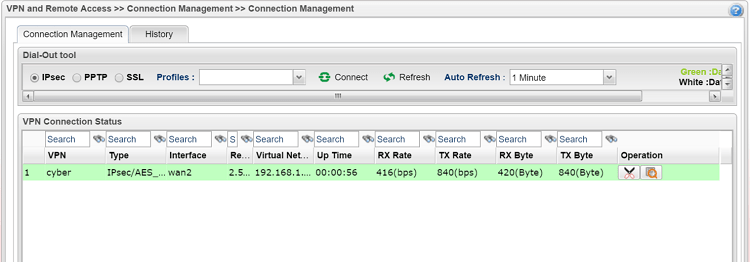
3. To establish the VPN, go to VPN and Remote Access >> Connection Management, click Dial on the VPN profile created.

4. We can see the VPN status when VPN connected successfully.
Published On: Jun 15, 2016
ShareWas this helpful?