
IPsec VPN between Cisco RV Series and DrayTek
This is an instruction of how to establish IPsec LAN-to-LAN VPN between a Cisco RV router and a DrayTek router.
Settings of Cisco RV Router
Create a VPN Profile for Vigor Router at VPN >> Gateway to Gateway,
- Select the Interface where Vigor Router is on for Interface
- Select IKE with Preshared key for Keying Mode
- In Local Group Setup, enter the local IP subnet of the Cisco RV Router which you want to link to the Vigor Router
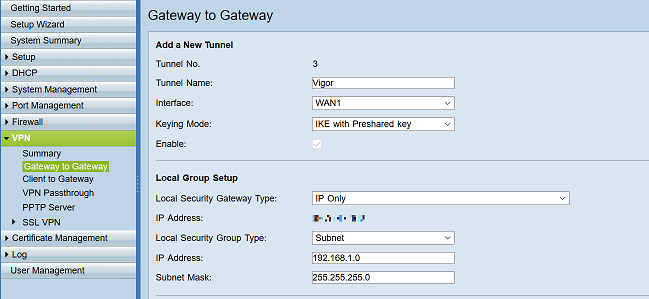
- In Remote Group Setup, use "IP Only" for Remote Security Gateway Type, and enter the WAN IP of Vigor Router for IP Address
- For IP Address and Subnet Mask, enter the LAN IP subnet of Vigor Router.
- Select the IPsec setup you want to use, in this example we use AES256_SHA1_G5 for IKE phase1, AES256_SHA1 for IKE phase2, without Perfect Forward Secret, and the Preshared Key is 12345678

Settings of DrayTek Router
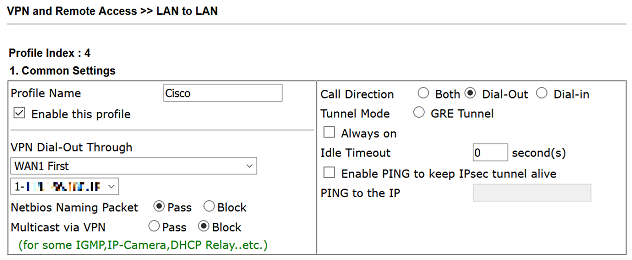
1. Go to VPN and Remote Access >> LAN to LAN, and click on an available index,
- Give Profile Name
- Enable the profile
- Select "Dial-Out" for Call Direction
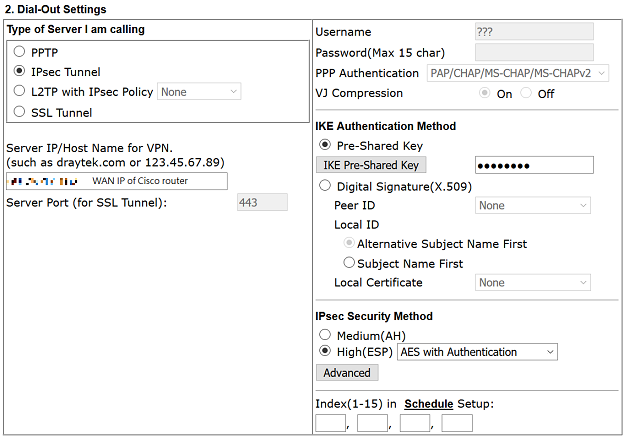
- Select "IPsec Tunnel" in Dial-Out Settings
- Enter the WAN IP or domain name of the Cisco Router for Server IP/Host Name
- Enter Preshared Key as the same as what was configured on the Cisco Router
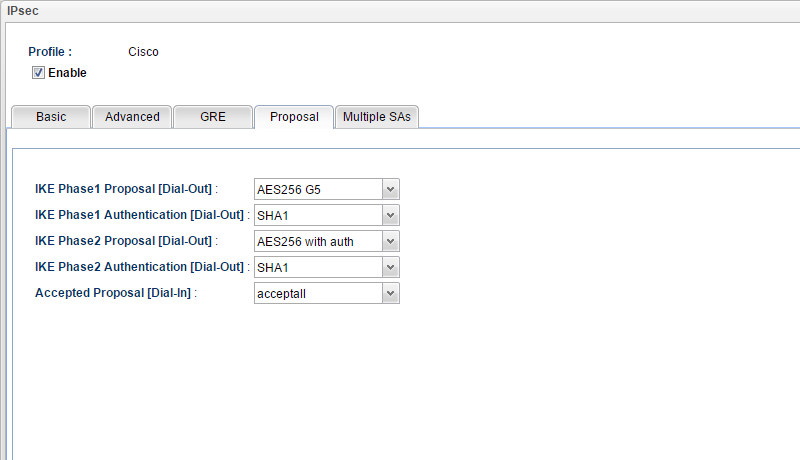
- Select High (ESP), AES with authentication for IPsec Security Method and click Advanced
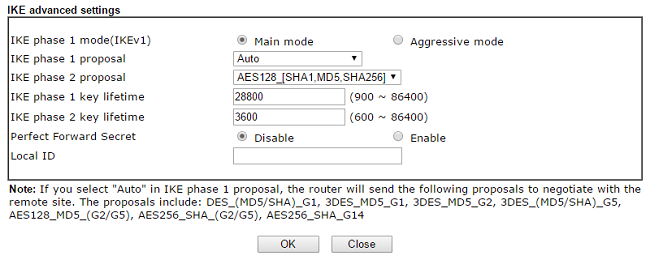
- Select the proposal to match the IPsec settings on the Cisco router
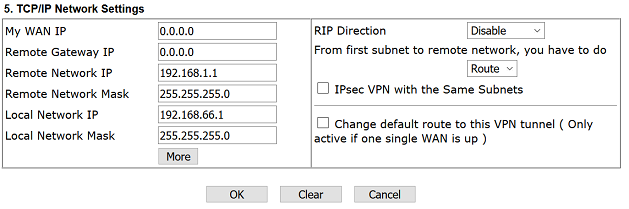
- Enter the LAN IP network of the Cisco Router in Remote IP/Mask at TCP/IP Network Settings
- Click OK to save the profile
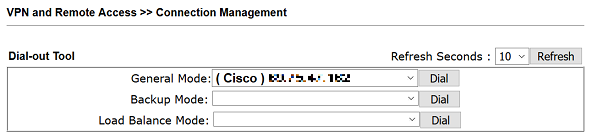
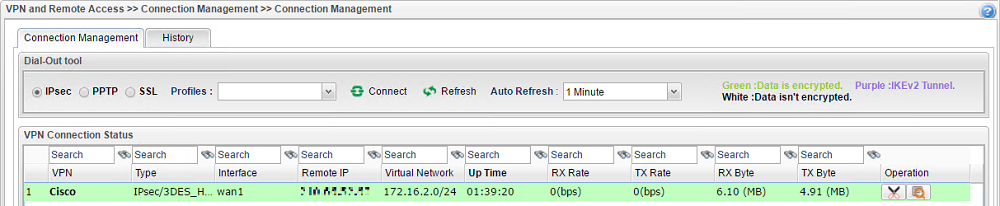
2. When the profile is enabled, Vigor Router will try to initiate the VPN automatically. However, to dial the VPN manually, go to VPN and Remote Access >> Connect Management page, select the IPsec profile and click Dial.
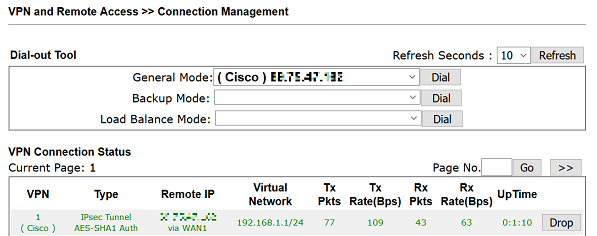
3. After VPN connected successfully, we can see the connection status below.
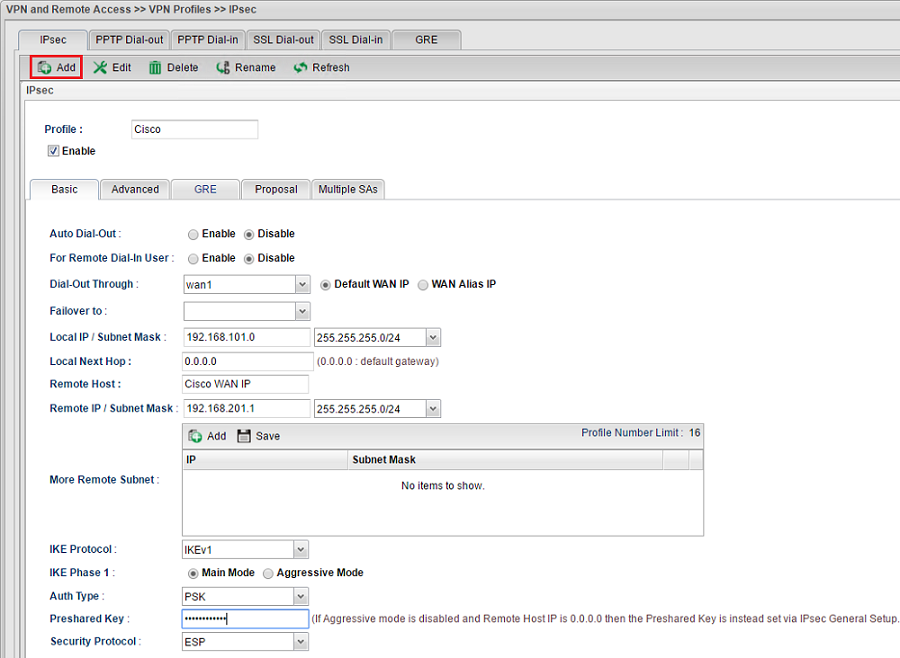
1. Go to VPN and Remote Access >> VPN Profiles, and click Add on IPsec tab to create a new profile.
- Enable the profile
- Select the WAN Interface where the Cisco Router is on for Dial-Out Through
- Enter the local network IP and subnet of Vigor Router in Local IP/Subnet Mask
- Enter the WAN IP address or Domain of the Cisco Router for Remote Host
- Enter the network IP and subnet of the Cisco Router in Remote IP/Subnet Mask
- Enter the same Preshared Key as what was configured on the Cisco Router
2. In the Proposal tab, select the IKE proposal to match the IPsec settings on the Cisco router. Then, click Apply to save the profile.
3. When the profile is enabled, the Vigor Router will try to initiate the VPN automatically. However, to dial the VPN manually, go to VPN and Remote Access >> Connect Management, select the IPsec profile, and click Connect.

4. After VPN connected successfully, we can see the connection status below.
Published On: Jun 13, 2017
ShareWas this helpful?