
Set up Vigor Router as an SMB Server
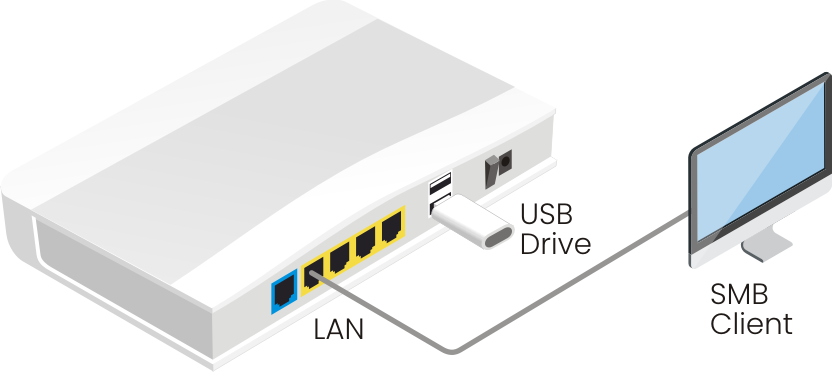
SMB service is a feature for file sharing. This document demonstrates how to make Vigor Router be an SMB server, and allow the LAN clients to access the files in the USB drive connected to the router's USB port.
Router Configuration
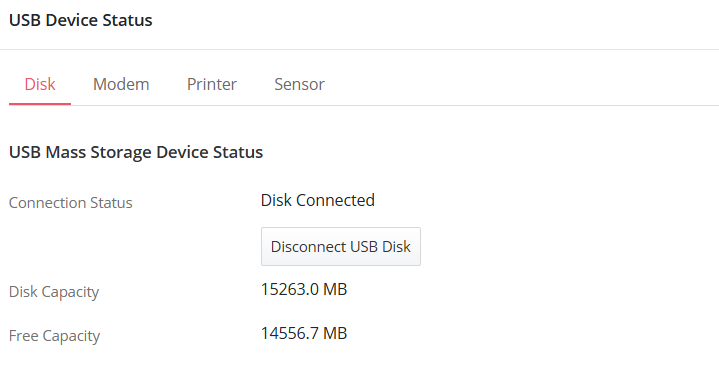
1. Insert a USB drive to router's USB port, and go to USB Application >> USB Devices Status to make sure the device is detected. (For the USB drive, we recommend file system FAT32, partition size no larger than 500 GB, and a single file not larger than 4 GB.)
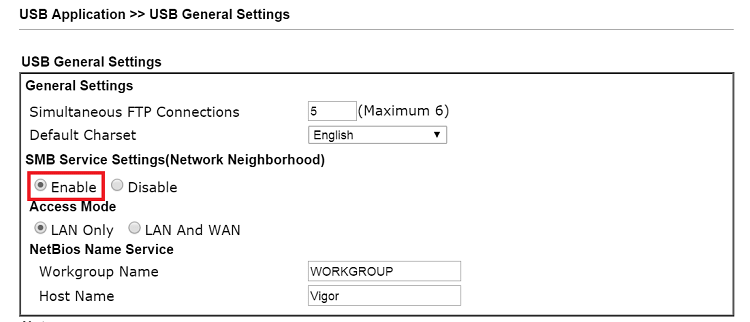
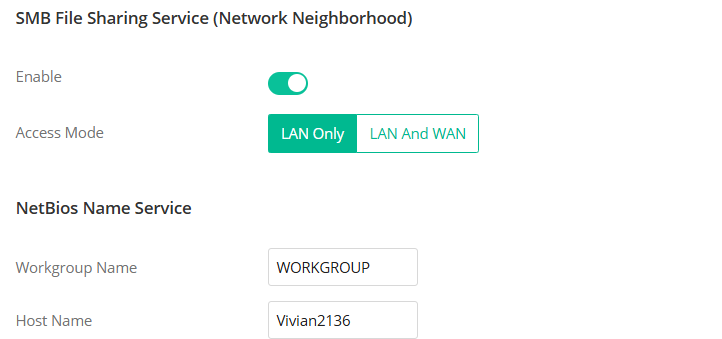
2. Go to USB Application >> USB General Settings to enable SMB Service Settings and set other details. After that, the router will ask for a reboot to make the changes to take effect.
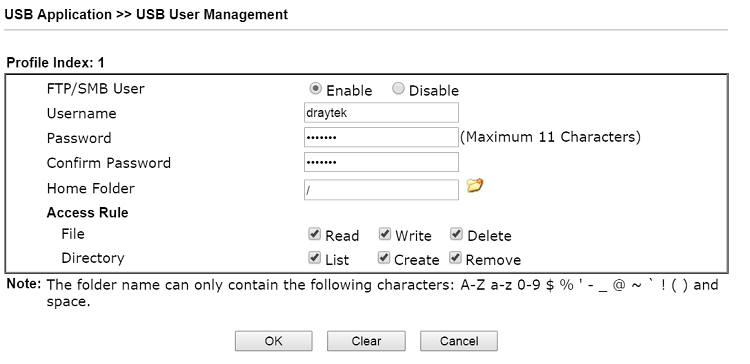
3. To create a user accounts for the SMB service, go to USB Application >> USB User Management, click on a profile index to add/edit the profile:
- Enable FTP/SMB User
- Enter Username and Password, and confirm the password again.
- Assign a Home Folder to which the users can access. We may click on the folder icon to select or create a folder in the USB drive, or just enter “/” if we would like to provide access to all the folders.
- Set the Access Rule for the users.
- Click OK to save the profile.
Access the files from LAN
With the configuration above, the router will act as an SMB server, and the LAN clients will be able to access the files in the USB drive. There are several operating systems and APPs that can work with Vigor SMB Service and be an SMB client, here we take Windows users for example.
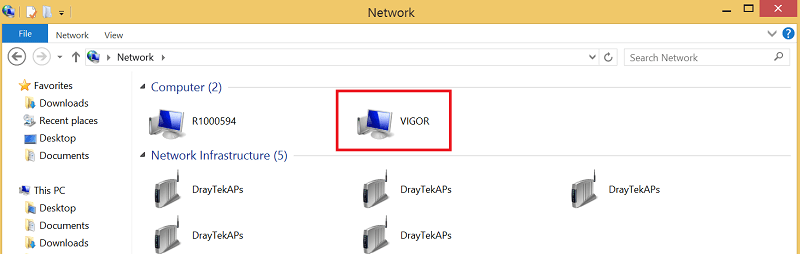
1. Open Network on the PC, and we will see a computer with hostname “VIGOR”. (You can change the hostname at USB Application >> USB General Settings.)
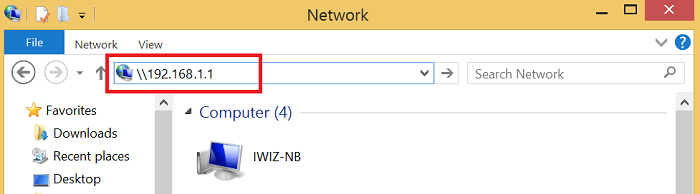
If you do not see Vigor Router on the network, you may also try accessing the router by input " \\ " with the router's LAN IP in the address bar, e.g., \\192.168.1.1.
2. Double click on the hostname, and it should pop up a window for network credentials. Enter the username and password set at USB Application >> USB User Management.

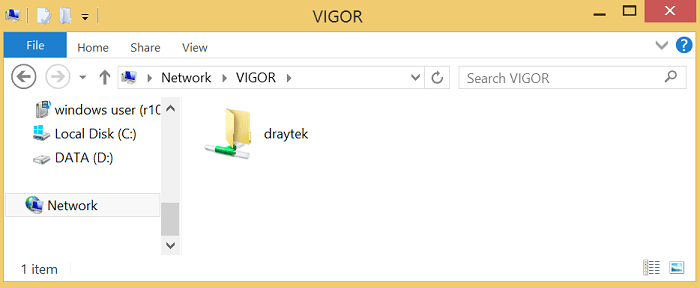
3. If logged in successfully, LAN clients will be able to access the folders and files in the USB drive.
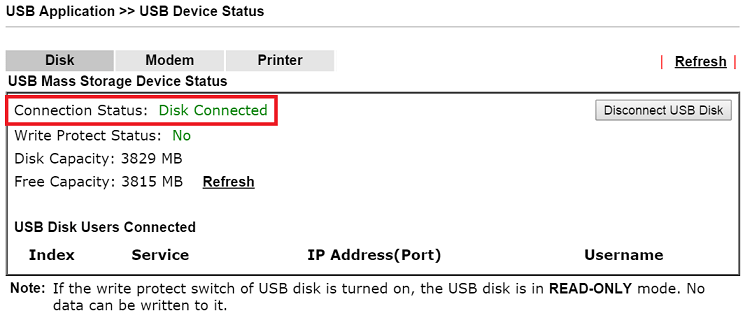
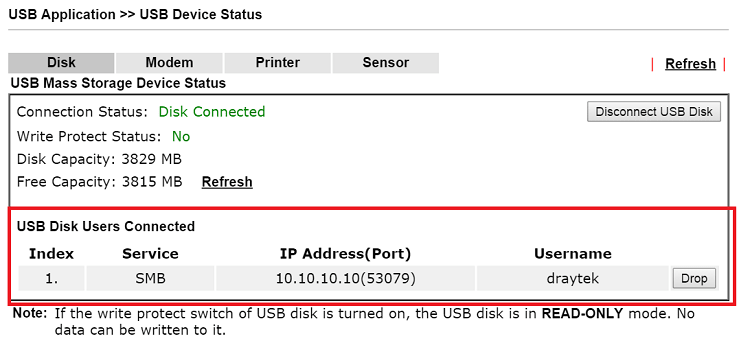
4. On the router, from USB Application >> USB Device Status page, the network administrator can check the users that have logged in.
SMB service is a feature for file sharing. This document demonstrates how to make Vigor Router be an SMB server, and allow the LAN clients to access the files in the USB drive connected to the router's USB port.
Router Configuration
1. Insert a USB drive to router's USB port, and go to Configuration > USB Application > USB Device Status to make sure the device is detected. (For the USB drive, DrayOS 5 router supports FAT32, NTFS, and exFAT file systems)
2. Go to Configuration > USB Application > General Setup to enable SMB File Sharing Service Settings. Choose the Access Mode (LAN Only is recommended) and enter the Work Group name and hostname.
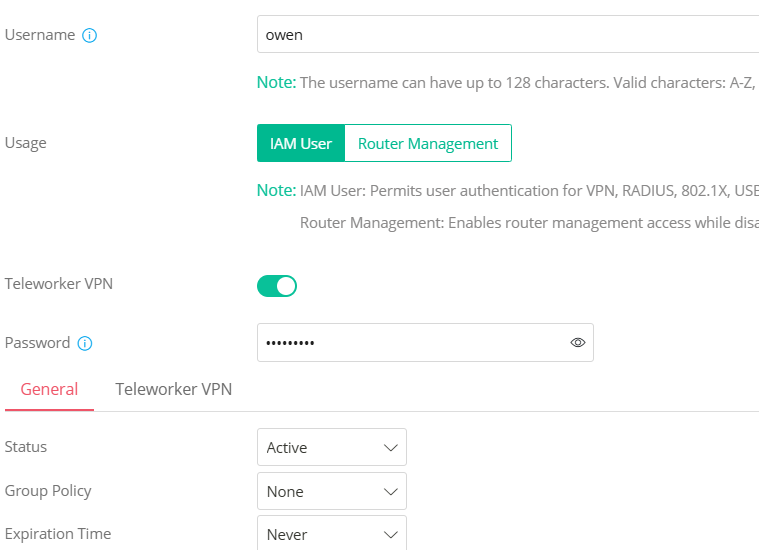
3. Go to IAM > Users & Groups > Users to create an user. Click Add, then enter a Username and Password for the new user.
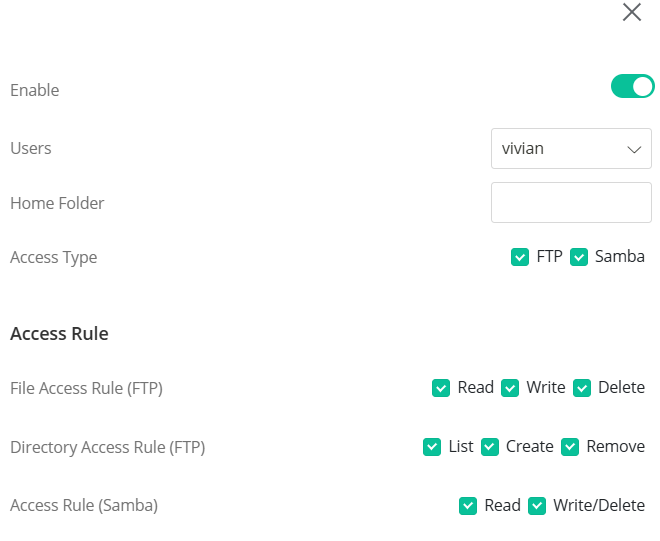
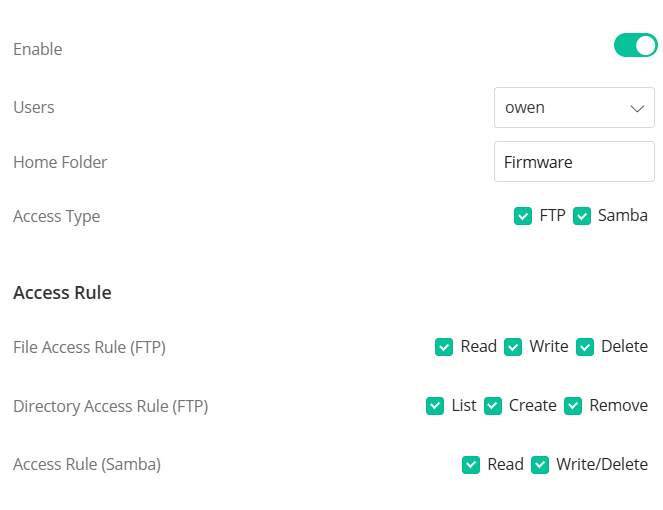
4. Go to Configuration > USB Application > USB User Management to set up USB User Access. Click Add, then configure the following settings:
In this example, we created a user vivian with a blank home folder, who can access entire folders, and a user owen with Firmware as the home folder, who can access files only within the specified Firmware folder.
Access the files from LAN
With the configuration above, the router will act as an SMB server, allowing LAN clients to access files on the USB drive. Various operating systems and apps can function as SMB clients; in this example, we will demonstrate access from macOS and Windows devices.
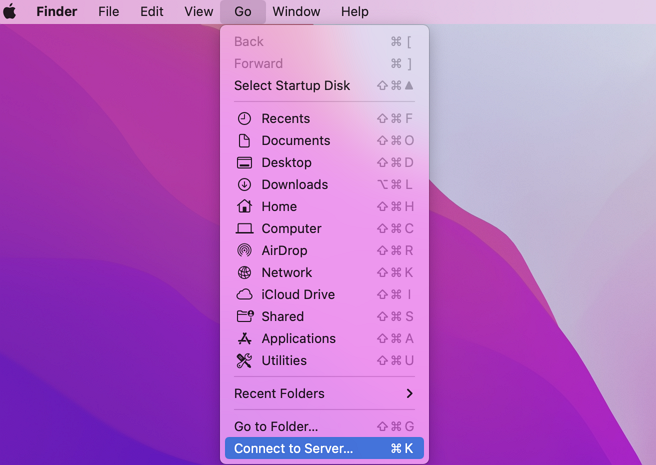
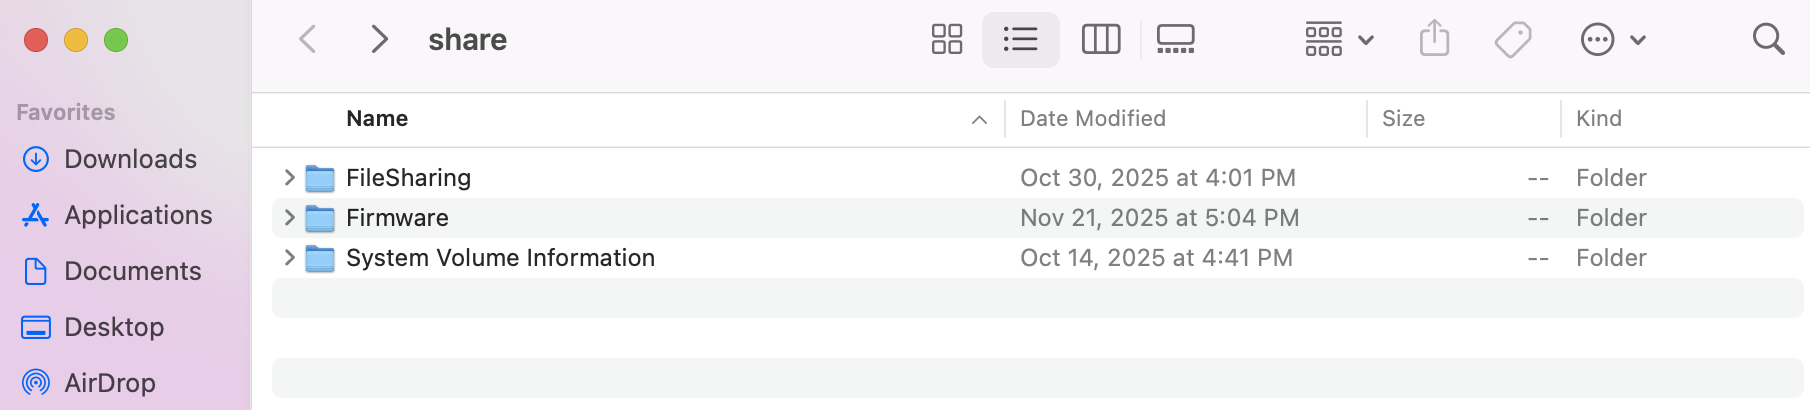
For macOS (user vivian)
1. Connect the macOS device to the network.
2. Open Finder → Go → Connect to Server.
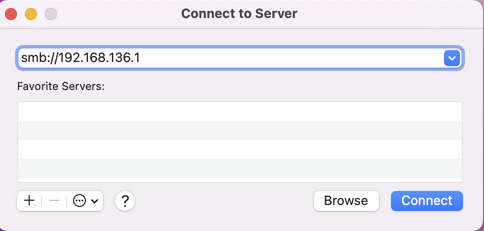
3. Enter smb://Vigor Router’s LAN IP and click Connect. If the user account on the Vigor Router has a home folder configured, we should instead connect to: smb://Vigor Router’s LAN IP/username
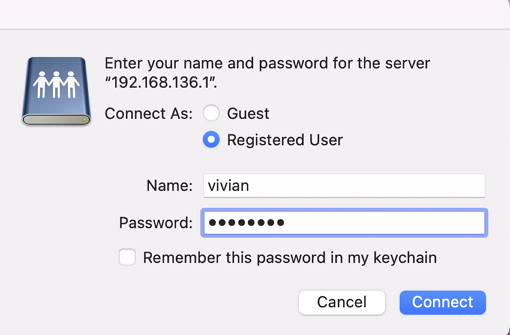
4. Enter the User Name and Password, then click Connect.
5. User can now view the shared folders and access files on the server.
For Windows (user owen)
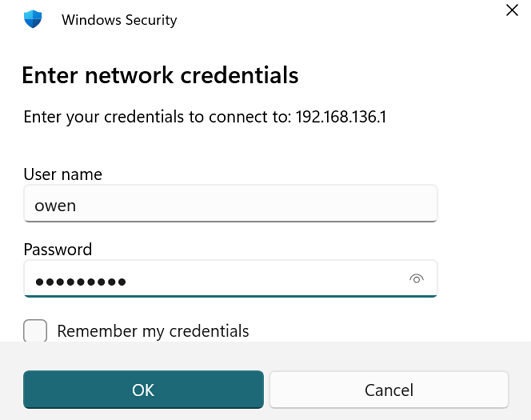
1. Open Network on the Windows, enter " \\ " with the router's LAN IP and the username in the address bar, e.g., \\192.168.136.1\owen, and press Enter.

2. There will be a window pop up for entering network credentials. Enter the username and password configured at USB Application >> USB User Management.
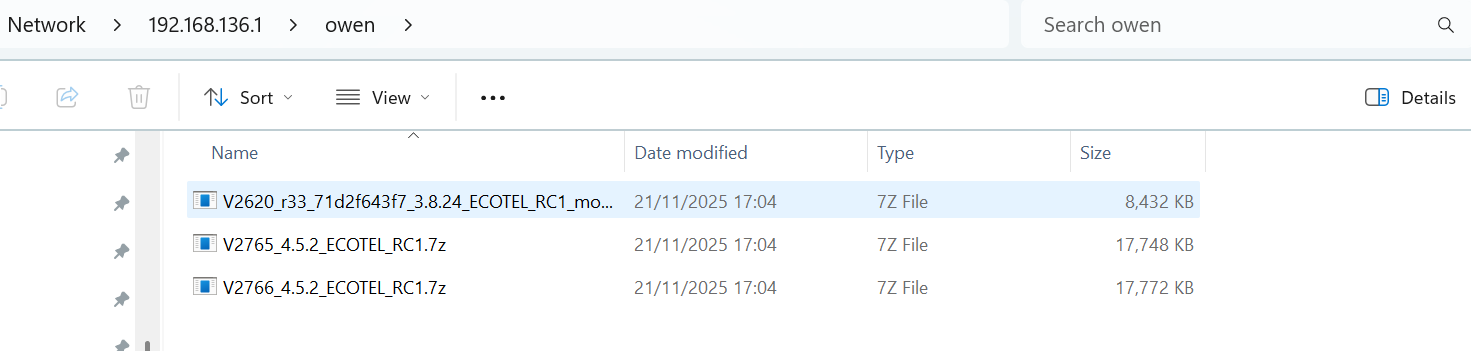
3. After login successfully, user owen can access files under the specified Firmware folder.
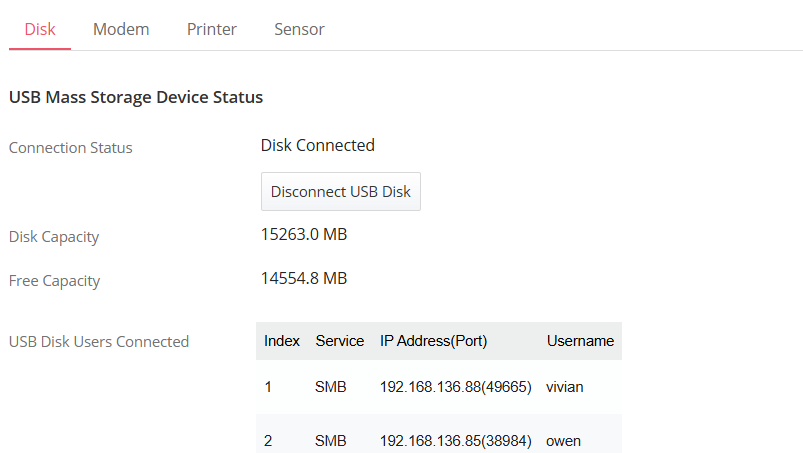
4. On the router, the network administrator can check which users have logged in by navigating to Configuration >> USB Application >> USB Device Status page.
Published On:2025-12-09
ShareWas this helpful?