
IKEv2 VPN between FortiGate and DrayTek
This article demonstrates how to establish an IPsec VPN tunnel between a FortiGate firewall and a DrayTek Vigor Router. The example below is based on FortiOS 7.0.
FortiGate Setup
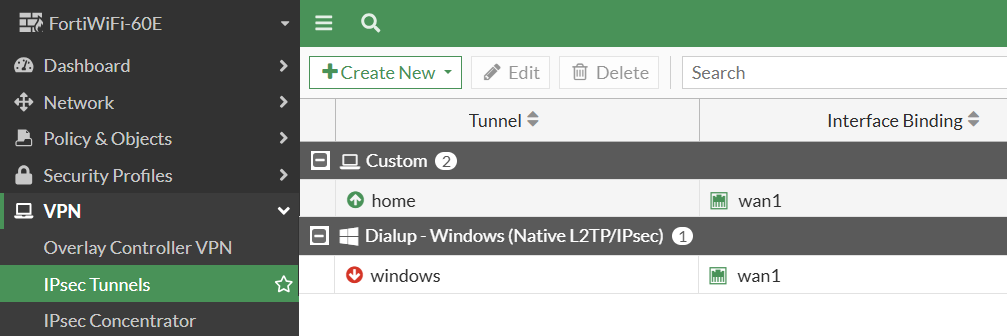
1. Create an IPsec VPN Tunnel
Go to VPN >> IPsec Tunnels, then click + Create New to create a new VPN profile. Enter a name for the tunnel, select Custom as the Template Type, and click Next.
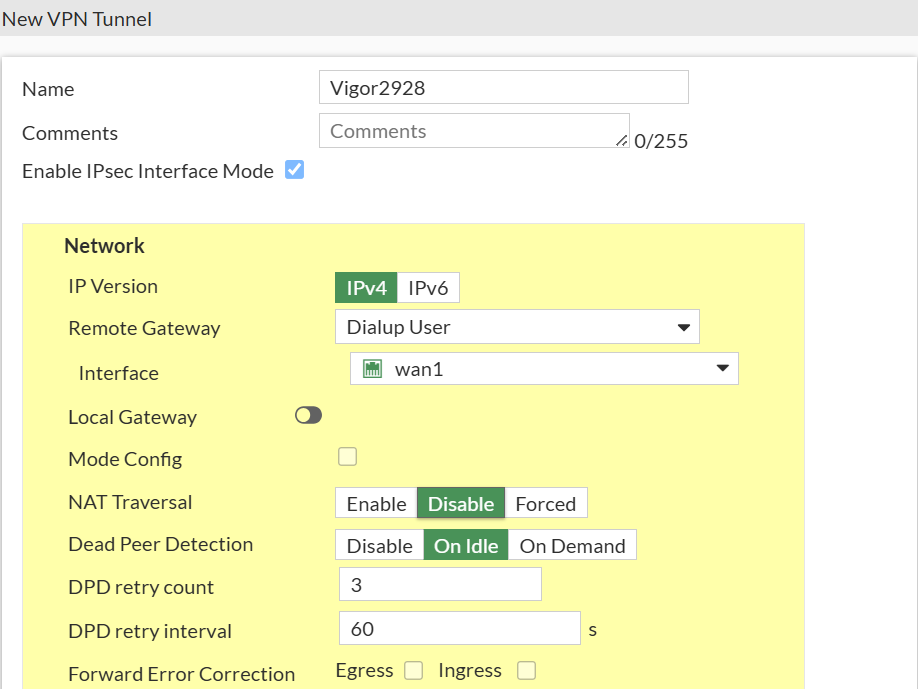
2. Configure the Network Settings
Under Network Settings:
- Select the appropriate IP Version.
- Set Remote Gateway to Dialup User (when the Vigor Router has a dynamic public IP address).
- Select the WAN interface on which the VPN tunnel will be established.
3. Configure Phase 1 (IKE) Settings
Under Authentication Settings:
- Select the desired IKE Version.
- Choose Pre-shared Key as the authentication method.
- Configure Specific Peer ID Accept Types and enter the Peer ID configured on the Vigor Router.
- Set the Key Lifetime. The default Phase 1 lifetime on the Vigor Router is 28800 seconds.

4. Configure Phase 2 Settings
Under Phase 2 Settings:
- Enter the FortiGate LAN subnet as the Local Address.
- Enter the Vigor Router LAN subnet as the Remote Address.
Click Advanced to configure the Phase 2 proposal and set the Key Lifetime. The default Phase 2 lifetime on the Vigor Router is 3600 seconds.

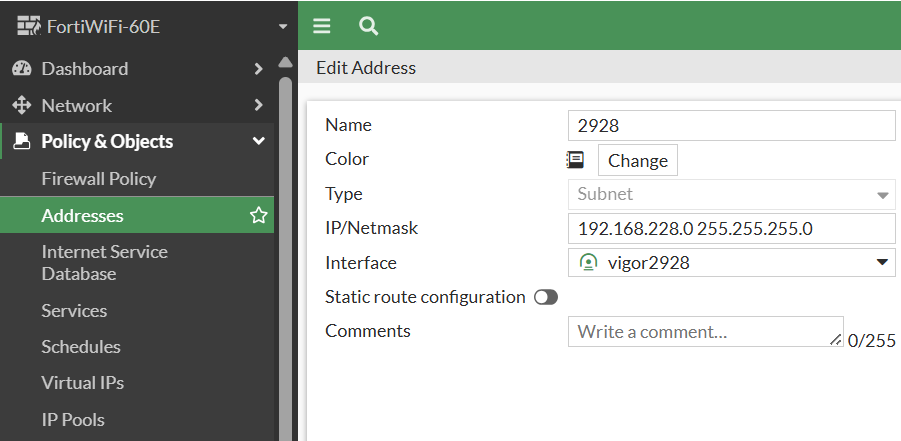
5. Create an Address Object
Go to Policy & Objects >> Addresses, then click Create New >> Address.
Configure the following:
- Name: A descriptive name for the Vigor LAN subnet.
- IP/Netmask: Enter the Vigor Router LAN subnet.
- Interface: Select the IPsec tunnel created earlier.
Click OK to save the configuration.
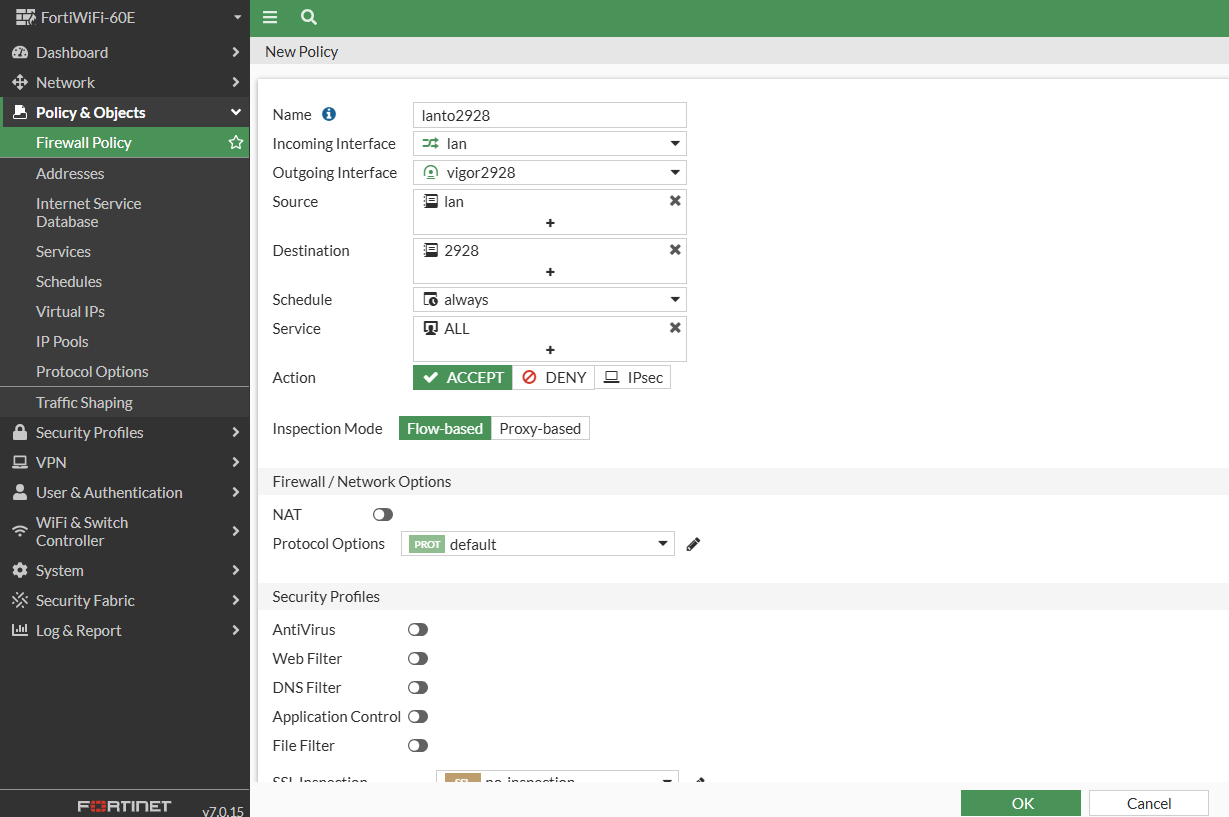
6. Create Firewall Policies
Go to Policy & Objects >> IPv4 Policy, then click Create New.
Create two firewall policies:
- Allow traffic from the FortiGate LAN to the Vigor LAN.
- Allow traffic from the Vigor LAN to the FortiGate LAN.
- Disable NAT for both policies.
Note: Ensure the IPsec policies have a higher priority than general firewall rules. If necessary, manually adjust the policy order so that VPN traffic is matched before other policies (except management-related rules).

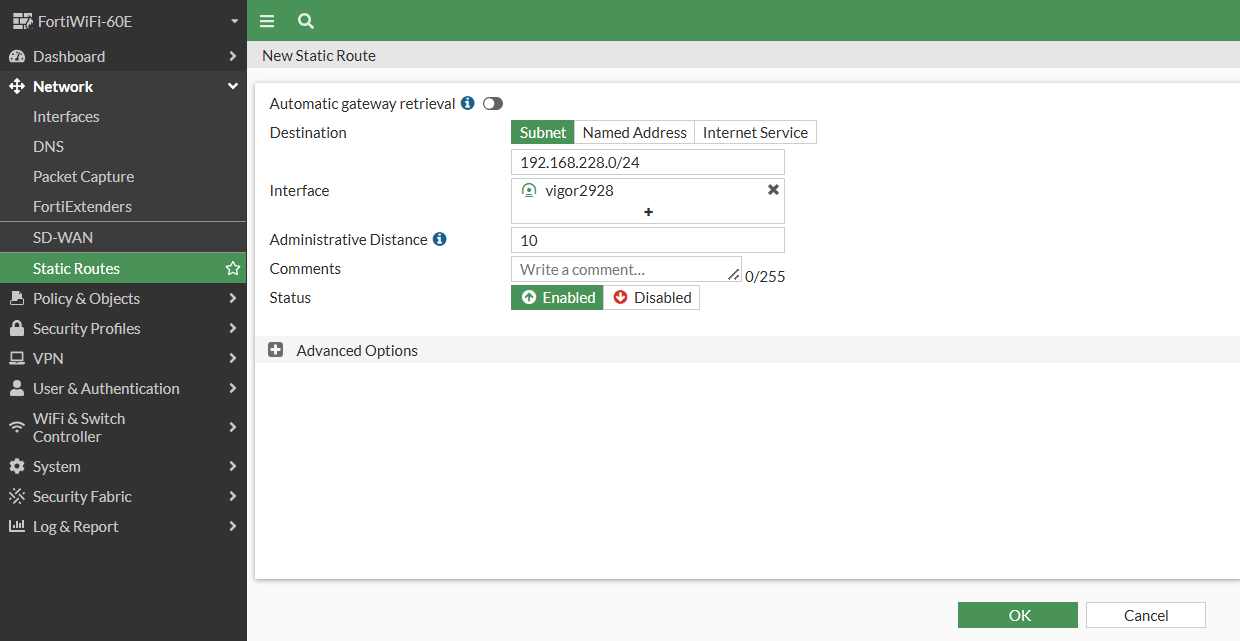
7. Create a Static Route
Go to Network >> Static Routes, then click Create New.
- Destination: Enter the Vigor Router LAN subnet.
- Device: Select the IPsec tunnel created earlier.
Click OK to apply the configuration.
Vigor Router Setup
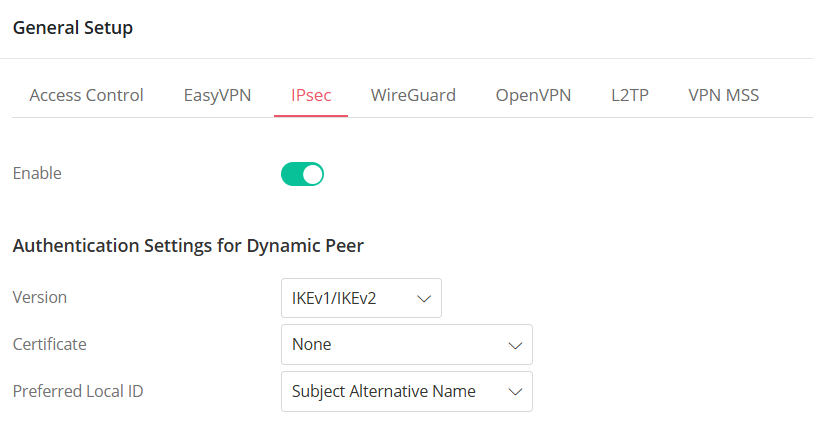
1. Enable the IPsec Service
Go to VPN and Remote Access >> General Setup >> IPsec.
- Enable IPsec Service.
- Click Apply to save the settings.
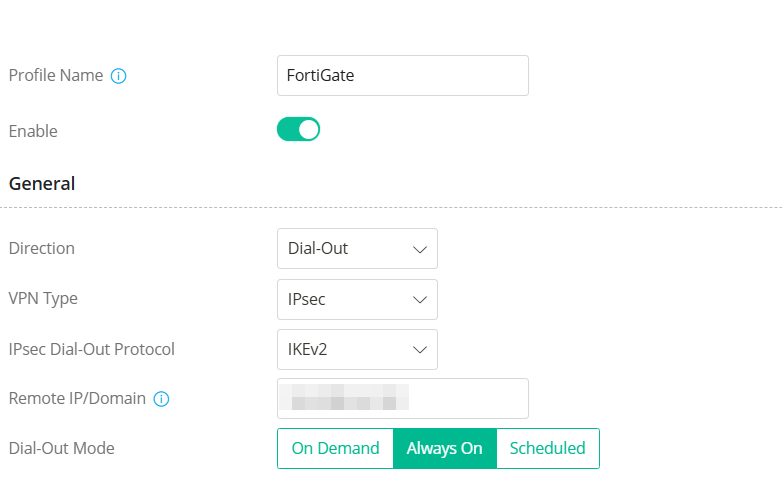
2. Create an IPsec VPN Profile
Go to VPN / Site-to-Site VPN.
Click +Add to create a new VPN profile. Enter a Profile Name and enable the profile.
General
- Direction: Dial-Out
- VPN Type: IPsec Tunnel
- IPsec Dial-Out Protocol: IKEv2
- Server IP/Host Name for VPN: Enter the public IP address or domain name of the FortiGate.
- Dial-Out Mode: Always On
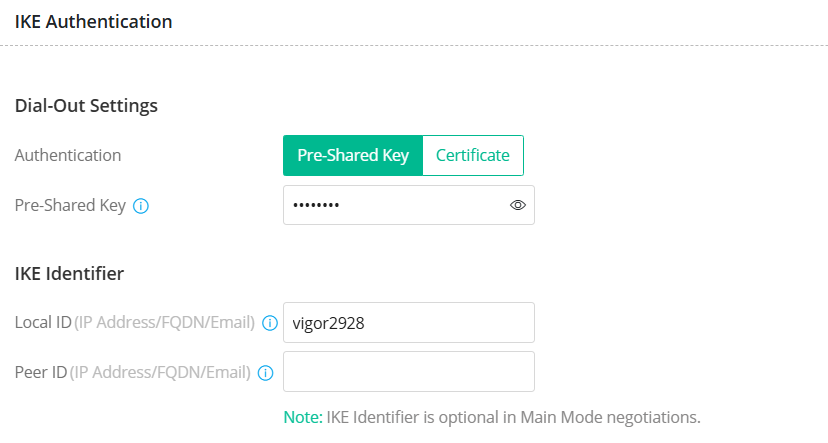
IKE Authentication
- Authentication Method: Pre-Shared Key
- Enter the Pre-Shared Key configured on the FortiGate.
- Enter the IKEv2 Local ID. This value must match the Peer ID configured on the FortiGate.
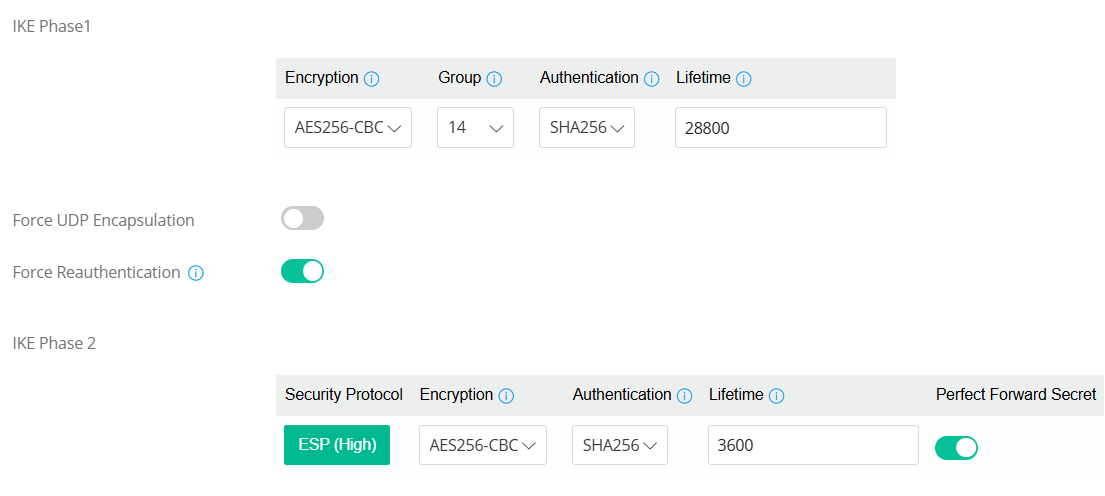
- Click More Settings to enable Force Reauthentication and Perfect Forward Secrecy (PFS), if required. Configure the IKE Phase 1 and Phase 2 encryption and authentication algorithms if they differ from the default settings.
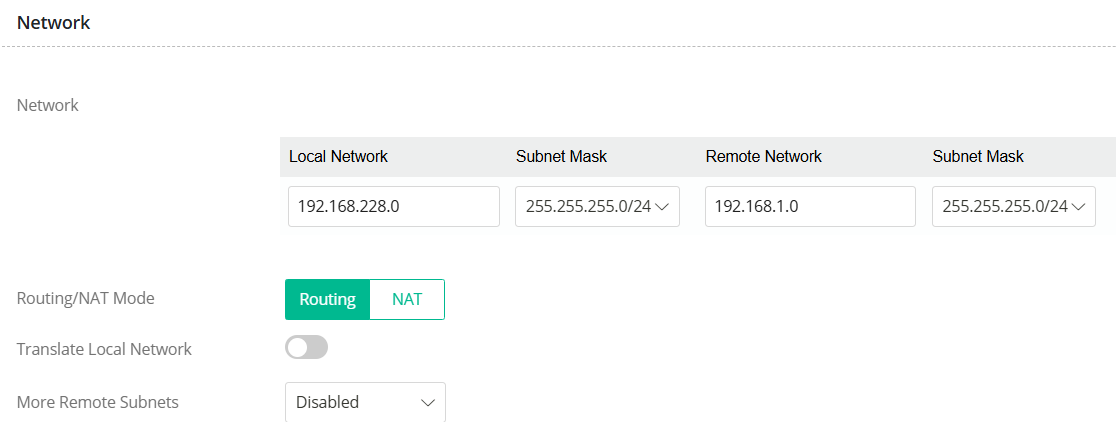
TCP/IP Network Settings
- Local Network: Enter the LAN subnet of the Vigor Router.
- Remote Network: Enter the LAN subnet of the FortiGate.
Click Apply to save the profile.
3. Verify the VPN Connection
After the configuration is complete, the Vigor Router will automatically establish the IPsec tunnel if Always On is selected.
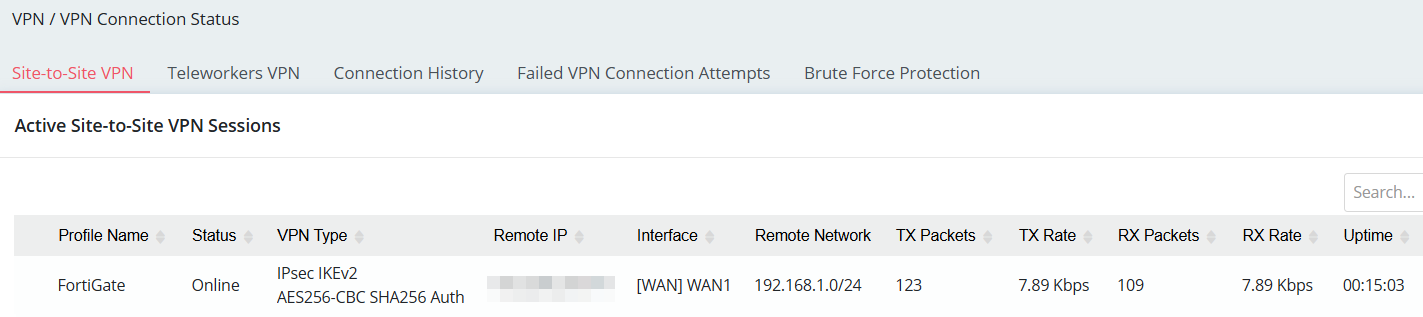
You can verify the VPN status by going to VPN / VPN Connection Status.
The tunnel status should be displayed as Connected once the VPN is successfully established.
Published On:2026-06-23
ShareWas this helpful?