
Sending Notifications via Microsoft 365 Mail Server with OAuth 2.0
More and more mail servers, including Google and Microsoft, are adopting the advanced OAuth 2.0 security authorization mechanism to authenticate mail clients. Unlike traditional username/password authentication, OAuth authorization requires identity verification through a third-party application. Vigor Router supports this mechanism, enabling it to send notification emails via such mail servers.
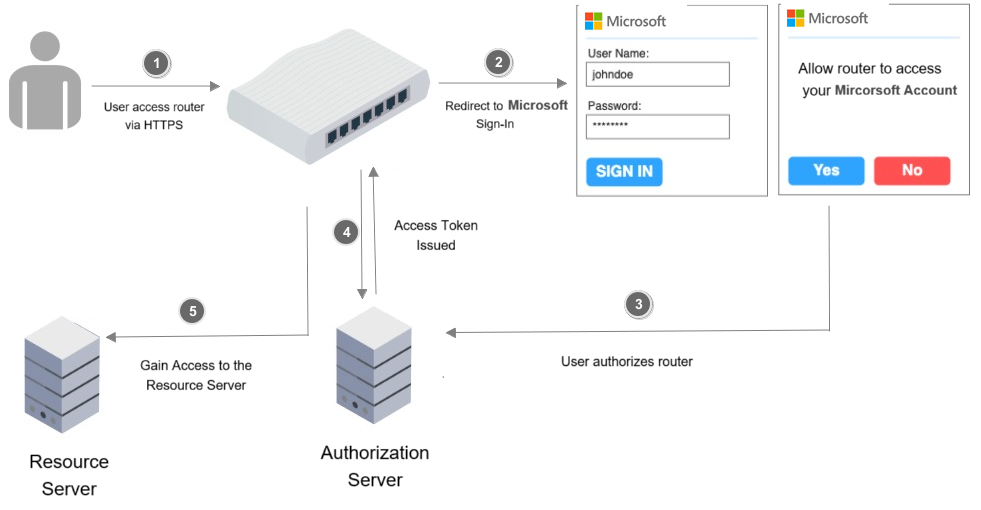
OAuth 2.0 Flow Process
-
User Authorization (Redirect to Authorization Server)
Vigor Router redirects the user to the authorization server (e.g., Microsoft) to log in and grant access. -
User Logs In and Grants Permission
The user logs in to their Microsoft account and authorizes the application to access the requested scopes. -
Authorization Code is Returned to the Client / Vigor Router
The authorization server redirects back to the router with an authorization code. -
Vigor Router Requests Access Token Using Authorization Code
The router uses the authorization code to request an access token from the authorization server. -
Authorization Server Returns Access Token (and Optional Refresh Token)
The authorization server responds with an access token and optionally a refresh token.
This article introduces how to configure a Vigor Router to use OAuth 2.0 to send notification emails through the Microsoft mail server.
Supported Models and Firmware Versions
- Vigor3912 / 3910 / 2962 firmware version 4.4.6.1
- Vigor2927 firmware version 4.5.3*
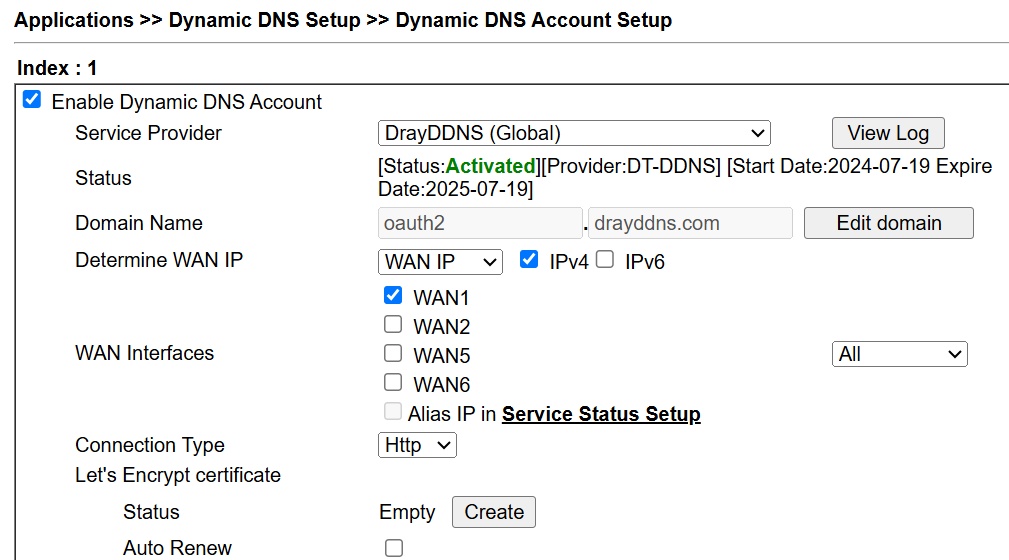
1. Configure Dynamic DNS
Navigate to Applications >> Dynamic DNS Setup >> Dynamic DNS Account Setup.
In this example, DrayDDNS is used. This DDNS name will later be used in the Microsoft Server Redirect URI.
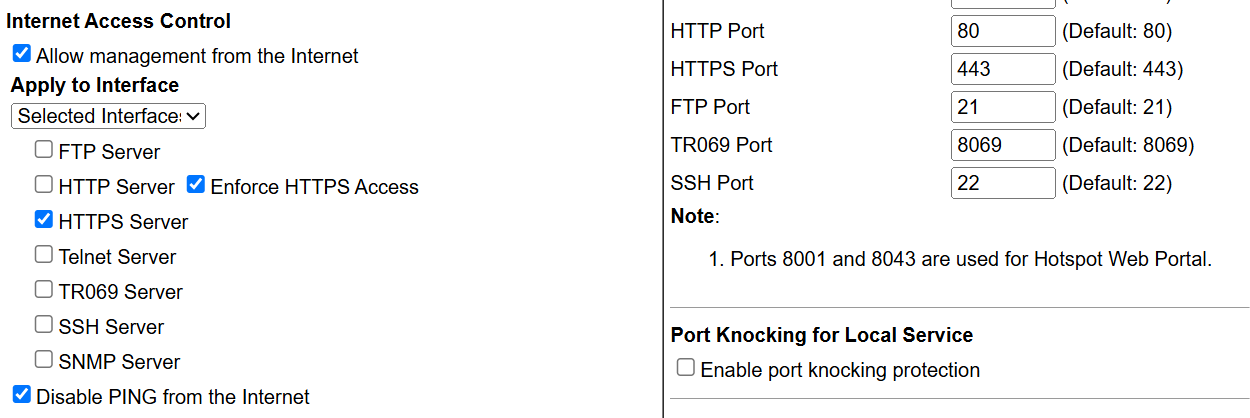
2. Enable HTTPS from WAN
Navigate to System Maintenance >> Management
Vigor Router acts as the OAuth client and needs to request an access token from the Microsoft authorization server before sending emails. The HTTPS management port must be set to 443 for OAuth 2.0 functionality.
3. Configure Microsoft Entra ID
To allow Vigor Router to use Microsoft OAuth 2.0 authentication, create an application in Microsoft Azure Portal / Microsoft Entra Admin Center.
3.1 Create an App Registration
Sign in to the Microsoft Entra Admin Center and navigate to Identity → Applications → App registrations → New registration
Recommended Settings
| Item | Value |
|---|---|
| Name | Router SMTP OAuth |
| Supported account types | Single tenant |
| Redirect URI | Leave blank initially |
After creating the application, record the following:
- Application (Client) ID
- Directory (Tenant) ID
3.2 Create a Client Secret
Navigate to Certificates & secrets → New client secret
Create a new client secret.
Save the Client Secret VALUE immediately after creation because it will not be displayed again later.
3.3 Add SMTP OAuth Permissions
Navigate to API permissions → Add permission
Select:
- Office 365 Exchange Online
- Delegated permissions
Add the following permissions:
- SMTP.Send
- offline_access
- openid
- profile
For Router / IoT implementations, delegated permissions with refresh token support are recommended.
3.4 Grant Admin Consent
Navigate to API permissions → Grant admin consent
Click: Grant admin consent
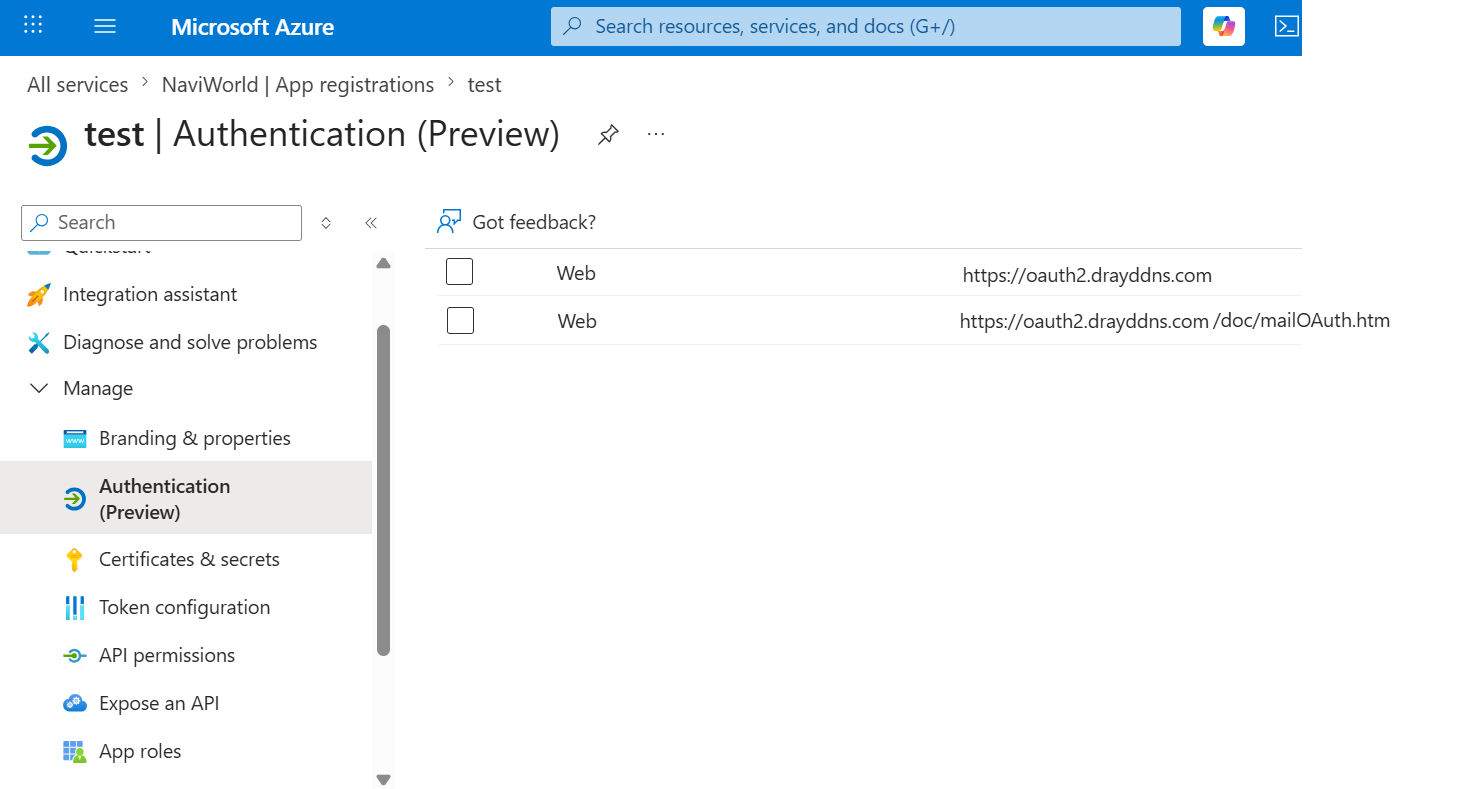
3.5 Configure Redirect URI
Navigate to Applications → App registrations → Your App → Authentication
Under Redirect URIs, add the router URL.
Example:
https://oauth2.drayddns.com/doc/mailOAuth.htm
The Redirect URI configured in Microsoft Entra ID must exactly match the URI used by the router OAuth request, including:
- Protocol (HTTP / HTTPS)
- Hostname / IP address
- Port number
- Path
- Trailing slash
4. Configure Mail Service on Vigor Router
Access the Vigor Router using the HTTPS DDNS address created in Step 1.
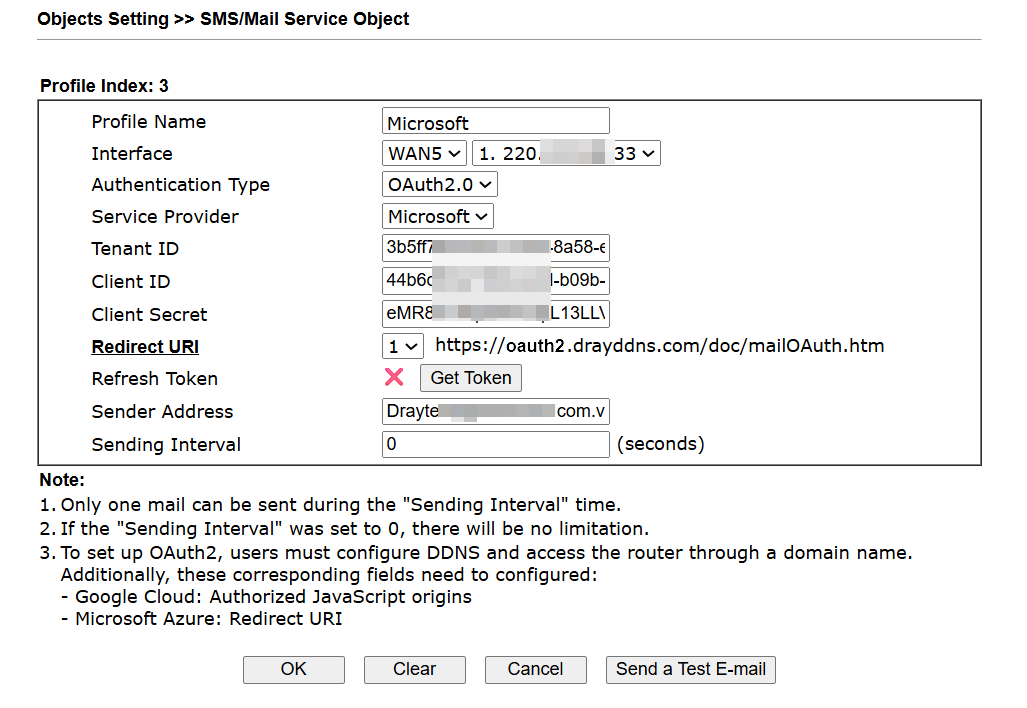
Navigate to Objects Setting >> SMS/Mail Service Object
Select a profile index and configure the following:
- Enter a Profile Name
- Select the WAN Interface
- Select OAuth2.0 as Authentication Type
- Select Microsoft as Service Provider
- Paste the Tenant ID
- Paste the Client ID
- Paste the Client Secret
- Select the DDNS profile as Redirect URI
- Click Get Token
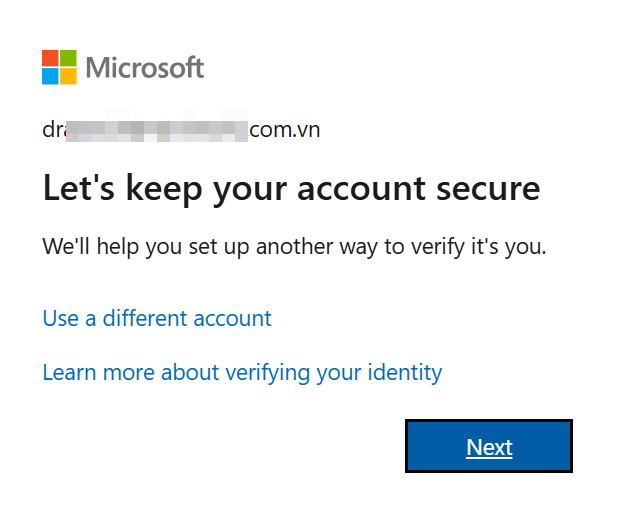
A Microsoft authentication window will appear. Choose the Microsoft account and proceed with authorization.
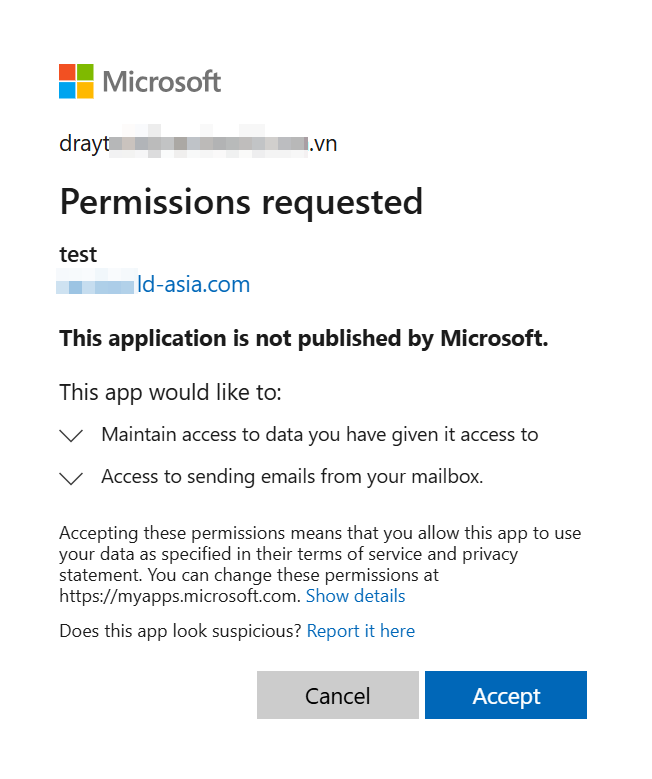
Click Accept to grant permission for the router to use the Microsoft API.
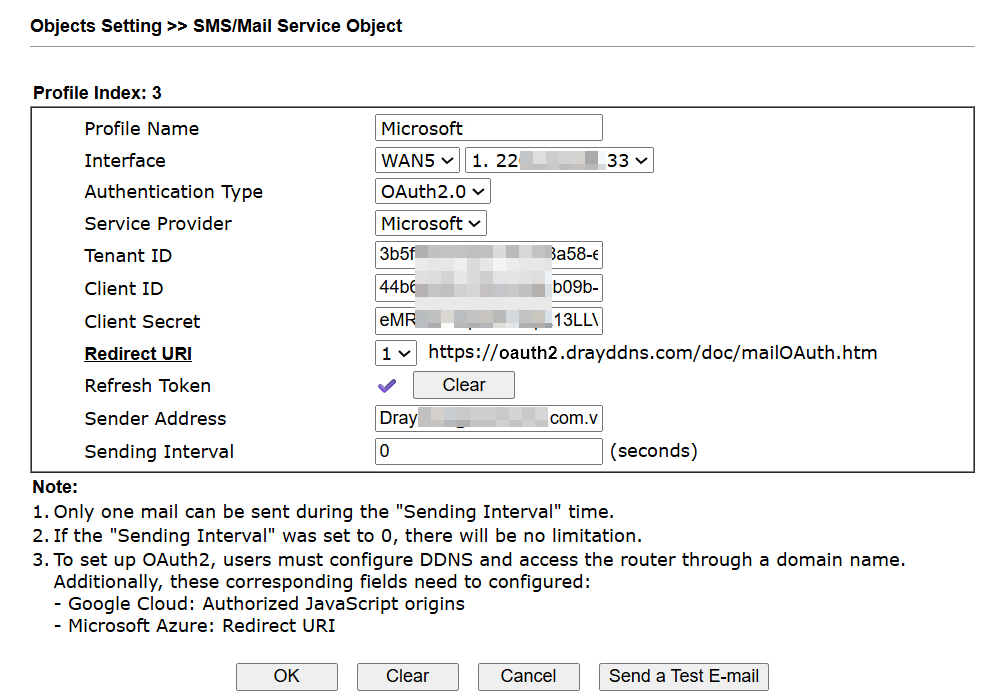
Once completed, the Vigor Router will successfully obtain the OAuth token from the Microsoft server.
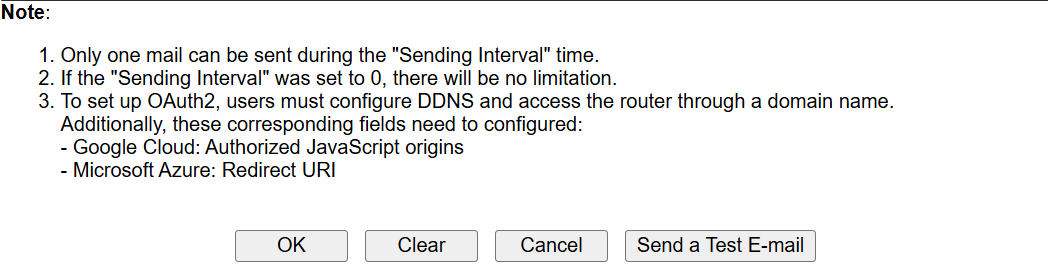
5. Send a Test Email
Use Send a Test E-mail to verify that the Vigor Router can send emails through the Microsoft server using OAuth 2.0 authentication.
6. Configure Notification Objects
After confirming that the test email is received successfully, configure the notification objects and Mail Service settings. Once completed, the Vigor Router will be able to send notification emails through Microsoft 365 using OAuth 2.0.
7. Disable HTTPS from WAN
Navigate to System Maintenance >> Management
Disable HTTPS from WAN after OAuth token acquisition is completed.
The initial OAuth authorization process requires WAN HTTPS access temporarily because the router must receive the OAuth callback through the configured domain name.
Once the token is obtained, the Vigor Router stores the token locally and uses it for subsequent HTTPS requests directly to the Microsoft server. These requests will pass the Access List security checks normally.