
Upgrade VigorACS3 by OTA on Windows
VigorACS provides OTA script for Download and Upgrade, this article will guide you on how to upgrade your ACS and keep all your data.
OTA requires adding MySQL to env path in Windows, please add the MariaDB bin directory as MySQL in the Environment Variables.

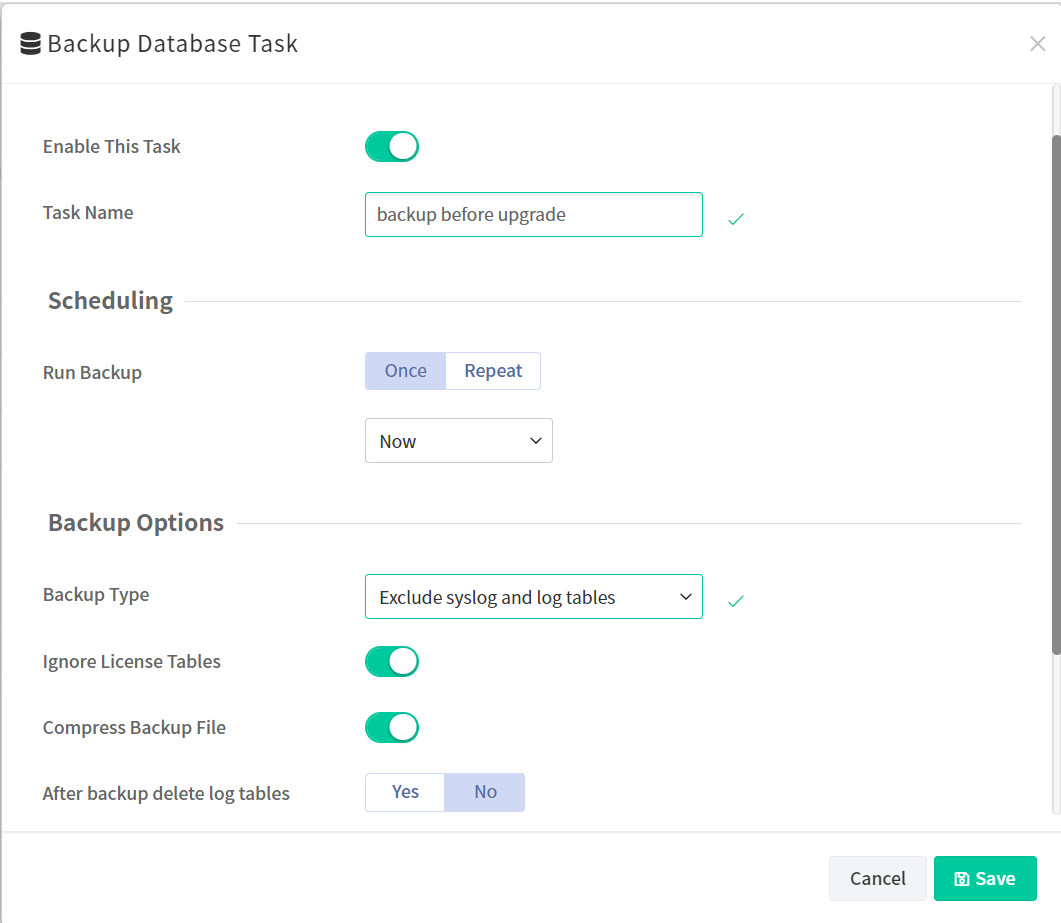
1. Backup the database
The database will remain after the upgrade; however, we still strongly recommend backup the database of VigorACS before you start. Please refer to this article to see how to backup the database.
2. Stop ACS service
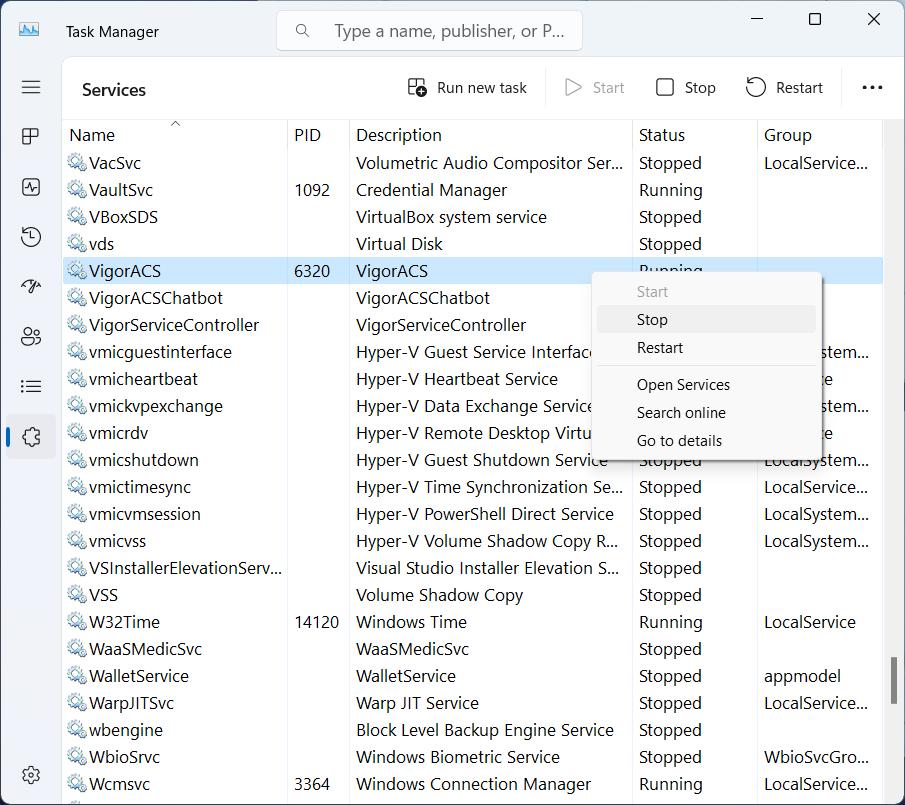
Go to Task Manager>Service to stop VigorACS
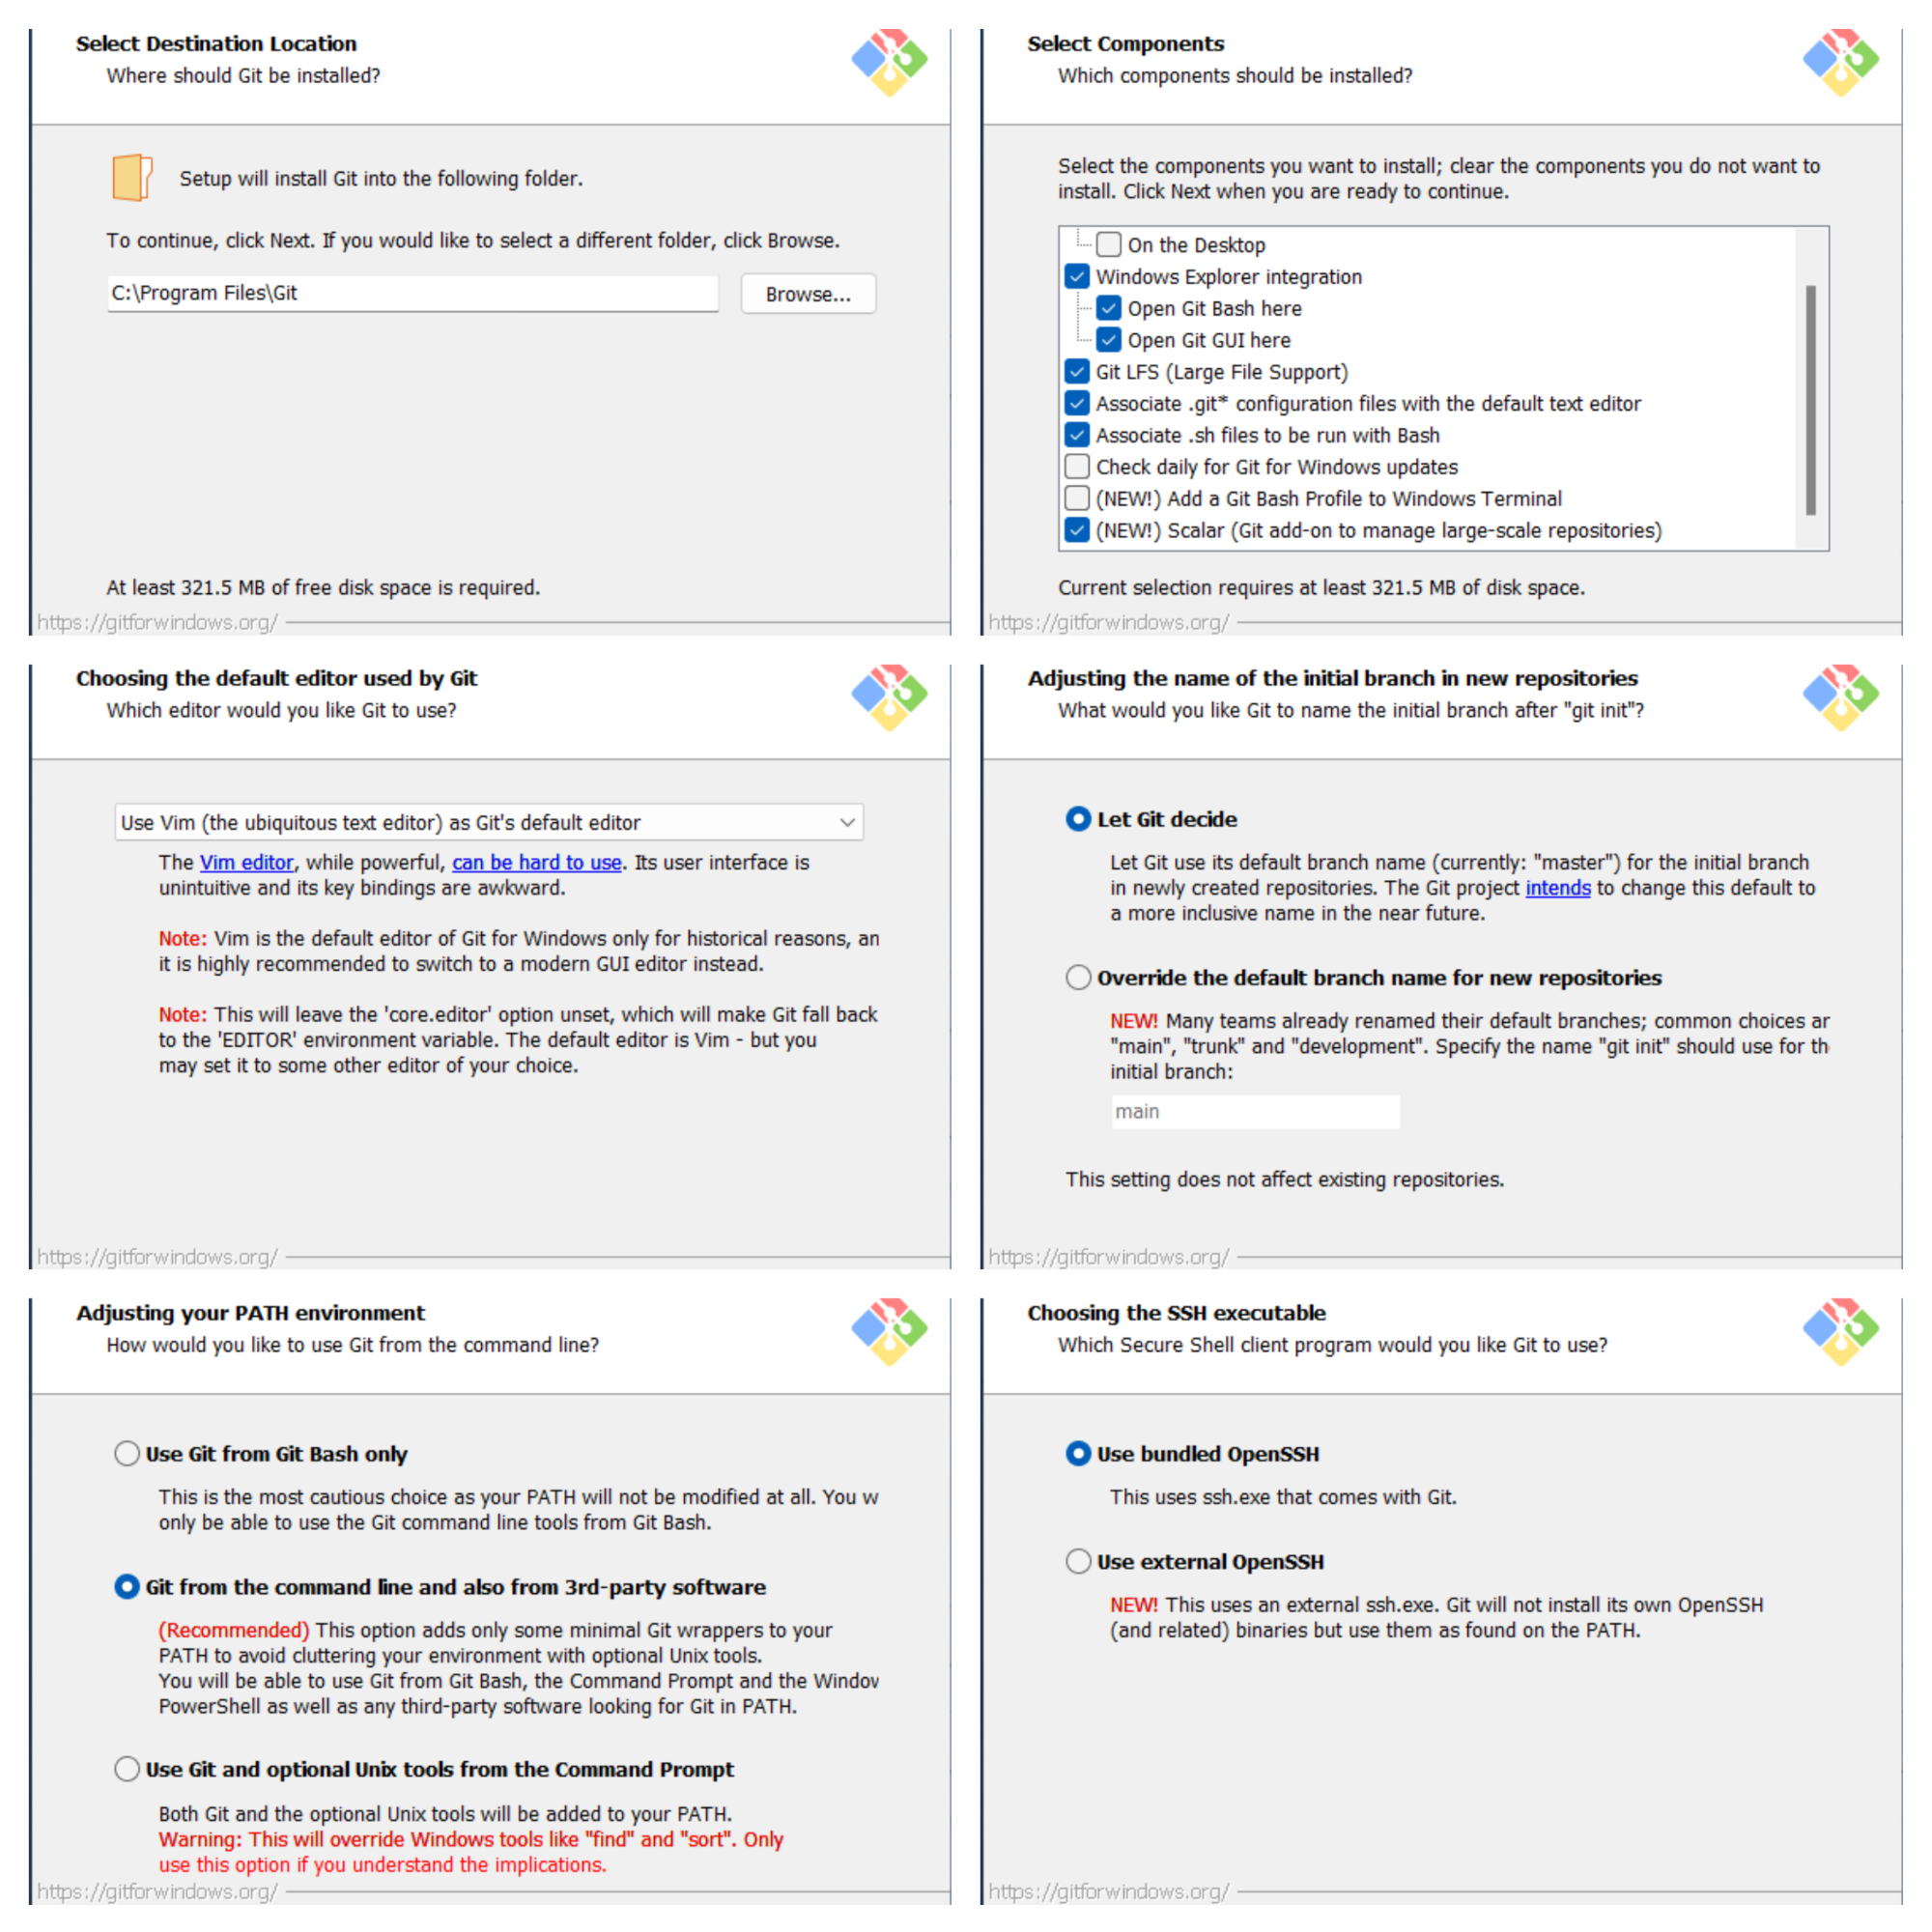
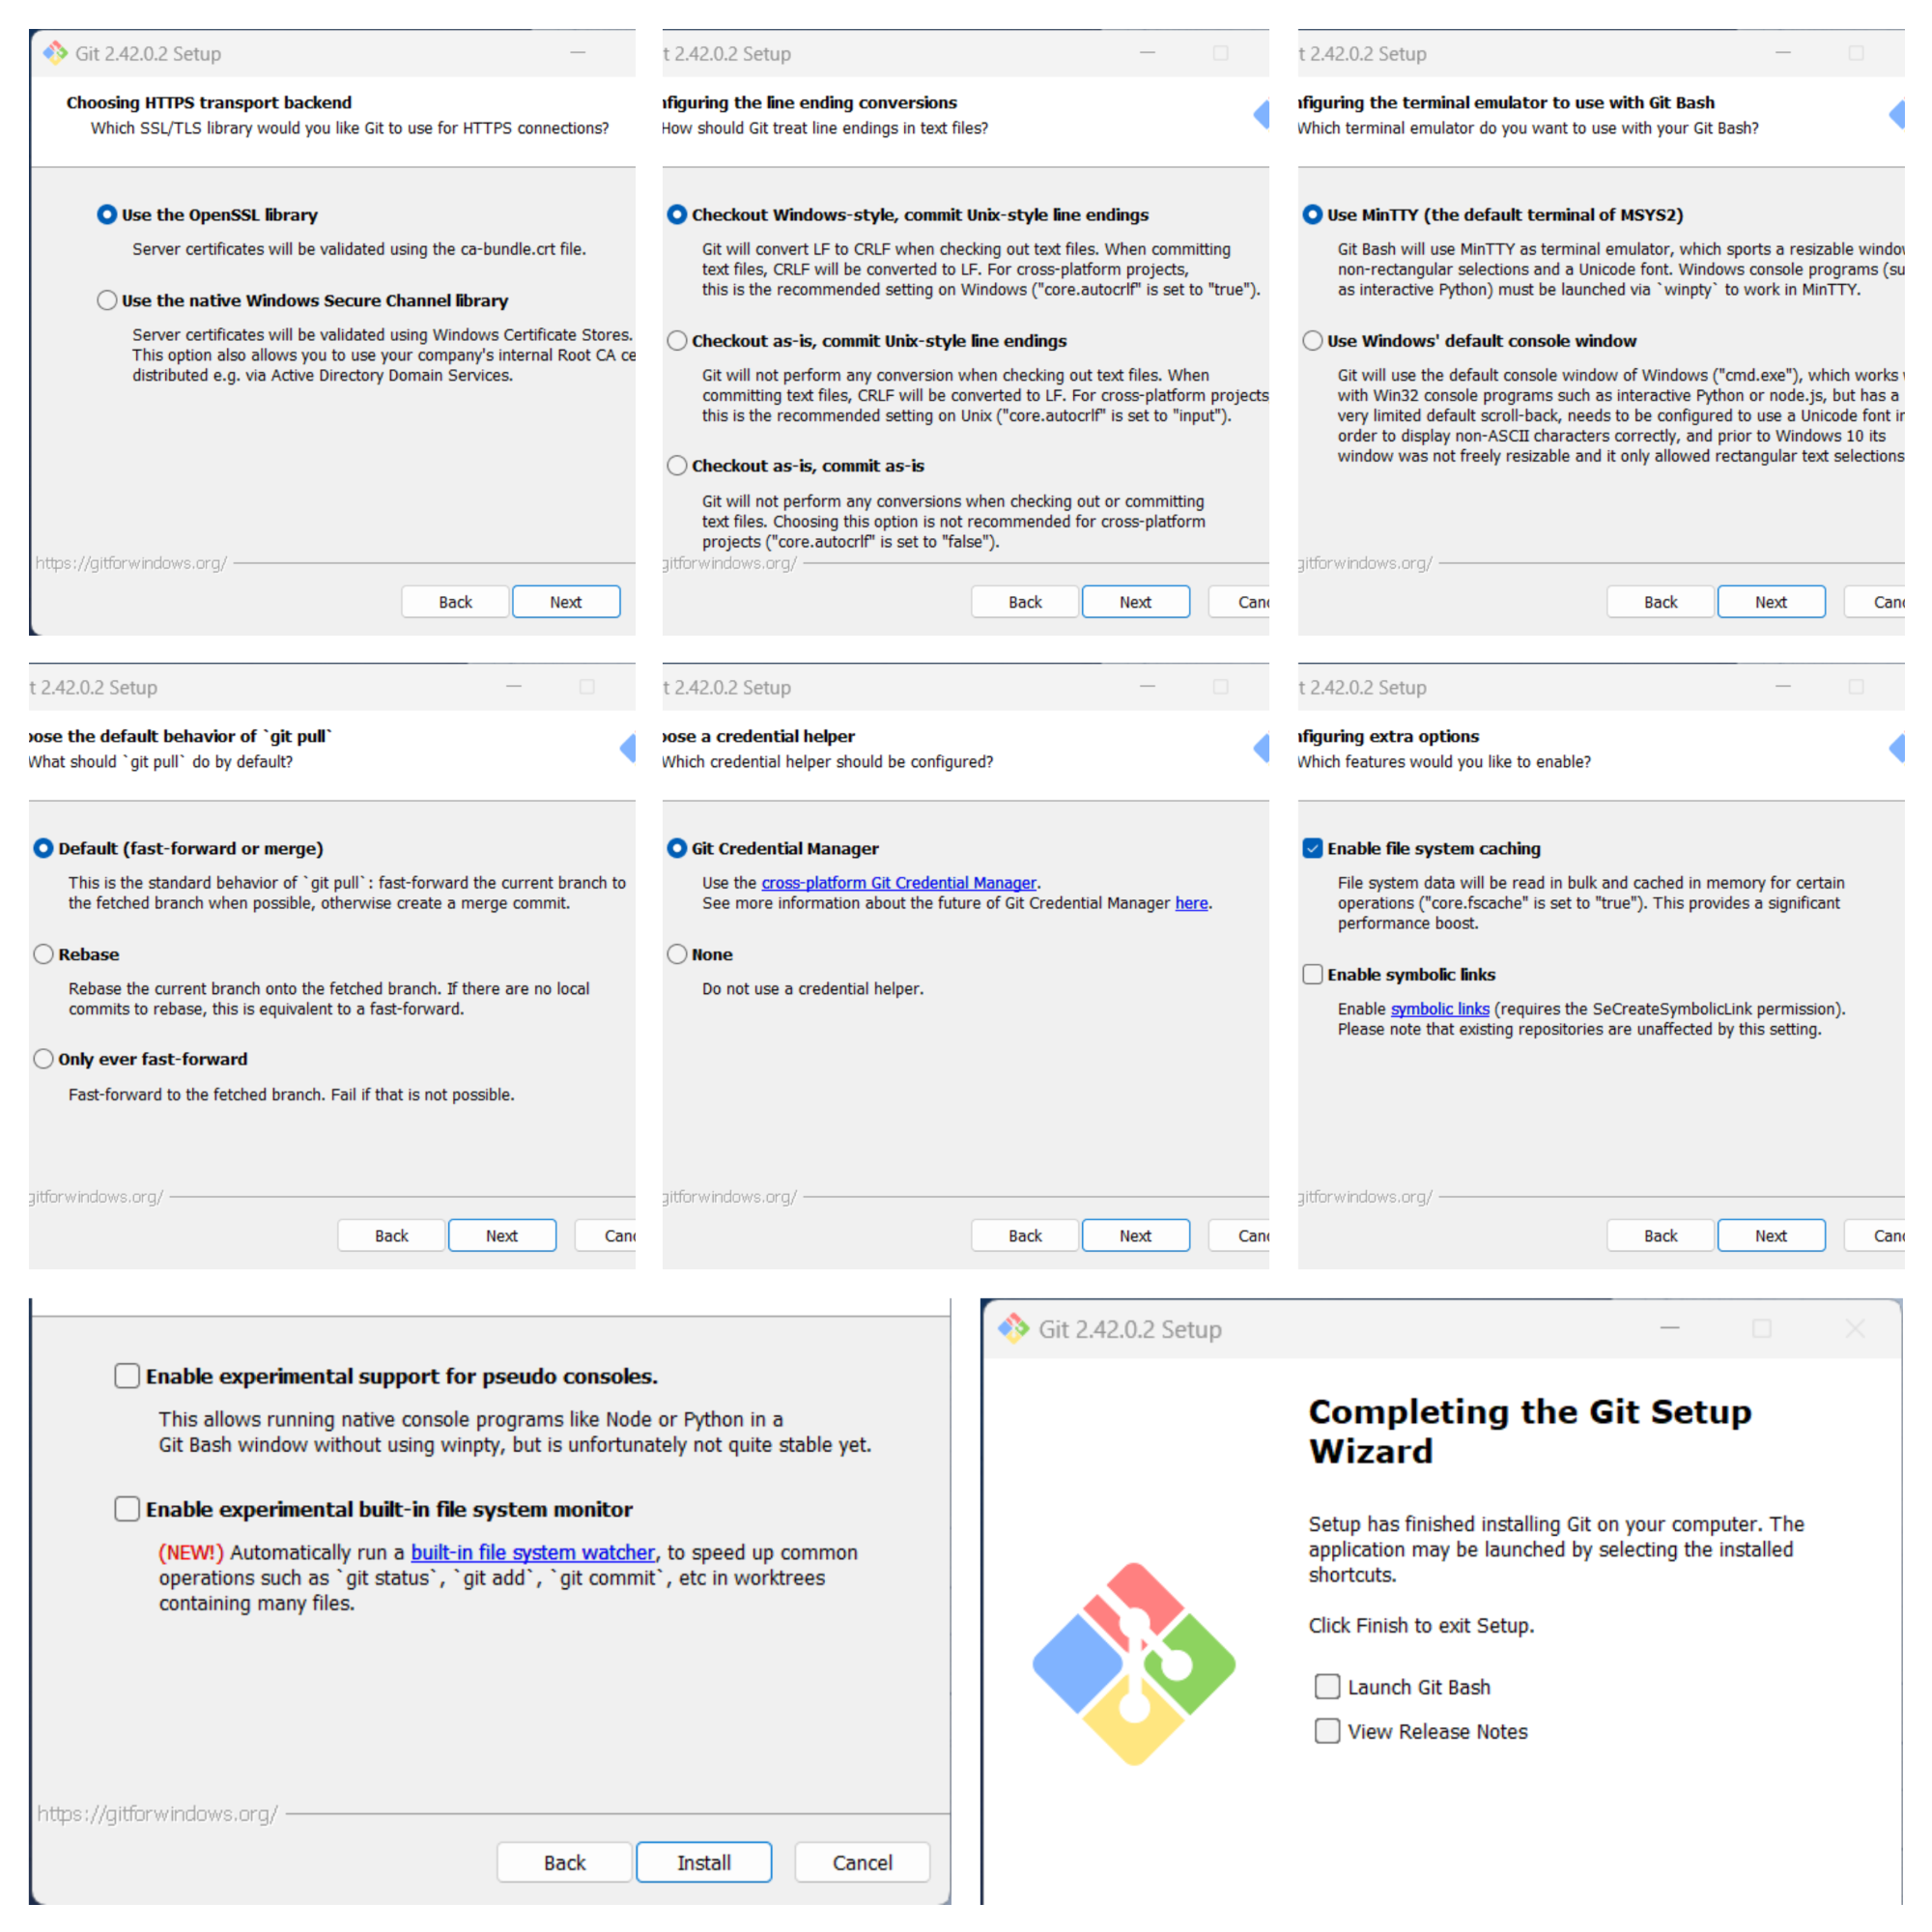
3. Install Git
4. Download VigorACS

It will start to download the latest VigorACS installation files.
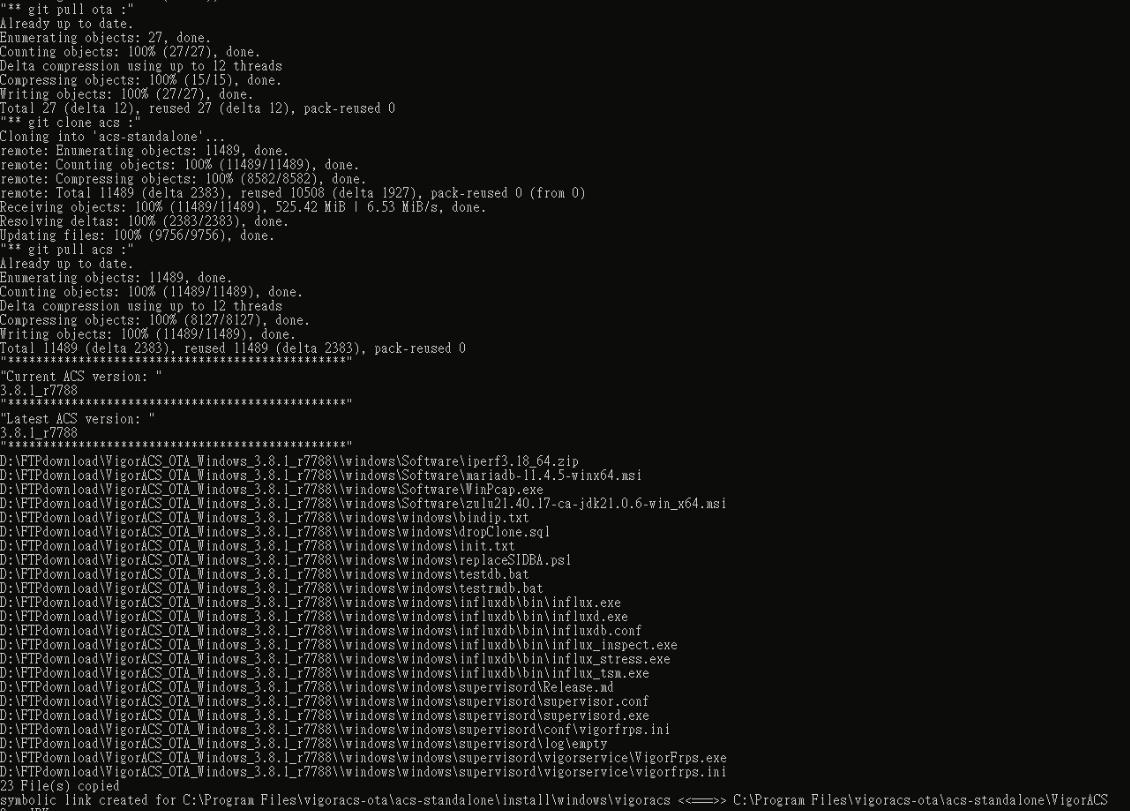
5. Upgrade JAVA
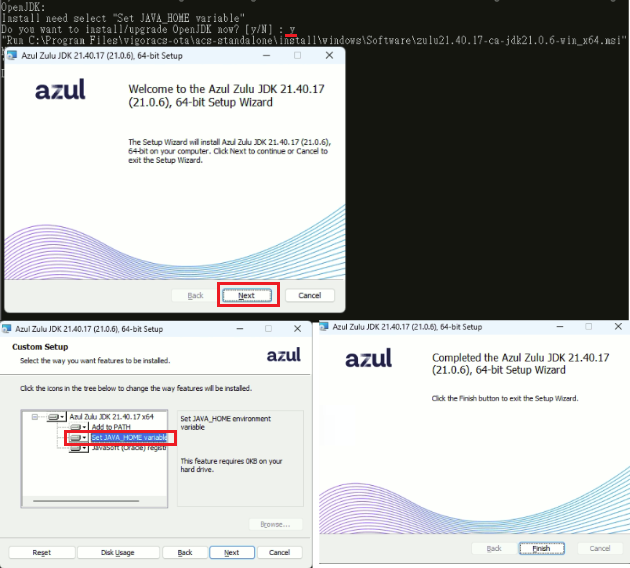
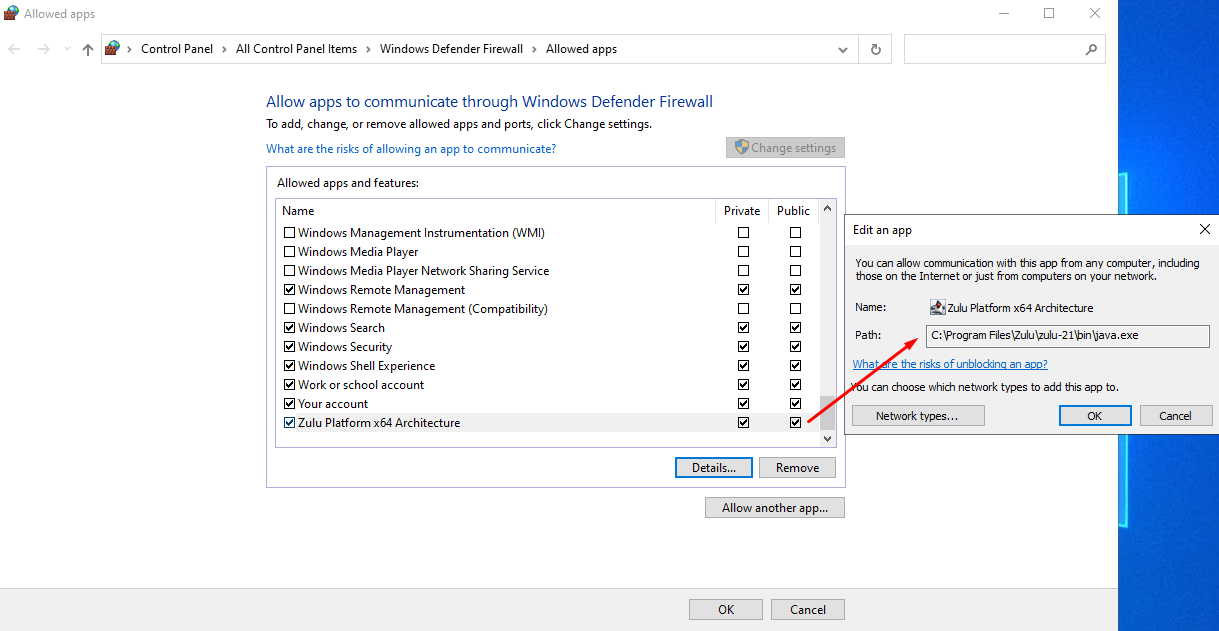
6. Upgrade VigorACS3
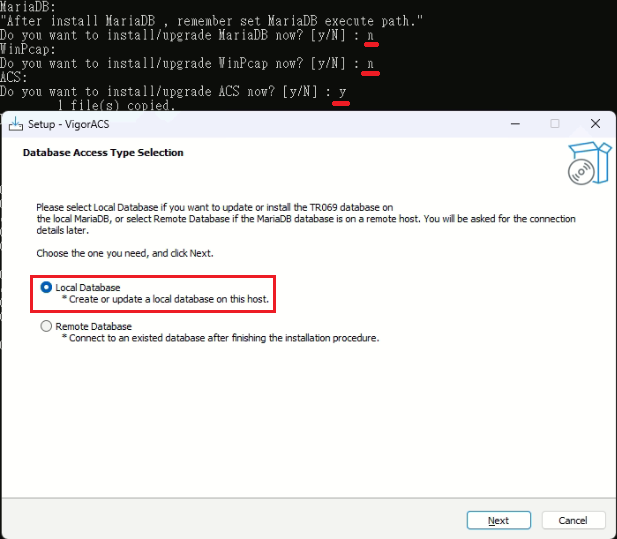
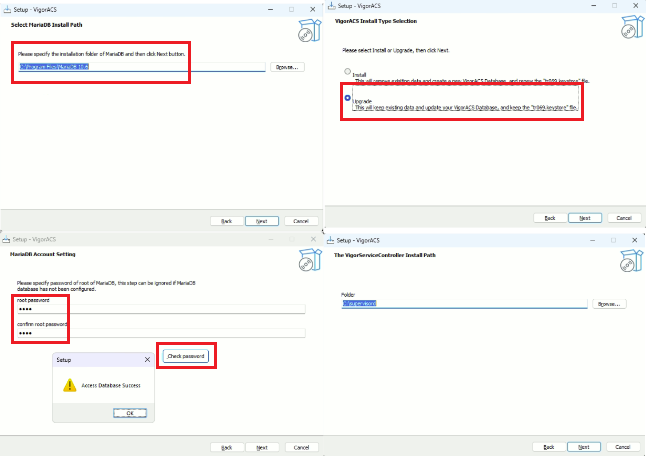
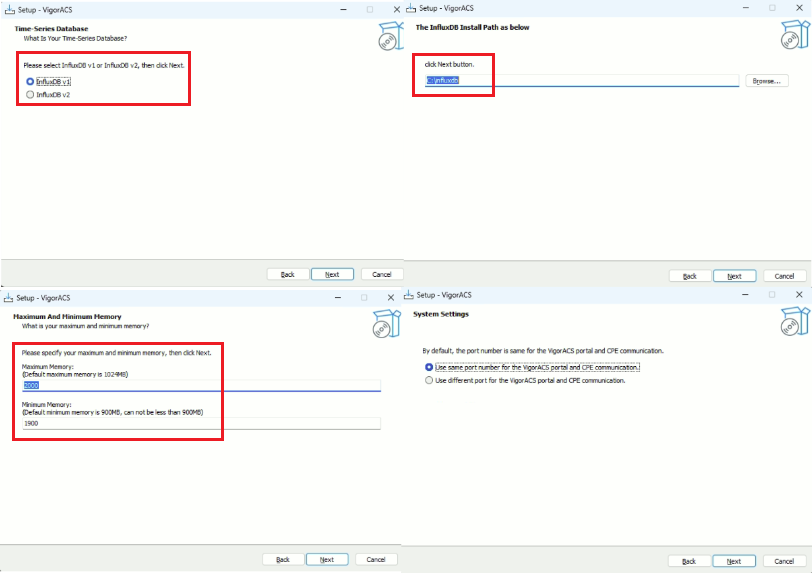
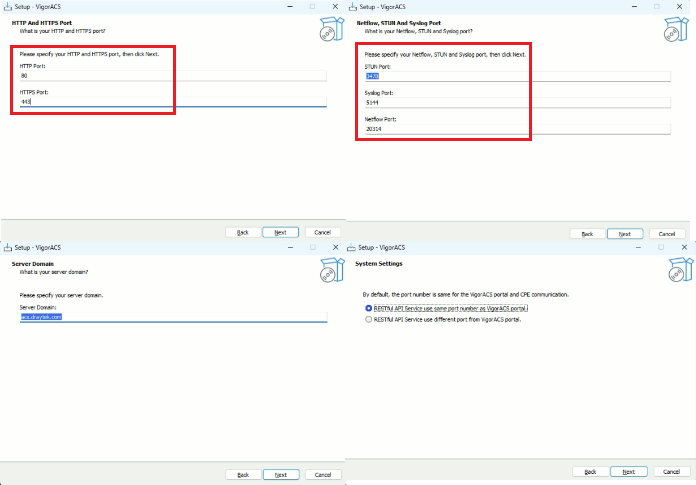
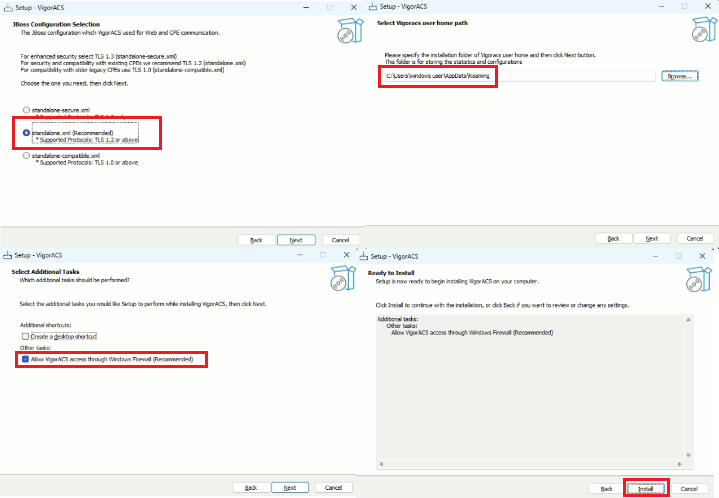
Note: If the MariaDB version is before 10.6, please enter these commands to update MySQL database.
C:\Program Files\MariaDB 10.4\bin\mysql -uroot -p

use tr069

ALTER TABLE provisioning_with_app_log_detail CHANGE COLUMN type info_type TINYINT(2) NOT NULL DEFAULT '0';

ALTER TABLE ui_customization CHANGE COLUMN hide_wan_ip hide_network_tree_ip TINYINT(1) UNSIGNED NOT NULL DEFAULT '1';

ALTER TABLE ui_customization CHANGE COLUMN hide_lan_ip hide_device_dashboard_ip TINYINT(1) UNSIGNED NOT NULL DEFAULT '1';
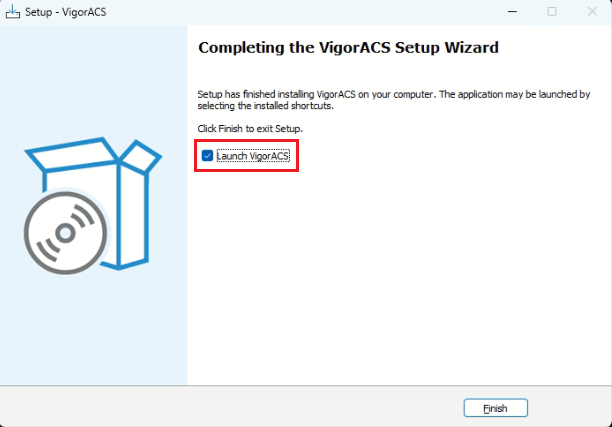
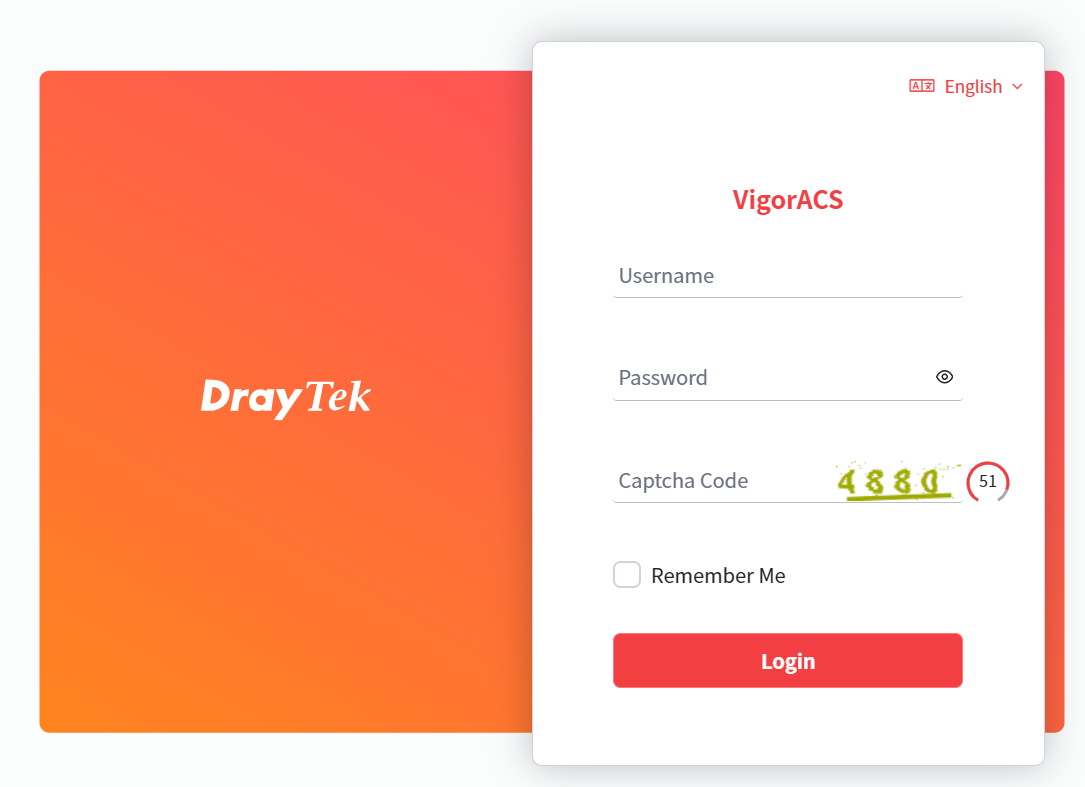
Now the new VigorACS3 is ready to go.
Published On:2023-11-08
ShareWas this helpful?