
Overview of Two Factor Authentication (2FA) on Vigor VPN solutions
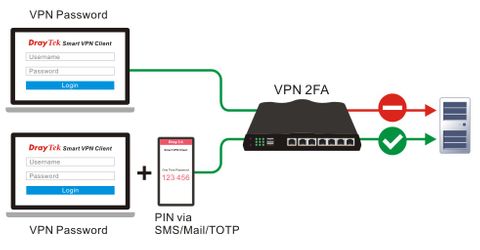
Two-Factor Authentication (2FA) refers to the security process which requires two different verification to prove your identity. Now we can activate 2FA on VPN connections to Vigor Router which adds an additional authentication to our VPN by activation either one of the following options:
Please note that the origin authentication method will not be changed, no matter which VPN protocol you are using, the fixed or the dynamic password. 2FA will add an extra layer of security to strengthen your VPN connection in case the credential is stolen.
This document will demonstrate how to activate two factor authentication on your remote dial-in VPN connection.
Note:
- Initially Supported Models: Vigor3910/2962 (firmware version 4.3.2)
- Smart VPN Client: Windows version 5.6.0, iOS version 1.8.0, MacOS version 1.5.0
- Support VPN Protocols: PPTP, SSL, IKEv2 EAP, IPsec XAuth, L2TP, OpenVPN, WireGuard
Time-based One-time Password (TOTP)
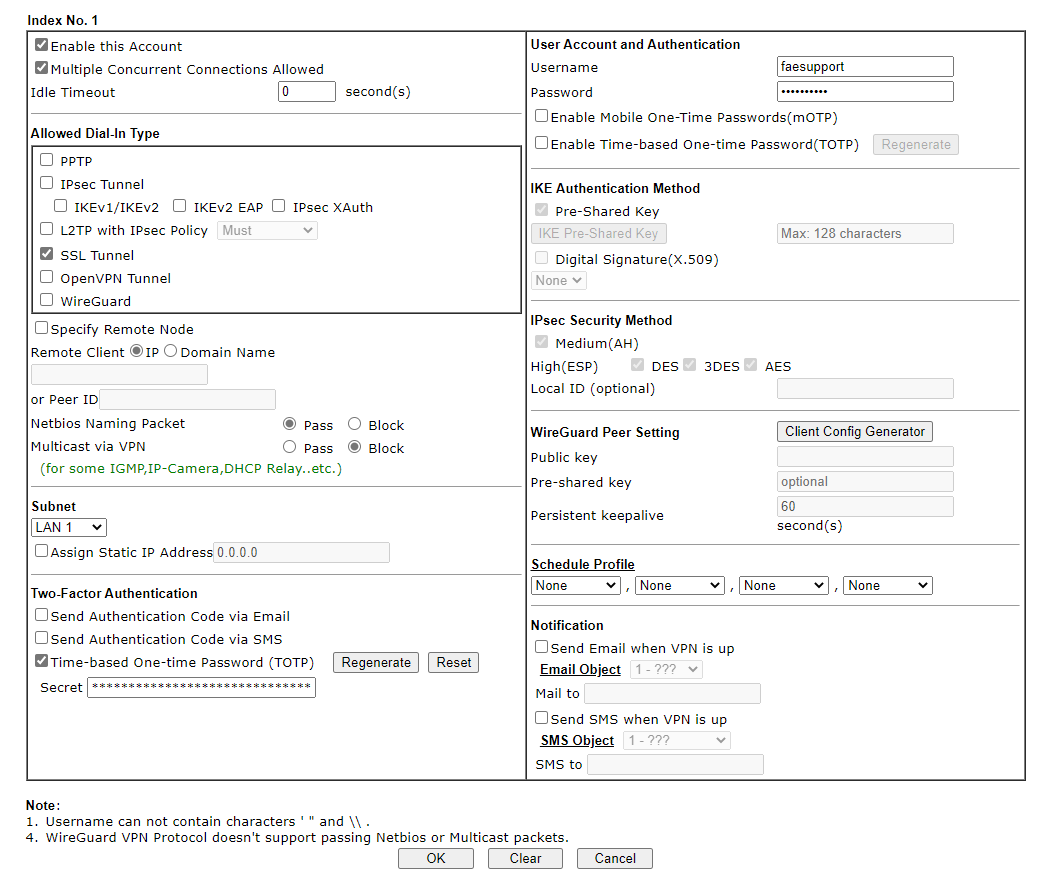
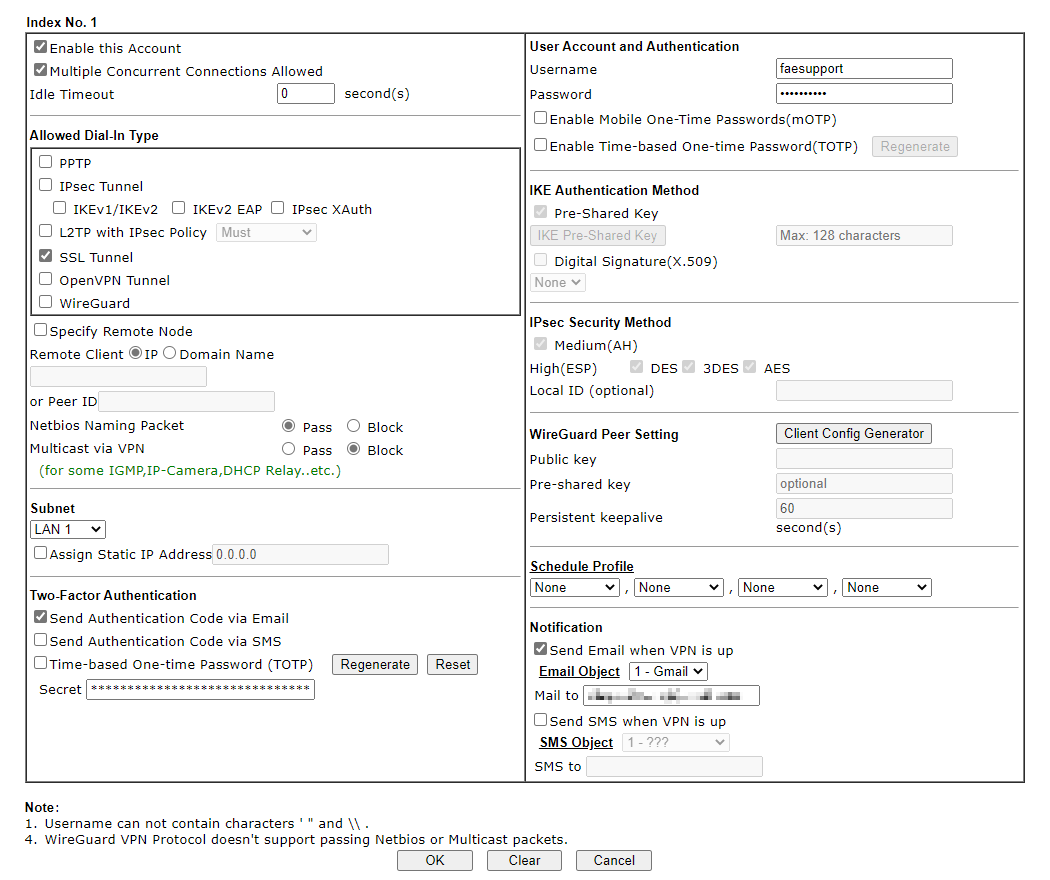
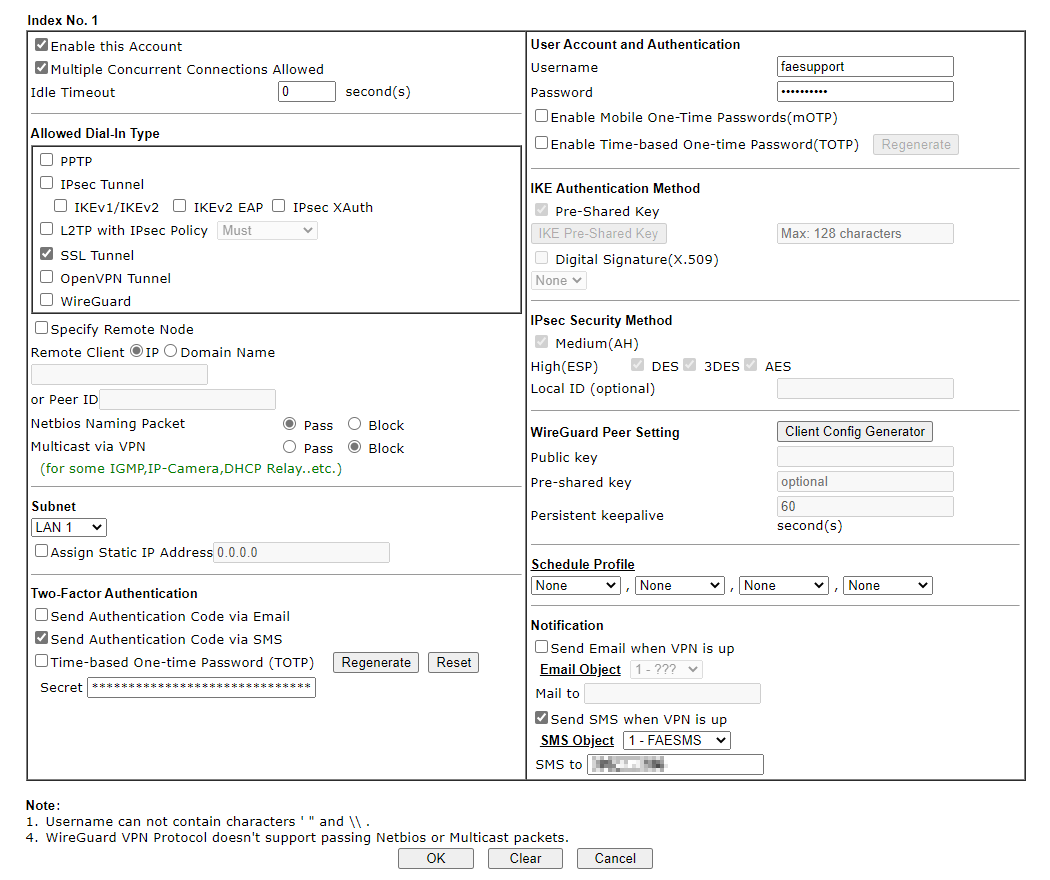
- Go to VPN and Remote Access >> Remote Dial-in User and edit a profile as follows:
- Check Enable this account.
- Enter Username and Password.
- Select the protocol in Allowed Dial-in Type.
- Enable Time-based One-time Password (TOTP) option.
- Click OK.
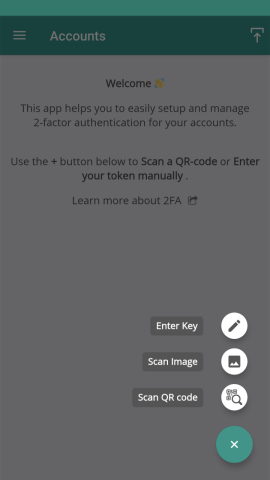
- Open an Authenticator App. (e.g. Google Authenticator, Microsoft Authenticator, TOTP Authenticator)
- Enter the Secret or scan the QR Code to create an account.
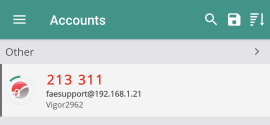
- We will be able to see the verification code in the App.
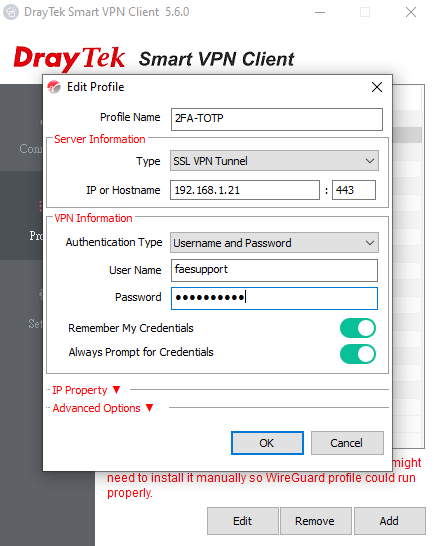
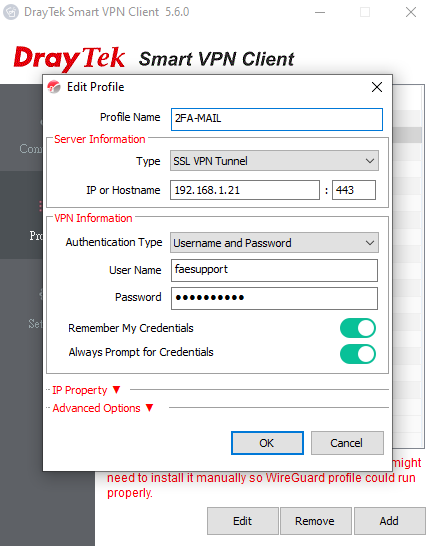
- Open the Smart VPN Client, add to create a profile as follows:
- Enter the Profile Name.
- Choose a protocol in Type.
- Enter router’s WAN IP in IP or Hostname.
- Enter User Name and Password.
- Click OK.
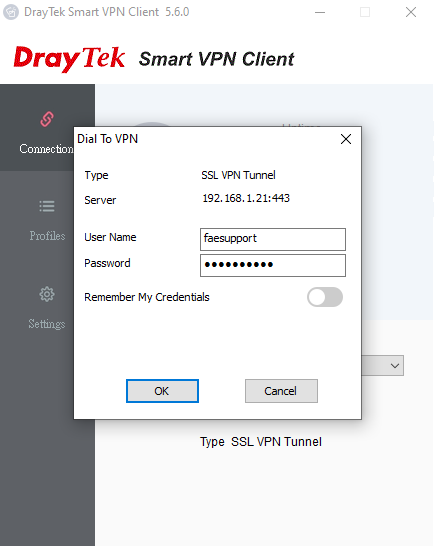
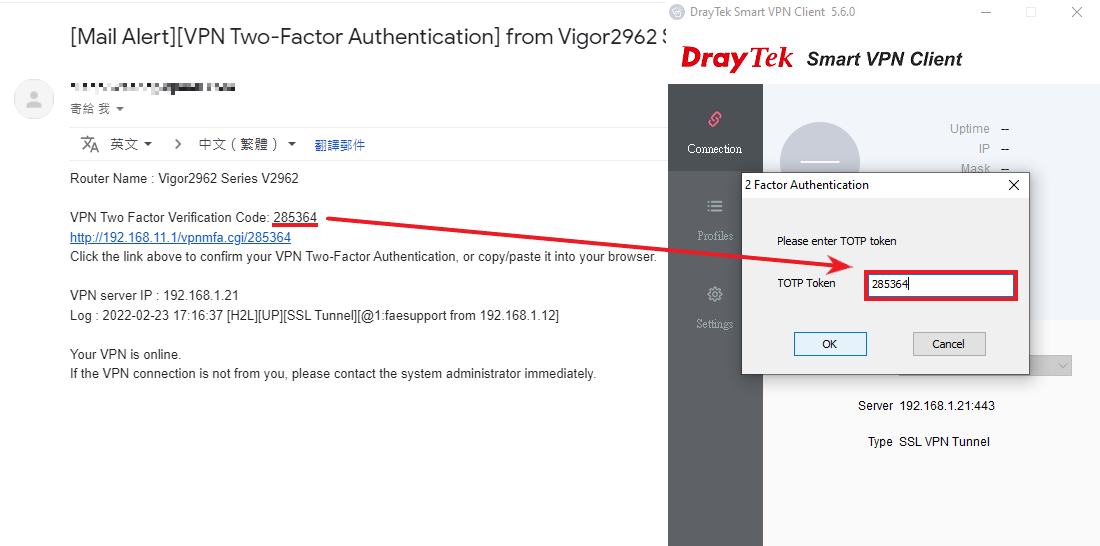
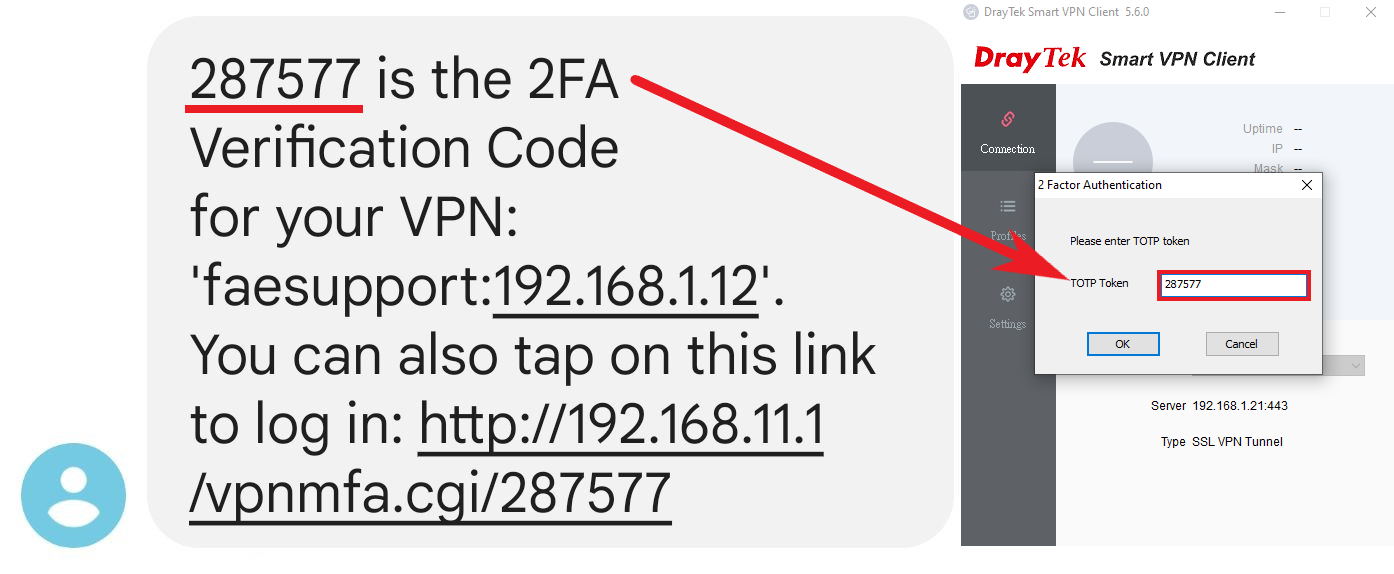
- Select the profile just created and swift to Connect. Confirm User Name and Password and click OK to dial up VPN connection.
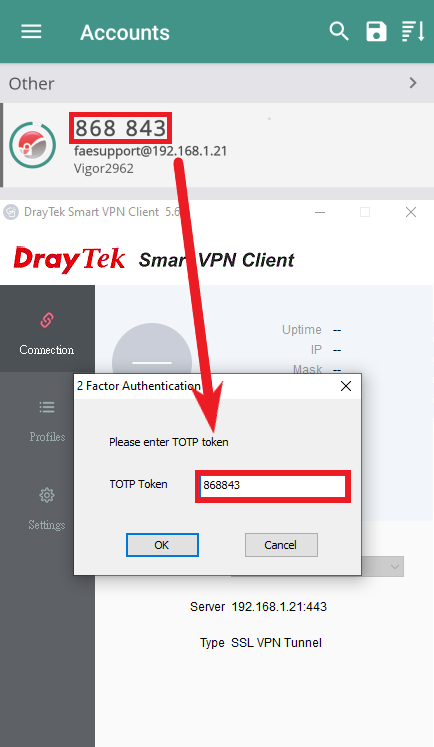
- When two factor authentication dialogue pops up, copy the 6 digit verification code displayed in the App. Enter the code and click OK to proceed the authentication.
- Now the VPN is connected.

Send via Email
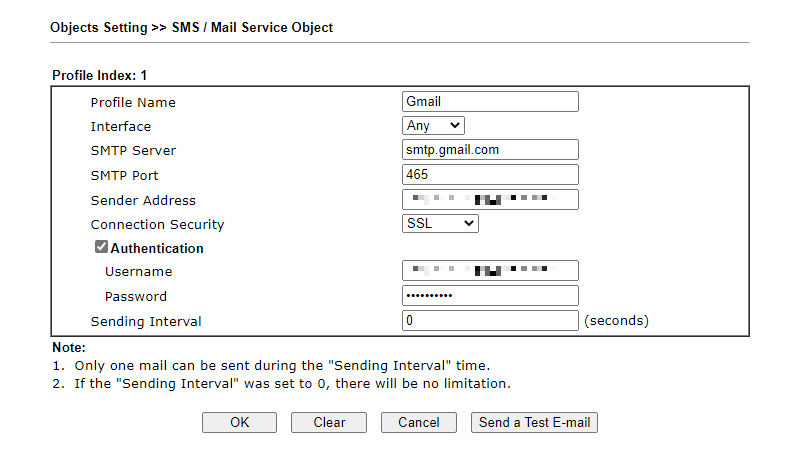
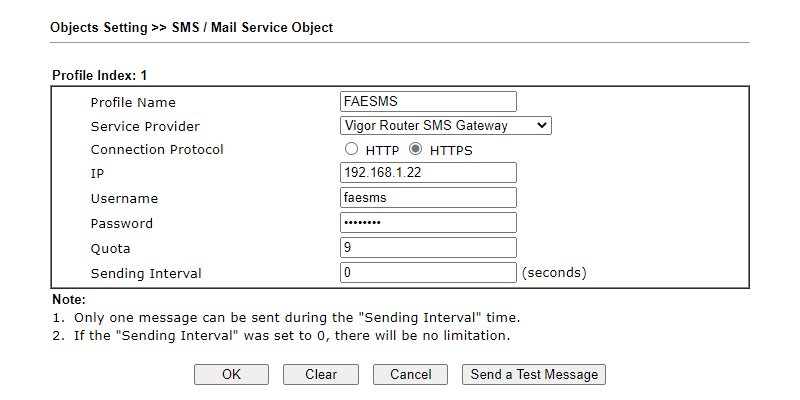
- Go to Object Settings >> SMS/Mail Service Object, setup a Mail Server Profile.
- Go to VPN and Remote Access >> Remote Dial-in User and edit a profile as follows:
- Check Enable this account.
- Enter Username and Password.
- Select the protocol in Allowed Dial-in Type.
- Enable Send Authentication Code via Email option.
- Select the Mail Server Profile and enter the recipient email address of the VPN user.
- Click OK.
- Open the Smart VPN Client, add to create a profile as follows:
- Enter the Profile Name.
- Choose a protocol in Type.
- Enter router’s WAN IP in IP or Hostname.
- Enter User Name and Password.
- Click OK.
- Select the profile just created and swift to Connect. Confirm User Name and Password and click OK to dial up VPN connection.
- When two factor authentication dialogue pops up, go to your email inbox and copy the 6 digit verification code received from the route. Enter the code and click OK to proceed the authentication.
- Now the VPN is connected.
- Note:
TOTP is recommended instead of email when the VPN client has "Use default gateway on remote network" enabled in the VPN profile and cannot receive 2FA authentication emails from other devices. Please refer to: Set up VPN with Two Factor Authentication(TOTP) on Smart VPN Client

Send via SMS
- Go to Object Settings >> SMS/Mail Service Object, setup an SMS Provider Profile.
- Go to VPN and Remote Access >> Remote Dial-in User and edit a profile as follows:
- Check Enable this account.
- Enter Username and Password.
- Select the protocol in Allowed Dial-in Type.
- Enable Send Authentication Code via SMS option.
- Select the SMS Provider Profile and enter the recipient phone number of the VPN user.
- Click OK.
- Open the Smart VPN Client, add to create a profile as follows:
- Enter the Profile Name.
- Choose a protocol in Type.
- Enter router’s WAN IP in IP or Hostname.
- Enter User Name and Password.
- Click OK.
- Select the profile just created and swift to Connect. Confirm User Name and Password and click OK to dial up VPN connection.
- When two factor authentication dialogue pops up, go to your SMS inbox and copy the 6 digit verification code received from the route. Enter the code and click OK to proceed the authentication.
- Now the VPN is connected.


Dial up VPN from other devices.
If the remote dial-in VPN user device is not Windows or not using Smart VPN Client (Windows), we can still activate 2-FA and enter the verification code with alternative method.
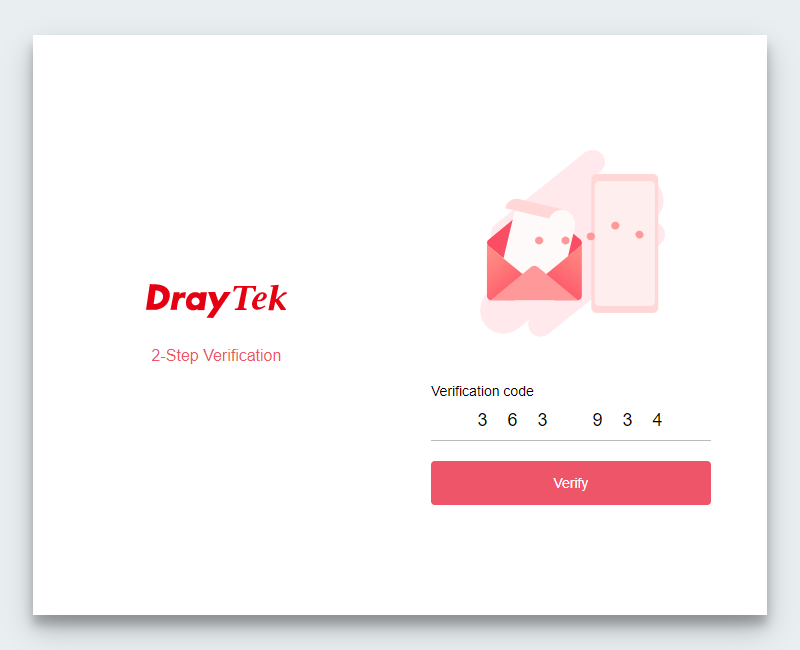
- Access Router’s WebUI page.
- Open your browser, enter router’s LAN IP to access router’s http WebUI page.
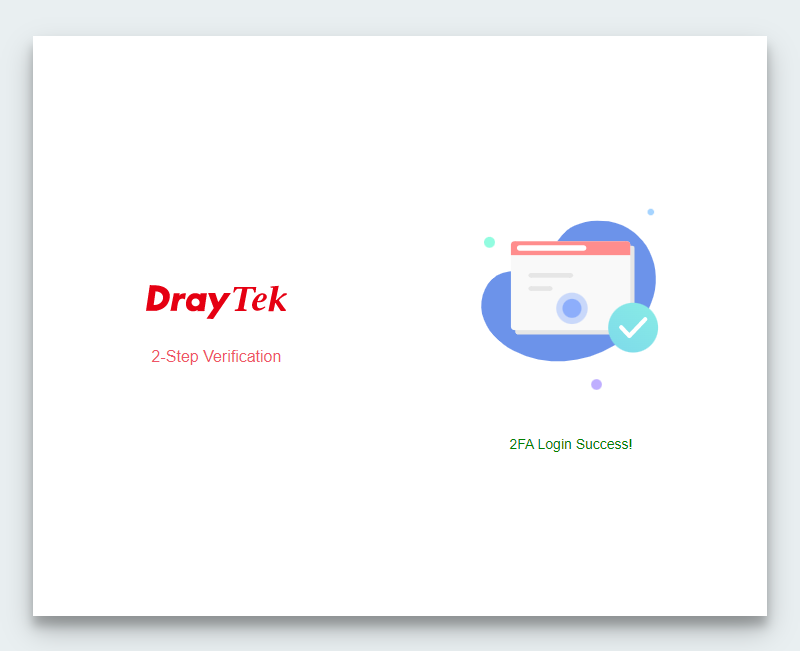
- Enter the 6 digit verification code and click Verify.
- Now the VPN is connected.
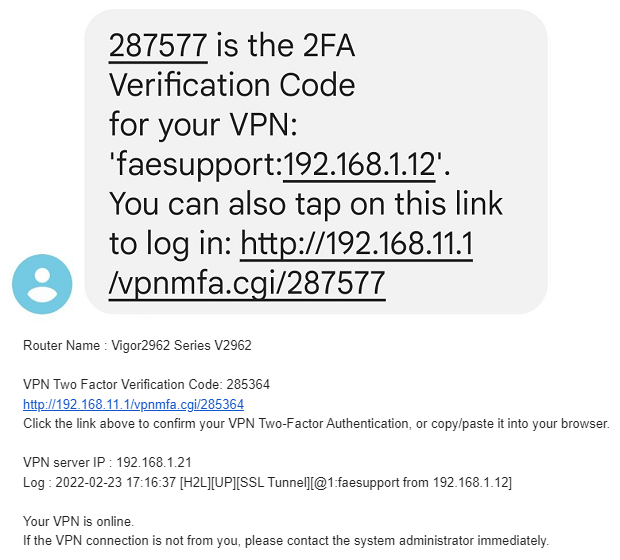
- Access the URL link from the notification.
- Click the URL link provided in the notification message sent to your Email or SMS inbox. The URL will help you complete the authentication automatically.
- Now the VPN is connected.
Note:
- If the VPN client has tried 2FA, each TOTP code is valid for 30 seconds and TOTP authentication needs to be finished in 180 seconds.
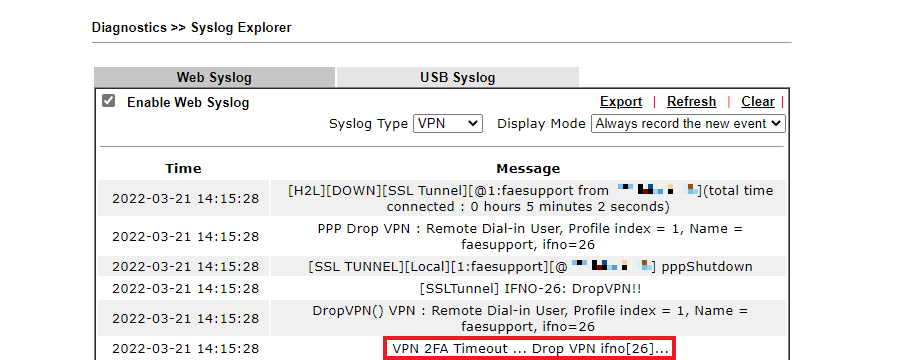
Email / SMS will need to be finished in 300 seconds. - If the VPN client has never tried 2FA, the router will drop the VPN after 1 hour and print the following message in the Syslog.
Published On:2022-05-23
ShareWas this helpful?