
How to use Digital Signature (X.509) to authenticate a LAN-to-LAN IPsec VPN between Vigor routers
Vigor routers support RSA(X.509) to authenticate IPsec, which enhances security of the VPN tunnels. In this article, we will take XCA as certificate provider to generate certificates for VPN routers to build an IPsec tunnel with RSA.
VPN Server Setting
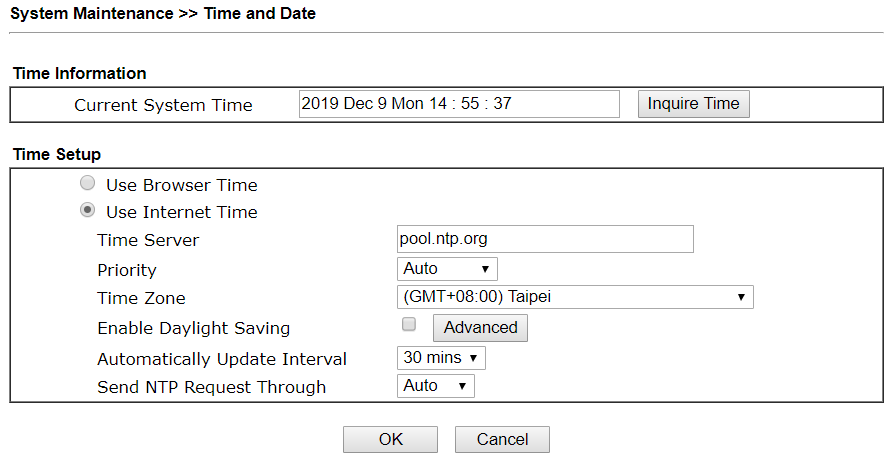
1. Go to System Maintenance >> Time and Date and make sure time setting is correct
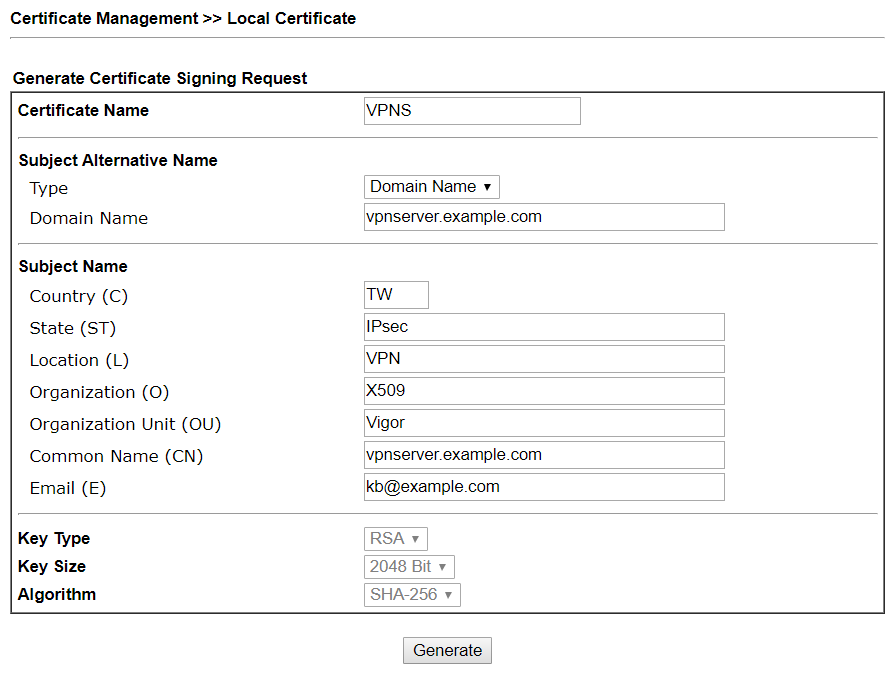
2. Go to Certificate Management >> Local Certificate and click Generate
3. Enter the certificate details, and click Generate
4. Click View, and copy the PEM Format Content

5. Run XCA, click New Certificate, and select [default]CA template in certificate tab
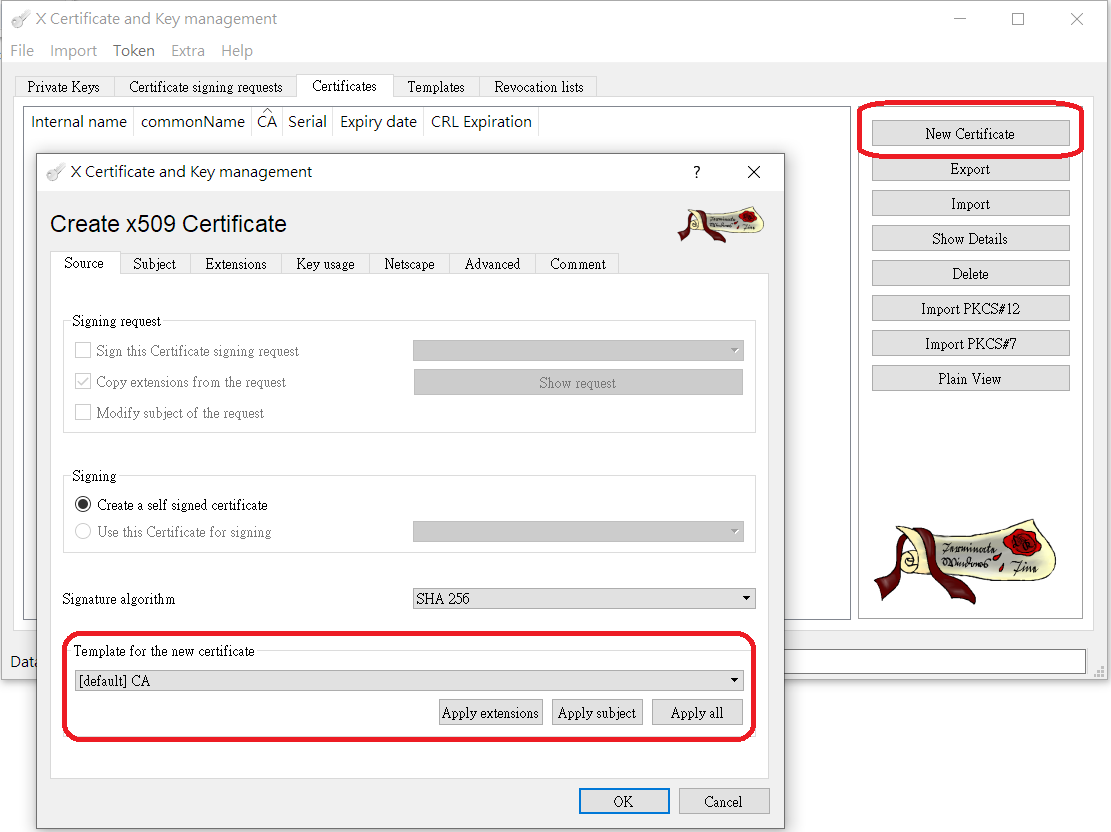
6. In the subject tab, enter RootCA details and generate a new key, then click Create to build a RootCA to sign certificates for the VPN routers
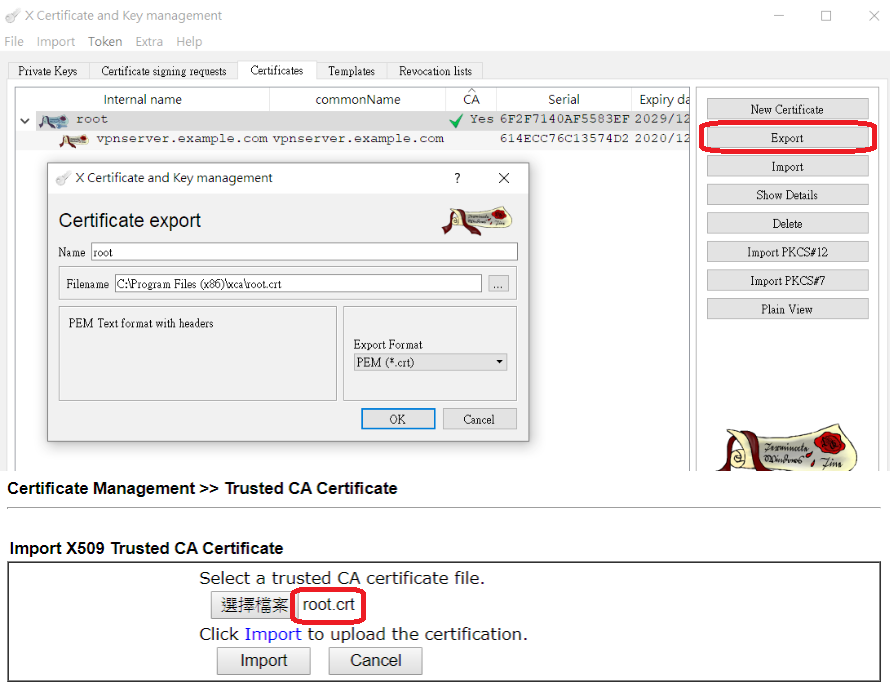
7. Export the RootCA in PEM(*.crt) format, and import it in the router on Certificate Management >> Trusted CA Certificate
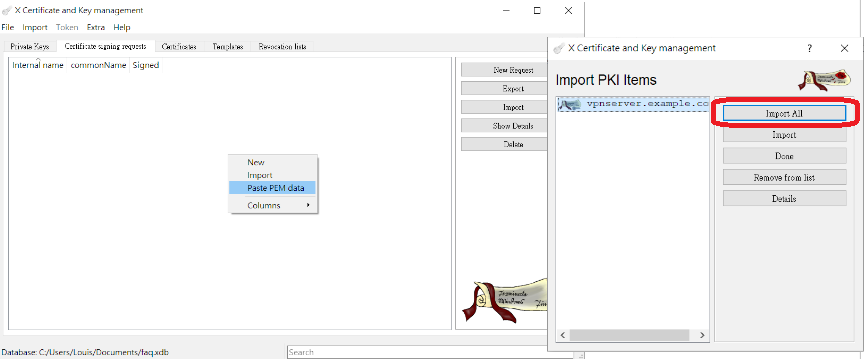
8. Back to XCA, right click in Certificate signing requests and Paste PEM data, then Import All
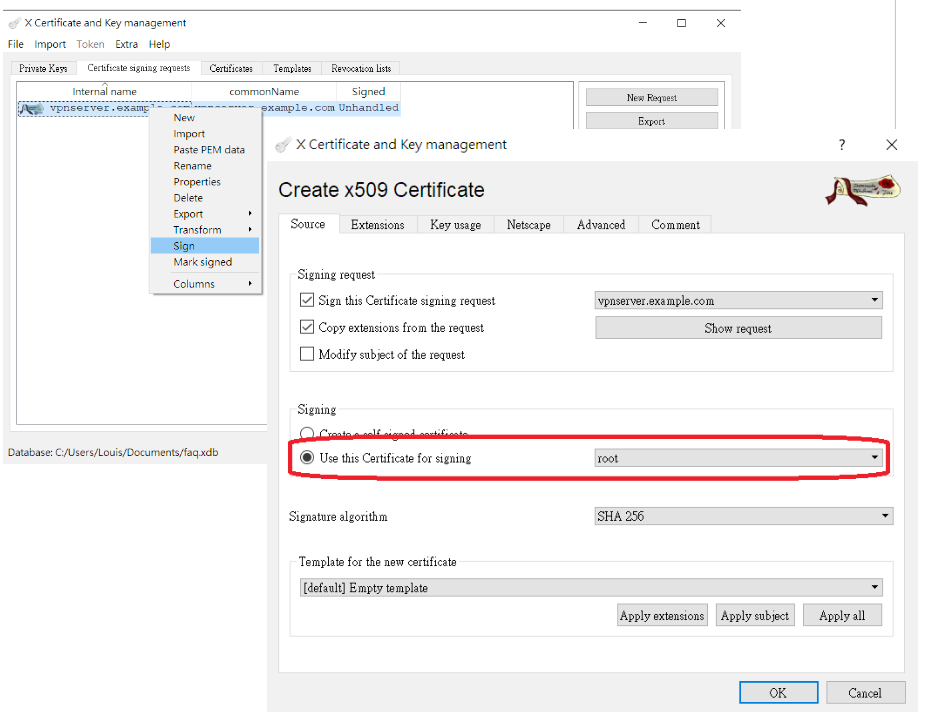
9. Right click the certificate and sign it by the RootCA we just built
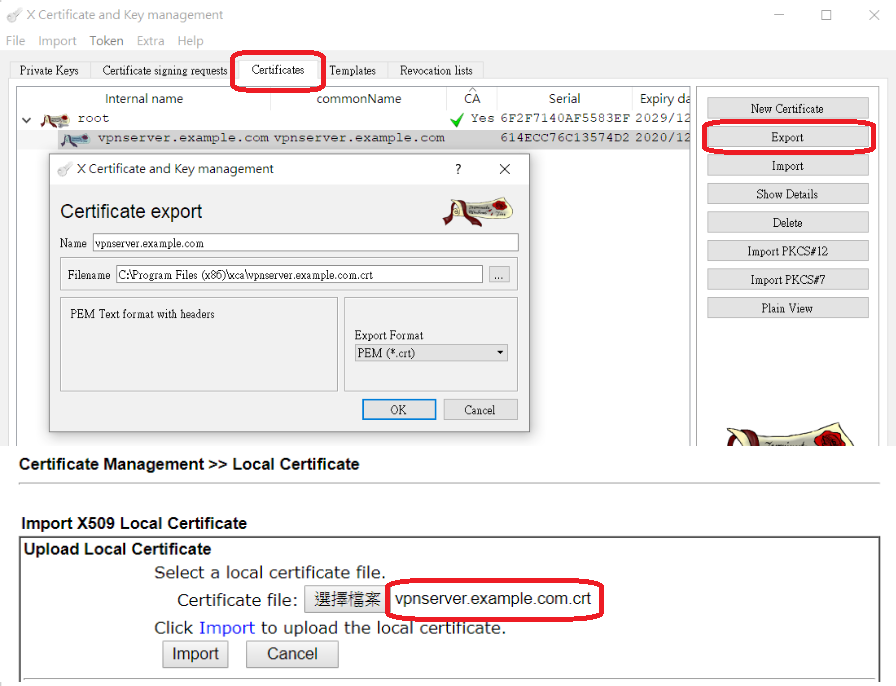
10. Export the certificate in PEM(*.crt) format in Certificate tab, and import it in the router on Certificate Management >> Local Certificate
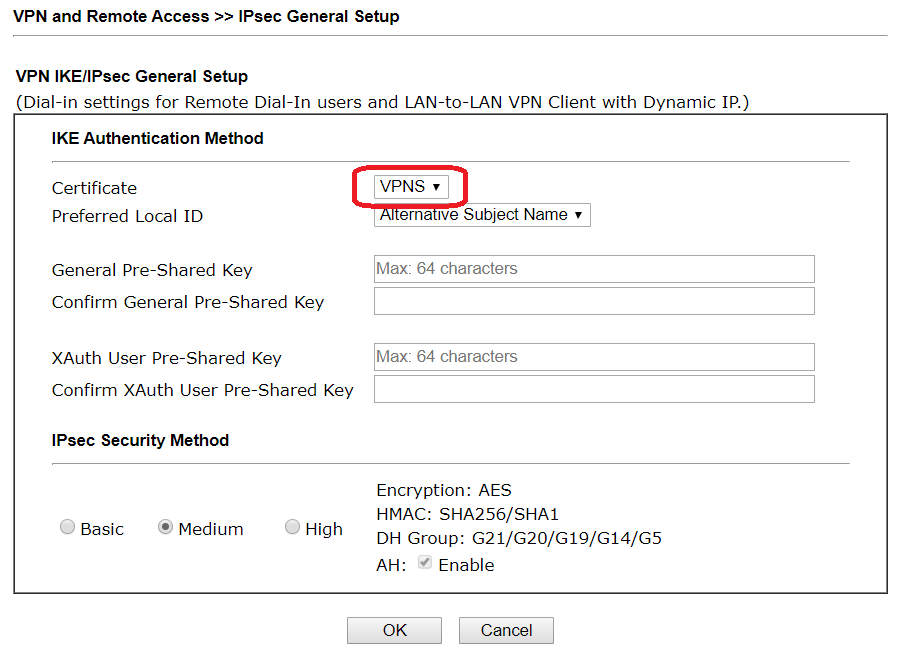
11. Go to VPN and Remote Access >> IPsec General Setup, and select the local certificate we just built in IKE Authentication Method >> Certificate
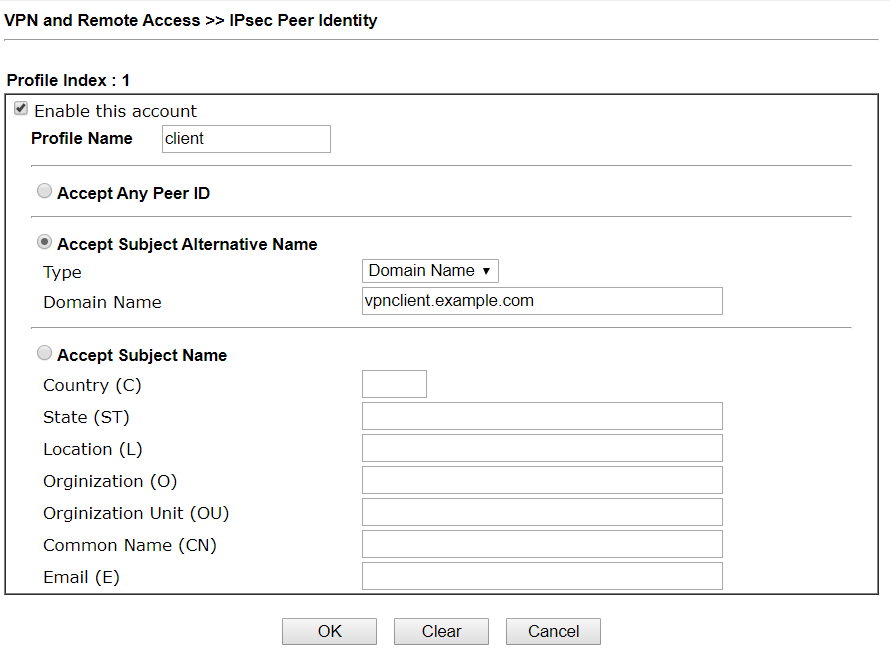
12. Go to VPN and Remote Access >> IPsec Peer Identity and click an Index
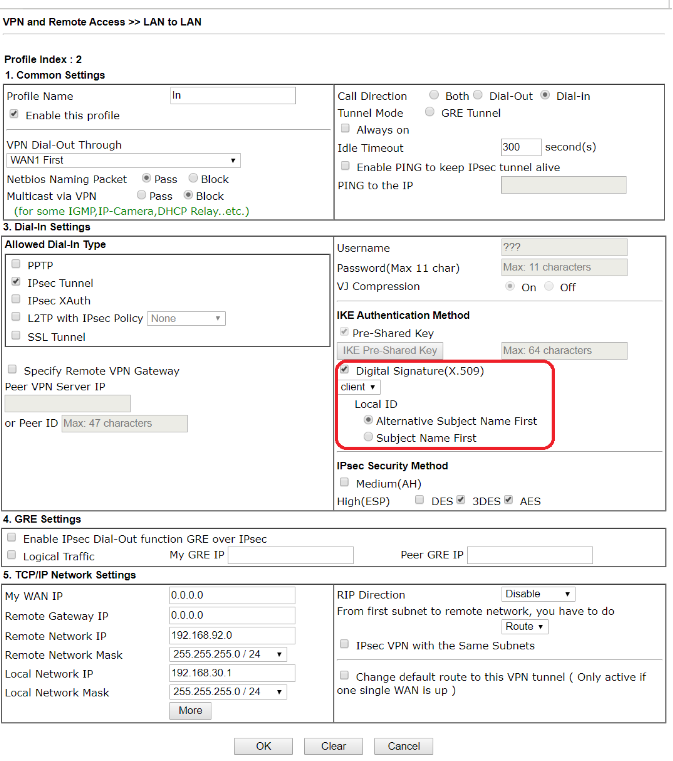
13. Go to VPN and Remote Access >> LAN to LAN, and click an Index
VPN Client Setting
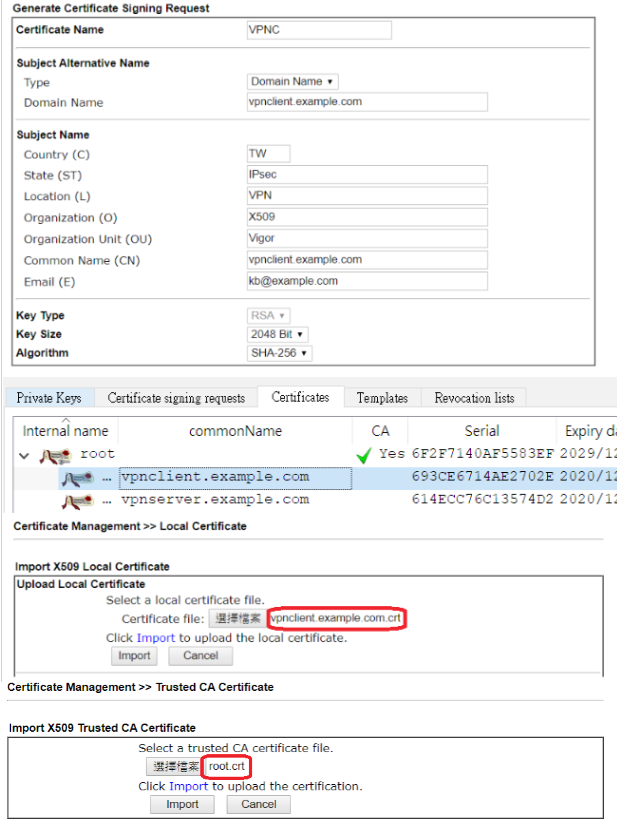
14. Repeat step 1~4 and 7~10 to build a certificate for the other VPN router
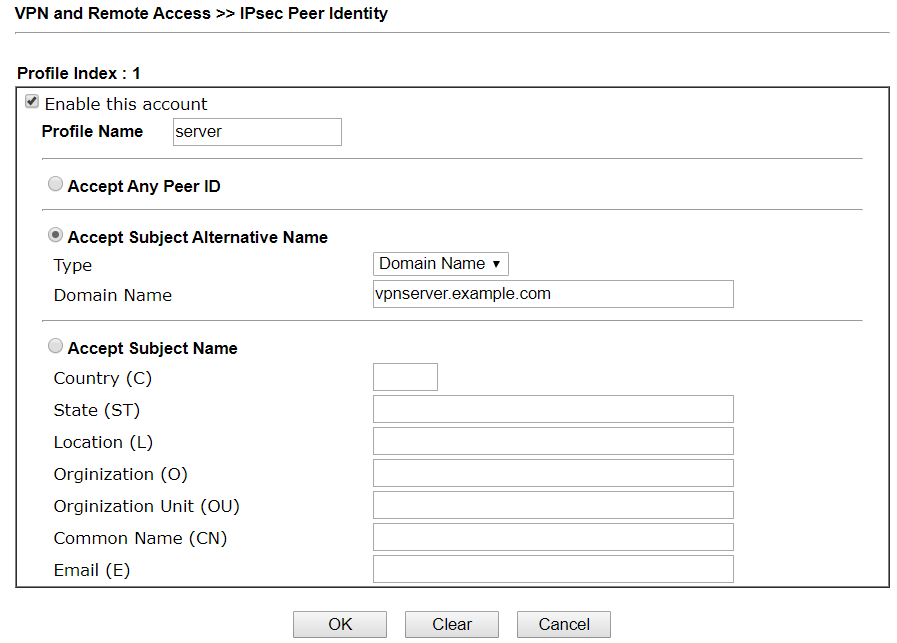
15. Go to VPN and Remote Access >> IPsec Peer Identity and click an Index
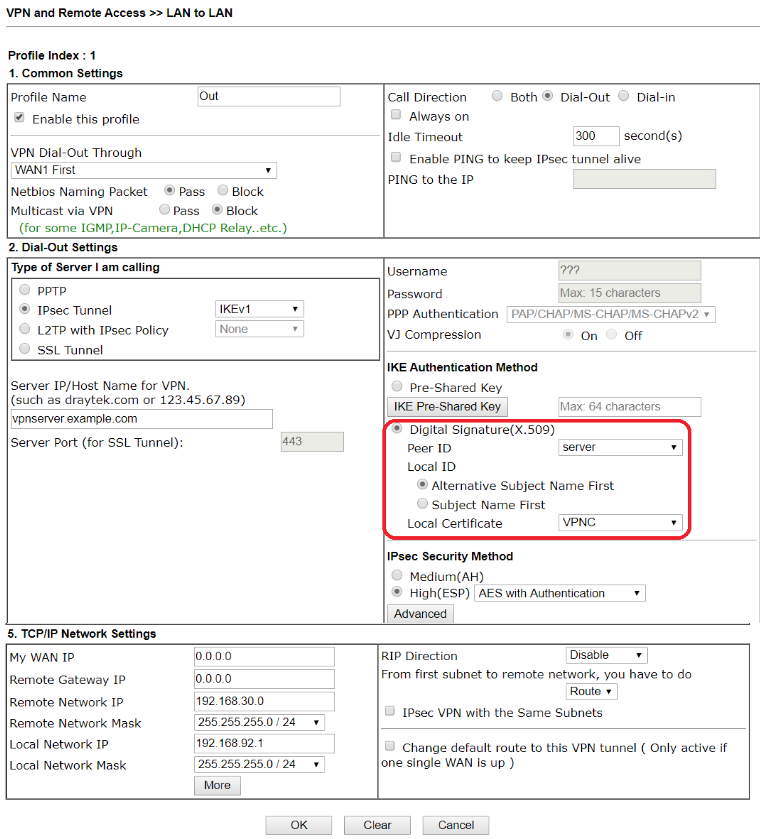
16. Go to VPN and Remote Access >> LAN to LAN, and click an Index
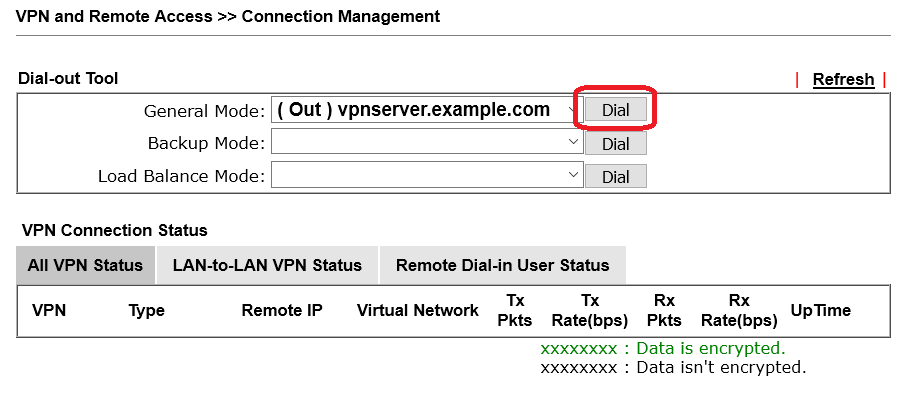
17. Go to VPN and Remote Access >> Connection Management, select the VPN profile to Dial
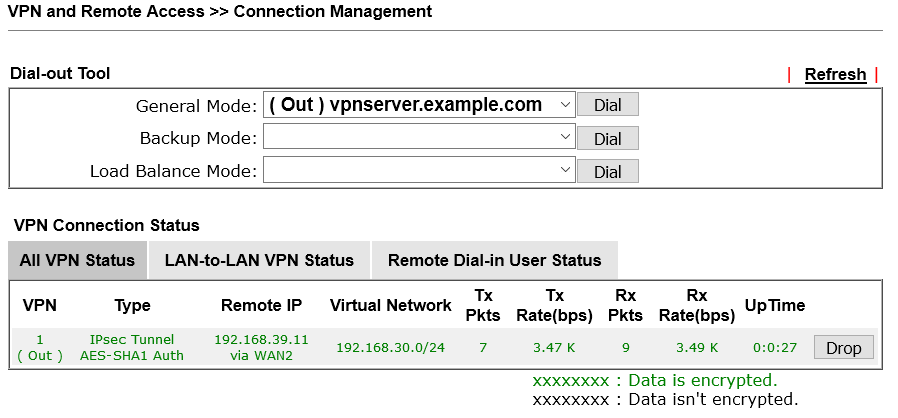
We will see VPN Connection Status down below when VPN is up.
Published On:2019-12-10
ShareWas this helpful?