
Backup and Restore VigorAP Configuration Files with VigorConnect
This guide demonstrates how to set VigorConnect to routinely back up configuration files from VigorAPs, where they are stored in VigorConnect's directory structure and how to restore configuration files to VigorAPs if needed.
Schedule backup for multiple CPEs
To configure VigorConnect to back up the configuration of a group of VigorAPs, go to System Menu > Maintenance > Scheduled Backup page and configure these settings:
1. Switch to Backup Setting Profile tab and press "Add" to create the backup profile,
- Profile Name: Specify the name for your backup profile
- Backup period (days): Specify how frequently VigorConnect should take a configuration backup from each VigorAP. If you set the period to 7 days, VigorConnect will take a configuration backup every week. Please notice that the backup will only execute one time (for each VigorAP) every day.
- Keep File
- All: VigorConnect will keep all config files without deleting the older configuration files
- The last 20: VigorConnect will only keep 20 of the most recent config files for each VigorAP. - Backup time
- Now: VigorConnect will request a configuration backup from the VigorAP when it makes its next Periodic Inform to VigorConnect.
- Scheduled: Specify the start time/end time window. VigorConnect will only request the config backup when it receives Inform from the VigorAP during the scheduled time.
- Schedule Profile: Select a schedule profile which can be created from Maintenance > Schedule
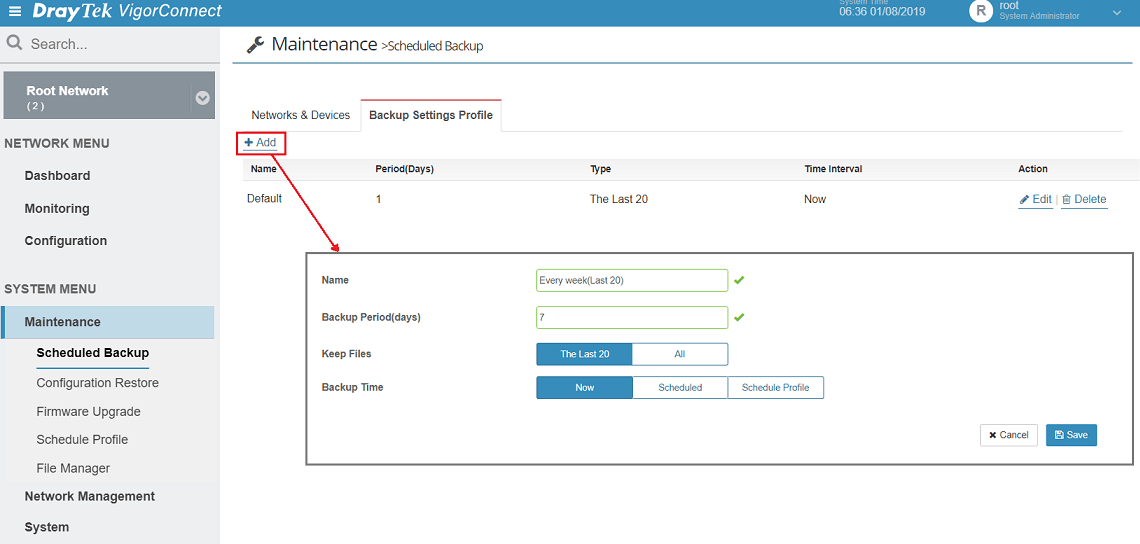
2. Click Save to save the backup setting profile
3. Switch back to the Network & Device tab. Select the backup profile on the network or device and save it.

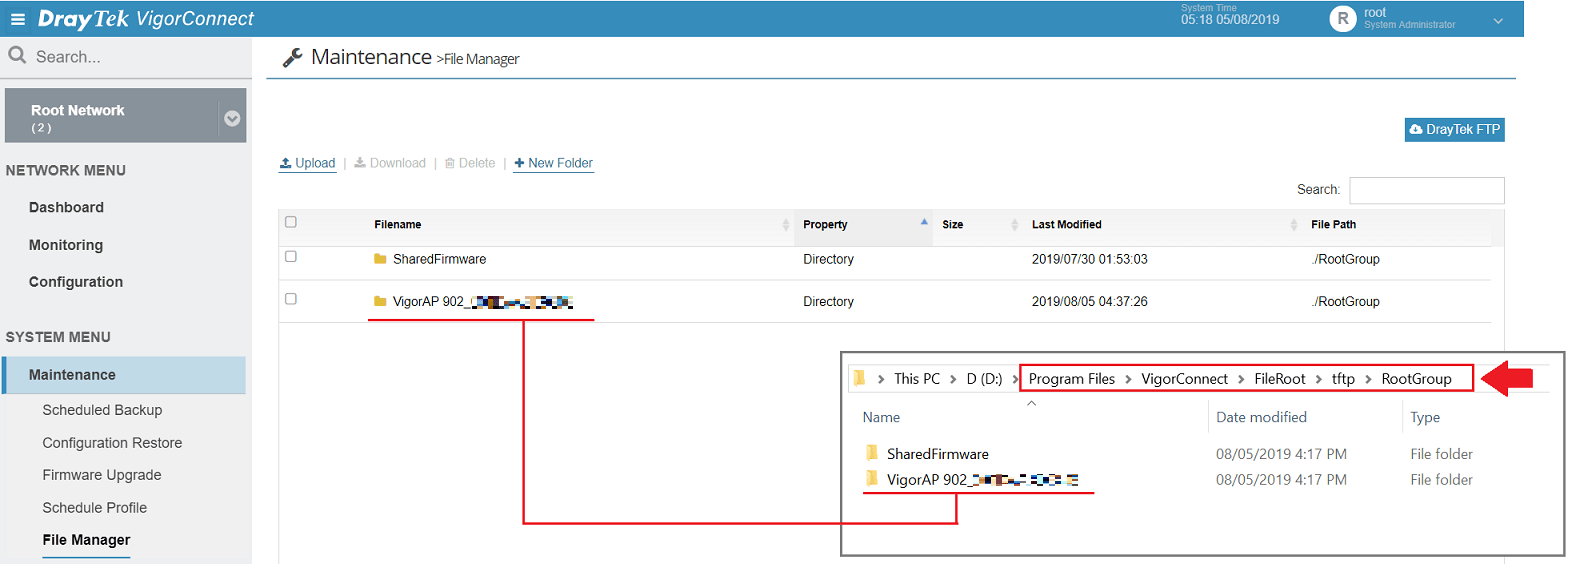
Location of the backup config file
The backup file will be saved in the Maintenance > File manager automatically, VigorConnect will create a new directory fpr each VigorAP, with a name of _. For instance, "VigorAP903_00507F123456". For the real path of the server storage, it will be located within the installation directory of Vigorconnect.
Restore Config
To restore settings for multiple devices at the same time, go to the System Menu > Maintenance > Configuration Restore page and follow these steps:
1. Switch to Restore Setting Profile tab and click Add to create the restore profile
- Name: Specify the name for your profile restoration event i.e. "Restore Configuration of Luton Office VigorAP 903"
- Restore time
- Now: VigorConnect will request VigorConnect to restore the selected configuration while receiving the next inform from the VigorAP.
- Scheduled: Specify the start time/end time window. VigorConnect will only request the config restore while it receives Inform from the VigorAP during the scheduled time. For instance setting this "02:00 to 03:00" would have the backup restoration occur overnight.
- Schedule Profile: Select the schedule profile from Maintenance > Schedule profile.
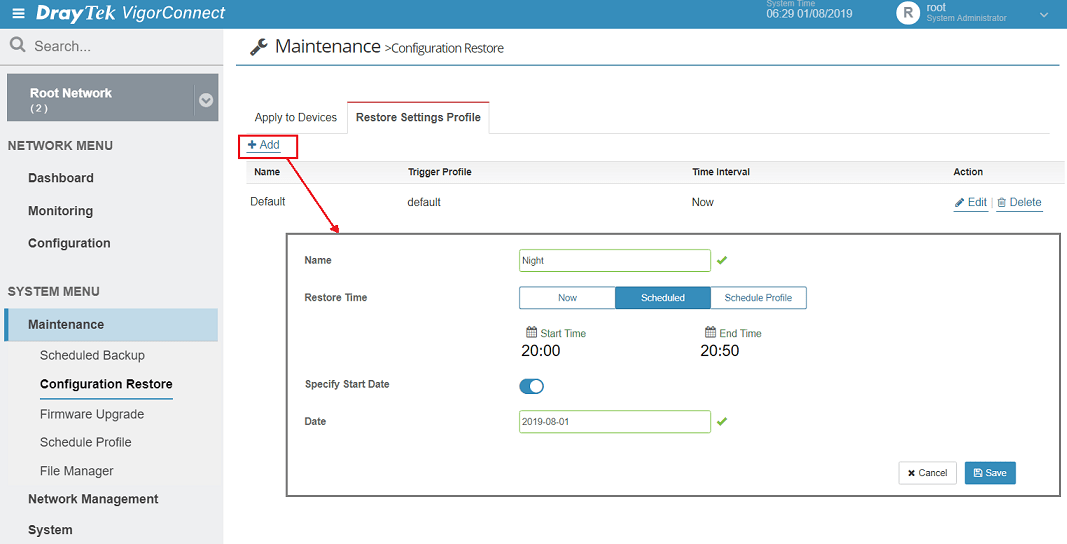
2. Click Save to save the restore setting profile
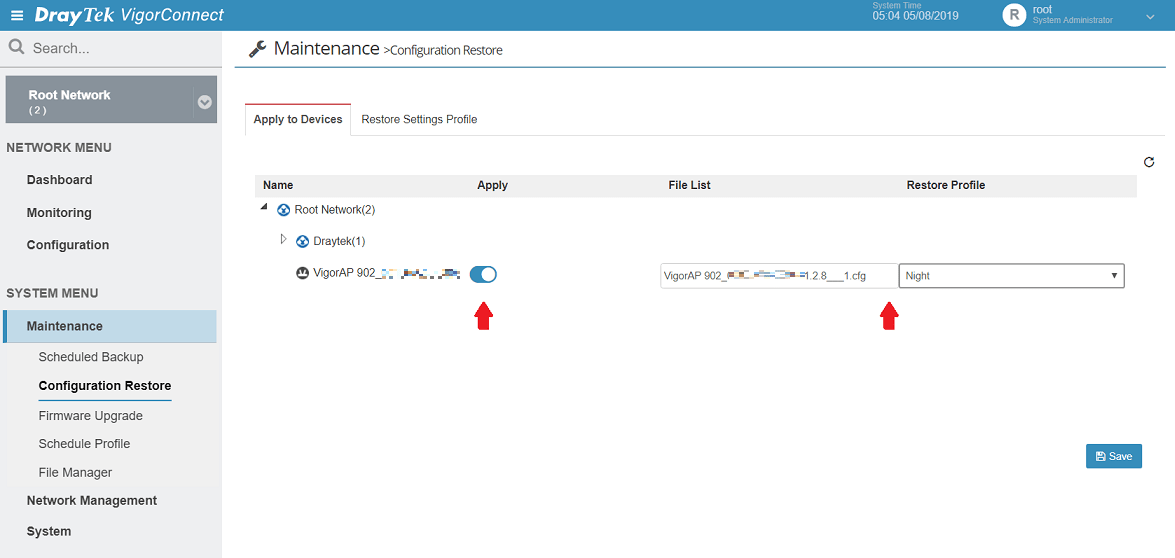
3. Switch back to the Network & Device tab. Select the Restore profile and config file on the device. Then enable the profile and save it.
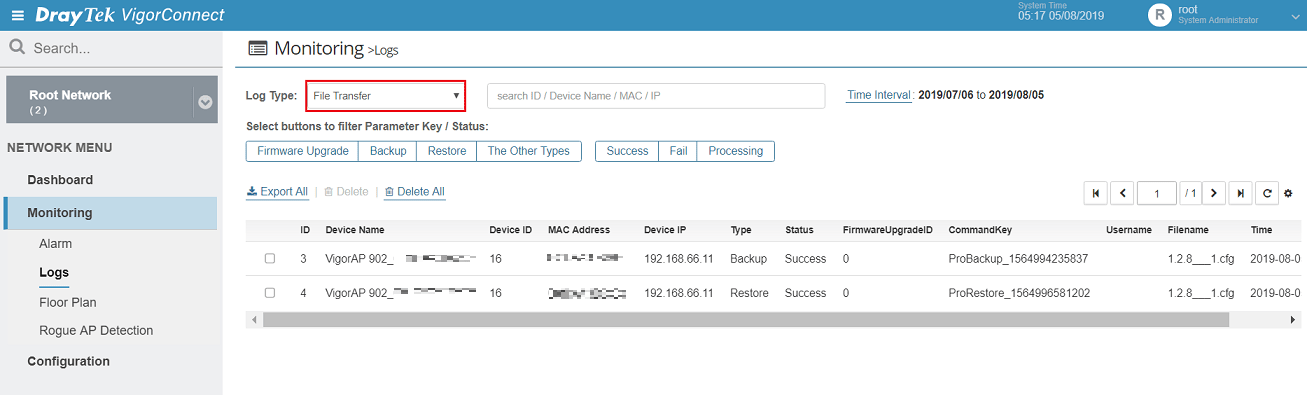
How to check the log of backup and restore
To check whether a configuration backup or restoration event has completed successfully, go to Monitoring > Log > File Transfer.
Published On:2019-08-14
ShareWas this helpful?