
Update VigorAP's configuration by AP Management (APM)
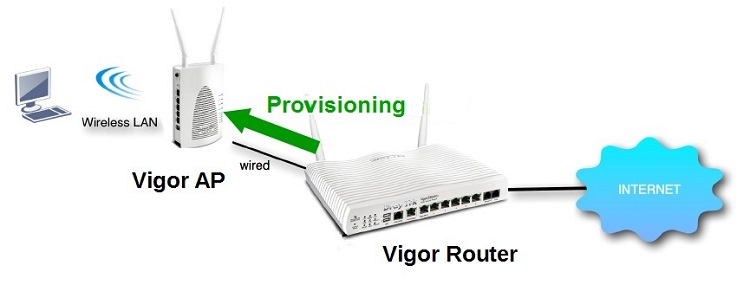
This document describes how to update the configuration of VigorAP with Vigor Router's Central AP Management (APM) feature. With APM, you can create a WLAN profile for the wireless settings on the router, and push the configuration to multiple VigorAPs at once.
This video was presented by DrayTek AUST & NZ
Initial Setup
1. Connect the VigorAP's LAN port (LAN-A) to the router's LAN network via a wired connection.
2. On VigorAP, go to Central AP Management >> General Setup and make sure Vigor AP Management and Auto Provision are enabled. (Enable is the default setting)
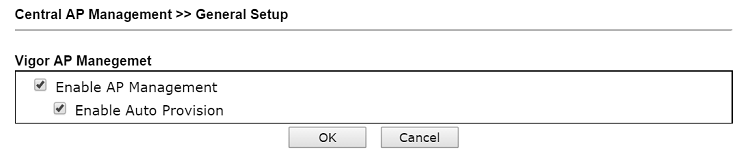
NOTE: On VigorAP 800, the AP Management settings is in LAN >> General Setup.
3. On the router, go to Central Management >> AP >> Statusif the VigorAP is detected. If the device information shown in green indicates that the AP is detected and the router is authorized to configure it.
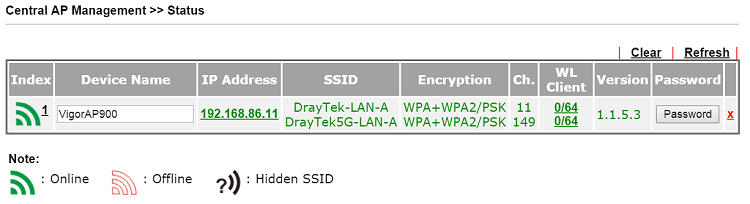
If it's shown in red with the "Unauthorized" message, this indicates that the AP 's admin password is changed so the router cannot access its management page. Then, click the "Password" button and enter the new admin password.

Edit WLAN Profiles
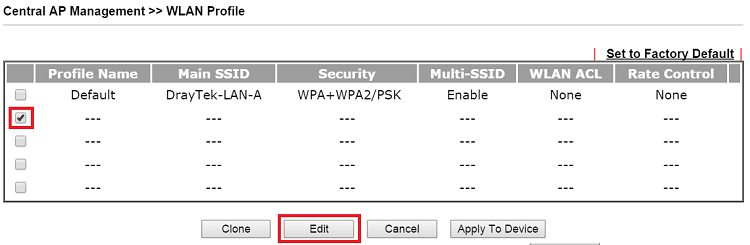
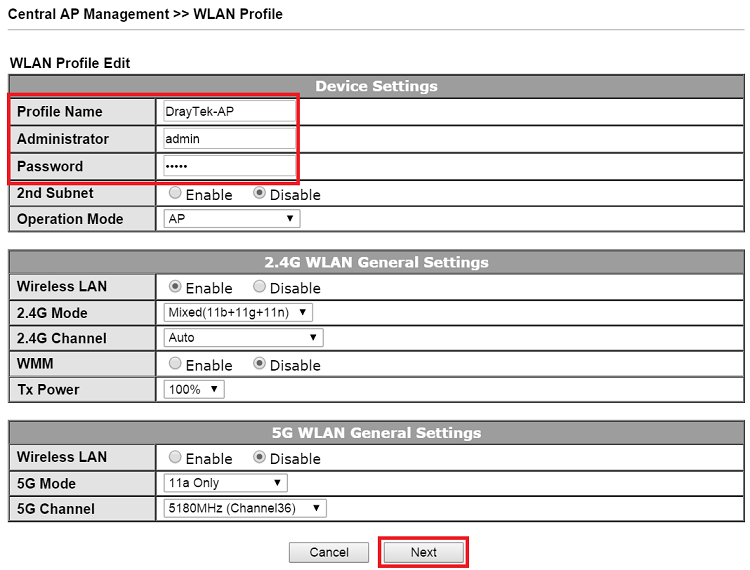
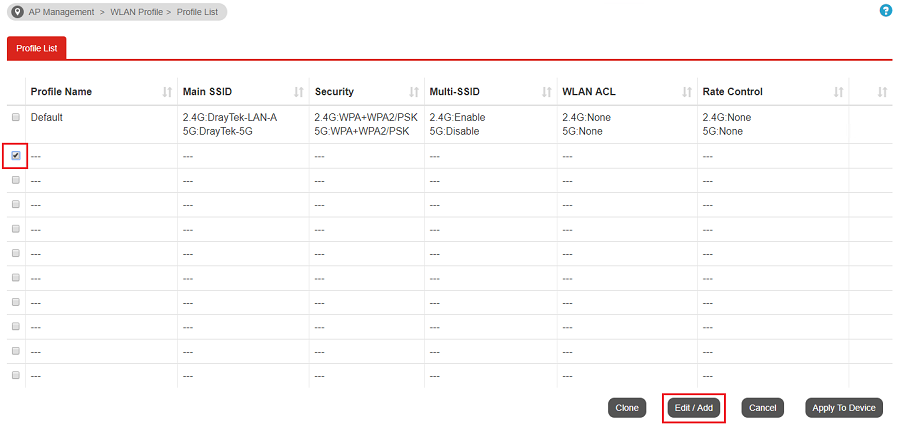
4. On the router, go to Central Management >> AP >> WLAN Profile to edit/create a configuration profile for the AP: Select an empty profile, and click Edit.
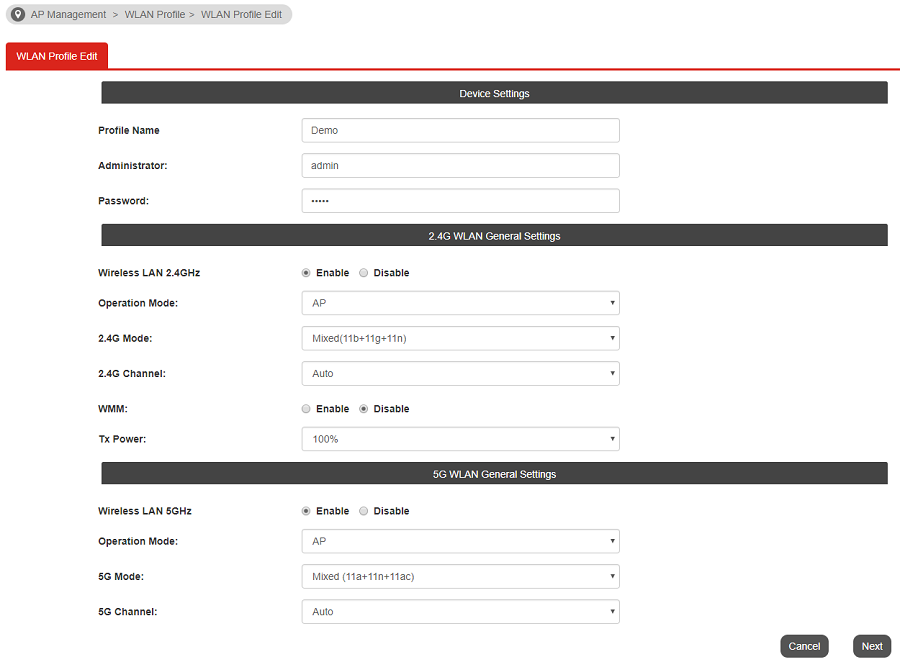
5. Edit the profile as follows:
- Enter Profile Name
- Enter Administrator and Password to logging the AP's management page. (both are "admin" by default)
- Configure 2.4G WLAN General Settings
- Configure 5G WLAN settings
- Click Next to go to set up 2.4G WLAN details for each SSID
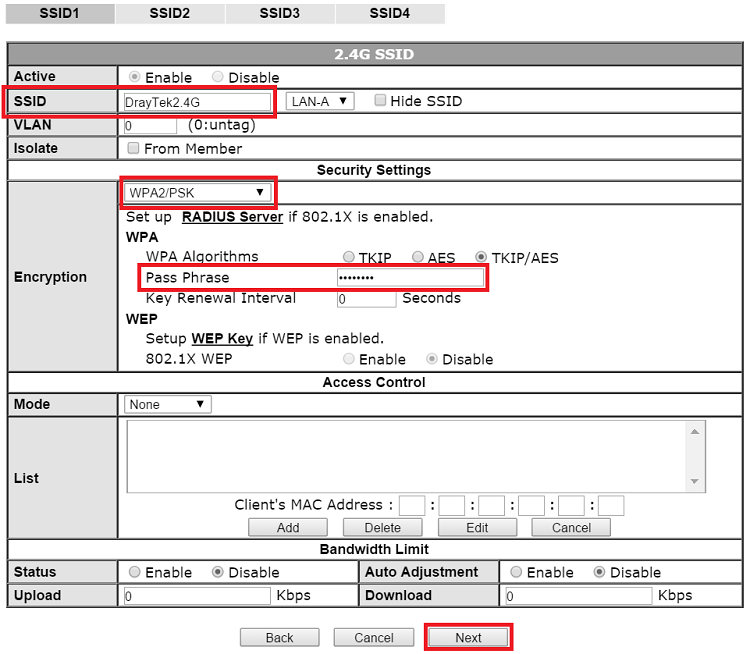
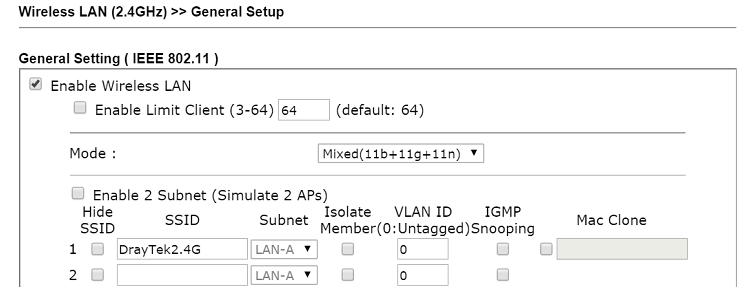
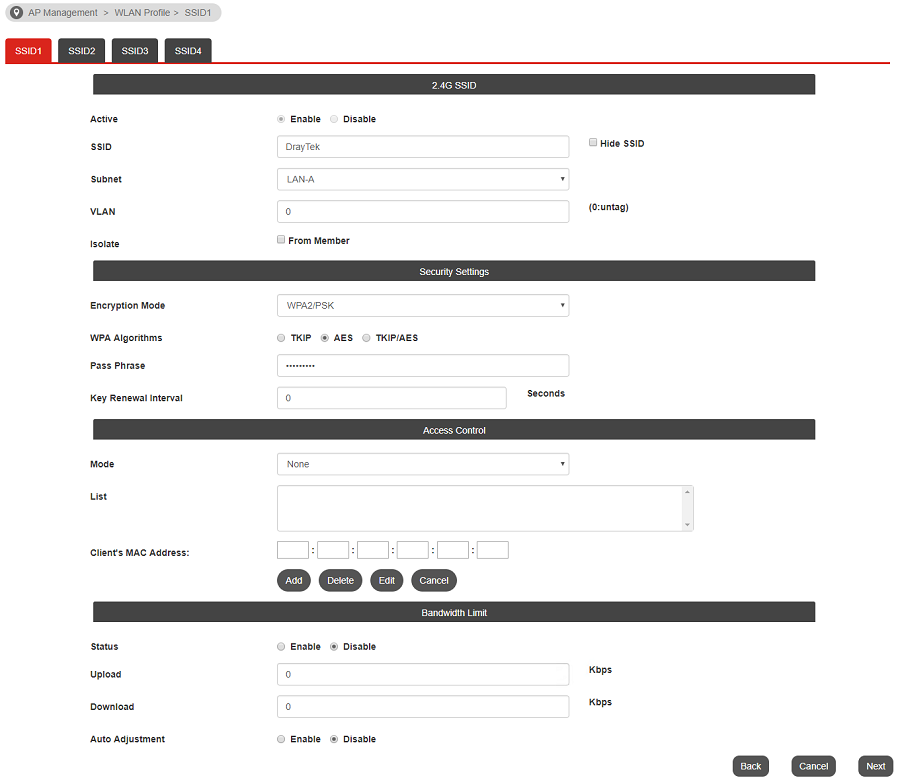
6. Edit 2.4G WLAN details for each SSID.
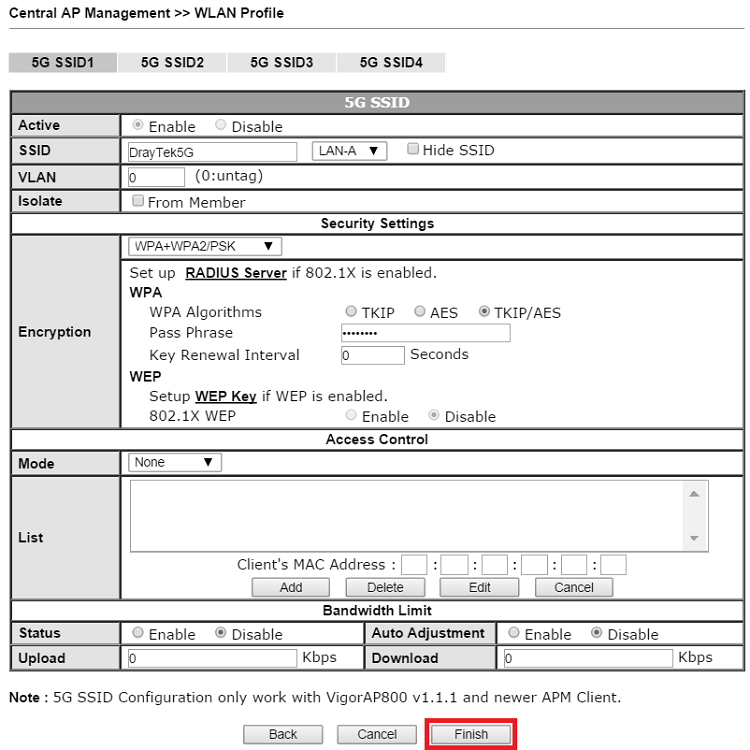
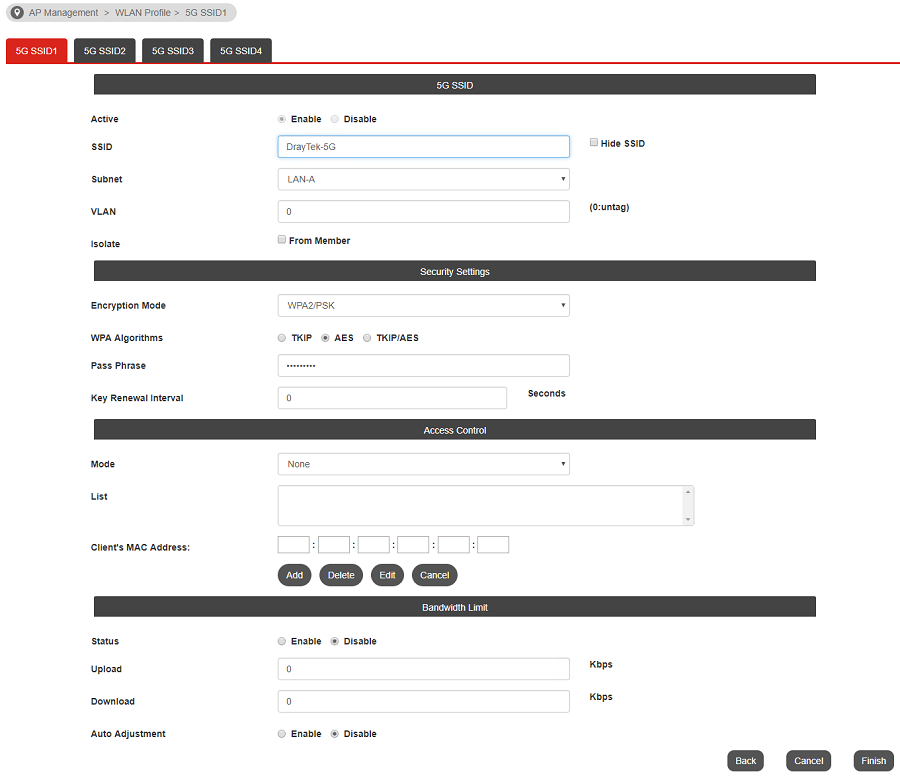
7. Similarly, set up 5G WLAN detail for each SSID, and click Finish
Push configuration to the VigorAP
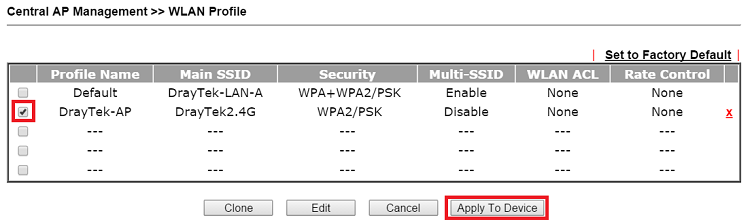
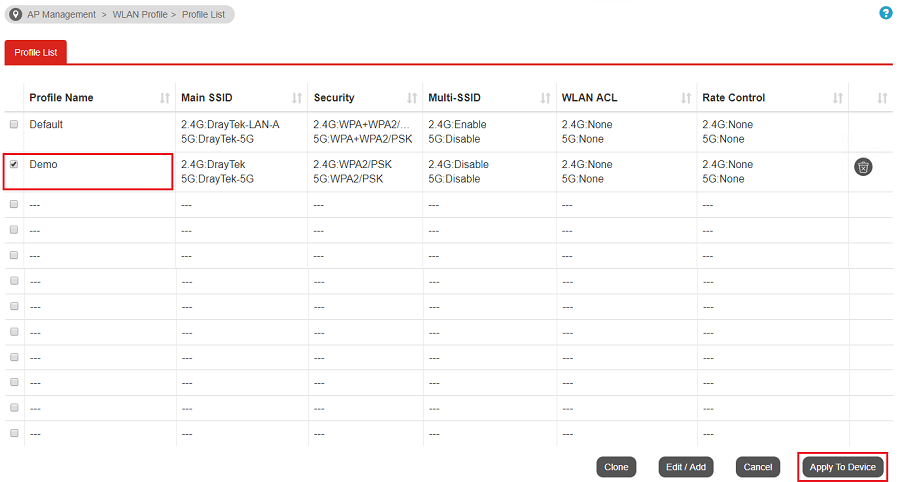
8. On the router, go to Central Management >> AP >> WLAN Profile, select the profile created in the previous steps, and click Apply To Device.
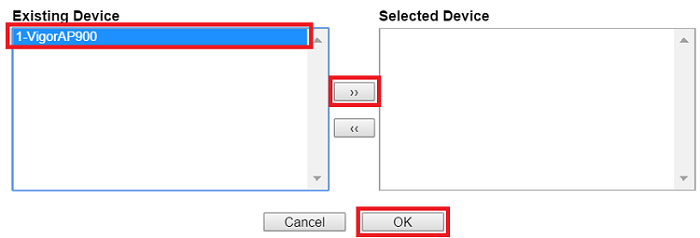
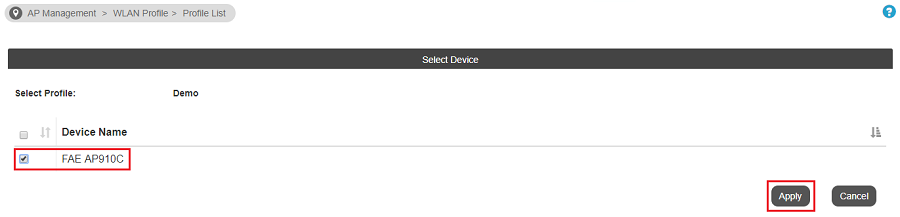
9. Select the VigorAP you want to update the configuration from Existing Device list, and click ">>" to add it to Selected Device list. Then click OK to push the settings to the selected device.
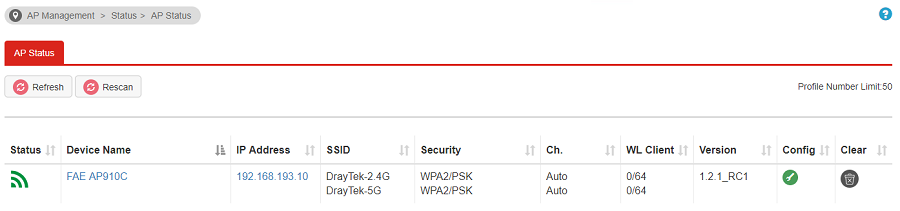
10. After that, we may go to Central Management >> AP >> Status to check the device information. And we see that the VigorAP is now using the SSID and security settings in WLAN profile. Click on the IP Address will lead us to AP's management page.

From the AP's web management page, we see that the configuration in the router's WLAN profile has applied to the AP's Wireless LAN settings.
Edit WLAN Profile
1. On Vigor3900, go to Central Management >> AP Management >> WLAN Profile, select an available profile then click Edit / Add.
2. Set up the WLAN profile, configure the general settings.
3. Edit detail settings of each SSID of 2.4G WLA
4. Edit detail settings of each SSID of 5G WLAN.
Apply Settings to AP
5. Select the profile you would like to apply to the AP(s), then click Apply To Device.
6. Select the AP(s) you would like to send the configuration to, then click Apply.
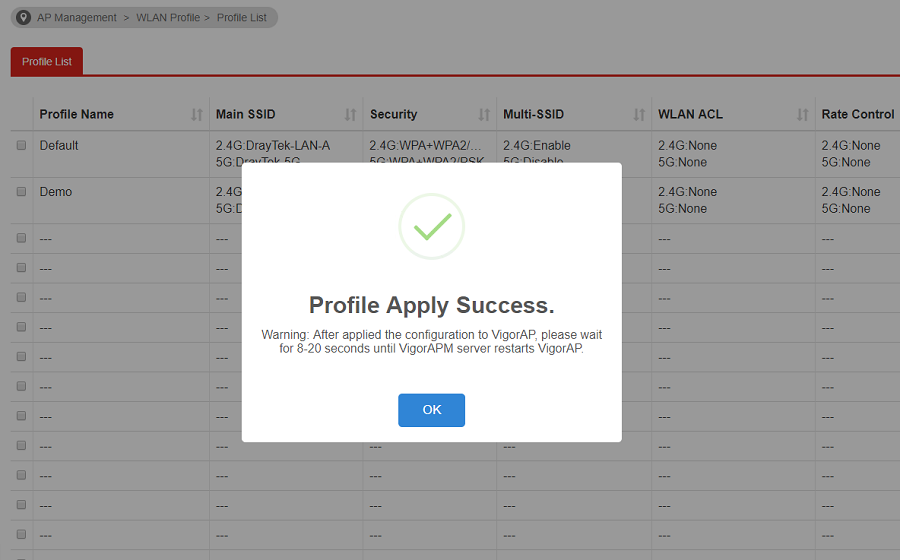
7. Wait for APM to apply the configuration. After you see the "Profile Apply Success.", your AP(s) should work as the WLAN profile you set.
8. We can go to AP Management >> Status to check if the status changed as expected.
Published On:2017-07-18
ShareWas this helpful?